Table of Contents
Advertisement
INSTRUCTION MANUAL
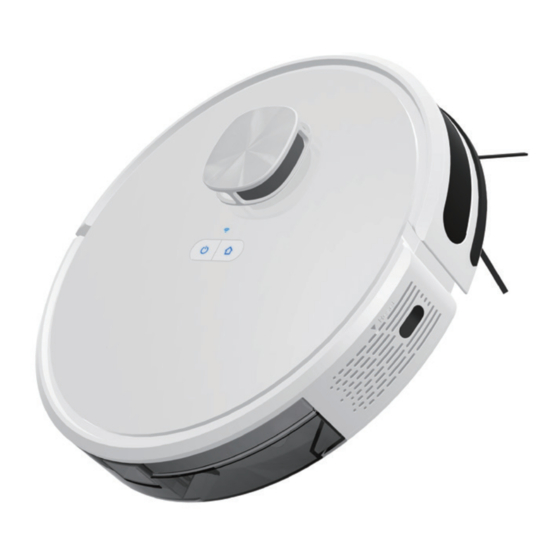
AUTO CHARGING LASER ROBOTIC
VACUUM CLEANER (VT-5557)
INTRODUCTION
Thank you for selecting and buying V-TAC product. V-TAC
will serve you the best. Please read these instructions
carefully before starting the installation and keep this manual
handy for future reference. If you have any another query
please contact our dealer or local vendor from whom you
have purchased the product. They are trained and ready to
serve you at the best.
1
works with
Ok Google
MULTI-LANGUAGE MANUAL
QR CODE
Please scan the QR code to access
the manual in multiple languages.
Advertisement
Table of Contents

Related Manuals for V-TAC VT-5557


Summary of Contents for V-TAC VT-5557
- Page 1 Ok Google VACUUM CLEANER (VT-5557) INTRODUCTION Thank you for selecting and buying V-TAC product. V-TAC will serve you the best. Please read these instructions carefully before starting the installation and keep this manual handy for future reference. If you have any another query please contact our dealer or local vendor from whom you have purchased the product.
-
Page 2: Table Of Contents
Table of Contents Important Safety Instructions Package Contents Main Unit Product Composition / Part Name Installation APP Installation Usage Instruction Routine Maintenance Troubleshooting Common Problems Product Parameters... -
Page 3: Important Safety Instructions
Important Safety Instructions • This device is only to be used with the power supply unit provided. • To reduce the risk of injury or damage, read these safety • For the purposes of recharging the battery, only use the instructions carefully and keep them at hand when setting up, using, and maintaining this device. - Page 4 • Ensure that the robot laser vacuum is not connected • If the room to be cleaned has a balcony, a physical barrier to the mains supply before cleaning. should be used to prevent access to the balcony and to •...
- Page 5 • Keep the hair, clothes, fingers and other parts of the human • Do not place any objects (including children and pets) body away from the opening or operating parts of the product. on the stationary or moving machine. • Do not use the product to vacuum any items that may block •...
- Page 6 • Dispose of used batteries properly and send them to profes- Notice This symbol on the device or its sional recycling agencies. packaging indicates: Do not dispose of • If the power line is damaged or broken, stop using it immedi- electrical appliances as unsorted ately and buy a new one through official channels.
-
Page 7: Package Contents
Package Contents Power Adapter Docking Station Robot 2in1 Dustbin & Water Tank Mop Holder Cleaning Brush High Efficiency Filter + Sponge Side Brush (2 sets) Mop Pad Instruction manual... -
Page 8: Main Unit
MAIN UNIT WIFI status light Recharge/Pause • Off: Wi-Fi not networked Press it to recharge/pause • Flash: Being networked • Normally on: Wi-Fi networked Power / Clean/Pause • Press and hold the button for 3 seconds to power on/off • Reset Press the button to System reset button... -
Page 9: Product Composition / Part Name
Product Composition / Part Name Sensor and Structure Cliff sensor Charging contact Universal wheel Button Side brush Battery cover Laser radar Drive wheel Bumper Rolling brush Infrared receiver Dust bin sensor Back side Front side... - Page 10 Product Composition / Part Name Dust bin Assembly Docking Station Power status light High-e ciency lter cover HEPA lter Sponge lter Infrared signal emitter Primary lter Power socket Charging shrapnel Water tank plasticplug Dustbin button...
-
Page 11: Installation
Installation Precautions 1. Before starting the vacuum cleaner, clean up wires and sundries scattered on the ground, and remove easy-to-fall, fragile, valuable and potentially dangerous items. Avoid being entangled, stuck, dragged or knocked down by the main unit; otherwise, personal injury or property damage may be caused. 3. - Page 12 Installation 1. Remove the protection material from both sides of the 3. After connecting the power adapter to the power supply, robot connect it to the charging base and tidy up the redundant wires. 4. Place the charging base on a flat ground against the wall and connect to the power supply.
- Page 13 Installation 5. Do not move the charging base at will; avoid direct sunlight on 6. Power on and charge the charging base Press and hold the “ ” button to power on. When the indicator light is normally on, put the main unit against the charging base for charging;...
- Page 14 Installation 3. Install the mop on the mop support 1. Open the water injection cover, add appropriate amount of water and then cover tightly, please do not add any detergent. 4. Install the mop support 2. Put the water tank back into the robot...
-
Page 15: App Installation
Step 2: Scan the given QR code, or download “V-TAC Smart Light’ from the App Store (iOS) or the Google Play Store (Android). Step 3: Open the V-TAC Smart Light app and tap on register for creating a new account. If you already have an existing account, please proceed to please proceed to logging in.(Ref Fig 1) - Page 16 Step 5: Enter the verification code which will be sent to your mobile number/emai id, then assign a new password to your account and tap on “Confirm” to complete the registration process. (Ref Fig 3). Once done you will be redirected to V-TAC Smart Light Home page.
- Page 17 Pairing Mode 1 (Smart Mode): Power ON the Robot and then press and hold “Wi-Fi” button for 3 seconds, the robot will notify with a beep sound and enters EZ Mode(Smart Mode). The Wi-Fi icon will start flashing rapidly indicating the device is now ready for pairing with the V-TAC Smart Light App.
- Page 18 Pairing Mode 2 (AP Mode): Power ON the Robot and then press and hold “Wi-Fi” button for 6 seconds, the robot will notify with a beep every 3 seconds indicating the device has entered AP Mode. The Wi-Fi icon will start flashing slowly indicating the device is now ready for pairing with the V-TAC Smart Light App. 1. Tap on Other Mode (Fig 8) 2.
- Page 19 4. Enter your Wi-Fi name and password (Fig 11) 5. Tap on “Go to Connect” (Fig 12) 6. Select the Wi-Fi name SmartLife-XXXX hotspot. (No Password required). 7. Upon successful connection of the Hotspot Smartlife-XXX. Return to the APP. Fig 11 Fig 12 Fig 13...
- Page 20 Step 9: Once you have successfully completed step 8, you will be redirected to “Connecting Now” page, where the App searches, registers and initializes the device (ref Fig 14). Once it is completed your device will be successfully paired. Step 10: Once your device is successfully paired, rename the device to your preference. And then tap on completed. (Ref Fig 15) Step 11: You can now start controlling your device with the App.
- Page 21 Step 12: Modes And Features 1. APP interface page allows you to control the device remotely offering multiple features (Ref Fig 17). Selected Forbidden cleaning cleaning area setting Charging mode Selected area cleaning mode Spot cleaning mode Planned cleaning mode Fig 17 Fig 18...
-
Page 22: Usage Instruction
Usage Instruction POWER ON & OFF THE VACUUM CLEANER SUCTION SELECTION Tap and hold the " " button for 3 seconds to power ON the vacuum Use the mobile APP to select energy-saving, standard and cleaner. If the indicator light is lit on, it means the machine is started powerful modes (the default is standard mode) up successfully When the vacuum cleaner is in a standby state, press and hold the... - Page 23 Usage Instruction NOTE: Do not move the main unit randomly and frequently during CLEANING OF SELECTED AREA operation. After moving, please put the main unit near the original Use the mobile APP to select the function of cleaning of place. When starting the machine again, the device will try to selected area, select the area to be cleaned on the map and reposition its coordinates;...
- Page 24 Usage Instruction CLEANING OF DEFINED AREA RESTRICTED AREA SETTING Use the mobile APP to select the function of cleaning of Use the mobile APP to select the restricted area editing defined area, select the area to be cleaned on the map and the function, select and set the restricted area of cleaning on the robot vacuum cleaner will clean in the defined area.
- Page 25 Routine Maintenance Usage Instruction ROLLING BRUSH SCHEDULED CLEANING (RECOMMENDED CLEANING FREQUENCY: ONCE A WEEK) 1. Turn over the machine, press the buckle on the After the setting of scheduled cleaning takes effect, themachine rolling brush cover and take out the cover plate of will automatically start to clean at the designated time, and rolling brush.
-
Page 26: Routine Maintenance
Routine Maintenance DUST BIN AND FILTER SIDE BRUSH (RECOMMENDED CLEANING FREQUENCY: ONCE A WEEK) 1. Press the dust bin button and draw out the dust bin (RECOMMENDED CLEANING FREQUENCY: ONCE A WEEK) 1. Turn over the machine upward and pull out the side brush vertically 2. - Page 27 Routine Maintenance CLEAN THE INFRARED OBSTACLE AVOIDANCE WASH THE DUST BIN SENSOR (RECOMMENDED CLEANING FREQUENCY: ONCE A WEEK) (RECOMMENDED CLEANING FREQUENCY: ONCE A MONTH) 1. After use for a long time, take down the sponge and high-efficiency filter 2. Flush the primary filter, dust bin and sponge under the water tap (the highefficiency filter cannot be washed with water) 3.
- Page 28 Routine Maintenance CLEAN THE CHARGING CONTACT CLEAN THE SIGNAL EMISSION REGION ON THE CHARGING BASE (RECOMMENDED CLEANING FREQUENCY: ONCE A MONTH) (RECOMMENDED CLEANING FREQUENCY: ONCE A MONTH) BATTERY • Rechargeable high-performance lithium ion battery pack is built in the main unit. To maintain the battery performance, please maintain the main unit in charging state during daily •...
-
Page 29: Troubleshooting
Troubleshooting ERROR PROMPT SOLUTION Cleaning is triggered when the dust bin is taken out; please reinstall the Error 1: Insert the dustbin dust bin Error 2: Put the machine on the floor You may pick up the machine; or the machine is suspended; please before starting move the machine to a flat ground and start it again Error 3: Please lay the machine flat... -
Page 30: Common Problems
Common Problems PROBLEM SOLUTION • The battery power is insufficient. Please place the machine on the docking station, and align with the charging electrode. The machine will be automatically powered on. Failed to power on the machine • The ambient temperature is below 0°C or above 40°C. Please use the machine when the ambient temperature is 0°C to 40°C. - Page 31 Common Problems PROBLEM SOLUTION • The dust boblocked. Clean or replace the filter. The cleaning performance is • The roller x is full. Clean the dust box. degraded, or ash is dropped. • The filter is brush is entangled with foreign objects. Clean the roller brush.
-
Page 32: Product Parameters
Motor suction power (pa) 2000 PA IN CASE OF ANY QUERY/ISSUE WITH THE PRODUCT, PLEASE REACH OUT TO US AT: SUPPORT@V-TAC.EU FOR MORE PRODUCTS RANGE, INQUIRY PLEASE CONTACT OUR DISTRIBUTOR OR NEAREST DEALERS. V-TAC EUROPE LTD. BULGARIA, PLOVDIV 4000, BUL.L.KARAVELOW 9B...
Need help?
Do you have a question about the VT-5557 and is the answer not in the manual?
Questions and answers