Advertisement
Quick Links
INSTALLATION INSTRUCTION
TECHNICAL DATA
MODEL
BATTERY TYPE
WIRELESS TYPE
STANDBY CURRENT
PROTOCOL
OPERATION TEMPERATURE -10C to +50C
WORKING HUMIDITY
DIMENSION
BODY TYPE
LED INDICATOR
RESERVED LAMP FOR EXTERNAL EXPANSION: MICRO
INTRODUCTION & WARRANTY
Thank you for selec�ng and buying V-TAC SMART Door/Window Sensor. V-TAC will serve you the
best. Please read these instruc�ons carefully before star�ng the installa�on and keep this manual
handy for future reference. If you have any other query, please contact our dealer or local vendor
from whom you have purchased the product. They are trained and ready to serve you at the best.
The warranty is valid for 2 years from the date of purchase. The warranty does not apply to
damage caused by incorrect installa�on or abnormal wear and tear. The company gives no
warranty against damage to any surface due to incorrect removal and installa�on of the product.
This product is warranted for manufacturing defects only.
IN CASE OF ANY QUERY/ISSUE WITH THE PRODUCT, PLEASE REACH OUT TO US AT: SUPPORT@V-TAC.EU
FOR MORE PRODUCTS RANGE, INQUIRY PLEASE CONTACT OUR DISTRIBUTOR OR NEAREST
DEALERS. V-TAC EUROPE LTD. BULGARIA, PLOVDIV 4000, BUL.L.KARAVELOW 9B
V-TAC SMART DOOR SENSOR
VT-5177
AAA, 1.5V(2Pcs)
2.4G
40uA
IEEE 802.11b/g/n
<85%RH
50x72.5x16.5mm
ABS
BLUE
works with
Ok Google
WEEE Number: 80133970
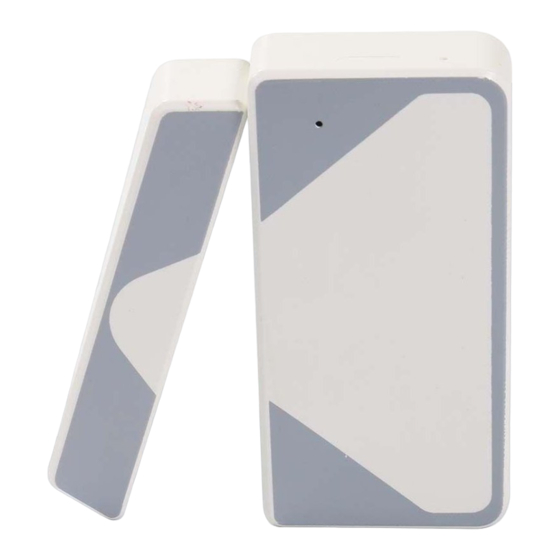
Reset Bu�on
LED Indicator
2
WARRANTY
*
Advertisement

Subscribe to Our Youtube Channel
Related Manuals for V-TAC VT-5177


Summary of Contents for V-TAC VT-5177
- Page 1 INTRODUCTION & WARRANTY WARRANTY Thank you for selec�ng and buying V-TAC SMART Door/Window Sensor. V-TAC will serve you the best. Please read these instruc�ons carefully before star�ng the installa�on and keep this manual handy for future reference. If you have any other query, please contact our dealer or local vendor from whom you have purchased the product.
-
Page 2: Safety Warning
Step 2: Turn the power ON to test the device. Step 3: Enable WI-FI and bluetooth on your phone device. Step 4: Scan the given QR code, or download “V-TAC Smart Light” from the App Store (iOS) or the Google Play Store (Android). - Page 3 Step 6: Step 5: Open the V-TAC Smart Light app and A) Mobile Number: Select the country, then enter tap on register for crea�ng a new account. your mobile number. Once done, tap ‘Next’. B) E-Mail: Enter your email id and tap on ‘Next’.
- Page 4 Step 9: Choose ‘Sensors’ to start pairing the device to the app. Step 10: V-TAC Smart Light Bulb offers two types of pairing modes: 1) EZ Mode - Light flashes rapidly 2) AP mode - Slow Flash or long brightness How to enable/reset the smart bulb into pairing mode - Step 1: Switch ON the bulb, if the light is flashing rapidly the device is in EZ mode.
- Page 5 Step 12: Once your device is successfully Step 11: Once you have successfully completed added, rename the device to your step 10, you will be redirected to below page, preference. where the App searches, registers and ini�alizes the device (ref image below). Step 13: A�er successfully pairing the device with the app, you can start controlling mul�ple features of the device through your mobile–...
- Page 6 Amazon Alexa, please proceed to logging in. Step 3: Tap on se�ngs and tap on Step 4: Search for ‘V-TAC Smart Light’ on the “Skills & Games” page as shown below. “skills and games” as shown below.
- Page 7 Step 6: Enter your V-TAC Smart Light login Step 5: Enable the Skill. ID and password and tap on “Link Now” Step 8: You will receive confirma�on of the Step 7: Once you tap on Link Now, you will be account being linked successfully redirected to a new page reques�ng for...
- Page 8 ! Alexa, set bedroom light to warm white. THINGS TO REMEMBER BEFORE STARTING INSTALLATION: 1. V-TAC Smart Light App & Amazon Alexa App 2. Make sure you have Amazon Alexa Device(including Echo, Echo Tap, or Echo Dot) 3. Smart Device - Device...
- Page 9 GOOGLE HOME SETTINGS Step 1: a&b) Install the Google Home app via the App Store (iOS) or the Play Store (Android) and register. If you already have an exis�ng account with Google Home, please proceed to logging in. c) Create a New Home/Choose from the exis�ng home if any. d) Power ON the Google Home device and connect it to the App.(Then Proceed to step 2) Step 2: Once you are on the Google home page, tap on the Add “+”...
- Page 10 Step 3: Make sure the Smart Bulb is paired Step 4: Type “V-TAC Smart Light” on the search with V-TAC Smart Light app before star�ng bar and tap on the icon of “V-TAC Smart Light” step 3. Tap on the arrow sec�on as highlighted in the below image.
- Page 11 Step 7 a. Account will now be linked, please stay on the page you will be redirected in few seconds to select the device to add to your home. b. Select the device and tap on Next as show in image b. Account is now Linked Step 8: Select the Home where you would like to Step 9: You have succesfully added Smart Light...
- Page 12 Ok, Google, set bedroom light to green. ! Ok, Google, set bedroom light to warm white. THINGS TO REMEMBER BEFORE STARTING INSTALLATION: 1. V-TAC Smart Light App & Google Home App 2. Make sure you have Google Home Device 3. Smart Device - Device...
Need help?
Do you have a question about the VT-5177 and is the answer not in the manual?
Questions and answers