Advertisement
Available languages
Available languages
Quick Links
Advertisement

Related Manuals for ARIETE 440


Summary of Contents for ARIETE 440
- Page 1 Electric grater ralador elétrico IMPORTADO E DISTRIBUÍDO POR: IMPORTED AND DISTRIBUTED BY: Imeltron Com. Imp. Exp. Ltda Rua James Clerk Maxwell - Nº 225 Techno Park - Campinas - SP - Cep: 13069380 CNPJ: 54.081.906/0001-07 Brazil 637111...
- Page 2 Fig. 5 Fig. 6 Fig. 7 Fig. 8 Fig. 1 Fig. 1 Bis Fig. 2 Fig. 9 Fig. 10 Fig. 11 Fig. 12 Fig. 3 Fig. 4...
- Page 3 Fig. 13 Fig. 14 Fig. 15 Fig. 16...
-
Page 4: Important Safeguards
Do not use the appliance if the power cord or plug are damaged or if the appli- ance itself is faulty; all repairs, including substitution of power cord, must be carried out exclusively by an Ariete assistance centre or by authorized Ariete technicians in order to avoid all risks. - Page 5 To prevent the risk of electric shock, if the power supply or the power cord need to be replaced or serviced, have the operation performed by an Authorized Ariete Service Centre, or in any case by a qualified electrician. The appliance runs on with rechargable batteries. When you change the appli-...
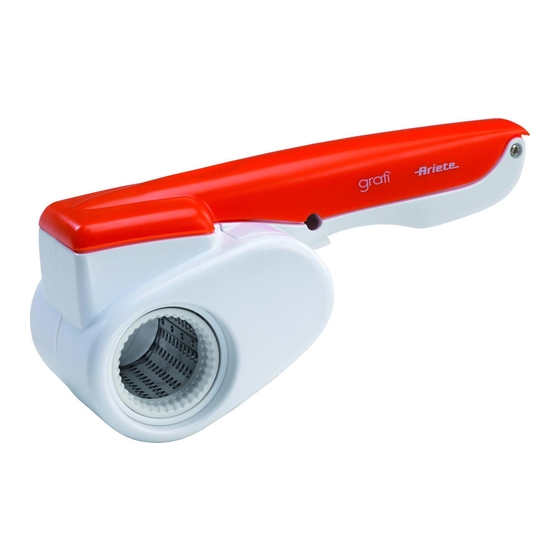
- Page 6 REFERE Dear customers, the Ariete gratì electric grater will soon become an absolutely necessary tool for cheese grating, to guarantee freshness without waste of food.It has been designed to grate any kind of solid cheese not too soft, but gratì can also grate chocolate, dry bread, almonds and nuts. gratì is now easier to clean because it can be completely disassembled and is dust-safe thanks to the side closing plug for roller.
- Page 7 Lever Start-up switch Machine body Charging contact Recharge base Charging unit Charging pilot light SUPPORT Fig. 1 - 1bis The charging unit is a convenient support for the gratì, both horizontally and vertically. Fig. 2 Place the base on the desired point, and mark the points to be drilled into the holes with a pencil. Drill holes on the wall and introduce the dowels and screws.
-
Page 8: Advertências Importantes
Não utilize o aparelho se o cabo elétrico ou a ficha estiverem danificados ou se o aparelho apresentar algum defeito; todas as reparações, incluindo a subs- tituição do cabo de alimentação, devem ser feitas somente pelo serviço de assistência da Ariete ou por técnicos por ela autorizados, de modo a prevenir... - Page 9 qualquer risco. No caso de utilizar uma extensão elétrica, verifique se é adequada à potência do aparelho de modo a evitar perigos para o operador e para a segurança do ambiente onde se opera. A utilização de extensões inadequadas podem provocar anomalias de funcionamento.
- Page 10 CONSERvAR SEMPRE ESTAS INSTRUÇÕES Caro cliente, O ralador eléctrico recarregável Ariete gRATÌ tornar-se-á em breve um ajudante indispensável na cozinha, simplificando muito a preparação de queijo ralado consentindo de apreciá-lo sempre fres- co, sem desperdícios. Projectado para ralar qualquer tipo de queijo com pasta dura e não demasia- do mole, gRATÌ...
-
Page 11: Descrição Do Aparelho
NOTAS SOBRE A RECARGA Os contactos da base possuem uma baixa voltagem e não constituem nenhum perigo. A maior duração e o melhor funcionamento se obterão se o aparelho for utilizado com uma certa frequência. A pega aquece-se durante a recarga: isto é normal. Evitar de efectuar a recarga a temperatura inferior aos 4°... - Page 12 DESMONTAGEM / MONTAGEM DO ROlO Fig. 6 Rodar, com o motor desligado, de aproximadamente 1/4 de giro no sentido contrário aos ponteiros do relógio o anel dentado, em seguida puxar para o exterior o rolo. Fig. 7 Para voltar a montar o rolo, é...
Need help?
Do you have a question about the 440 and is the answer not in the manual?
Questions and answers
Замена барабана
The Ariete Gratì 440 has a removable drum, but the context does not provide specific steps for replacing it. Refer to the user manual or contact Ariete assistance for detailed instructions.
This answer is automatically generated