Mamava Solo Assembly Manual
Hide thumbs
Also See for Solo:
- Assembly manual (29 pages) ,
- Assembly instructions manual (15 pages) ,
- Manual (5 pages)
Table of Contents
Advertisement
Quick Links
| Solo and Solo Base
Assembly Guide
Shipping crate dimensions:
7'10" W x 4'7" D x 2'5" H
Assembled pod dimensions:
4' W x 4' D x 7'4" H
It should take 2 people approximately
1.5 hours to assemble this Mamava pod.
Table of Contents
Tools + Hardware.................................................................................................................................................................................................................. Pg. 2
Parts .......................................................................................................................................................................................................................................... Pg. 3
Warnings ................................................................................................................................................................................................................................. Pg. 4
Markings .................................................................................................................................................................................................................................. Pg. 5
Shipping Crate ...................................................................................................................................................................................................................... Pg. 6
Foundation ............................................................................................................................................................................................................................. Pg. 7
Wall Plug Wiring ................................................................................................................................................................................................................... Pg. 9
Wall Panels + Door ............................................................................................................................................................................................................ Pg. 10
Roof Frame ........................................................................................................................................................................................................................... Pg. 16
Wiring + Lighting ............................................................................................................................................................................................................... Pg. 19
Roof Panel .............................................................................................................................................................................................................................. Pg. 21
Seat.......................................................................................................................................................................................................................................... Pg. 22
Shelf + Laptop Desk .......................................................................................................................................................................................................... Pg. 24
Final Assembly + Testing ................................................................................................................................................................................................ Pg. 27
Notes ....................................................................................................................................................................................................................................... Pg. 29
service@mamava.com
(802) 347-2111
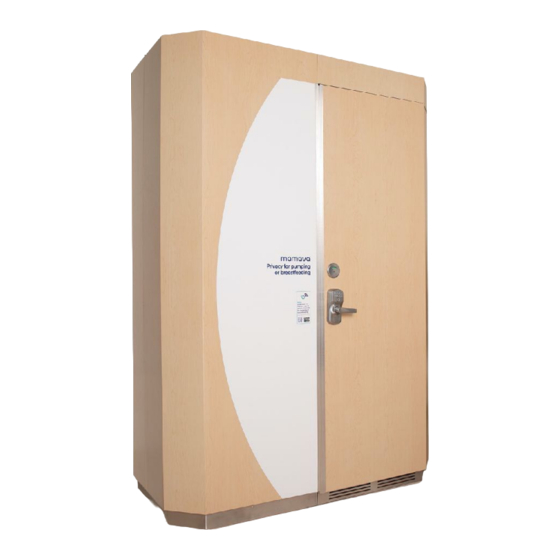
Mamava Solo
Mamava, the leading expert in lactation space design, provides dignified lactation
accommodations and breastfeeding resources for employers and organizations
around the world. Our mission is to create a healthier society through
infrastructure and support for breastfeeding.
Certified B Corporation, Assembled in U.S.A.
The curved lactation suite design is a TM/SM of Mamava, Inc. All rights reserved.
Mamava Solo Base
Advertisement
Table of Contents

Related Manuals for Mamava Solo


Summary of Contents for Mamava Solo
-
Page 1: Table Of Contents
(802) 347-2111 around the world. Our mission is to create a healthier society through infrastructure and support for breastfeeding. Certified B Corporation, Assembled in U.S.A. The curved lactation suite design is a TM/SM of Mamava, Inc. All rights reserved. -
Page 2: Tools + Hardware
Button Head Cap Screw 16870 16370 (16835) 16840 (2) #8 x 5/8” 5 mm hex key 5/32” hex key Phillips Pan Head Screw (16980) (17240) | Solo service@mamava.com • (802) 347-2111 • 180 Battery St, Suite 210, Burlington, VT 05401 221027... -
Page 3: Parts
Caster Wheels (optional) 17180 (Solo) 16355 / 17180 14915 14955 14980 17160 16765 16595 16615 16710 16700 16770 16705 15450 16715 16350 15015 15065 /17175 | Solo service@mamava.com • (802) 347-2111 • 180 Battery St, Suite 210, Burlington, VT 05401 221027... -
Page 4: Warnings
Electrical ratings for the pod: Branch Circuit: 120 vAC/ 15 A / 50-60 Hz Pod: 12 vDC / 7 A Outlet: 120 vAC / 13.3 A | Solo service@mamava.com • (802) 347-2111 • 180 Battery St, Suite 210, Burlington, VT 05401 221027... -
Page 5: Markings
Risk of Electric Shock, Fire and Injury Review the assembly instructions to confirm the appropriate critical components and accessories are being used with the furnishing. | Solo service@mamava.com • (802) 347-2111 • 180 Battery St, Suite 210, Burlington, VT 05401 221027... -
Page 6: Shipping Crate
Set aside the end panels. 3. Remove the screws from the side panels of the crate. Set aside the side panels. | Solo service@mamava.com • (802) 347-2111 • 180 Battery St, Suite 210, Burlington, VT 05401 221027... -
Page 7: Foundation
Foundation Assemble the Mamava Solo pod as close to its final location as possible. Once a location is selected, T I P : ensure the floor is level and there aren’t any gaps greater than 1” between the bottom of the level and the floor. - Page 8 If you have trouble tightening the nuts, turn the base on its side. Once nuts are tight, return the base back to its position and ensure that it’s stable. | Solo service@mamava.com • (802) 347-2111 • 180 Battery St, Suite 210, Burlington, VT 05401 221027...
-
Page 9: Wall Plug Wiring
2’ of cord inside. Leave the GFCI plug outside the pod. 2. Check that the GFCI plug can reach the nearby outlet, but don’t plug in yet. | Solo service@mamava.com • (802) 347-2111 • 180 Battery St, Suite 210, Burlington, VT 05401 221027... -
Page 10: Wall Panels + Door
(16370). If the bolt doesn’t tighten, you may need to adjust the alignment of the wall panel. Loosely tighten for now, you’ll secure later. | Solo service@mamava.com • (802) 347-2111 • 180 Battery St, Suite 210, Burlington, VT 05401 221027... - Page 11 M8 x 55 flange head bolts (16370). Start from the top left to ensure the pod wall is stable. Loosely tighten for now, you’ll secure later. | Solo service@mamava.com • (802) 347-2111 • 180 Battery St, Suite 210, Burlington, VT 05401 221027...
- Page 12 Use a Phillips head screwdriver to attach in place with (2) #8 x 5/8” Phillips pan head screws (17240). | Solo service@mamava.com • (802) 347-2111 • 180 Battery St, Suite 210, Burlington, VT 05401 221027...
- Page 13 (4) M8 x 55 flange head bolts (16370). Start from the upper right to stabilize the pod. Loosely tighten for now, you’ll secure later. | Solo service@mamava.com • (802) 347-2111 • 180 Battery St, Suite 210, Burlington, VT 05401 221027...
- Page 14 9. Place the door on the base so that the bottom aluminum flange sits on top of the threshold and the aluminum corners align with the left and right wall panels. | Solo service@mamava.com • (802) 347-2111 • 180 Battery St, Suite 210, Burlington, VT 05401 221027...
- Page 15 Keep the door propped open. It may be helpful to use the deadbolt to do so. Loosely tighten for now, you’ll secure later. | Solo service@mamava.com • (802) 347-2111 • 180 Battery St, Suite 210, Burlington, VT 05401 221027...
-
Page 16: Roof Frame
Attach the two antennas to the top of the Pod Control Device (PCD), with the shorter antenna closest to the power cord. Once secured, keep the antennas upright. | Solo service@mamava.com • (802) 347-2111 • 180 Battery St, Suite 210, Burlington, VT 05401 221027... - Page 17 (6) M8 x 55 flange head bolts (16370). Loosely tighten as the bolts will be fully secured in the next step. | Solo service@mamava.com • (802) 347-2111 • 180 Battery St, Suite 210, Burlington, VT 05401 221027...
- Page 18 7. Connect the two wires at the top left of the door frame and the two wires at the top right of the door frame. Then tuck them into the channel. | Solo service@mamava.com • (802) 347-2111 • 180 Battery St, Suite 210, Burlington, VT 05401 221027...
-
Page 19: Wiring + Lighting
3. Snap the wire cover into the back left corner and slide it up until it touches the roof frame. | Solo service@mamava.com • (802) 347-2111 • 180 Battery St, Suite 210, Burlington, VT 05401 221027... - Page 20 6. Connect the two wires in the left corner of the light fixture. | Solo service@mamava.com • (802) 347-2111 • 180 Battery St, Suite 210, Burlington, VT 05401 221027...
-
Page 21: Roof Panel
(Make sure your hands are clean before handling the roof.) | Solo service@mamava.com • (802) 347-2111 • 180 Battery St, Suite 210, Burlington, VT 05401 221027... -
Page 22: Seat
4. Tighten the (4) M8 x 35 button head cap screws (16840) on the seat frame right side and seat frame left side. | Solo service@mamava.com • (802) 347-2111 • 180 Battery St, Suite 210, Burlington, VT 05401 221027... - Page 23 6. Position the assembled seat over the base frame, align the corners and plastic connectors, and press down firmly to snap into place. | Solo service@mamava.com • (802) 347-2111 • 180 Battery St, Suite 210, Burlington, VT 05401 221027...
-
Page 24: Shelf + Laptop Desk
Start here with (4) M8 x 35 button head cap screws (16840). Start with the outside holes first, then finish with the center holes. | Solo service@mamava.com • (802) 347-2111 • 180 Battery St, Suite 210, Burlington, VT 05401 221027... - Page 25 GFCI cord. Insert the black male plug from the side of the outlet box into the power supply. | Solo service@mamava.com • (802) 347-2111 • 180 Battery St, Suite 210, Burlington, VT 05401 221027...
- Page 26 Use a 5 mm hex key to attach the laptop desk to the right wall panel with (4) M8 x 20 button head cap screws (16835). | Solo service@mamava.com • (802) 347-2111 • 180 Battery St, Suite 210, Burlington, VT 05401 221027...
-
Page 27: Final Assembly + Testing
2. Insert the power plug on the exterior of the pod into the GFCI wall outlet and press the reset button on the plug. | Solo service@mamava.com • (802) 347-2111 • 180 Battery St, Suite 210, Burlington, VT 05401 221027... - Page 28 5/32” hex key in the top of the hinge, firmly push down, and rotate clockwise. To decrease the door closure speed, rotate counterclockwise. | Solo service@mamava.com • (802) 347-2111 • 180 Battery St, Suite 210, Burlington, VT 05401 221027...
-
Page 29: Notes
D O N ’ T F O R G E T If this pod is being listed on the Mamava app—so breastfeeding parents can find the space using Mamava’s Smart Access—please send photos of your installed pod to customersuccess@mamava.com. Notes Need assistance? Visit help.mamava.com or contact service@mamava.com •...
Need help?
Do you have a question about the Solo and is the answer not in the manual?
Questions and answers