Advertisement

Trademarks
HUMZOR®, NEXZSYS®, NEXZLINK®, NEXZSCAN®, and NEXZSYS® are trademarks of
Shenzhen Hanzhi Technology Co., Ltd., registered in China, the United States and other countries. All other
marks are trademarks or registered trademarks of their respective holders.
Copyright Information
No part of this manual may be reproduced, stored in a retrieval system or transmitted, in any form or by
any means, electronic, mechanical, photocopying, recording, or otherwise without the prior written permission
of HUMZOR.
Disclaimer of Warranties and Limitation of Liabilities
All information, specifications and illustrations in this manual are based on the latest information
available at the time of printing.
HUMZOR reserves the right to make changes at any time without notice. While information of this
manual has been carefully checked for accuracy, no guarantee is given for the completeness and correctness of
the contents, including but not limited to the product specifications, functions, and illustrations.
HUMZOR will not be liable for any direct, special, incidental, indirect damages or any economic
consequential damages (including lost profits).
IMPORTANT
Before operating or maintaining this unit, please read this manual carefully, paying extra attention to the
safety warnings and precautions.
For Services and Support
www.humzor.com
www.humzor.cn
service@humzor.com
info@humzor.com
For details, please refer to the
NEXZSYS Windows Products
User's Manual
Service Procedures
in this manual.
1

Advertisement

Table of Contents
loading
Need help?

Need help?

Do you have a question about the NEXZSYS NS706 and is the answer not in the manual?

Questions and answers

Håkan
January 27, 2025

Howe do i get cars like volkswagen and Saab in the program

Summary of Contents for Humzor NEXZSYS NS706

  • Page 1 All information, specifications and illustrations in this manual are based on the latest information available at the time of printing. HUMZOR reserves the right to make changes at any time without notice. While information of this manual has been carefully checked for accuracy, no guarantee is given for the completeness and correctness of the contents, including but not limited to the product specifications, functions, and illustrations.
  • Page 2 Safety Information For your own safety and the safety of others, and to prevent damage to the device and vehicles upon which it is used, it is important that the safety instructions presented throughout this manual be read and understood by all persons operating or coming into contact with the device. There are various procedures, techniques, tools, and parts for servicing vehicles, as well as in the skill of the person doing the work.
  • Page 3 ⚫ Do not connect or disconnect any test equipment while the ignition is on or the engine is running. ⚫ Keep the test equipment dry, clean, free from oil, water or grease. Use a mild detergent on a clean cloth to clean the outside of the equipment as necessary.
  • Page 4: Table Of Contents

    CONTENTS USING THIS MANUAL ......................5 1.1 C ONVENTIONS ............................. 5 GENERAL INTRODUCTION ....................6 2.1 A ......................6 CCESSORIES AND ACKAGE 2.3 S ........................8 OFTWARE VERVIEW GETTING STARTED ....................... 9 3.1 S TART ............................9 3.2 S ............................11 SOFTWARE INSTALLATION AND RUNNING ..............
  • Page 5: Using This Manual

    1 Using This Manual This manual contains device usage instructions. Some illustrations shown in this manual may contain modules and optional equipment that are not included in your system. 1.1 Conventions The following conventions are used. 1.1.1 Bold Text Bold text is used to highlight selectable items such as buttons and menu options. Example: ⚫...
  • Page 6: General Introduction

    2 General Introduction The NEXZSYS NS706/NS806/NS906 is a multi-platform diagnostic solution in PC or laptop, a NEXZ-BOX communication and diagnostic measurement unit and an on-tool and cloud-based repair instructions and expert advice. As an intelligent diagnostic and information system, NEXZSYS NS706/NS806/NS906 not only displays the relevant repairs gathered from experienced industry experts, but provides step-by-step guidance to ensure the repair is done correctly and efficiently.
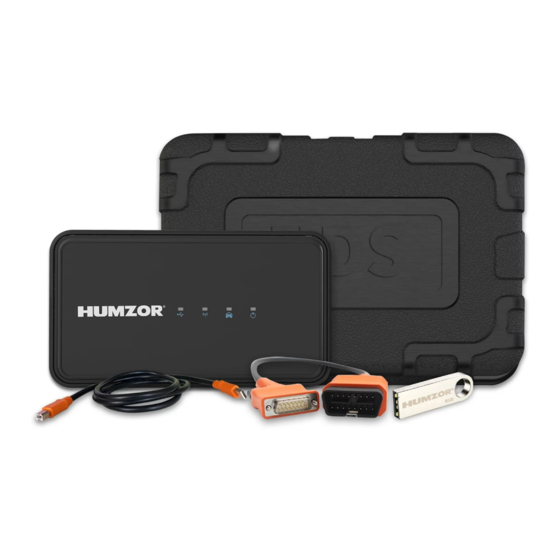
  • Page 7 2.1.2 Package Figure 2-2 NEXZSYS Package View 2.2 VCCI – Vehicle Communication and Check Interface...
  • Page 8: Software Overview

    Figure 2-3 NEXZSYS VCCI Top View 2.3 Software Overview 2.3.1 Overview NEXZSYS is a tool-based APP which focus on car diagnosis, reset, key programming and other maintenance functions in windows. It is connected to the vehicle through a specific Wi-Fi device. The car owner or maintenance worker can learn the basic information and the existed faults of the vehicle in real time through the software, etc., making vehicle maintenance become more convenient.
  • Page 9: Getting Started

    CVT, Injector Coding, and etc. ④ Support online DTC Query, Remote Assistance, One-click to Feedback, Screenshot, Screen Recording, and Upgrade. 2.3.3 Performance The software is easy to operate and reliable, guarantees the authenticity and security of information. 3 Getting Started Make sure the computer has sufficient power or is connected to the external power supply.
  • Page 10 3.1.1 Application Buttons The table below briefly describes each of the applications in the NEXZSYS system. Table 3-1 Applications Name Button Description Accesses the unit's car diagnostics functions. Diagnostics Heavy-duty Accesses the unit's Heavy-duty diagnostics functions. Diagnostics Special Accesses special functions menu Function IMMO Key Accesses Key programming and IMMO Reset menu...
  • Page 11: Shut Down

    3.1.2 Locator and Navigation Buttons Operations of the Navigation buttons at the bottom of the screen are described in the table below: Table 3-2 Locator and Navigation buttons Name Button Description Persoanl Accesses saved consumer information. Settings Accesses the system settings menu. Camera Take a screenshot and save the picture.
  • Page 12: Software Running

    4.2 Software Running The user clicks on the NEXZSYS icon to enter the system. Figure 4-1 Sample Application Home 5 Product Registration and Login 5.1 User Registration When you access the "NEXZSYS" application for the first time, you need to follow the steps below to register: 1.
  • Page 13 Figure 5-1 Sample Login and Registration Interface Figure 5-2 Sample Registration Interface...
  • Page 14: Login

    5.2 Login Users who have registered can log in through the following steps: 1. Click the "NEXZSYS" icon on the desktop to open the application. 2. On the Login registration interface, enter the email or mobile number you need to log in in the "E-mail" column.
  • Page 15 Figure 5-3 Sample Password Reset Interface 5.2.2 Serial Number Binding After the user logs in successfully, it comes to the serial number binding interface. Users can add, delete, and select products here. Figure 5-4 Sample Binding Serial Number Interface...
  • Page 16 5.2.3 Product Binding 1. Manually input a. Click the "Add a new product" button and the "Binding serial number" interface will pop up. b. Enter the serial number (S/N) of the device you purchased in the "Serial number" field, and enter the Activation code of the device in the "activation code"...
  • Page 17 5.2.5 Product Selection 1. Click the product serial number you need to enter, and the icon on the right becomes 2. Click the "Next step" button and the system will guide you to the main interface of "HUMZOR". 5.2.6 Enable Location Permission IMPORTANT Windows7 or above, the tablet need to get tablet address information.
  • Page 18: Wifi Connection

    VCI device with the corresponding serial number you have purchased through the following steps: 1. Insert the VCI of the HUMZOR NEXZSYS product you purchased tightly into the OBD port. At this time, the WIFI icon on the top right side is.
  • Page 19: Diagnostics

    6 Diagnostics The Diagnostics application can access the electronic control module of multiple vehicle control systems, including but not limited to the engine, transmission, antilock brake system (ABS) and airbag system (SRS). 6.1 Establish Vehicle Communication The diagnostics operations require connecting the PC to the test vehicle through the VCCI device using the Main Cable.
  • Page 20: Getting Started

    6.3 Getting Started Prior to first use of the Diagnostics application, ensure the VCCI device is properly connected to and is communicating with the PC. 6.3.1 Vehicle Menu Layout Manufacturer Buttons The Manufacturer buttons display the various vehicle brand names. Select the manufacturer button after the VCCI device is properly connected to the test vehicle to start a diagnostic session.
  • Page 21 Figure 6-2 Sample BMW brand 6.3.2 Vehicle Identification The NEXSYS diagnostic system supports two methods of Vehicle Identification. 1. Vehicle Manual Select 2. Vehicle Select by VIN Figure 6-3 Sample Diagnostic Menu Selection 6. 3.2.1 Vehicle Manual Select...
  • Page 22 For vehicles that do not support the Auto VIN diagnose function, the NEXZSYS diagnostic system allows you to enter the vehicle brand manually. Figure 6-4 Sample Manual Selection 6.3.2.2 Vehicle Select by VIN The NEXSYS diagnostic system features the latest VIN-based Auto VIN Scan function to identify CAN vehicles with just one tap, enabling the technician to quickly identify the exact vehicle and scan its available systems for fault codes.
  • Page 23 Figure 6-5 Sample Auto VIN Selection After the vehicle information is selected. Tap the NEXT button at the bottom right corner of the screen (See Figure 6-5) to open the Main menu page. This section consists of various functions commonly used, including quick test, Control Unit, and more.
  • Page 24 Figure 6-7 Sample System Test mode 6.3.3 Quick Test The Quick Test function performs a comprehensive scanning of all the systems in the vehicle ECU to locate faults and retrieve DTCs. Systems with no faults detected will display OK; systems containing faults will display F[] with fault numbers.
  • Page 25 Figure 6-9 Sample Quick Test Result Screen 6.3.4 Control Unit This option allows you to manually locate a required control system for testing through a series of choices. Simply follow the menu driven procedure, and make proper selection each time; the program will guide you to the diagnostic function menu after a few choices you've made.
  • Page 26 ⚫ Live data – retrieves and displays live data and parameters from the vehicle's ECU. ⚫ Active test – provides specific subsystem and component tests. This selection may display as Actuators, Actuator Test, or Function Tests. Available tests vary by vehicle. ⚫...
  • Page 27 Figure 6-12 Sample Read DTCs Screen Figure 6-13 Sample Read DTCs Screen ⚫ Clear DTCs – tap to erase codes from the ECU. It is recommended that DTCs are read and needed repairs are performed before erasing codes. ⚫ Read DTCs - retrieves and displays the DTCs from the vehicle control system. The Read Codes screen varies for each vehicle being tested.
  • Page 28 Figure 6-14 Sample Clear DTCs Screen 1 ➢ To erase codes 1. Tap Clear DTCs in the Function Menu. 2. A warning message displays to inform you of data loss when this function is applied. Tap YES to continue. A confirming screen displays when the operation is successfully done. Tap NO to exit.
  • Page 29 6.3.7 Live Data When this function is selected, the screen displays the data list for the selected module. The parameters display in the order that they are transmitted by the ECU, so expect variation among vehicles. Gesture scrolling allows you to quickly move through the data list. The figure below displays a typical Live Data screen: Figure 6-16 Sample Live Data Screen 6.3.8 Active Test...
  • Page 30: Special Function

    Figure 6-17 Sample Active Test Screen The functional buttons in the lower right corner of the Active Test screen manipulate the test signals. The operational instructions are displayed in the main section of the test screen. Follow the on-screen instructions and make appropriate selections to complete the tests.
  • Page 31 For example: Click on Special Function->OIL RESET->Europe->BMW, interface as image such as: Figure 7-2 Sample Special Function Screen 2 Figure 7-3 Sample Special Function Screen 3...
  • Page 32 Figure 7-4 Sample Special Function Screen 4 Figure 7-5 Sample Special Function Screen 5...
  • Page 33: Key Programming

    Figure 7-6 Sample Special Function Screen 6 Figure 7-7 Sample Special Function Screen 7 8 Key Programming These functions perform various key programmer, including add and erase keys, reset immobilizer, replace engine or immobilizer ECU, and so on. For example: Click on Key Programming ->ASIA->HYUNDAI->Program Immobilizers.
  • Page 34 Figure 8-1 Sample Key Programmer Screen 1 Figure 8-2 Sample Key Programmer Screen 2...
  • Page 35 Figure 8-3 Sample Key Programmer Screen 3 Figure 8-4 Sample Key Programmer Screen 4...
  • Page 36: App Store

    You can download the model or function you need through the following steps: On the "HUMZOR" main interface, click the "App Store" icon button, and the system will guide you to the "App Store" interface. If the "basic data" of your NEXZSYS application is not the latest, please click the "OK"...
  • Page 37 Figure 9-2 Sample Vehicle Model Interface Figure 9-3 Sample Vehicle Model Download Interface...
  • Page 38: Special Function

    3. Click the "download" button at the bottom right to start the download function. 4. After the special function is downloaded and decompressed, you can click the "Special Function" icon button on the "HUMZOR" main interface to enable the special function. Figure 9-4 Sample Special Function Interface...
  • Page 39: Immo

    3. Click the "download" button at the bottom right to start the download function. 4. After the models have been downloaded and decompressed, you can click the "Key Programming" icon button on the "HUMZOR" main interface to start IMMO function. Figure 9-6 Sample IMMO Function Interface...
  • Page 40: Dtc Query

    2. Enter the ID of the DTC you want to query in the "Searching Code" input box. Figure 10-1 Sample DTC Query Interface 11 Personal On the "HUMZOR" main interface, click the "Personal" icon button, and the system will guide you to the Personal interface. 11.1 Editing Personal Information If you need to add or modify some personal information, you can operate it through the following steps: 1.
  • Page 41: Upgrade

    11.2 Upgrade If your NEXZSYS application is not the latest version, you can upgrade the application version through the following steps: 1. On the Personal interface, click the "Update" icon button. 2. Click the "Update" button on the right to start downloading the new version. 11.3 Product Serial Number Switch If you need to switch the current product to another serial number, you can switch through the following steps:...
  • Page 42: Log Out

    If you need some remote assistance when using the NEXZSYS application, you can get help in the following ways: 1. On the "HUMZOR" main interface, click the "Remote Assistance" icon button. 2. If you have not installed the "TeamViewer: Remote Control" application, please click the "OK" button to download and install the TeamViewer application.
  • Page 43 12.2 Quick Feedback Choose Quick Feedback, you can quickly feedback the vehicle diagnostic data to the server without filling in any content. Users can feed QFID back to after-sales personnel for convenient query. Figure 12-2 Sample Feedback Interface 13 Settings In the Settings page, users can make a choice of the Language, Auto Update, Windows Size, Connection Method, Logo Size, Logo Type, Font.
  • Page 44 Figure 13-1 Sample About Interface 13.2 Language The language supported by each product is configured by the server. Figure 13-2 Sample Language Interface 13.3 Auto Update After selecting automatic update, the software will automatically check and download the latest model diagnostic version when it starts.
  • Page 45 Figure 13-3 Sample Auto Update Interface 13.4 Windows Size After selecting full screen, the software will adapt to the size of the screen. Figure 13-3 Sample Windows Size Interface...
  • Page 46 13.5 Connection Method USB: The software will communicate with the device through the USB cable. WIFI: When entering the diagnosis, the software will automatically connect to the SSID which name is the product serial number via WIFI. When exiting the diagnosis, the software will automatically disconnect the previously connected WIFI.
  • Page 47 Figure 13-6 Sample Logo Size Interface 13.7 Logo Type Currently, if the language is set to non-Chinese, the original logo cannot be selected. Figure 13-7 Sample Logo Type Interface...
  • Page 48: Other

    The program defaults to the Arial Unicode MS font, and users can modify the font according to their own preferences. Figure 13-8 Sample Font Interface 14 Other On the "HUMZOR" main interface, click the "Other" icon button, and the system will guide you to the other interface. 14.1 Data Playback Data stream playback function.
  • Page 49 Choose the model to select single or multiple pictures. Then click the "Delete"icon button at the bottom right, and then click the YES button in the pop-up window to delete it successfully. Figure 14-1 Sample Data Manage Interface 1...
  • Page 50: Screenshot

    When you use the NEXZSYS application, you can save a screenshot of the current interface through the following steps: main interface "HUMZOR", click icon on the right side of the top navigation bar, the screenshot is saved successful, and you can view it on the "Data Manage" interface.

This manual is also suitable for:

Nexzsys ns806Nexzsys ns906

Table of Contents

Save PDF