Advertisement
Quick Links
Advertisement

Related Manuals for Currie tech 600 Series


Summary of Contents for Currie tech 600 Series
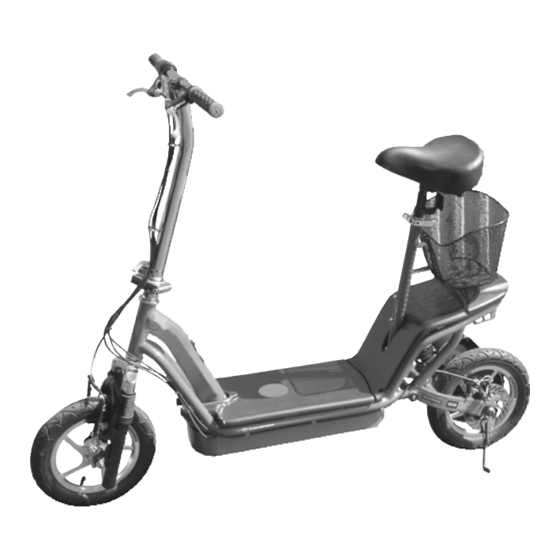
- Page 1 600/750 Series Electric Scooters Owners and Riders Instruction Manual UPDATED 04 11 05...
- Page 2 ON THE INSIDE • Instructions on how to set up your 600/750 series scooter and charge the battery. • Tips on how to maintain your scooter and keep it running smoothly. • Advice on safe riding techniques and safety equipment. •...
- Page 3 Warning Notices: Like most instruction manuals, this one contains a lot of Warnings and Cautions. Many of them are safety related, and some are connected to legal issues. Please take time to read through all of them; they are here to help make scooter riding as safe and enjoyable as possible—especially for kids.
- Page 4 I. BASIC ASSEMBLY & SET UP I M P O R TA N T: Before turning on and riding your scooter, please read and follow the set-up and operating instructions first. If you purchased your scooter from a local r e t a i l e r, it should be fully assembled and ready to ride. BUT...if you bought your scooter and took it home in the carton, then you MUST follow the set-up instructions below covering assembly and final adjustment.
- Page 5 7. Tire Pressure: The correct tire pressure for the 600/750 series tires (size: 12 1/2” X 2 1/4”) is 35 psi. Check it with a reliable tire pressure gauge and inflate as needed. Caution: Do not use an unregulated compressor when inflating your tires.
- Page 6 flipped closed, t h e figure b figure c lever should be very tight in its closed position (fig. e) and unable to vibrate loose. c. To unlock and lower the handlebar, reverse steps a. through c. above. W A R N I N G ! If you are unable to lock the handlebar folding hinge properly,...
- Page 7 3. Battery Pack, Charger Port and Charger The 600/750 series electric scooter comes with a 36 Volt/10 AH “Plug and Play” battery pack. The battery pack is installed at the factory, and it is located under the deck plate. To access the battery, if necessary, turn the power switch to the OFF position (fig. a), unscrew the “D”...
- Page 8 Changing the Battery Pack 1. Make sure the power switch is set to the OFF position. 2. Undo the deck plate mounting bolt and remove the deck. 3. Disconnect the battery power pack connector (cut zip tie holding the wire connector if necessary) and lift the battery pack out of the scooter’s battery box.
- Page 9 Onboard Diagnostic Controller & Throttle 4. Slowly rotate the throttle from zero all the way to the full speed position and then allow it to return slowly. You should notice that the LED’s will change with different throttle positions. A. While at zero speed, the LED’s will all be on. B.
- Page 10 If all LED’s are blinking simultaneously, the controller is over-heated (MOSFET temperature is too high), Power to the motor has been shut down. Turn the main power switch off for at least 30 minutes to allow the controller to cool down before riding any more. This can occur if excessive stress is placed on the scooter, (I.e.
- Page 11 Ca u t i o n : If you reach the limit of the cable adjustments described above and you are still experiencing poor braking performance, do not continue to ride. Do not attempt to adjust the cable any further or attempt to adjust the band brake. Take your scooter to a qualified mechanic for proper service, or call CTI Customer Service at: 1-800-377-4532.
- Page 12 have 5 to 6mm of up-and-down travel or slack. Note: Currie Technologies strongly recommends that any chain tension adjustment be performed by a trained scooter or bicycle mechanic. The Direct Chain Drive System allows for adjustment of chain tension in the following steps: figure 1 figure 2 •...
- Page 13 7. Optional Seat and Seat Post Assembly The seat assembly is an included with the 600/750 series scooter. The seat assembly can be easily attached to the scooter. The assembly consists of: a) Comfort Seat, b) Seat Post, c) Seat Tube, d) Quick Release Seat Post Clamp (QR) e) basket and f) a separate sheet of assembly instructions.
- Page 14 Front Wheel Removal: You will need to first release the front “V”-Brake cable “noodle” from its brake arm carrier on the brake arm in order to open the brake wider than the tire. Using a 15mm box or adjustable wrench, loosen both axle nuts enough to unhook the safety washers from the fork.
- Page 15 f . Remove the motor with the small sprocket from the motor plate with the 3 (5mm) bolts. g . Loosen and remove both axle nuts (15mm) h. Loosen and remove the motor plate fixing bolt (5mm Allen) on the lower right side of the frame. i .
- Page 16 Front Wheel Installation Raise the front end of the scooter and lower it onto the front wheel axle. Make sure the axle seats properly in the dropouts. Center the wheel in the forks and tighten both axle nuts. Spin the wheel to make sure it is centered in the forks and the axle nuts properly tightened.
- Page 17 Adjusting the Brake Cables: To adjust the brake wires correctly, loosen the 5mm Allen “pinch bolt”, pull and hold the wire through the pinch bolt, push the brake actuator arm forward along the wire and then tighten the cable pinch bolt using a 5mm Allen wrench.
- Page 18 2. Ride on Smooth Pavement: Your Electro Drive 600/750 series scooter was designed to be ridden only on smooth, dry pavement. Caution: Riding off-road in the dirt or riding in wet conditions will damage the scooter, so don’t do it. The Limited Warranty will not cover damages sustained by off-road riding.
- Page 19 IV. Frequently Asked Questions (FAQ’s) • How far with the 600/750 series scooter go on a full charge? Up to 12-15 miles per charge on level ground. • How many hours will the scooter run on a full charge? On average, it will run 1/2 hour to 1 hour per charge on level ground. Note: Riding at full-throttle dramatically reduces your range.
- Page 20 V. Limited Warranty Currie Technologies Inc. (CTI) manufactured or distributed “Electro-Drive” powered products are warranted to the original retail purchaser to be free from defects in materials and workmanship in the frame and components, except for batteries, tires and inner tubes for a period of 180 days from the date of purchase.
- Page 21 600/750 Series Electric Scooters Contact: Currie Technologies Inc. 2060 Nordhoff St. Chatsworth, CA 91311 phone: 800 377 4532 www.currietech.com Pre-Ride Checklist We recommend you perform each of the checks on this list before each ride. • Check the tires for any cuts or unusual wear. •...
Need help?
Do you have a question about the 600 Series and is the answer not in the manual?
Questions and answers