Advertisement
Available languages
Available languages
Quick Links
Advertisement

Subscribe to Our Youtube Channel
Related Manuals for AgfaPhoto CC2700


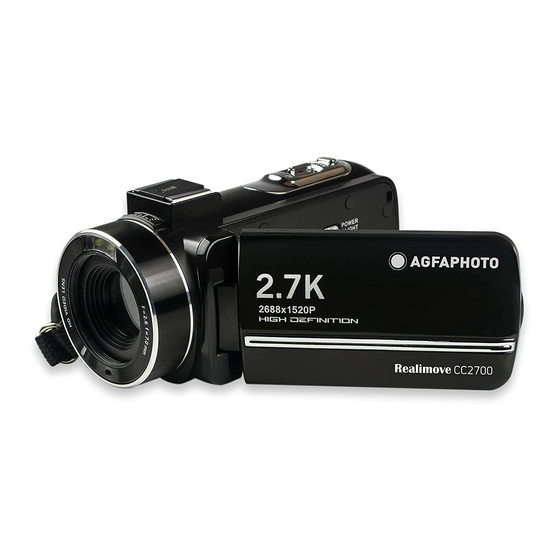
Summary of Contents for AgfaPhoto CC2700
- Page 2 1. About the product 1.1 System requirements The videos and photos transfer must be done on a computer with the following configuration: • Intel ®Pentium 2.0 GHZ or higher • Microsoft Windows XP or higher operating system • 2 GB RAM •...
- Page 3 Buttons fonctions Icon Button name Function description Power button Turn on/off the camcorder or LED light. Display the setup menu of the different Menu button modes. Press this button to switch to the modes: Photo Mode button MODE Vidéo Playback Setup In playback mode, press this button to Up button...
-
Page 4: Start Using
2. Start using 2.1 Inserting the memory card The camcorder supports SD memory card up to 128 GB. It is necessary to insert a memory card before using it to store more photos or videos. When the battery is low or replaced, the media files stored on the memory card would not be lost. - Page 5 2.3 Charging the lithium battery To recharge the lithium battery of the camcorder, simply connect it to your computer with the USB cable provided in the box (without removing the battery). The red indicator light on the back of the camcorder will light up to indicate that the battery is being charged, and will turn off when fully charged.
- Page 6 2.6.1 PC camera mode Connect the camcorder to your PC as above. The screen will then display: Press Up/ Down button to choose "PC Camera" and press OK button to switch to PC camera mode. 2.6.2 Connecting an external microphone To get a better audio, you can connect an external microphone via the MIC port and fix it to the hot shoe if it has an adapter.
- Page 7 2.8 Photo mode In photo mode, you can take pictures and store them in the internal memory of the camcorder or on the memory card. Here is the signification of each icon appearing on the screen in video mode: 1.Photo mode 7.
- Page 8 Note: you can turn the LED lighting on and off when photo shooting or video recording. 3. Using the camcorder This section helps you understand how to enjoy all the features of the camcorder. To record videos, first press the Mode button to switch to video mode. The corresponding icon will then appear in the upper left corner of the screen.
- Page 9 3. Press the OK button to enter the submenu. 4. Press the Up / Down buttons to select a resolution from the following options: 2.7K / FHD / HD / VGA / Cancel. 5. Finally press the OK button to save and return to the previous menu. 3.3 Face beauty This function allows you to optimize images automatically and brighten teeth whitening.
- Page 10 1. In video mode, press the Menu button to display its configuration menu. 2. Then press the Up / Down buttons to select this setting. 3. Press the OK button to enter the submenu. 4. Press the Up / Down buttons to select from the following options: Auto / 100 / 200 / 400 / Cancel.
- Page 11 2. When the message "Memory full" appears on the screen, it means that the SD memory card is full and you need to replace it to continue taking pictures. The number of pictures taken depends on the size of the memory card and the selected resolution, the higher the resolution, the more memory is occupied.
- Page 12 4.4 Continuous shooting This function allows you to take up to 3 pictures in quick succession after only pressing the Shutter button once. 1. In photo mode, press the Menu button to display its configuration menu. 2. Then press the Up / Down buttons to select this setting. 3.
- Page 13 4. Press the Up / Down buttons to select from the following options: Auto / Daylight / Cloudy / Fluorescent / Tungsten / Cancel. 5. Finally press the OK button to save and return to the previous menu. 4.8 Quality This function allows you to define the quality of a photo.
- Page 14 4.11 ISO This function allows you to adjust the video sensitivity if the shooting brightness is low. It is recommended to set it up to Automatic. 1. In photo mode, press the Menu button to display its configuration menu. 2. Then press the Up / Down buttons to select this setting. 3.
- Page 15 1. Browse through the photo files: press the Up / Down buttons to move from one photo to another. 2. Zoom in / out on the photo: push the Zoom button to the right to zoom in on the selected photo. 3.
- Page 16 5. Finally press the OK button to confirm execution and return to the previous menu. 5.1.3 Rotate This function allows you to rotate a photo. 1. In playback mode, press the Menu button to display its configuration menu. 2. Then press the Up / Down buttons to select this setting. 3.
- Page 17 1. In photo mode, press the Menu button to display its configuration menu. 2. Then press the Up / Down buttons to select this setting. 3. Press the OK button to enter the submenu. 4. Press the Up / Down buttons to select from the following deletion options:This video / All / Cancel.
- Page 18 4. Press the Up / Down buttons to select the desired language from the following options: English / French / German / Spanish / Italian / Portuguese / Dutch / Polish / Hungarian / Czech / Russian / Simplified Chinese / Traditional Chinese / Japanese. 5.
- Page 19 5. Finally press the OK button to save and return to the previous menu. 6.5 Frequency This setting allows you to prevent the image from blinking when the lighting conditions for shooting are low. 1. Press the Mode button to enter the setup mode and access the settings menu.
-
Page 20: Technical Specifications
6.8 Screen touch correction The touch correction of this camcorder was initially set in the factory. If you notice a loss of touch control or other disordered reactions, please perform a touch correction to solve the problem. 1. Press the Mode button to enter the setup mode and access the settings menu. - Page 21 White balance Exposure 3.0" IPS compensation Self-timer <1.0m PC interface Auto / Sunlight / Cloudy / Fluorescent / Tungsten External microphone -3.0EV~+3.0EV Auto power off Off, 2s, 5s, 10s Power USB 2.0 Dimension 8. Common problems and solutions Problem Possible cause Solutions Correctly install the Device does not...
- Page 22 1. À propos 1.1 Exigence système Le transfert des vidéos et des photos doit s’effectuer sur ordinateur disposant des configurations système suivantes : • Intel ®Pentium 2.0 GHZ ou supérieur • Microsoft Windows XP ou système d'exploitation supérieur • 2 GB de RAM •...
-
Page 23: Fonctions Des Boutons
Fonctions des boutons Icône Nom du bouton Fonction Bouton d'alimentati Allumer / éteindre le caméscope ou la lumière LED. Afficher le menu de configuration des Bouton de menu différents modes. Appuyez sur ce bouton pour basculer vers les modes : Photo Bouton Mode MODE... - Page 24 2. Débuter l’utilisation 2.1 Insertion de la carte mémoire Le caméscope prend en charge les cartes mémoire SD allant jusqu'à 128 GB maximum.Il est nécessaire d’y insérer une carte mémoire avant de l’utiliser pour stocker plus de photos ou de vidéos. Lorsque la batterie est faible ou bien remplacée, les fichiers multimédias stockés sur la carte mémoire ne sont pas perdus.
- Page 25 Attention! Veuillez installer la batterie correctement, sinon vous risquez de ne pas pouvoir allumer le caméscope ou de l’endommager. Utilisez un chargeur standard avec adaptateur pour le brancher sur une prise dont l’alimentation est de 100V-240V / 50- 60HZ. ...
- Page 26 Branchez le câble USB à la troisième interface située à l’arrière du caméscope pour le relier à votre ordinateur. 2.6.1 Mode webcam Connectez le caméscope à votre PC comme ci-haut. L’écran affichera ensuite : Appuyez sur le bouton Haut/Bas pour choisir "PC Camera"puis appuyez sur le bouton OK pour passer en mode webcam.
- Page 27 2.8 Mode photo En mode photo, vous pouvez prendre des photos et les stocker dans la mémoire interne du caméscope ou sur la carte mémoire.Voici la signification de chaque icône apparaissant à l’écran en mode vidéo : 1.Mode photo 7. Voyant lumineux 13.Netteté...
- Page 28 2.9 Zoom Le caméscope dispose d'une fonction de zoom numérique, vous permettant d’agrandir votre prise de vue jusqu’à 18 fois. Faites glisser le bouton zoom vers la droite (T) pour effectuer un zoom avant, puis faites-le glisser vers la gauche (W) pour effectuer un zoom arrière. 2.10 Utiliser l’éclairage LED En mode photo, vous pouvez prendre des photos et les stocker dans la mémoire interne du caméscope ou sur la carte mémoire.
- Page 29 3.1 Scène Le caméscope dispose d’un multiple choix de scènes prédéfinies afin d’adapter la prise de vue à l’environnement dans lequel vous vous trouvez. 1. En mode vidéo, appuyez sur le bouton Menu pour en afficher le menu de configuration. 2.
- Page 30 3.4 Exposition Ce paramètrepermet de régler la luminosité d’une vidéo en fonction de la luminosité de l'environnement dans lequel vous la prenez. 1. En mode vidéo, appuyez sur le bouton Menu pour en afficher le menu de configuration. 2. Appuyez ensuite sur les boutons Haut / Bas pour choisir ce paramètre. 3.
- Page 31 2. Appuyez ensuite sur les boutons Haut / Bas pour choisir ce paramètre. 3. Appuyez sur le bouton OK pour entrer dans le sous-menu. 4. Appuyez sur les boutons Haut / Bas pour sélectionner parmi les options d’effet suivantes : Normal / N & B / Sépia / Rouge / Vert / Bleu / Coucher de soleil / Chaud / Froid / Surexposé...
- Page 32 4.1 Scène Le caméscope dispose d’un multiple choix de scènes prédéfinies afin d’adapter la prise de vue à l’environnement dans lequel vous vous trouvez. 1. En mode photo, appuyez sur le bouton Menu pour en afficher le menu de configuration. 2.
- Page 33 4.4 Prise de vue continue Cette fonction permet de prendre jusqu'à 3 photos en succession rapide après avoir appuyé une fois seulement sur le bouton d'obturateur. 1. En mode photo, appuyez sur le bouton Menu pour en afficher le menu de configuration.
- Page 34 4.7 Balance des blancs Cette fonction permet d’ajuster l’écart de couleur d’une photo en fonction de la source de lumière. 1. En mode photo, appuyez sur le bouton Menu pour en afficher le menu de configuration. 2. Appuyez ensuite sur les boutons Haut / Bas pour choisir ce paramètre. 3.
- Page 35 4.10 Effet Cette fonction permet de donner un effet fantaisie à une photo en ajoutant un effet. 1. En mode photo, appuyez sur le bouton Menu pour en afficher le menu de configuration. 2. Appuyez ensuite sur les boutons Haut / Bas pour choisir ce paramètre. 3.
- Page 36 4.13 Détection visage Grâce à cette fonction, le caméscope détecte automatiquement le visage des personnes dans le viseur pour mieux ajuster la prise de vue. 1. En mode photo, appuyez sur le bouton Menu pour en afficher le menu de configuration. 2.
- Page 37 5.1.1 Supprimer Cette fonction permet de supprimez les photos indésirables pour libérer plus de mémoire. Vous pouvez le faire fichier par fichier ou bien procéder à une suppression entière de l’ensemble des photos non protégées stockées sur la carte mémoire. 1.
- Page 38 5. Appuyez enfin sur le bouton OK pour confirmer l'exécution et revenir au menu précédent. 5.1.4 Diaporama Cette fonction permet devisualiser vos photos en diaporama. 1. En mode lecture, appuyez sur le bouton Menu pour en afficher le menu de configuration. 2.
- Page 39 6. Appuyez enfin sur le bouton OK pour confirmer l'exécution et revenir au menu précédent. 5.2.2 Protéger Cette fonction permet protéger unevidéode toute suppression accidentelle. Pour supprimer une vidéo verrouillée, n’oubliez pas d’en ôter la protection avant. 1. En mode lecture, appuyez sur le bouton Menu pour en afficher le menu de configuration.
- Page 40 6.2 Réglage de la date et de l’heure Ce paramètre permet de régler la date et l'heure du caméscope. 1. Appuyez sur le bouton Mode pour passer en moderéglage et accéder au menu des paramètres. 2. Appuyez ensuite sur les boutons Haut / Bas pour sélectionner ce paramètre.
- Page 41 3. Appuyez sur le bouton OK pour entrer dans lesous-menu. 4. Appuyez sur les boutons Haut / Bas pour sélectionner parmi les options suivantes : Désactiver / Activer / Annuler. 5. Appuyez sur le bouton OK pour enregistrer et revenir au menu précédent.
- Page 42 6.7 Paramètres par défaut Si le paramétrage du camescope devient trop complexe et que celui-ci ne fonctionne plus correctement, rétablissez les paramètres d'usine par défaut grâce à cette fonction. La date ne sera ni supprimée du caméscope ni de la carte mémoire. 1.
-
Page 43: Caractéristiques Techniques
7. Caractéristiques techniques Capteur Capteur COMS, max. 30 MP (interpolation logicielle) Sensibilité Auto, ISO100, ISO200, ISO400 Support de Prend en charge les cartes SD C10 (ou supérieure), stockage max. 128GB Objectif Objectif fixe, F / 2.6, f = 7.0mm Plage de mise Normal : 1m~infini au point Format de fichier : JPEG... -
Page 44: Problèmes Communs Et Solutions
8. Problèmes communs et solutions Problème Cause possible Installez correctement la L’appareil ne Batterie incorrectement batterie conformément aux s’allume pas installée ou déchargée instructions du manuel ou chargez la complètement Fonction Allumez et éteignez économie d'énergie plusieurs fois l’appareil ou Arrêt soudain activée charger complètement... - Page 45 1. A termékről 1.1 Rendszerkövetelmények A videók és fényképek továbbítását a következő konfigurációjú számítógépen kell befejezni: • Intel® Pentium 2.0 GHZ vagy újabb • Microsoft Windows XP vagy újabb operációs rendszer • 2 GB RAM • 40 GB szabad lemezmemória •...
- Page 46 1.3 Gomb funkció Ikon Gomb neve Funkció leírás Kapcsolja be / ki a kamerát vagy Bekapcsoló gomb a LED lámpát. Jelenítse meg a különböző módok Menü gomb beállítási menüjét. Nyomja meg ezt a gomb a következő üzemmódokra váltáshoz: Mód választó Fénykép MODE gomb...
- Page 47 2. Kezdje el használni 2.1Helyezze be a memóriakártyát A kamera legfeljebb 128 GB méretű SD memóriakártyákat támogat. Mielőtt további fényképeket vagy videókat tárolna a memóriakártyán, be kell helyeznie a memóriakártyát. Ha az elem lemerült vagy kicserélték, a memóriakártyán tárolt médiafájlok nem vesznek el. A helyes beszúráshoz kövesse az alábbi utasításokat: 1.
- Page 48 2.3 Töltse fel a lítium akkumulátort A fényképezőgép lítium akkumulátorának feltöltéséhez egyszerűen csatlakoztassa a számítógéphez a dobozban található USB-kábel segítségével (nem szükséges eltávolítani az akkumulátort). A fényképezőgép és a fényképezőgép hátulján lévő piros jelzőfény kigyullad, jelezve, hogy az akkumulátor töltődik, és teljesen feltöltve kialszik.
- Page 49 2.6.1 PC kamera mód Csatlakoztassa a kamerát a PC fent leírtak szerint. A képernyőn megjelenik: Nyomja meg a Fel / Le gomb a "PC kamera" kiválasztásához, majd nyomja meg az OK gomb a PC kamera üzemmódba váltáshoz. 2.6.2 Csatlakoztasson egy külső mikrofont A jobb hangzás érdekében csatlakoztathat egy külső...
- Page 50 2.8 Fotó mód Fotó módban fényképeket készíthet és tárolhat a kamera belső memóriájában vagy memóriakártyáján. A következõ az egyes ikonok jelentése, amelyek videó mód jelennek meg a képernyõn: 13. Élesség 1. Fotó mód 7. Jelzőfények 2. Fotó felbontás 8. A fennmaradó számú fénykép 14.
- Page 51 Jegyzet: Akkor kapcsolja ki / be a LED világítás, ha figyelembe fényképek vagy videofelvételek. 3. Használjon videokamerát Ez a fejezet segít a felhasználóknak megérteni, hogyan élvezhetik a kamera összes funkcióját. Videofelvételhez először nyomja meg az Mód gomb, hogy átváltson videó módba. Ezután a megfelelő ikon megjelenik a képernyő...
- Page 52 1. Videó mód nyomja meg a Menü gomb a konfigurációs menü megjelenítéséhez. 2. Ezután nyomja meg a Fel / Le gomb a beállítás kiválasztásához. 3. Nyomja meg az OK gomb az almenübe történő belépéshez. 4. A Fel / Le gomb válassza ki a következő lehetőségek közül a felbontást: 2.7K / FHD / HD / VGA / Mégse.
- Page 53 2. Ezután nyomja meg a Fel / Le gomb a beállítás kiválasztásához. 3.Nyomja meg az OK gomb az almenübe történő belépéshez. 4.Nyomja meg a Fel / Le gomb a következő lehetőségek közül való kiválasztáshoz: Auto / Nappali / Felhős / Fluoreszkáló / Volfram / Mégse. 5.Végül nyomja meg az OK gomb az elmentéshez és az előző...
- Page 54 1. Videó mód nyomja meg a Menü gomb a konfigurációs menü megjelenítéséhez. 2. Ezután nyomja meg a Fel / Le gomb a beállítás kiválasztásához. 3. Nyomja meg az OK gomb az almenübe történő belépéshez. 4. A Fel / Le gomb megnyomásával válasszon a következő élességi lehetőségek közül: Lágy / Normál / Éles.
- Page 55 5. Végül nyomja meg az OK gomb az elmentéshez és az előző menübe való visszatéréshez. 4.2 Felbontás A kamera különféle fényképfelbontásokat választhat. Minél nagyobb a felbontás, annál jobb a fénykép minősége és annál nagyobb a fénykép. 1. Fotó mód nyomja meg a Menü gomb a konfigurációs menü megjelenítéséhez.
- Page 56 4.5 Önidőzítő Ha az önidőzítő be van kapcsolva, az exponáló gomb lenyomása után néhány másodperccel készítsen képet. 1.Fotó mód nyomja meg a Menü gomb a konfigurációs menü megjelenítéséhez. 2.Ezután nyomja meg a Fel / Le gomb a beállítás kiválasztásához. 3.Nyomja meg az OK gomb az almenübe történő belépéshez. 1.
- Page 57 4.8 Minőség Ezzel a funkcióval határozhatja meg a fénykép minőségét. 1. Fotó mód nyomja meg a Menü gomb a konfigurációs menü megjelenítéséhez. 2. Ezután nyomja meg a Fel / Le gomb a beállítás kiválasztásához. 3. Nyomja meg az OK gomb az almenübe történő belépéshez. 4.
- Page 58 4.11 ISO Ez a funkció lehetővé teszi a videó érzékenységének beállítását. Ha a fel vétel fényereje alacsony, akkor ajánlott Automatikusra állítani. 1. Fotó mód nyomja meg a Menü gomb a konfigurációs menü megjelenítéséhez. 2. Ezután nyomja meg a Fel / Le gomb a beállítás kiválasztásához. 3.
- Page 59 5. Fájlok lejátszása Ez a fejezet elmagyarázza, hogyan tekintheti meg a fényképeket és a videofájlokat a kamera lejátszási módján keresztül. Fénykép készítése és videó rögzítése után nyomja meg a mód gomb a lejátszási módba való belépéshez. 5.1Fotólejátszás és a kapcsolódó műveletek A memóriakártyán tárolt fényképek böngészése mellett a fényképeket is nagyíthatja / kicsinyítheti, és indexképként megtekintheti.
- Page 60 5.1.2 Védje Ez a funkció lehetővé teszi a felhasználók számára, hogy megvédjék a fényképeket a véletlen törléstől. Zárt fénykép törléséhez ne felejtse el először törölni a védelmet. 1. Lejátszási mód nyomja meg a menü gomb a konfigurációs menü megjelenítéséhez. 2. Ezután nyomja meg a Fel / Le gomb a beállítás kiválasztásához. 3.
- Page 61 5.2 Videolejátszás és a kapcsolódó műveletek A Lejátszás mód nem csak a kamera memóriakártyáján tárolt videókat képes lejátszani, hanem védeni és törölni is tudja. 1. Lejátszás módban nyomja meg a Fel / Le gomb a megtekinteni kívánt videofájl kiválasztásához. 2. Ezután nyomja meg a felvétel / OK gomb a kiválasztott fájl lejátszásához. 3.
- Page 62 6. Beállít Ez a beállítási mód lehetővé teszi a felhasználók számára, hogy meghatározzák az alapvető beállításokat, mint például a nyelv, a dátum, az idő, a hang, a frekvencia és az energiatakarékosság, a formázás és a kamera alapértelmezett beállításainak visszaállítása. A feldolgozás megegyezik a lejátszási mód beállításával.
- Page 63 6.3 E nergiatakarékosság Ha a felhasználó már nem használja a fényképezőgépet, ez a beállítás lehetővé teszi a felhasználó számára, hogy néhány perc múlva automatikusan kikapcsolja a fényképezőgépet az akkumulátor kímélése érdekében. 1.Nyomja meg a mód gombot a beállítási módba való belépéshez és a beállítási menü...
- Page 64 6.6 Formázás Ez a funkció lehetővé teszi a felhasználók számára, hogy a rájuk tárolt összes fájl törlésével formázzák a kamerát és a memóriakártyát. Mivel a törölt fájlokat nem lehet helyreállítani, ezért körültekintően használja ezt a funkciót. 1. Nyomja meg a mód gombot a beállítási módba való belépéshez és a beállítási menü...
- Page 65 3. A "+" jel folyamatosan megjelenik a képernyő minden sarkában és a képernyő közepén. 4. Nyomja meg az egyes "+" jeleket az érintőképernyő kijavításához. 5. A művelet befejezése után a "Mentés" jelenik meg a képernyőn, jelezve, hogy az érintőképernyő menti a legfrissebb érintési kalibrációs adatokat. 6.
- Page 66 Külső mikrofon -3.0EV ~ + 3.0EV Automatikus Ki, 2 második, 5 második, 10 második kikapcsolás Hatalom USB 2.0 Dimenzió IGEN 8. Gyakori problémák és megoldások Probléma Lehetséges ok Megoldások Az akkumulátor megfelelő telepítéséhez vagy Az eszköz nem Az akkumulátor nincs teljes feltöltéséhez kapcsolható...
- Page 67 Made in France...
Need help?
Do you have a question about the CC2700 and is the answer not in the manual?
Questions and answers