Table of Contents
Advertisement
Quick Links
Advertisement
Table of Contents

Related Manuals for AgfaPhoto Microflex 100


Summary of Contents for AgfaPhoto Microflex 100
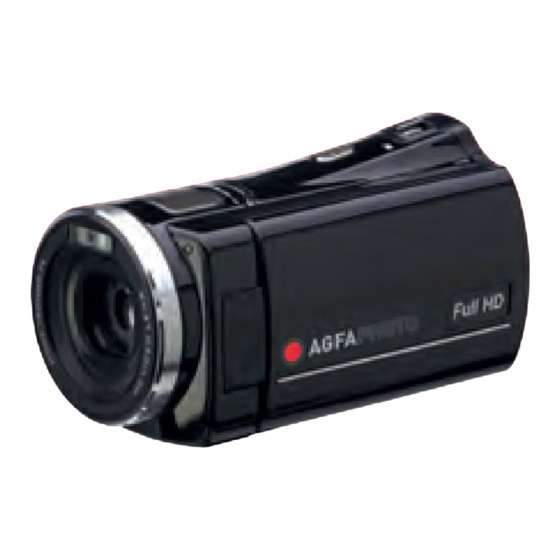
- Page 1 User manual Microflex 100...
-
Page 2: Table Of Contents
Contents Disclaimer...............7 Trademark Recognition..........7 Federal Communications Commission (FCC) Compliance ..............7 Declaration of Conformity ..........8 Disposal of Waste Equipment by Users in Private Households in the European Union ......9 Precautions ..............10 General Introduction ......12 System Requirements........12 Features..............12 Accessories ............13 Camera View............14 Adjusting the LCD Display......15 Getting Started........ - Page 3 About LED Indicators ........22 Initial Settings Before Use ......23 Setting the Date and Time ......23 2.7.1 LCD Display Information ..... 24 In Movie Clip Mode...........24 In Voice Recording Mode .......26 In DSC Mode............27 Using the Camera........29 Recording a Movie Clip........29 Capturing a Still Image from a Movie ..31 Capturing a Still Image in Video Mode..32 Voice Recording ..........33...
- Page 4 6.1.3 Effect............47 Metering ............48 6.1.4 6.1.5 Backlight............49 6.1.6 Night Mode..........50 Motion Detection ........51 6.1.7 EV Compensation ........52 6.1.8 Multi Shot ..........53 6.1.9 Movie Clip / Voice Playback Menus .....54 Delete ............54 6.2.1 Protect ............56 6.2.2 Camera Mode Menu Options ......57 6.3.1 Still Image Resolution......57 White Balance ..........58...
- Page 5 Settings Menu ...........73 Information ..........73 6.5.1 6.5.2 Date / Time..........73 6.5.3 Beep............74 Default ............75 6.5.4 TV standard ..........76 6.5.5 6.5.6 USB............77 Auto Power Off .........78 6.5.7 Frequency ..........79 6.5.8 Language ..........80 6.5.9 Format ............81 6.5.10 6.5.11 File Number (Default: Series)....82 LCD Brightness ........83 6.5.12 6.5.13...
- Page 6 10.2 Troubleshooting ........93 10.3 Customer Care ..........95...
-
Page 7: Disclaimer
This manual is designed to assist you in using your new AgfaPhoto digital video camera. All information presented is as accurate as possible but is subject to change without notice. Disclaimer This manual contains proprietary information protected by copyright. All rights are reserved. No part of this manual may be reproduced by any mechanical, electronic or other means, in any form, without prior written permission of the manufacturer. -
Page 8: Declaration Of Conformity
television reception, which can be determined by turning the equipment off and on, the user is encouraged to try to correct the interference by one or more of the following measures: • Reorient or relocate the receiving antenna. • Increase the distance between the equipment and the receiver. •... -
Page 9: Disposal Of Waste Equipment By Users In Private Households In The European Union
Disposal of Waste Equipment by Users in Private Households in the European Union This symbol on the product or on its packaging indicates that this product must not be disposed of with your other household waste. Instead, it is your responsibility to dispose of your waste equipment by handing it in to a designated collection point for the recycling of waste electrical and electronic equipment. -
Page 10: Precautions
Precautions General precautions • Do not try to disassemble the product yourself, which may damage the product or cause electric shock. • Keep the Digital Video Camera away from children and animals to prevent them from swallowing the battery or small accessories. -
Page 11: Power Supply
Power Supply • Be sure to use the type of battery or battery charger that is suitable for this Digital Video Camera. Using any other type of battery or battery charger may damage the equipment and render the guarantee void. •... -
Page 12: General Introduction
1 General Introduction Please read this chapter carefully to understand the features and functions of this AgfaPhoto Microflex 100. This chapter also includes a description of system requirements, package contents and hardware components. 1.1 System Requirements In order to get the most out of your camera, your computer must meet the following system requirements: •... -
Page 13: Accessories
1.3 Accessories Please check the contents of your camera package. It should contain:... -
Page 14: Camera View
1.4 Camera View... -
Page 15: Adjusting The Lcd Display
1.5 Adjusting the LCD Display Before starting to take pictures or record movie clips, rotate the LCD display according to the illustrations below. -
Page 16: Getting Started
2 Getting Started 2.1 Inserting an SD Card Open the LCD panel and the battery cover. Insert an SD card with the label facing downwards. Note: Do not remove or insert SD cards when the camera is powered on to avoid damaging files. -
Page 17: Loading The Battery
2.2 Loading the Battery Use only the battery provided or recommended by the manufacturer or dealer. Note: Insert the battery correctly according to this description. Inserting the battery wrongly may result in non-repairable damage to this Digital Video Camera. Open the LCD panel and the battery cover. Battery Status Indicator: Battery full Battery half full... - Page 18 Insert battery according to the illustration. Close battery cover.
-
Page 19: Charging The Battery
2.3 Charging the Battery You can use the adaptor to charge the lithium battery. The battery that comes in the package is not charged. Insert the lithium battery and connect the camera to the adaptor cable. 2.4 Using the Touchscreen 2.4.1 Single touch This single touch function acts as a hotkey menu to adjust basic... -
Page 20: Slide
2.4.2 Slide Scroll right or left to view the previous file or next file in Playback Mode. 2.4.3 Rotate In Playback Mode you can rotate the image in 90° steps as shown below. -
Page 21: Buttons & Functions
2.5 Buttons & Functions Description Button Function Power Press the Power button to turn Button the camera ON / OFF. Press the Menu button to display SET (Menu) the main OSD (On Screen Button Display) menu. There are three operating Modes for the camera: •... -
Page 22: About Led Indicators
Shutter Press the button to take still Button images Press the button to take movie Recording clips and voice recordings. Button Press the button again to stop recording. Press the Playback button to Playback enter Playback Mode and play Button back the last file. -
Page 23: Initial Settings Before Use
2.7 Initial Settings Before Use 2.7.1 Setting the Date and Time When powering on for the first time, set the camera to the SET Mode. Select the date and time by moving the Up/Down button or touching the screen to select. Press the 4-Way Direction button left/right to highlight each column. -
Page 24: Lcd Display Information
3 LCD Display Information 3.1 In Movie Clip Mode The following illustration shows the LCD display layout and icon description in the DV Mode ( Movie Clip recording icon Motion Detection Night Mode Exposure compensation Color effect settings Metering settings... - Page 25 White balance settings Indicates Macro is enabled Battery level Remaining recording time Current resolution Compensation indicator Histogram indicator (graphical brightness distribution) Playback Mode Zoom Menu button Current memory for recording : SD card : Internal memory (appears when there is no SD card inserted) Multi shot function...
-
Page 26: In Voice Recording Mode
3.2 In Voice Recording Mode The following illustration shows the LCD display layout and icon description in the Voice Recording Mode ( ). Voice Recording Mode Battery level Recording time left Playback button Menu button Current memory for recording : SD card : Internal memory (appears when there is no SD card inserted) -
Page 27: In Dsc Mode
3.3 In DSC Mode The following illustration shows the LCD display layout and icon description in the DSC Mode ( DSC Mode indicator Night Mode (captures images with night scenery background). EV compensation Color Effect Metering settings White balance settings Indicates Macro is enabled... - Page 28 Battery level Remaining shots available Resolution indicator Backlight compensation Histogram (graphical brightness distribution) Playback button Zoom Menu button Current memory for recording : SD card : Internal memory (appears when there is no SD card inserted) Continuous Shot Mode Self-timer indicator...
-
Page 29: Using The Camera
4 Using the Camera 4.1 Recording a Movie Clip Set the camera to DV Mode: this is the default setting after you power on the camera. Press the Recording button to start and stop Movie recording. The camera will store the Movie clip automatically. The LCD screen ratio will be different depending on the video clip resolution setting. - Page 30 Video Resolution Preview 16:9 ratio Full HD (1920 x 1080) HD (1280 x 720) WVGA (848 x 480) 4:3 ratio WEB (320 x 240)
-
Page 31: Capturing A Still Image From A Movie
4.2 Capturing a Still Image from a Movie You can save a selected frame from a recorded movie as a still image. Select the video clip and press the Shutter button at the frame you want. Set the camera to the DV Mode. Press the Recording button to start or stop video recording. -
Page 32: Capturing A Still Image In Video Mode
4.3 Capturing a Still Image in Video Mode You can save a selected frame in Video Mode as a still image. Press the Shutter button at the preview image frame you want to save. You can also do this while recording a video clip. Press the Shutter button in the movie clip during playback. -
Page 33: Voice Recording
4.4 Voice Recording 1. Power on the camera. 2. Press the MODE button to enter the Voice Recording Mode. 3. Press the Recording button to start or stop Voice recording. Voice Recording Mode... -
Page 34: Movie Clip / Voice Clip Playback
4.5 Movie Clip / Voice Clip Playback In Movie / Voice Recording Mode, press the Playback button to display recently stored files on the LCD screen. Playback Playback Mode indicator Playback Mode indicator... - Page 35 Press the 4-Way Direction button up/down or left/right to view the stored file. Press the SET (Menu) button to play back, or touch the screen to select Playback of the file. To pause file Playback, press the Recording button or touch the ( ) screen icon.
- Page 36 You can also play back the movie clip at a different speed by touching the ( ) screen icon ON/OFF. Playback speed is as below when Playback speed is as below when Slow Motion is “OFF": Slow Motion is “ON”: Rewind 1/2X play Forward...
-
Page 37: Taking / Playing Back Images
4.6 Taking / Playing Back Images 4.6.1 Taking a Picture Set the camera to the DSC Mode. Press the Shutter button to capture images. DSC Mode indicator... -
Page 38: Playing Back Photos
4.6.2 Playing Back Photos Set the camera to the DSC Mode and press the Playback button to display the images on the LCD screen. Playback Playback Mode Indicator Press the 4-Way Direction button up/down or left/right to view the saved files. Press the SET (Menu) button to replay or touch the screen to play back. - Page 39 Press the SET (Menu) button or touch the screen to return to the full screen to view images. Touch the ( ) panel icon to enlarge or shrink the image. You can then move the image up/down or left/right. Press the Playback button again to return to the DSC Mode.
-
Page 40: Lcd Display Information
5 LCD Display Information 5.1 Movie Clip Recording Mode Please refer to the following table showing a description of each icon and symbol. Indicates protected file Battery level Playback Mode icon Length of each Movie Clip Resolution indicator Return button Fast forward Playback button Playback/Pause button... - Page 41 Fast rewind Playback button Menu button Current memory for recording : SD card : Internal memory (appears when there is no SD card inserted) Slow motion Playback...
-
Page 42: Voice Recording Mode
5.2 Voice Recording Mode Please refer to the following table showing a description of each icon and symbol. Indicates protected file Battery level Playback Mode icon Length of each voice recording Return Playback/Pause button Menu button Current memory for recording : SD card : Internal memory (appears when there is no SD card inserted) -
Page 43: Dsc Playback Mode
5.3 DSC Playback Mode Please refer to the following illustration to familiarize yourself with icons and symbols of the DSC Playback Mode. DPOF (Digital Print Order Format) indicator Indicates protected file Exposure compensation indicator White balance Battery level Image Playback Mode icon Number of pictures left... - Page 44 Resolution indicator Return button Menu button Zoom-Out indicator Zoom-In indicator Current memory for recording : SD card : Internal memory (appears when there is no SD card inserted)
-
Page 45: Menu Mode
6 Menu Mode When the menu appears on the LCD display, the SET (Menu) button is used to move through the highlighted items in the submenu or to select a menu item. 6.1 Menu Options in Movie Clip Mode When in Movie Clip Mode, press the SET (Menu) button to show the Movie options menu. -
Page 46: White Balance
Note: 1.When setting to FHD, HD or WVGA resolution, the LCD display aspect ratio is 16:9. 2. When setting to WEB video resolution, the LCD display aspect ratio is 4:3. 6.1.2 White Balance The White Balance function allows you to adjust the camera setting according to the white light. -
Page 47: Effect
This setting is suitable for indoors with incandescent lamp lighting, environments with color Tungsten temperatures. 6.1.3 Effect The Effect function lets you record movies and apply different colors or tones for a more artistic effect. Turn on the camera. Press the SET (Menu) button and press the 4-Way Direction button to highlight the Effect item. -
Page 48: Metering
6.1.4 Metering The Metering function lets you select the area of the subject or frame by which the camera measures the light to record movies. Turn on the camera. Press the SET (Menu) button and move the 4-Way Direction button to highlight the Metering item. Press the SET (Menu) button to display the submenu or touch the screen to select the item. -
Page 49: Backlight
6.1.5 Backlight 1. Turn on the camera. 2. Press the SET (Menu) button and move the 4-Way Direction button to highlight the Backlight item. Press the SET (Menu) button to display the submenu or touch the screen to select the item. -
Page 50: Night Mode
6.1.6 Night Mode This function is used to capture videos with night scenery backgrounds. Turn on the camera. Press the SET (Menu) button and press the 4-Way Direction button to highlight the Night Mode item. Press the SET (Menu) button to display the submenu or touch the screen to select the item. -
Page 51: Motion Detection
6.1.7 Motion Detection When the Motion Detection function is enabled, the camera will detect any movement for Movie Clip recording without human intervention. When the AE variation is detected, recording will start immediately. Turn on the camera. Press the SET (Menu) button and move the 4-Way Direction button to highlight the Motion Detection item. -
Page 52: Ev Compensation
6.1.8 EV Compensation EV stands for Exposure Value. In difficult lighting condition, the auto exposure function of your camera may be misled into giving the wrong readings. You can adjust the value of the exposure compensation which ranges from -2.0EV to +2.0EV (in 0.5EV increments). -
Page 53: Multi Shot
6.1.9 Multi Shot Turn on the camera and switch to DV Mode. Press the SET (Menu) button and press the 4-Way Direction button to highlight the Multi shot item. Press the SET (Menu) button to display the submenu or touch the screen to select the item. -
Page 54: Movie Clip / Voice Playback Menus
6.2 Movie Clip / Voice Playback Menus When in Movie Clip Mode, press the SET (Menu) button to show the Movie Clip options menu. 6.2.1 Delete The delete function lets you remove unwanted files. Turn on the Digital Video Camera and switch to Movie Clip / Voice Playback Mode. - Page 55 Press the 4-Way Direction button to select “O” Yes or “X” No. Press the SET (Menu) button to confirm or touch the screen to select the item. Delete the current file Delete One Delete all files stored in the camera Delete All Note: Files cannot be retrieved once deleted.
-
Page 56: Protect
6.2.2 Protect The protection function lets you lock video or audio files. Turn on the camera and switch to Movie Clip / Voice Playback Mode. Press the SET (Menu) button and move the 4-Way Direction button to highlight the Protect item. Press the SET (Menu) button to display the submenu or touch the screen to select the item. -
Page 57: Camera Mode Menu Options
6.3 Camera Mode Menu Options When in the DSC Mode, press the SET (Menu) button to display the Camera Mode Menu options. 6.3.1 Still Image Resolution Turn on the camera and switch to DSC Mode. Press the SET (Menu) button and move the 4-Way Direction button to highlight the Resolution item. -
Page 58: White Balance
6.3.2 White Balance The White Balance function allows you to adjust the camera setting according to the white light when recording still images Set the camera to the DSC Mode. Press the SET (Menu) button and move the 4-Way Direction button to highlight the White Balance item. -
Page 59: Effect
6.3.3 Effect The Effect function allows you to take standard color images, Black & White or Sepia-tone images. Set the camera to the DSC Mode. Press the SET (Menu) button and move the 4-Way Direction button to highlight the Effect item. Press the SET (Menu) button to display the submenu or touch the screen to select the item. -
Page 60: Metering
6.3.4 Metering The Metering function lets you select the area of the subject or frame by which the camera measures light to record images. Set the camera to the DSC Mode. Press the SET (Menu) button and move the 4-Way Direction button to highlight the Metering item. -
Page 61: Backlight
6.3.5 Backlight Turn on the camera and switch to DSC Mode. Press the SET (Menu) button and move the 4-Way Direction button to highlight the Backlight item. Press SET (Menu) button to display the submenu or touch the screen to select the item. Press the 4-Way Direction button to select On or Off. -
Page 62: Night Mode
6.3.6 Night Mode Set the camera to the DSC Mode. Press the SET (Menu) button and move the 4-Way Direction button to highlight the Night Mode item. Press the SET (Menu) button to display the submenu or touch the screen to select the item. -
Page 63: Self-Timer
6.3.7 Self-timer Set the camera to the DSC Mode. Press the SET (Menu) button and use the 4-Way Direction button to highlight the Self-timer item. Press the SET (Menu) button to display the submenu or touch the screen to select the item. -
Page 64: Continuous Shot
6.3.8 Continuous Shot You can record three consecutive pictures using this function, started by pressing and holding the Shutter button and ending automatically after taking the third picture. Set the camera to the DSC Mode. Press the SET (Menu) button and press the 4-Way Direction button to highlight the Continuous Shot item. -
Page 65: Ev Compensation
6.3.9 EV Compensation You can adjust the value of the exposure compensation which ranges from -2.0EV to +2.0EV (in 0.5EV increments). The higher the EV value, the brighter the image will be. Set the camera to the DSC Mode. Press the SET (Menu) button and press the 4-Way Direction button to highlight the EV Compensation item. -
Page 66: Playback Menus
6.4 Playback Menus 6.4.1 Delete Use this function to delete files. Set the camera to the Playback Mode. Press the SET (Menu) button and press the 4-Way Direction button Down or touch the screen to select the file to be deleted or to delete all files. Press the 4-Way Direction button or touch the screen to select “Delete One”... - Page 67 Press 4-Way Direction button or touch the screen to select “O” Yes or “X” No and press the SET (Menu) button to delete file(s). Note: Files cannot be retrieved once deleted. Therefore please make sure you have backed up your files before deleting. Protected files cannot be deleted.
-
Page 68: Protect
6.4.2 Protect 1. Turn on the camera and switch to Playback Mode. 2. Choose the file you want to protect. 3. Press the SET (Menu) button and move the 4-Way Direction button to highlight the Protect item. Press the SET (Menu) button to display the submenu or touch the screen to select the item. -
Page 69: Autoplay
6.4.3 Autoplay This Digital Video Camera includes a slide show function that can play back each picture at a regular interval. 1. Set the camera to the Playback Mode. 2. Press the SET (Menu) button and move the 4-Way Direction button to highlight the Autoplay item. -
Page 70: Rotate
6.4.4 Rotate 1. Set the camera to the Playback Mode. 2. Use the 4-Way Direction button to highlight the Rotate item and press the SET (Menu) button or touch the screen to select Left 90º or Right 90º. -
Page 71: Dpof
6.4.5 DPOF The Digital Print Order Format (DPOF) setting allows you to select images on the memory card for printing and specify the number of print copies in advance using the camera. Set the camera to the Playback Mode. Press the Playback button and press the SET (Menu) button to display the Image Playback Menu or touch the screen to select the item. - Page 72 DPOF Press the Playback button or touch the screen to exit the image. Note:1. A memory card is required for the DPOF function. 2. If DPOF is set, the pictures to be printed are ordered to print.
-
Page 73: Settings Menu
6.5 Settings Menu The Settings Menu can be used to select all kinds of camera settings. 6.5.1 Information This function can be used to display information on the LCD screen to help you capture the best images and movie clips. Turn the camera power on and switch to SET Mode. -
Page 74: Beep
6.5.3 Beep Turn the camera power on and switch to SET Mode. Press the 4-Way Direction button up or down to highlight Beep and press the SET (Menu) button to confirm or touch the screen to select. Use the 4-Way Direction button or touch the screen to select On or Off. -
Page 75: Default
6.5.4 Default Use this function to reset all settings to default settings. Turn the Digital Video Camera power on and switch to SET Mode. Press the 4-Way Direction button to highlight the Default item. Press the SET (Menu) button to display the submenu or touch the screen to select the item. -
Page 76: Tv Standard
6.5.5 TV standard Use the TV standard to set the TV system for your area. Turn the camera power on and switch to SET Mode. Use the 4-Way Direction button to highlight the TV standard item. Press the SET (Menu) button to display the submenu or touch the screen to select the item. -
Page 77: Usb
6.5.6 This setting is for the USB output function. You can select an external device to connect to the Digital Video Camera by using the supplied USB cable. Turn on the camera and switch to SET Mode. Press the 4-Way Direction button to highlight the USB item. Press the SET (Menu) button to display the submenu or touch the screen to select the item. -
Page 78: Auto Power Off
6.5.7 Auto Power Off This function can be used to turn the Digital Video Camera off automatically after not using it for a period of time. Turn the camera power on and switch to SET Mode. Press the 4-Way Direction button to highlight the Auto Power Off item. -
Page 79: Frequency
6.5.8 Frequency Use the Frequency option to set the frequency system for your area. Turn the Digital Video Camera power on and switch to SET Mode Use the 4-Way Direction button to highlight the Frequency selection item. Press the SET (Menu) button to display the submenu or touch the screen to select the item. -
Page 80: Language
6.5.9 Language Turn the camera power on and switch to SET Mode. Move the 4-Way Direction button up/down to highlight the Language item and press the SET (Menu) button to confirm or touch the screen to select. Press the 4-Way Direction button or touch the screen to select the following languages: English, German, French, Italian, Japanese, Spanish, Portuguese, Traditional Chinese, Simplified Chinese, Turkish, Russian, Thai, or... -
Page 81: Format
6.5.10 Format This function allows you to format the memory card or the built-in memory. Turn the camera power on and switch to SET Mode. Press the 4-Way Direction button to highlight the Format item. Press the SET (Menu) button or touch the screen to display the submenu. -
Page 82: File Number (Default: Series)
6.5.11 File Number (Default: Series) This setting allows you to name the files. If “Series” is selected, the file number will follow the last stored file consecutively. If “Reset” is selected, the next file number will start from 0001 even after formatting, deleting or inserting a new memory card. -
Page 83: Lcd Brightness
6.5.12 LCD Brightness This function can be used to adjust the screen brightness. Turn the camera power on and switch to SET Mode. Use the 4-Way Direction button to highlight the LCD brightness item. Press the SET (Menu) button to display the submenu or touch the screen to select the item. -
Page 84: Instant Review
6.5.13 Instant Review This function can be used to instantly browse files after taking the picture. Turn the camera power on and switch to SET Mode. Press the 4-Way Direction button to highlight the Instant Review item. Press the SET (Menu) button to display the submenu or touch the screen to select the item. -
Page 85: Volume
6.5.14 Volume Use this function to adjust the sound volume. Turn the camera power on and switch to SET Mode. Press the 4-Way Direction button to highlight the Volume item. Press the SET (Menu) button to display the submenu or touch the screen to select the item. -
Page 86: Start-Up Logo
6.5.15 Start-up Logo Use this function to select the image that is displayed on the LCD when the digital camcorder is turned on. Turn on the camera and switch to Setup Menu. Press the 4-Way Direction button to highlight the Start-up Logo item. -
Page 87: Pc And Tv Connection
7 PC and TV Connection 7.1 Connecting to a Computer As shown in the illustration, use the USB cable provided to connect the Digital Video Camera to a PC for file transfer, or use the Digital Video Camera as a webcam for conferencing purposes. 7.2 Connecting to a Standard TV As shown in the illustration, use the video cable to connect the Digital Video Camera to a standard TV. -
Page 88: Connecting To An Hd Tv
7.3 Connecting to an HD TV As shown in the illustration, use the HDMI cable provided to connect the Digital Video Camera to an HD TV for high resolution picture display. -
Page 89: Installing The Software
8 Installing the Software Insert the supplied CD ROM into the CD player. If the CD does not execute automatically, please use Windows File Manager to execute the Install_CD.exe file on the CD. The following screen will be displayed. Tap the desired menu item to start the installation process and follow the on-screen instructions. -
Page 90: Editing Software
9 Editing Software ArcSoft TotalMedia Extreme® manages your media for you, and gives you tons of fun and exciting ways to create and share projects featuring your photo, video, and music files. Edit, enhance and add creative effects to your photos. You can: Create your own movies or photo slide shows complete with soundtrack. -
Page 91: Appendix
10 Appendix 10.1 Specifications Image sensor 1/2.5 inch. 5.0 mega pixels CMOS sensor 5.03 Mega pixels (2592 x 1944) Effective pixels Built-in 32 MB Flash memory Storage media SD and SDHC cards are supported ISO Equipment Auto Color effect Normal/BW/Sepia Lens 5x zoom lens Normal: 80cm... - Page 92 LCD display 3.0” Touchscreen display (16:9) Range: < 2 m Flash light Off, Auto, Fill-in White balance Auto / Daylight / Cloudy / Tungsten / Fluorescent Exposure -2.0 EV~+2.0 EV Self-Timer Off, 2 seconds, 10 seconds. Digital output connector: USB 2.0 high-speed (480Mbps Max.) MIC Input, Speaker Interface...
-
Page 93: Troubleshooting
10.2 Troubleshooting Problem Possible Cause Solution 1. Battery is not 1. Insert battery inserted Cannot power on correctly. correctly. Digital Video Camera. 2. Replace battery. 2. Battery is exhausted. 1. Power Saving 1. Power on again. Camera shuts down Mode is activated. suddenly. - Page 94 Take the picture within the focus Images are out of Object exceeds the range and select focus range of focus. normal or Macro Mode. 1. Unlock the 1. Memory card is memory card. protected. 2. Reformat the 2. Memory card Unable to use memory card.
-
Page 95: Customer Care
Germany MK10 9RG United Kingdom AgfaPhoto is used under license of Agfa-Gevaert NV & Co. KG or Agfa-Gevaert NV. Neither Agfa-Gevaert NV & Co KG nor Agfa-Gevaert NV manufacture this product or provide any product warranty or support. For service, support and warranty information, contact the distributor or manufacturer. - Page 96 AgfaPhoto is used under license of Agfa-Gevaert NV & Co. KG or Agfa-Gevaert NV. Neither Agfa-Gevaert NV & Co. KG nor Agfa- Gevaert NV manufacture this product or provide any product warranty or support. For service, support and warranty information, contact the distributor or manufacturer.
Need help?
Do you have a question about the Microflex 100 and is the answer not in the manual?
Questions and answers
How do I turn the light on
To turn on the light (backlight) on the AgfaPhoto Microflex 100:
1. Turn on the camera and switch to DSC Mode.
2. Press the SET (Menu) button.
3. Use the 4-Way Direction button to highlight the "Backlight" item.
4. Press the SET (Menu) button to display the submenu or touch the screen.
5. Select "On" using the 4-Way Direction button.
6. Press the SET (Menu) button to confirm or touch the screen to select.
This answer is automatically generated