Advertisement
Quick Links
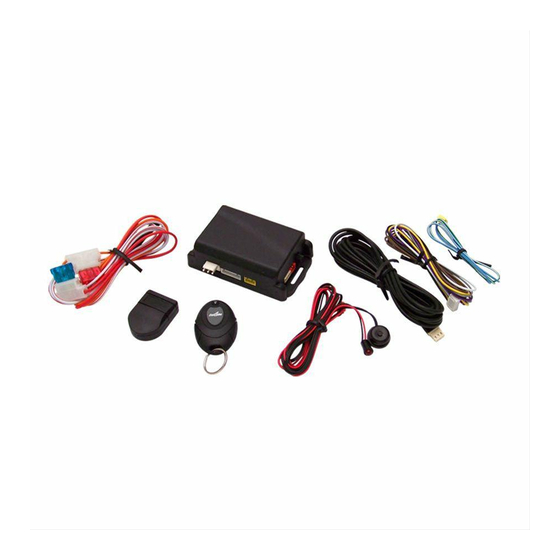
HF1000
Button
Function
Press button
•Arm and lock the door
once
•Disarm and unlock the door
•Lock the door
•Unlock the door
Press and
•Open trunk and disarm
hold the
button for 3
seconds
Press the
Turn on/off auto transmit
button 3
times and
then press
& hold for 2
seconds
Press the
Adjust auto transmit sensitivity
button 2
times and
then press
and hold for
2 seconds
Low power indication for transmitter
While unit is arming or disarming, the siren will chirp 8
times to indicate that transmitter's power is lower than
2.8V. If Auto Transmit was turned ON, the transmitter LED
will flash once every 2 seconds, all the Auto Transmit func-
tions will be bypassed.
Turn on/off auto transmit function
Press the button 3 times, then press and hold for 2 sec-
onds. LED will flash once slowly to indicate Auto Transmit
has been turned on. The LED will flash twice slowly to
indicate Auto Transmit has been turned off.
Mount in Dry
Install Fuses
Location
Condition
•Ignition off & alarm disarmed
•Alarm armed
•Ignition on & doors unlocked
•Ignition on & doors locked
Anytime
Anytime
Anytime
Good Ground
Required
Amp Relay
Indication
LED flashes quickly
LED flashes quickly
LED flashes once slowly to indicate
auto transmit is turned on. LED flashes
twice slowly to indicate auto transmit
is turned off.
LED flashes once quickly to indicate
Sensitivity 1, flashes twice quickly to
indicate Sensitivity 2, flashes 3 times
to indicate Sensitivity 3.
Set auto transmit sensitivity
Press the button 2 times, then press and hold for 2 sec-
onds. The LED will flash once quickly to indicate Auto
Sensitivity is I, twice quickly to indicate Auto Sensitivity
is II, 3 times quickly to indicate Auto Sensitivity is III.
Note: The distance of Sensitivity I is in the range of 2~3
meters; the distance of Sensitivity II is in the range of 5~8
meters, the distance of Sensitivity III is in the range of 20
meters. Transmit power grade and ANT location can be
set freely as user desires.
Transmitter programming procedure
1. Disarm the system in the way of Emergency disarming.
2. After turning the Ignition ON, press the Valet Switch
Use High
Advertisement

Related Manuals for AutoLoc HF1000


Summary of Contents for AutoLoc HF1000
- Page 1 HF1000 Mount in Dry Install Fuses Good Ground Use High Location Required Amp Relay Button Function Condition Indication Press button •Arm and lock the door •Ignition off & alarm disarmed LED flashes quickly once •Disarm and unlock the door •Alarm armed •Lock the door...
-
Page 2: Using Your System
10 times within 8 seconds. Siren will chirp 3 times to at most 8 times. enter code-learning mode. 3. For each individual detector, the number of sounding 3. Press the button on the transmitter within 8 seconds. cycle can be accumulated in the same arming period. more than 8 seconds pass or the ignition is turned OFF, (I.e., If open the door, and let the siren sound 5 cycles, the system will exit code-learning mode automatically. - Page 3 For MODE A, there are “a” ways to enter anti carjacking Auto arm /disarm (turn on auto signal of transmitter) (See Jumper Selection J4). When auto signal mode has been turned ON, the system For MODE B, there are “a” and “b” ways to enter anti will enter auto-arm/disarm mode.
- Page 4 2. If the unit receives an auto transmit signal (or anti car- will flash twice when locking the door. The siren will chirp jacking was released) during auto anti carjacking mode, three times and parking lights will flash three times when unit will exit anti carjacking mode.
- Page 5 Function selection There are five jumper selections (J1~J5). See below: JUMPER MODE DEFAULT MODE VARIANTS J1: LAST DOOR ARMING ON / OFF J2: LOCK/UNLOCK MODE 0.5 SEC 2 PULSE FOR UNLOCK J3: AUTO ANTI CARJACKING J4: ANTI CARJACKING MODE MODE A MODE B J5: LAST DOOR ARMING WITH LOCK...
-
Page 6: Wiring Diagram
Push Button Start Diagram (Optional) Push Button Basic Hands-Free Keyless Entry Blue Black #5 HF500 Black #3 Switch Ignition Switch Accessory Ignition Relay Relay Accessory Advanced Hands-Free Keyless Entry Crank HF1000 Relay ignition Gray Yellow 12 Volt Power Hands-Free Relay Starter (Crank)
Need help?
Do you have a question about the HF1000 and is the answer not in the manual?
Questions and answers