Table of Contents
Advertisement
Quick Links
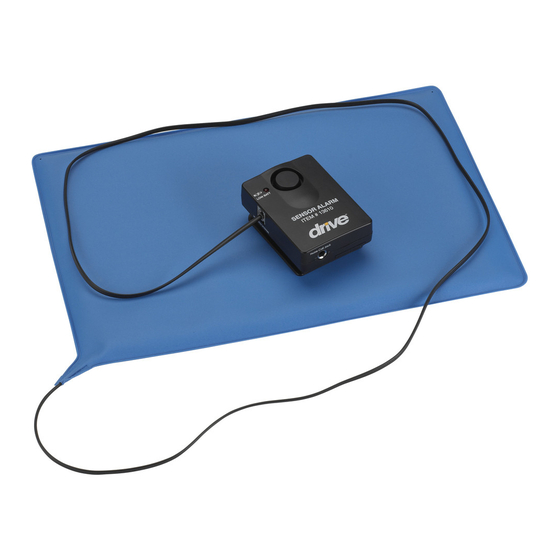
tamper-proof chair and bed patient alarm
Application
The Drive Sensor Basic Alarm is used with a sensor pad to alert staff that a patient is about to wander. When sensor is activated
an 85dB or 100dB alarm tone sounds notifying caregiver. LED indicates low battery. Alarm features convenient ON/OFF switch.
9V battery included or AC adatable (adapter sold seperately).
Installation
1. Insert one 9V battery into battery compartment of the alarm. Slide com-
partment door open.
2. Secure to chair or bed using hook and loop straps. If using mounting
bracket to attach alarm box to chair or bed, remove belt clip from back
of alarm unit. Peel backing from pressure sensitive hook (included), and
attach to back of alarm box. Press firmly to attach alarm to mounting
bracket.
3. BED: Mount alarm box toward foot of bed. Route cord toward footboard
of bed. Keep cord clear of siderails and all other moving parts. Secure
excess cord for patient/staff safety.
4. CHAIR: Mount alarm box out of patient's reach. Route cord toward back
of chair. Keep cord clear of wheels and all other moving parts. Secure
excess cord for patient/staff safety (Figure 2).
Use
1. Move volume switch to Low or Hi, depending on required alarm volume
for environment (Figure 1).
2. Plug sensor pad into telephone-type jack on side of alarm box.
Inspect wires for damage before connecting. Replace if damage to
wiring or device is present. Once initial pressure or contact
is detected by alarm unit, unit will beep once to alert caregiver that unit
is active.
3. If resident leaves the chair or bed or unbuckles the seat belt, alarm will
sound and LED will flash. Unit will sound continuously until patient
returns to bed or chair, or power switch is moved to the OFF position.
Note: Battery power is low if LED flashes continuously and sounds a single
beep every 30 seconds. Replace battery immediately. If alarm tone
decreases in volume, replace battery immediately.
Testing the System
1. Test pad by applying pressure to pad for 3 seconds and releasing. Alarm will sound when pressure is released. Test lap cushion
by connecting activation strap and releasing. Alarm will sound when strap is released. Note: If using alarm unit with optional
delay settings, pressure must be removed from pad for entire delay cycle before alarm will sound.
2. Always test alarm unit and pad together before each use. Never use if alarm fails to sound when tested. Always retest if
alarm unit is dropped.
3. Inspect pad and all connections for damage.
Do not use if damaged. Replace immediately.
REV3.31.07.14
Directions For Application, Use and Care
figure 1
Power Switch
Power Switch
Off, Low 85dB or Hi 100dB
Off, Low 85dB or Hi 100dB
locate mounting bracket
out of patient's reach, low
on back of wheelchair
figure 2
item # 13605
item # 13606
Advertisement
Table of Contents

Related Manuals for Drive 13605


Summary of Contents for Drive 13605
- Page 1 Application The Drive Sensor Basic Alarm is used with a sensor pad to alert staff that a patient is about to wander. When sensor is activated an 85dB or 100dB alarm tone sounds notifying caregiver. LED indicates low battery. Alarm features convenient ON/OFF switch.
- Page 2 1 Year Limited Warranty Your Drive brand product is warranted to be free of defects in materials and workmanship for one year of the original consumer purchaser. This device was built to exacting standards and carefully inspected prior to shipment. This 1 year Limited Warranty is an expres- sion of our confidence in the materials and workmanship of our products and our assurance to the consumer of years of depend- able service.
- Page 3 Application The Drive Sensor Basic Alarm is used with a sensor pad to alert staff that a patient is about to wander. When sensor is activated an 85dB or 100dB alarm tone sounds notifying caregiver. LED indicates low battery. Alarm features convenient ON/OFF switch.
- Page 4 1 Year Limited Warranty Your Drive branded product is warrantied to be free of defects in materials and workmanship for 1 year from the date of pur- chase for the original consumer purchaser.
Need help?
Do you have a question about the 13605 and is the answer not in the manual?
Questions and answers