
Related Manuals for Drive Check and Go


Summary of Contents for Drive Check and Go
- Page 1 Check and Go 18580 Operating Manual ONLY Federal law (USA) restricts this device to sale by or on the order of a physician.
-
Page 2: Warning And Cautions
Check and Go oxygen analyzer in any cleaning solution. • The flow diverter provided with the Check and Go is for use with flowing gases only. not use the diverter when performing static sampling (e.g., in incubators, oxygen tents, oxygen hoods). -
Page 3: Table Of Contents
Table of Contents Page Warning and Cautions ………………………………….. 1 Introduction ………………………………………………. 3 Features and Functions ……………………………. …. 4 Calibrating the Check and Go ……… ……………… 6 Operating the Check and Go …………………..…… 8 Frequently Asked Questions …………..…………….. 9 Cleaning and Maintenance …………………………… 9 Calibration Errors and Error Codes …………………. -
Page 4: Introduction
The Check and Go is designed to monitor oxygen concentration in the patient-breathing environment. It is one of a full line of oxygen analyzers. The Check and Go utilizes the Drive oxygen sensor and is engineered for fast response, maximum reliability and stable performance. -
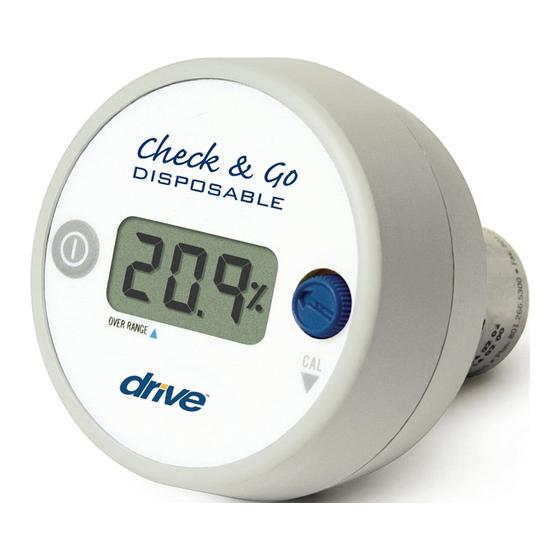
Page 5: Features And Functions
Features and Functions TOP VIEW CALIBRATION KNOB DISPLAY "ON" Handi BUTTON SIDE VIEW HANDI AUTO OXYGEN OVER RANGE ANALYZER PRODUCT LABEL CONFIGURATION A CONFIGURATION B BARBED FLOW ADAPTER DIVERTER CLEAR "T" ADAPTER TUBING (TO GAS) - Page 6 Use this button to turn the Check and Go on and off. When the Check and Go is in the Sleep (power off) mode, the LCD display is blank. The analyzer turns off after 1.3 minutes if no buttons are pressed.
-
Page 7: Calibrating The Check And Go
Check and Go. In Line Calibration (Configuration A) 1. Put the Check and Go in an upright position such that you can read the product label. 2. Connect a sample supply hose to a standard "T" piece. The Drive "T" is precision-tapered to insure a tight connection with O-rings of the MAX-250 oxygen sensor diverter. - Page 8 30 seconds, allow at least 2 minutes to ensure that the sensor is completely saturated with the calibration gas. 6. If the Check and Go is not already turned on, do so now by pressing the analyzer ON button.
-
Page 9: Operating The Check And Go
3. Start the flow of the sample gas to the sensor. 4. Allow the oxygen sensor to remain in the flow of the sample gas until stable. 5. If the Check and Go is not already turned on, do so now by pressing the analyzer ON button. -
Page 10: Frequently Asked Questions
"false " calibration value. Make sure that the calibration gas is connected to the Check and Go at 2 liters per minute for a minimum of 2 minutes prior to proceeding with calibration. This 2-minute equilibration time is necessary to insure that the sensor is completely saturated with the calibration gas. -
Page 11: Calibration Errors And Error Codes
Calibration Errors and Error Codes The Check and Go analyzers have a self test feature built into the software to detect faulty calibrations, oxygen sensor failures, and low operating voltage. These are listed below, and include possible actions to take, if an error code occurs. -
Page 12: Factors Affecting Calibration Effects Of Elevation
500 feet. Effects of Temperature The Check and Go will hold calibration and read correctly within ±3% when in thermal equilibrium within the operating temperature range. The device must be thermally stable when calibrated and allowed to thermally stabilize after experiencing temperature changes before readings are accurate. -
Page 13: Effects Of High Humidity
The Check and Go oxygen sensor has been validated at pressures up to 2 atmospheres absolute. Calibration or operation above this pressure is beyond the intended use. Humidity Effect Humidity has no effect on the performance of the Check and Go other than diluting the gas, as long as there is no condensation. -
Page 14: General Specifications
General Specifications Sensor Type: Drive galvanic cell w/Temperature Compensation (non- replaceable) 0.0 - 99.9% oxygen (gas). Measurement Range: Resolution/ 0.1% - The three digit LCD indicates values between 0.0 - 99.9% oxygen. Over range indicated by one decimal point Display: on display located after the first digit. -
Page 15: Effect Of Interferent Gases And Vapors
Drive warrants the Check and Go to be free from defects of workmanship or materials for a period of two (2)-years from the date of shipment from Drive, under normal operating conditions and provided that the Check and Go is properly operated and maintained in accordance with Drive’s operating... - Page 16 Drive Medical Design and Manufacturing 99 Seaview Boulevard Port Washington, N.Y. 11050 Phone: 516.998.4600 Fax: 516.998.4601 www. drivemedical.com © 2014 Medical Depot, Inc. Port Washington N.Y. 11050 R218M12-004 Rev B...
Need help?
Do you have a question about the Check and Go and is the answer not in the manual?
Questions and answers