Hans Grohe Clubmaster Pressure Balance Shower Set With Rough 04907 0 Series Installation/User Instructions/Warranty
Hide thumbs
Also See for Clubmaster Pressure Balance Shower Set With Rough 04907 0 Series:
- Installation/user instructions/warranty (40 pages)
Table of Contents
Advertisement
Quick Links
EN Installation / User Instructions / Warranty
FR Instructions de montage / Mode d'emploi / Garantie
ES Instrucciones de montaje / Manejo / Garantía
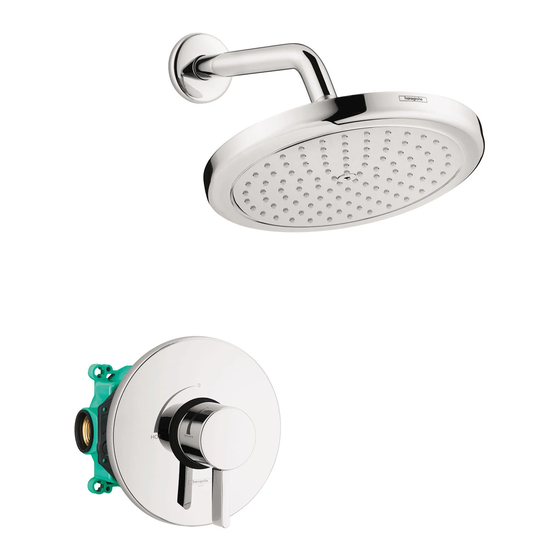
Clubmaster Pressure Balance
Shower Set With Rough
04907xx0
Croma Pressure Balance
Shower Set With Rough
04909xx0
Croma Select E Pressure Balance
Shower Set With Rough
04911xx0
Advertisement
Table of Contents

Related Manuals for Hans Grohe Clubmaster Pressure Balance Shower Set With Rough 04907 0 Series


Summary of Contents for Hans Grohe Clubmaster Pressure Balance Shower Set With Rough 04907 0 Series
- Page 1 EN Installation / User Instructions / Warranty FR Instructions de montage / Mode d'emploi / Garantie ES Instrucciones de montaje / Manejo / Garantía Clubmaster Pressure Balance Shower Set With Rough 04907xx0 Croma Pressure Balance Shower Set With Rough 04909xx0 Croma Select E Pressure Balance Shower Set With Rough 04911xx0...
-
Page 2: Technical Information
English Technical Information Water pressure recommended 15 - 75 PSI (0.1-0.5 MPa) maximum 145 PSI (1 MPa) Hot water temp. recommended 120°-140° F (49°- 60°C)* maximum 158°F (70° C)* Flow rate @ 44 PSI (0.3 Mpa) valve 5.5 GPM (20.8 L/min) 26478xx1, 26528xx1 2.0 GPM (7.6 L/min) 28496xx1... - Page 3 Français Données techniques Pression d’eau recommandée 15 - 75 PSI (0.1-0.5 MPa) maximum 145 PSI (1 MPa) Température d'eau chaude recommandée 120°-140° F (49°- 60°C)* maximum 158°F (70° C)* Capacité nominale @ 44 PSI (0.3 Mpa) soupape 5.5 GPM (20.8 L/min) 26478xx1, 26528xx1 2.0 GPM (7.6 L/min) 28496xx1...
-
Page 4: Datos Tecnicos
Español Datos tecnicos Presión en servicio recomendada 15 - 75 PSI (0.1-0.5 MPa) máximo 145 PSI (1 MPa) Temperatura del agua caliente recomendada 120°-140° F (49°- 60°C)* máximo 158°F (70° C)* Caudal máximo @ 44 PSI (0.3 Mpa) válvula 5.5 GPM (20.8 L/min) 26478xx1, 26528xx1 2.0 GPM (7.6 L/min) 28496xx1... - Page 5 Clubmaster Pressure Balance Shower Set 04907xx0 iBox Universal Plus Ecostat Pressure Balance Trim S 01850181 04233xx0 ⅝" (15 mm) 3⅛" (80 mm) 5⅞" (149 mm) 2⅜" (60 mm) 5⅜" (137 mm) 1⅛" (28 mm) ¾ NPT ⅞" (21 mm) 4⅛" (106 mm) 2⅜"-4¼"...
- Page 6 Croma Select E Pressure Balance Shower Set 04911xx0 iBox Universal Plus Ecostat Pressure Balance Trim E 01850181 15718xx1 ⅝" (15 mm) 3⅛" (80 mm) 5⅞" (149 mm) 2⅜" (60 mm) 5⅜" (137 mm) 1⅛" (28 mm) ¾ NPT 2⅜"-3½" (61-89 mm) ⅞"...
- Page 7 Installation Suggestion / Suggestion d'installation / Sugerencia para la instalación ½ NPT drop-ear ell The measurements shown here are suggestions and may be altered to suit the needs and preferences of the homeowner. ½" Les mesures indiquées sont des sug- gestions, qui peuvent être modifiées en fonction des besoins et préférenc- es du propriétaire.
- Page 8 Installation Suggestions / Suggestions d'installation / Sugerencias para la instalación When intalling the supply elbows, Pour monter les différents raccors, Para enroscar los codos de hold the iBox steady using a pipe on peut fixer l'iBox grâce à un conexión, fijar el iBox universal and a vise.
- Page 9 It is possible to support the iBox Plus Universal using a stringer and screws (not included). The valve may also be supported using installation kit 96615000 (not included). C’est possible de soutenir le robinet utilisant un plaque arrière et vis (pas inclus). C’est aussi possible à...
- Page 10 Adjust the fixing ring / Ajuster l'anneau de fixation / Ajuste el anillo de fijación The fixing ring may be repositioned to accommodate different wall thicknesses. L’anneau réparant pourrait être repositionné pour accommoder les épaisseurs de mur différentes. press El anillo que fija puede ser recolocado acomodar los espesores diferentes de pared.
-
Page 11: Installation / Installation / Instalación
Installation / Installation / Instalación 01850181 Install the valve so that the "top" marking faces upward. Install the hot and cold supplies on the hot inlet and cold inlet. Install the outlet line. Seal the unused outlet using a ¾" brass plug (not included). - Page 12 Make sure that the valve is level. Install the valve so that the outside surface of the finished wall falls between the "min" and "max" markings. Assurez-vous que le robinet est de niveau. Installez le robinet de façon à ce que la surface exté- rieure du mur fini se trouve entre les lignes «...
- Page 13 Install the sheet rock or green board on the wall. It should come up to the iBox. Use sealant to fill any gap between the iBox and the sheet rock or green board. Installez le panneau de plâtre ou le panneau de plâtre imperméable sur le mur.
- Page 14 Flush the hot and cold supplies / Rincez les conduites d’alimentation de l’eau chaude et de l’eau froide / Lave los suministros frío y caliente Remove the dust cover. Open the cold stop. 90° Retirez l’étiquette. 4 mm Ouvrez l’eau froide à la butée d'arrêt d'isolation. Retire la etiqueta.
- Page 15 Remove the flushing block. Turn it 90° and reinstall. Open the hot stop. Retirez la vis de la pièce d’insertion affleurante. Tournez-le à 90°, et réinstallez-le. 5 mm Ouvrez l’eau chaude à la butée d'arrêt d'isolation. Retire el inserto de lavado. Gírelo 90° y reinstálelo. 90°...
- Page 16 Installation / Installation / Instalación 04233XX1, 15718XX1 To reduce the risk of scald injury and property damage, make sure the stops are closed. Cut the plaster shield so that it extends ¹⁄₁₆" - ⅛" from the finished wall surface. Pour réduire les risques de blessures par brûlure et de dommages matériels, assurez-vous que les butées d’arrêt sont fermées.
- Page 17 Install the function block. Tighten the screws. Insérez le bloc de fonction. Installez les vis du bloc de fonction. 4 mm Inserte el bloque de función. Instale los tornillos del bloque de función. Measure the distance from the front of the plaster shield to one of the screw-in flanges ("X").
- Page 18 Add ½" to this measurement. Cut each screw so that it is X + ½" long. ( X + ½ " Ajoutez ½ po à cette longueur « X ». Notez cette longueur. Coupez les vis de façon à ce que celui-ci dépasse de ½...
- Page 19 Install the carrier plate. Installez la plaque-support. Instale la placa del portador. Test the valve: Place the adapter and the handle on the stem. Turn the handle counter-clockwise as far as it will go. Testez le robinet: Placez ensuite l'adapteur et la poignée sur la tige. Tournez la manette dans le sens antihoraire jusqu'a l'extrémité...
- Page 20 Measure the temperature of the output water. Make sure that cold water flows from the valve first. Use caution with skin contact to hot water to reduce the risk of scald injury. If the valve opens through hot, reverse the cartridge. See page 23.
- Page 21 Turn the water off. Remove the handle and the adapter. Fermez l'eau. Retirez la poignée et l'adapteur. Cierre el agua. Retire la manija y el adaptador. Lubricate the cartridge o-ring using a small amount of white plumber's grease. Install the sleeve. Install the escutcheon.
- Page 22 Install the handle adapter and the screw. Install the handle. Tighten the handle screw. Installez l'adapteur et la vis. 2.5 mm Installez la poignée. Serrez la vis de la poignée. Instale el adaptador para la manija y el tornillo. Instale el mando. Apriete el tornillo.
- Page 23 Do not caulk around the escutcheon! N’appliquez pas de matériau de calfeu- trage autour de l’écusson. No coloque masilla alrededor del escudo.
- Page 24 Reverse the cartridge / Inversez la cartouche / Invierta el cartucho Use caution with skin contact to hot water to reduce the risk of scald injury. If valve opens through hot, reverse the cartridge. Close the stops. 90° Pour réduire les risques de blessures 4 mm par brûlure, évitez le contact de la peau avec l’eau.
- Page 25 Do not attempt to pry the cartridge from the function block by using a screwdriver as doing so can damage the cartridge. Damage to the cartridge can result in property damage. Place the adapter and the handle on the cartridge stem.
- Page 26 Lift the cartridge out. Turn the cartridge 180°, so that the "hot side" mark- ing is on the right. Install the cartridge Install the nut. Retirez la cartouche. Tournez la cartouche de 180°, de façon à ce que la marque « hot side » soit à droite. Installez la cartouche.
- Page 27 Adjust the Rotational Limit Stop / Réglez la butée de limite de rotation / Ajuste el tope límite rotacional Pull the white rotational limit stop outward. Tirez vers extérieur l’arrêt de limite de rotation. Tire la parada de límite rotacional de color blanco hacia afuera.
- Page 28 Installation / Installation / Instalación 27411XX3, 04186XX3 NPT ½ Installation / Installation / Instalación 26478XX1 26478xx1 17 mm 7.4 ft-lb 10 Nm 2 mm 0.74 ft-lb 1 Nm...
- Page 29 Installation / Installation / Instalación 26528xx1 28496xx1 17 mm 7.4 ft-lb / 10 Nm 19 mm...
- Page 30 Replacement Parts / Pièces détachées / Repuestos iBox Universal Plus 01850181 97739000 13595000 not included non compris no incluido 98560000 5x1.5 98797000 Ecostat Pressure Balance Trim E 15718xx1 98133000 16x2 96525000 98793000 15597xx0 88727000 (⅞"/22 mm) 92756000 96454000 88765xx0 88763xx0 xx = Colors / Couleurs / Acabados 00 = Chrome 82 = Brushed Nickel...
- Page 31 Ecostat Pressure Balance Trim S 04233xx0 98133000 16x2 96525000 96647000 88727000 88765xx0 92756000 96454000 13596xx0 ⅞"/22 mm 88760xx0 88763xx0 Clubmaster Showerhead 3-Jet Showerarm Standard 6" 28496xx1 27411xx3 Showerarm Standard 9" 04186xx3 96425000 88649000 06920xx0...
- Page 32 Croma Showerhead 220 1-Jet Croma Select E Showerhead 180 2-Jet 26478xx1 26528xx1 94246000 98058000 98942xx1 97958xx0 98941xx1 97536000 97735000 97606000 98343001 98149000 (7x2) 95795xx0...
- Page 33 User Instructions / Instructions de service / Manejo warmer ouvert plus chaud abierto más caliente cooler fermé plus froid cerrado más frío It is normal for the showerhead Il est normal que la pomme de Es normal que el cabezal de du- and/or the tub spout to drip for douche dégoutte pendant plus- cha gotee durante varios minutos...
- Page 34 User Instructions / Instructions de service / Manejo 26528xx1 IntenseRain Rain User Instructions / Instructions de service / Manejo 28496xx1...
- Page 35 Cleaning / Nettoyage / Limpieza 26528xx1 QUICK Just clean: simply rub over the spray nozzles to CLEAN remove lime scale. La propreté en toute simplicité: les dépôts formés sur les buses élastiques en silicone s’éliminent par un simple passage de la main. Fácil aseo: La cal se puede retirar sencillamente frotando con los dedos de las toberas elásticas de silicona.
- Page 36 3 mm (1.5 ft-lb /2 Nm) > 1 min 17 mm 7.4 ft-lb / 10 Nm...
- Page 37 Cleaning / Nettoyage / Limpieza 26478xx1 2 mm 17 mm scale remover détartrant commercial desincrustante comercial 17 mm 7.4 ft-lb 10 Nm...
- Page 38 2 mm 0.74 ft-lb 1 Nm >1 min scale remover détartrant commercial desincrustante comercial 4 mm...
- Page 39 4 mm 1.5 ft-lb 2 Nm Cleaning / Nettoyage / Limpieza 28496xx1 scale remover détartrant commercial desincrustante comercial > 1 min.
-
Page 40: Maintenance
Maintenance • Should the volume of water decrease over time, When reassembling after first inspect and clean the showerhead(s). If the maintenance, set the rotational problem persists, inspect the cartridge. limit stop before reinstalling the handle (see page 27). • At least once per year, inspect the cartridge, including the check valves on the rear of the If the shower will not be used for an cartridge. -
Page 41: Entretien
Entretien • Si le débit d’eau devait décroître avec le temps, Lors du réassemblage après l’entretien, commencez par inspecter et nettoyer la ou les réglez la butée de limite de rotation pomme(s) de douche. Si le problème persiste, avant de réinstaller la poignée (voir inspectez la cartouche. -
Page 42: Mantenimiento
Mantenimiento • Si el volumen del agua disminuye con el tiempo, Al rearmar después de realizar el primero inspeccione y limpie el cabezal de mantenimiento, configure el tope límite ducha. Si el problema persiste, inspeccione el rotacional antes de reinstalar la manija cartucho. - Page 43 Cleaning Recommendation for Hansgrohe Products Modern bathroom faucets, kitchen faucets and shower products are made from different materials to comply with the needs of the market with regard to design and functionality. To avoid damage to the product, it is necessary to take proper care of it.
- Page 44 Important • Les residus de produits pour le corps comme les savons liquides, shampooings, gels de douche, teintures pour cheveux, parfums, apres-rasage et vernis a ongles peuvent causer des deteriorations. Rincez le produit avec de l’eau propre après chaque utilisation. •...
- Page 47 Hansgrohe, Inc. Limited Warranty • abuse, neglect or improper or incorrectly performed Offering our customers the highest quality at all times is a funda- mental part of the Hansgrohe, Inc. company philosophy. We of- installation, maintenance or repair, including the use of fer consumers a limited warranty on our hansgrohe and AXOR abrasive or caustic cleaning agents or “no-rinse”...
- Page 48 TEAR, OUTDOOR USE, MISUSE (INCLUDING USE OF THE This warranty gives you specific legal rights, and you may also PRODUCT FOR AN UNINTENDED APPLICATION), FREEZING have other rights which vary from state to state. WATER, EXCESSIVE WATER PRESSURE, PIPE CORROSION IN THE HOME IN WHICH THE PRODUCT IS INSTALLED, ABUSE, P RO D UC T I NS T RU CT ION S A N D QUE S T ION S NEGLECT OR IMPROPER OR INCORRECTLY PERFORMED...
Need help?
Do you have a question about the Clubmaster Pressure Balance Shower Set With Rough 04907 0 Series and is the answer not in the manual?
Questions and answers