Advertisement
Quick Links
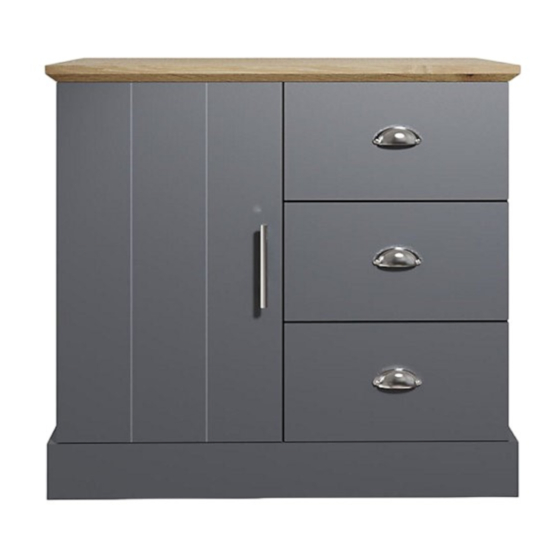
Thank you for purchasing the KENDAL MULTI UNIT. Please read the instructions carefully to ensure
PLEASE READ this sheet prior to assembly to familiarise yourself with the various stages of construction.
Carefully open the pack supplied and check the contents against the parts and fittings check list. Do not
destroy any of the packaging until you are certain that you have all the necessary parts for the assembly.
CAUTION: There are small components used in the construction of this unit. These loose items should be
kept away from young children whilst assembling your unit to avoid the danger of choking hazards.
Tools Required
KENDAL MULTI UNIT
ASSEMBLY INSTRUCTIONS
safe operation of the product.
Size: 788 x 389 x 775mm
Person Required
3.5m/12'
x 2
V2 2022.02
Page 1 of 20
Approximate
Assembly Time
1.5 hours
Advertisement

Related Manuals for GFW KENDAL MULTI UNIT


Summary of Contents for GFW KENDAL MULTI UNIT
- Page 1 KENDAL MULTI UNIT ASSEMBLY INSTRUCTIONS Thank you for purchasing the KENDAL MULTI UNIT. Please read the instructions carefully to ensure safe operation of the product. Size: 788 x 389 x 775mm PLEASE READ this sheet prior to assembly to familiarise yourself with the various stages of construction.
-
Page 2: Care Information
IMPORTANT - READ CAREFULLY - RETAIN THESE INSTRUCTIONS FOR FUTURE REFERENCE. INFORMATION � Due to the size of this product we recommend that it is assembled in the room intended for use � When you are ready to start, make sure that you have the right tools, plenty of space and a clean, dry area for assembly. - Page 3 Please check the pack contents before assembling the product. If any components are missing, please contact your retailer. The fittings pack contains small items that should be kept away from small children. Parts CODE PART NAME DIMENSION CODE PART NAME DIMENSION Side Panel - L 30 x 350 x 740mm...
- Page 4 Fixings (to scale) M6.3 x 40mm M4 x 38mm EU 24 Dia. 8 x 30mm M4 x 22mm Unitar Minifix Wooden Handle Dowel Screw Screw Bolt Screw #10 x 16mm #6 x 16mm M3.5 x 15mm M6 x 8mm Tapping Euro Tapping Shelf Support...
- Page 5 Fixings (not to scale) Dia. 15 x 12mm Minifix Cam Hinges (5/8") L-Bracket L-145/H-96mm H-64mm D-16mm Handle Pocket Handle Flat Washer 1.2x15x32x75mm L-Mounting Bracket 3 set x 3 set x 12" (300mm) 12" (300mm) Allen Key Drawer Slide Drawer Slide V2 2022.02 Page 5 of 20...
- Page 6 Layout Parts on Soft Surface V2 2022.02 Page 6 of 20...
- Page 7 STEP 1 12 x BOTTOM BOTTOM FRONT BACK SECOND HOLE PLEASE ENSURE TO FIX THE SCREWS AS PER ABOVE POINTED HOLES INSTRUCTION TO AVOID DISTORTION OF OVERALL LOOK OF PRODUCTS V2 2022.02 Page 7 of 20...
- Page 8 STEP 2 STEP 3 V2 2022.02 Page 8 of 20...
- Page 9 STEP 4 STEP 5 V2 2022.02 Page 9 of 20...
- Page 10 STEP 6 STEP 7 V2 2022.02 Page 10 of 20...
- Page 11 STEP 8 STEP 9 WARNING : THE FRONT NAIL LEG MUST FIX AT 10MM FROM FRONT. V2 2022.02 Page 11 of 20...
- Page 12 STEP 10 STEP 11 V2 2022.02 Page 12 of 20...
- Page 13 STEP 12 STEP 13 16 x PLEASE ENSURE THAT EACH OF THE FOUR CORNERS OF THE CABINET IS SQUARE. 90° V2 2022.02 Page 13 of 20...
- Page 14 STEP 14 NOTE : Wall fixing are not supplied with this product as different wall materials require different types of fixing devices (such as Rawl plugs on brick work). You must use fixing devices suitable for the type of wall you intend to mount this product to. Please ensure that the head of any screw used has a diameter greater that the diameter of the mounting hole on the product and that the fixing is safe and...
- Page 15 STEP 15 STEP 16 V2 2022.02 Page 15 of 20...
- Page 16 STEP 17 A. Lateral adjustment (Moving Door Left-Right) B. Vertical adjustment (Moving Door Up-Down) C. Front-to-back adjustment (Spacing Door Off by screw adjusting via slot in the mounting plate Carcas) by slacking the hinge arm mounting screw V2 2022.02 Page 16 of 20...
- Page 17 STEP 18 (3x) STEP 19 12 x (3x) STEP 20 (3x) V2 2022.02 Page 17 of 20...
- Page 18 STEP 21 12 x (3x) STEP 22 (3x) STEP 23 12 x LAST THIRD HOLE BACK THIRD HOLE (3x) FRONT V2 2022.02 Page 18 of 20...
- Page 19 STEP 24 V2 2022.02 Page 19 of 20...
-
Page 20: Complete Assembly
Complete Assembly Your KENDAL MULTI UNIT is now completely assembled. Periodically check to ensure that the components are in their proper position, free from damage. Also, make sure the connectors are tight and secure. Keep instructions for future reference V2 2022.02...
Need help?
Do you have a question about the KENDAL MULTI UNIT and is the answer not in the manual?
Questions and answers