
Subscribe to Our Youtube Channel
Related Manuals for Car Keys Express Simple Key TORH-E4TZ1SK


Summary of Contents for Car Keys Express Simple Key TORH-E4TZ1SK
- Page 1 V1.0520 USER GUIDE Pairing Instructions for Toyota Remote Key Replacement Keys Powered By Instruction Manual Part Number: TYPKA-7000-0 Replacing car keys is simple and affordable again. ™ www.CarKeysExpress.com...
-
Page 2: Important Notes
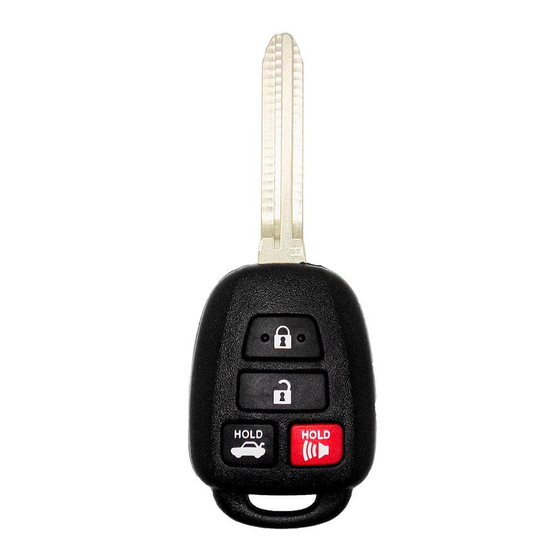
SIMPLE™ KEY USER GUIDE IMPORTANT NOTES ► You MUST have at least one existing key that already works with your vehicle in order to use the EZ Installer™. If you have no working keys, return the Simple™ Key to the retailer where it was purchased. ►... - Page 3 SIMPLE™ KEY USER GUIDE COMPATIBILITY LOOKUP NOTE: Only FCC IDs ending in “BBY” or “BDM” will work with Simple™ Key. To check your key’s FCC ID, turn your key over or remove the remote cover. The FCC ID is engraved on the back of the remote or under the remote cover. NOTE: Determine the type of transponder chip that is in your vehicle’s key.
- Page 4 SIMPLE™ KEY USER GUIDE COMPATIBILTY LOOKUP TRANSPONDER KEY PAIR KEY EZ INSTALLER™ YEAR MAKE/MODEL DIAL POSITION CHIP TYPE PRIMARY DIAL ALTERNATE DIAL TOYOTA POSITION POSITION Camry 2006-2011 Camry 2014-2018 Corolla 2009-2010 Corolla 2014-2019 RAV4 2006-2010 RAV4 2013-2018 Visit www.CarKeysExpress.com for the most up-to-date vehicle compatibility lookup.
- Page 5 SIMPLE™ KEY USER GUIDE COMPATIBILTY LOOKUP PAIR REMOTE EZ INSTALLER™ ERASE KEY EZ INSTALLER™ ERASE REMOTE EZ INSTALLER™ DIAL POSITION DIAL POSITION DIAL POSITION PRIMARY DIAL ALTERNATE DIAL PRIMARY DIAL ALTERNATE DIAL PRIMARY DIAL ALTERNATE DIAL POSITION POSITION POSITION POSITION POSITION POSITION Visit www.CarKeysExpress.com for the most up-to-date vehicle compatibility lookup.
- Page 6 SIMPLE™ KEY USER GUIDE STEP 1 (OF 2) KEY PAIRING Instructions have timing requirements. If you wait too long between steps, your vehicle’s computer may time out, requiring you to start over. Once you begin the pairing procedure, move at a quick and even pace. NOTE: If you have a Toyota RAV4 (2006-2010), your vehicle may not have a transponder key.
- Page 7 SIMPLE™ KEY USER GUIDE Insert the original key and turn the ignition to the ON/RUN position. If there are no markings, turn the key clockwise and stop just short of starting the engine. TOYOTA IGNITION POSITIONS Press and release the EZ Installer™ button. You will hear a short beep. NOTE: If you hear a series of 5 quick beeps, this indicates that the maximum number of keys have been paired, and an error has occurred.
- Page 8 SIMPLE™ KEY USER GUIDE STEP 2 (OF 2) REMOTE PAIRING Instructions have timing requirements. If you wait too long between steps, your vehicle’s computer may time out, requiring you to start over. Once you begin the pairing procedure, move at a quick and even pace. NOTE: If you have a Toyota Camry or Corolla, your vehicle may not be equipped with a remote.
- Page 9 SIMPLE™ KEY USER GUIDE Insert the original key, buttons facing down, and turn the ignition to the ON/RUN position. If there are no markings, turn the key clockwise and stop just short of starting the engine. NOTE: It is important to make sure that you insert the key, buttons facing down, so that when you turn the key to the ON/RUN position, buttons are facing up and easily visible and accessible for the following steps.
- Page 10 SIMPLE™ KEY USER GUIDE Unplug the EZ Installer™. If the EZ Installer™ is left in the vehicle’s OBD port for more than 20 minutes, an alarm will sound reminding you to remove it. Remove the key from the ignition and test the new remote. OPTIONAL STEP: ERASE KEY Instructions have timing requirements.
- Page 11 SIMPLE™ KEY USER GUIDE Insert the original key and turn the ignition to the ON/RUN position. If there are no markings, turn the key clockwise and stop just short of starting the engine. TOYOTA IGNITION POSITIONS Press and release the EZ Installer™ button. You will hear a short beep. Wait 30 seconds, the EZ Installer™...
- Page 12 SIMPLE™ KEY USER GUIDE OPTIONAL STEP: ERASE REMOTE Instructions have timing requirements. If you wait too long between steps, your vehicle’s computer may time out, requiring you to start over. Once you begin the pairing procedure, move at a quick and even pace. NOTE: This process is only necessary if you received the maximum number of keys error during REMOTE PAIRING (see FAQs for more information).
- Page 13 SIMPLE™ KEY USER GUIDE Insert the original key, buttons facing down, and turn the ignition to the ON/RUN position. If there are no markings, turn the key clockwise and stop just short of starting the engine. NOTE: It is important to make sure that you insert the key, buttons facing down, so that when you turn the key to the ON/RUN position, buttons are facing up and easily visible and accessible for the following steps.
-
Page 14: Frequently Asked Questions
Four distinct beeps at 1 second intervals indicate that the incorrect dial position was selected on the EZ Installer™. Carefully read the instructions and refer to the compatibility lookup on pages 4-5. Please contact Car Keys Express customer service at 888-598-8910 for any questions. - Page 15 Q: The vehicle won’t start with the new key or old keys after attempting to pair. A: Please call Car Keys Express customer service at 888-598-8910. FCC AND ISED REGULATORY STATEMENT TRANSPONDER CHIP: DOT...
-
Page 16: Other Keys
New Ford, Lincoln, T oyota, and Honda, Simple™ Keys are coming soon. Replacing car keys is simple and affordable again. ™ Patent Pending Designed and assembled in the USA 828 East Market Street Louisville, KY 40206 © 2020 Car Keys Express www.CarKeysExpress.com... - Page 17 V1.0520 MANUAL DE USUARIO Instrucciones de emparejamiento para llaves de repuesto de llaves remotas para Toyota Desarrollado por Parte del manual de instrucciones número: TYPKA-7000-0 Replacing car keys is simple and affordable again. ™ www.CarKeysExpress.com...
-
Page 18: Notas Importantes
SIMPLE™ KEY MANUAL DE USUARIO NOTAS IMPORTANTES ► DEBE tener al menos una llave existente que ya funcione con su vehículo para poder usar el EZ Installer™. Si no tiene llaves que funcionen, devuelva la Simple™ Key a la tienda donde la compró. ►... - Page 19 SIMPLE™ KEY MANUAL DE USUARIO BÚSQUEDA DE COMPATIBILIDAD NOTA: Solo los FCC ID que terminen en “BBY” o “BDM” funcionarán con la Simple™ Key. Para comprobar el FCC ID de su llave, dé vuelta su llave o quite la cubierta del control remoto. El FCC ID se encuentra impreso en el reverso del control remoto o debajo de la cubierta del control remoto.
- Page 20 SIMPLE™ KEY MANUAL DE USUARIO BÚSQUEDA DE COMPATIBILIDA TIPO DE CHIP POSICIÓN DEL DIAL DEL EZ INSTALLER™ MARCA/MODELO AÑO DE LA LLAVE DE PARA EMPAREJAR LA LLAVE TRANSPONDEDOR TOYOTA PRIMARIA ALTERNATIVA Camry Punto 2006-2011 Camry 2014-2018 Corolla Punto 2009-2010 Corolla 2014-2019 RAV4 Punto...
- Page 21 SIMPLE™ KEY MANUAL DE USUARIO COMPATIBILTY LOOKUP POSICIÓN DEL DIAL DEL EZ INSTALLER™ POSICIÓN DEL DIAL DEL EZ INSTALLER™ POSICIÓN DEL DIAL DEL EZ INSTALLER™ PARA EMPAREJAR EL CONTROL REMOTO PARA BORRAR LA LLAVE PARA BORRAR EL CONTROL REMOTO PRIMARIA ALTERNATIVA PRIMARIA ALTERNATIVA...
- Page 22 SIMPLE™ KEY MANUAL DE USUARIO PASO 1 (DE 2) - EMPAREJAMIENTO DE LA LLAVE Las instrucciones tienen requisitos de tiempo. Si espera demasiado entre los pasos, es posible que la computadora de su vehículo se apague, lo que lo obligará a comenzar de nuevo. Una vez que comience el proceso de emparejamiento, hágalo a un ritmo rápido y uniforme.
- Page 23 SIMPLE™ KEY MANUAL DE USUARIO Inserte la llave original y gire el encendido a la posición ON/RUN [Prendido/funcionando]. Si no hay marcas, gire la llave en el sentido de las agujas del reloj y deténgase justo antes de arrancar el motor. POSICIONES DE IGNICIÓN DE TOYOTA Presione y suelte el botón del EZ Installer™.
- Page 24 SIMPLE™ KEY MANUAL DE USUARIO Para probar la nueva llave, arranque el vehículo. PASO 2 (DE 2) - EMPAREJAMIENTO DEL CONTROL REMOTO Las instrucciones tienen requisitos de tiempo. Si espera demasiado entre los pasos, es posible que la computadora de su vehículo se apague, lo que lo obligará...
- Page 25 SIMPLE™ KEY MANUAL DE USUARIO Inserte la llave original, con los botones hacia abajo y gire el encendido a la posición ON/RUN [Prendido/ funcionando]. Si no hay marcas, gire la llave en el sentido de las agujas del reloj y deténgase justo antes de arrancar el motor.
- Page 26 SIMPLE™ KEY MANUAL DE USUARIO comience con el PASO 5 – EMPAREJAMIENTO DEL CONTROL REMOTO. Desconecte el EZ Installer™. Si el EZ Installer™ se deja introducido en el puerto OBD del vehículo durante más de 20 minutos, sonará una alarma que le recordará que lo retire. Retire la llave del encendido y pruebe el nuevo control remoto.
- Page 27 SIMPLE™ KEY MANUAL DE USUARIO NOTA: Puede encontrar la ubicación del puerto OBD de su vehículo en el manual de uso. Inserte la llave original y gire el encendido a la posición ON/RUN [Prendido/funcionando]. Si no hay marcas, gire la llave en el sentido de las agujas del reloj y deténgase justo antes de arrancar el motor.
- Page 28 SIMPLE™ KEY MANUAL DE USUARIO PASO OPCIONAL: BORRADO DEL CONTROL REMOTO Las instrucciones tienen requisitos de tiempo. Si espera demasiado entre los pasos, es posible que la computadora de su vehículo se apague, lo que lo obligará a comenzar de nuevo. Una vez que comience el proceso de emparejamiento, hágalo a un ritmo rápido y uniforme.
- Page 29 SIMPLE™ KEY MANUAL DE USUARIO Inserte la llave original, con los botones hacia abajo y gire el encendido a la posición ON/RUN [Prendido/funcionando]. Si no hay marcas, gire la llave en el sentido de las agujas del reloj y deténgase justo antes de arrancar el motor. NOTA: Es importante que se asegure de insertar la llave, con los botones hacia abajo, para que cuando gire la llave a la posición ON/RUN, los botones miren hacia arriba y sean fácilmente visibles y accesibles para los siguientes pasos.
-
Page 30: Preguntas Frecuentes
SIMPLE™ KEY MANUAL DE USUARIO PREGUNTAS FRECUENTES P: El EZ Installer™ emite 5 pitidos después de presionar el botón para iniciar el proceso de emparejamiento y no empareja la nueva llave. R: Su vehículo permite un máximo de 5 llaves emparejadas o 6 controles remotos emparejados. Si el vehículo ya tiene 5 llaves emparejadas, no puede emparejar una nueva llave. - Page 31 4-5. Comuníquese con el servicio de atención al cliente de Car Keys Express al 888-598-8910 si tiene preguntas. P: La nueva llave no se empareja con mi auto.
- Page 32 Pronto tendremos nuevas Simple™ Keys para Ford, Lincoln, T oyota y Honda. Patent Pending Designed and assembled in the USA 828 East Market Street Louisville, KY 40206 © 2020 Car Keys Express Replacing car keys is simple and affordable again. ™ www.CarKeysExpress.com...
Need help?
Do you have a question about the Simple Key TORH-E4TZ1SK and is the answer not in the manual?
Questions and answers