Leica Digilux 3 User Manual
Leica digilux 3: user guide
Hide thumbs
Also See for Digilux 3:
- Brochure (20 pages) ,
- Software installation manual (6 pages) ,
- Software manual (5 pages)
Table of Contents
Advertisement
Quick Links
Advertisement
Table of Contents

Related Manuals for Leica Digilux 3


Summary of Contents for Leica Digilux 3
- Page 1 LEICA DIGILUX 3 ,QVWUXFWLRQV...
-
Page 2: Information For Your Safety
• Adobe is a trademark or registered trademark of Adobe Systems Incorporated in the United States and/or other countries. • Leica is a registered trademark of Leica Microsystems IR GmbH. • Elmarit is a registered trademark of Leica Camera AG. - Page 3 Trade Name: LEICA Model No.: DIGILUX 3 Responsible party / Support Contact: Leica Camera AG Oskar-Barnack-Str. 11 D-35606 Solms Tel.: +49 (0) 64 42-208-0 Fax: +49 (0) 64 42-208-333 www.leica.camera.com...
- Page 4 Before Use -If you see this symbol- Information on Disposal for Users of Waste Electrical & Electronic Equipment (private households) This symbol on the products and/or accompanying documents means that used electrical and electronic products should not be mixed with general household waste.
- Page 5 About the Lens • Do not press the lens with excessive force. • Do not leave the camera with the lens facing the sun as it may cause the camera to malfunction. Also, be careful when you leave the camera outside or near a window.
-
Page 6: Before Use
Before Use About These Operating Instructions About indications in these operating instructions Convenient or helpful information for using the camera is described. About illustrations of the cursor button In these operating instructions, operations using the cursor button are described with illustrations. -
Page 7: Table Of Contents
Contents Before Use Information for Your Safety ... 2 About These Operating Instructions ... 6 Preparation Scope of delivery ... 10 Names of the Components ... 11 Screen Display... 13 About the Lens... 16 Attaching/Detaching the Lens ... 16 Charging the Battery with the Charger ... - Page 8 Adjusting the White Balance... 68 • [WHITE SET] Resetting the white balance ... 70 • [COLOR TEMPERATURE SETTING] Setting the color temperature ... 70 • [WHITE BALANCE ADJUSTMENT] Finely adjusting the white balance ... 70 Setting the ISO Sensitivity ... 71 Deciding the Method to Measure Brightness (Metering mode)...
- Page 9 Specifications... 122 Accessories ... 125 Index ... 126 Installing the Software on the CD ... 128 Leica Academy ... 130 Leica on the Internet ... 130 Leica Customer Service... 131 Leica Information Service ... 131 AC Mains Lead Caution... 132...
-
Page 10: Preparation
Preparation Preparation Scope of Delivery Check that all the accessories are included before using the camera. ACA-DC3 424-015.001-000 (TW 423-067.801-089) 423-067.801-084 423-067.801-081 423-067.801-082 423-067.801-088 BP-DC3-E/U/J 18662/-663/-664 EU 423-068.801-019 UK -020 / US -021 JP -022 / AUS -023 423-067.801-083 TW 423-075.801-083 423-067.801-017 423-067.801-086 423-067.801-013... -
Page 11: Names Of The Components
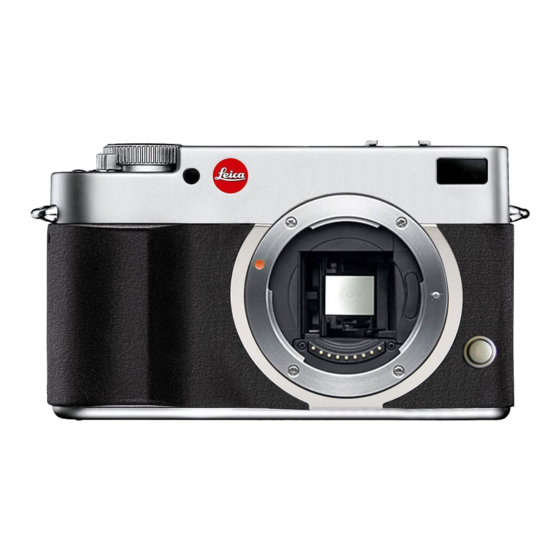
1 Camera Body (This is referred to as camera body in these operating instructions.) 2 Interchangeable Lens LEICA D VARIO-ELMARIT 14– 50 mm f/2.8–3.5 ASPH (This is referred to as lens in these operating instructions.) 3 Battery Pack (This is referred to as battery in these operating instructions.) - Page 12 Preparation 13 Focus mode lever (P32, 35, 42, 54, 55) 14 [AFL/AEL] button (P63) 15 Drive mode lever 16 Camera ON/OFF switch (P25) 17 Command dial (P33, 37, 38, 40, 47 to 49, 56, 58, 61, 68, 71, 73) / / / Cursor buttons (P27) 19 [MENU/SET] button (P27) 20 Delete button (P45)
-
Page 13: Screen Display
Lens LEICA D VARIO-ELMARIT 14–50 mm f/2.8– 3.5 ASPH 54 53 47 Focus distance indicator (P42, 55) 48 Aperture ring (P32, 36, 38) 49 Lens fitting mark (P16) 50 Contact point 51 Aperture ring button (P32, 36, 38) 52 [O.I.S.] switch (P17) - Page 14 Preparation Information Display on the LCD Monitor (When taking pictures with the Viewfinder) F 2.8 2000 2000 STANDARD STANDARD AUTO AUTO 13 12 11 1 Recording mode (P32, 36, 38) 2 Aperture value (P36, 38) 3 Shutter speed (P36, 38) 4 AF frame setting (P85) 5 Metering mode (P72) 6 Exposure compensation (P40)
- Page 15 16 Picture size (P78) 17 Battery indication (P19) 18 High angle mode (P53) 19 AF frame (P54) 20 Focus position (P54) 28 27 21 Program shift (P33) 22 Continuous (P64): Auto bracket (P66): Self-timer (P67): 23 White balance fine adjustment (P68) 24 2nd curtain synchro (P83): 2ND 25 Histogram (P52) 26 Self-timer (P67)
-
Page 16: About The Lens
You can use the supplied lens or a lens that is compatible with the lens mount standard for the “Four Thirds System (Four Thirds Mount)” with the LEICA DIGILUX 3. If you use a lens other than the supplied interchangeable lens, some of the functions described in these instructions may not be available and/or work differently. - Page 17 3 Detach the lens cap. Optical image stabilizer The supplied lens has an optical image stabilizer function. The optical image stabilizer function is set for activation when the lens is attached to the camera body. Set the [O.I.S.] switch to [ON]. •...
-
Page 18: Charging The Battery
Preparation Charging the Battery with the Charger • The battery is not charged when the camera is shipped. Charge the battery before use. 1 Connect the AC cable. • When you connect the AC cable, the [POWER] indicator • The battery cannot be charged when the DC cable is connected to the AC adaptor. -
Page 19: About The Battery
About the Battery (charging/number of recordable pictures) Battery indication The remaining battery power appears on the screen. • The battery indication turns red and blinks. (The status indicator blinks when the LCD monitor turns off.) Recharge the battery or replace it with a fully charged battery. (This does not appear when using the AC adaptor. -
Page 20: Inserting/Removing The Battery
• Close the flash. 1 Slide the release lever in the direction of the arrow (OPEN side) and then open the battery door. • Always use genuine Leica batteries (BP-DC3). 2 Insert: Insert the charged battery fully until it clicks. -
Page 21: Using The Ac Adaptor
Using the AC Adaptor You can use the camera without worrying about battery discharge when it is connected to a PC or printer if you use the AC adaptor. • Check that the camera is turned off. • Close the flash. 1 Connect the AC cable. -
Page 22: About The Card
Preparation • Do not touch the connection terminals on the back side of the card. • The card may be damaged if it is not fully inserted. Close the card door. Slide the card door to the end and then close it firmly. •... -
Page 23: Attaching The Lens Hood
• The reading/writing speed of an SD Memory Card and an SDHC Memory Card is fast. Both types of cards are equipped with a Write-Protect switch that prevents writing and formatting the card. (If the switch is slid to the [LOCK] side, it is not possible to write or delete data on the card and format it. -
Page 24: Attaching The Strap
• Attach the strap to the other side of the camera also so that is does not get twisted. • Check that the strap is firmly attached to the camera. • Attach the strap so that the Leica Logo is on the outside. -
Page 25: Attaching The Eyepiece Cap
Attaching the Eyepiece When taking pictures with your eye removed from the viewfinder, light may enter the viewfinder and affect the exposure and focus. Attach the eyepiece cap so that light does not enter the viewfinder and prevent accurate exposure when taking pictures with Live View (P50) or the Self-timer (P67) and when using the remote Control Unit. -
Page 26: Setting Date/Time (Clock Set)
Preparation Setting Date/Time (Clock Set) Initial setting The clock is not set so the following screen appears when you turn the camera on. PLEASE SET THE CLOCK MENU CLOCK SET : [MENU/SET] button : Cursor buttons 1 Press [MENU/SET]. 2 Press / / / to select the date and time. -
Page 27: About The Setup Menu
About the Setup Menu • Set items as required. (Refer to P28 to 30 for each menu item.) • The following example shows how to set [BEEP]. • Select [RESET] to return the settings to the initial settings at the time of purchase. (P29) 1 Press [MENU/SET] and then press... - Page 28 Preparation [CLOCK SET] Press [ MENU ] to display the [SETUP] menu and select the item to set. (P27) Change date and time. (P26) [WORLD TIME] Press [ ] to display the [SETUP] menu MENU and select the item to set. (P27) The local time at the travel destination area is set.
- Page 29 [BEEP] Press [ MENU ] to display the [SETUP] menu and select the item to set. (P27) Set the volume of the focus confirmation beep, the self-timer beep, and the alarm beep. No beep Soft beep Loud beep [NO.RESET] MENU Press [ ] to display the [SETUP] menu and select the item to set.
- Page 30 Preparation • There may be white saturated areas if the distance between the camera and the subject is too close when taking pictures with the flash. If [HIGHLIGHT] is set to [ON] in this case, these white saturated areas appear blinking in black and white. [VIDEO OUT] MENU Press [...
-
Page 31: Basic
Basic Before Taking Pictures with the Viewfinder Tips for taking good pictures • Hold the camera gently with both hands, keep your arms still at your side and stand with your feet slightly apart. • When taking pictures, make sure your footing is stable and there is no danger of colliding with another person, a ball etc. -
Page 32: Setting The Focus And The Exposure Automatically (Af: Auto Focus/Program Ae Mode)
Basic Setting the Focus and the Exposure Automatically Focus/Program AE mode [ The camera automatically sets the aperture value and the shutter speed according to the brightness of the subject. • Remove the lens cap. • Turn the camera on. (P25) •... - Page 33 • The camera focuses on any of 3 focus area points- left, right or center - in the AF frame and a lamp (AF-LED display) lights where the subject is focused. You can change the setting for the AF frame and the AF-LED display in the [CUSTOM] menu.
-
Page 34: Taking Good Pictures
Basic Example of program shift when using the supplied lens 1/ 2 1/ 4 1/ 8 1/ 15 1/ 30 1/ 60 1/ 125 1/ 250 1/ 500 1/ 1000 1/ 2000 (A): Aperture value (B): Shutter speed Program shift amount Program shift line chart •... -
Page 35: Continuously Focusing On A Subject (Afc) (When Taking Pictures With The Viewfinder)
Preventing jitter (camera shake) • Be careful of jittering when pressing the shutter button. • We recommend using a tripod. Also, be careful how you hold the camera (P31). Using the self-timer (P67) or the remote Control Unit (CR-DC1; optional) (P107) prevents jittering caused by pressing the shutter button when you are using a tripod. -
Page 36: Aperture-Priority Ae
Basic Aperture-priority AE Set the aperture value to a higher number when you want a sharp focus background. Set the aperture value to a lower number when you want a soft focus background. 1 Rotate the shutter speed dial to [A]. - Page 37 2 Rotate the shutter speed dial to set the shutter speed. : [2-60s/B] to [1000-4000] 1000 1000 STANDARD STANDARD AUTO AUTO SINGLE SINGLE • The mode becomes Shutter-priority AE mode [ • If the shutter speed dial is set to [2-60s/ B] or [1000-4000], press the command dial to set the shutter...
-
Page 38: Manual Exposure
Basic Manual Exposure [ Determine the exposure by manually setting the aperture value and the shutter speed. 1 Set the aperture value and the shutter speed. Rotate the aperture ring to set the aperture value. : [2.8] to [22] • When changing from [A], rotate the aperture ring while pressing the aperture ring button Rotate the shutter speed dial to... - Page 39 Manual Exposure Assistance The exposure is adequate. Set to faster shutter speed or larger aperture value. Set to slower shutter speed or smaller aperture value. • The manual exposure assistance is an approximation. We recommend checking the pictures using Auto Review. About [B] (Bulb) If you set the shutter speed to [B], the shutter stays open while the shutter button...
-
Page 40: Compensating The Exposure
Basic Compensating the Exposure Use this function when you cannot achieve appropriate exposure due to the difference in brightness between the subject and the background. Look at the following examples. Under exposed Compensate the exposure towards positive. Properly exposed Compensate the exposure towards If you are using [FUNC.2] to compensate the exposure ([FUNC.2] is set for compensating the... - Page 41 • The exposure compensation value is displayed on the LCD monitor when taking pictures with Live View. Refer to P50 for information about Live View. 3 Press the shutter button halfway to set the selected exposure. • You can also set the selected exposure by doing the following: –...
-
Page 42: Taking Pictures With Manual Focus
Basic Taking Pictures with Manual Focus Use this function when you want to fix the focus or when the distance between the lens and the subject is determined and you do not want to activate auto focus. 1 Set the focus mode lever to [MF]. 2 Rotate the focus ring to focus on the subject. -
Page 43: Taking Pictures With The Zoom
• If the distance between the camera and the subject is beyond the focus range of the camera, the picture may not be properly focused even if the focus indication lights. • The available flash range is about 2.5 m (8.2 feet) to 7.0 m (23.0 feet) (Wide) (When the ISO sensitivity is set to [AUTO].). -
Page 44: Playing Back Pictures
Basic Playing Back Pictures 1 Press [ PLAY F5.6 125 F5.6 100 _ 0001 2 Press to select the picture. F5.6 125 F5.6 100 _ 0001 : Play back the previous picture : Play back the next picture • The first recorded picture will be displayed after the last recorded picture. -
Page 45: Changing The Information Displayed On The Playback Screen
Changing the Information Displayed on the playback screen Press [DISPLAY] to switch the monitor screen. : [DISPLAY] button : LCD monitor • The [DISPLAY] button is not activated when the menu screen is displayed. You can only select Normal display or No display in playback zoom (P47) and during a slide show (P89). - Page 46 Basic To delete [MULTI DELETE]/ [ALL DELETE] 1 Press [DELETE] twice. 2 Press to select [MULTI DELETE] or [ALL DELETE] and then press [MENU/SET]. MULTI/ALL DELETE MULTI DELETE ALL DELETE MENU SELECT SET CANCEL • If you select [MULTI DELETE], perform steps onwards.
-
Page 47: Using The Playback Zoom
Using the Playback Zoom 1 Press [PLAY]. 2 Rotate the command dial downwards to enlarge the picture. DELETE CANCEL • 1 • When you rotate the command dial upwards after enlarging a picture, the magnification becomes lower. When you rotate the command dial downwards, the magnification becomes higher. -
Page 48: Displaying Multiple Screens
Basic Displaying Multiple Images (Multi Playback) 1 Press [PLAY]. 2 Rotate the command dial upwards to display multiple images. (Screen when 9 images are displayed) DEC. 1.2006 CANCEL • 1 image 9 images Calendar screen display (P49) • After multiple images are displayed, rotate the command dial further upwards to display 25 images and the calendar screen (P49). -
Page 49: Displaying Pictures By Recording Date (Calendar Playback)
Displaying Pictures by Recording Date (Calendar Playback) You can display pictures by recording date using the calendar playback function. 1 Press [PLAY]. 2 Rotate the command dial upwards to display the calendar screen. MON TUE WED THU FRI 2006 MONTH •... -
Page 50: Advanced
Advanced Advanced Switching to Live View You can also take pictures while looking at the LCD Monitor by using it as a viewfinder. This is called Live View. This is useful if you want to check the composition of the subject on the LCD Monitor when taking close-up pictures, using a tripod etc. -
Page 51: Tips For Taking Good Pictures With Live View
Tips for taking good pictures with Live View • Hold the camera gently with both hands, keep your arms still at your side and stand with your feet slightly apart. • Make sure the camera does not shake when you press the shutter button. •... - Page 52 Advanced Histogram A histogram is a graph that displays brightness along the horizontal axis (black to white) and the number of pixels at each brightness level on the vertical axis. It allows you to easily check a picture’s exposure. When the values are distributed evenly, the exposure is proper and the brightness is well-balanced.
-
Page 53: Recording A Picture With The Camera Held High Above Your Head (High Angle Mode)
Recording a picture with the camera held high above your head (High angle mode) The LCD monitor becomes easier to see when recording a picture with the camera held high above your head if the camera is held as shown in the following illustration. This is useful when you cannot get close to the subject because there is a person in the way. -
Page 54: Auto Focus When Taking Pictures With Live View
Advanced Auto focus when taking pictures with Live View 1 Set the focus mode lever to [AFS]. (P32) 2 Aim the AF frame you want to focus on and then press the shutter button halfway. F5.6 F5.6 • When you press the shutter button halfway, the mirror goes down and then goes up to enable the camera to focus. -
Page 55: Manual Focus When Taking Pictures With Live View
Manual focus when taking pictures with Live View 1 Set the focus mode lever to [MF]. 2 Rotate the focus ring to focus on the subject. : [0.29] m (0.95 feet) to [ ] • The focus distance indicator ([0.29] m (0.95 feet) to [ ]) show the approximate “in focus”... - Page 56 Advanced 3 Press [MENU/SET] to magnify the MF assist screen. MENU CANCEL • Rotate the focus ring to focus on the subject. • The enlarged area can be moved by pressing / / / . 4 Press [MENU/SET] to close MF assist.
-
Page 57: Checking The Depth Of Field
• The MF assist disappears in the following cases. – About 10 seconds after you stop pressing / / / or rotating the focus ring or the command dial – When the shutter button is pressed halfway • The MF assist returns to the center of the screen when the camera is turned off and then on again. -
Page 58: Taking Pictures Using The Built-In Flash
Advanced Taking Pictures using the Built-in Flash Open the flash Press the [FLASH] button • If you press the [FLASH] button lightly, the flash will open to the bounce flash position . If you press the [FLASH] button fully, the flash will open to the normal flash position •... - Page 59 3 Press the shutter button halfway to set the selected flash setting. • You can also set the selected flash setting by doing the following: – Pressing [ ] – Not operating the camera for a few seconds : AUTO The flash is automatically activated when the recording conditions make it necessary.
- Page 60 Advanced The available flash range to take pictures (when the supplied lens is attached) The available flash settings for the built-in flash differ depending on the ISO sensitivity setting. Wide sensitivity 2.5 m (8.2 feet) to AUTO 7.0 m (23.0 feet) 2.5 m (8.2 feet) to ISO100...
-
Page 61: Adjusting The Flash Output
• When you take a picture beyond the available flash range, the exposure may not be adjusted properly and the picture may become bright or dark. • The white balance may not be properly adjusted if the flash level is insufficient. (P68) •... -
Page 62: Bounce Flash
Advanced 3 Press the shutter button halfway to set the selected flash output. • You can also set the selected flash output by doing the following: – Pressing [ – Not operating the camera for a few seconds • The flash output setting is memorized even if the camera is turned off. -
Page 63: (Af/Ae Lock)
Locking the Focus and the Exposure This is useful when you want to take a picture of a subject outside the AF frame or the contrast is too strong and you cannot achieve appropriate exposure. 1 Aim the AF frame at the subject. : Viewfinder Display 2 Press and hold [AFL/AEL] to lock the focus and the exposure. -
Page 64: Taking Pictures Using Continuous Mode
Advanced When [AE] is selected (Locking the exposure only) Fill the screen with the object that you want to take a picture of. Press and hold [AFL/AEL] to lock the exposure. • The aperture value and the shutter speed light when the exposure matches. - Page 65 Frequency (High) Frequency (pictures/ second) • The frequency is constant regardless of the transfer speed of the card. • The frequencies indicated are when the shutter speed is faster than 1/60 and the flash is not activated. • The frequency may become slower depending on the following settings.
-
Page 66: Taking Pictures Using Auto Bracket
Advanced Taking Pictures using Auto Bracket In this mode, up to 5 pictures are recorded in the selected exposure compensation range each time the shutter button is pressed. You can select the picture with the desired exposure among different exposures. 1 Set the drive mode lever to [ STANDARD STANDARD... -
Page 67: Taking Pictures With The Self-Timer
• [SEQUENCE] (When taking 5 pictures) – [0/ / / (5 pictures are taken. The first picture is taken at 0 EV. The next 4 pictures are taken at 1 EV, and then 2 EV.) – [ / /0/ / (5 pictures are taken. -
Page 68: Adjusting The White Balance
Advanced Changing the time setting for the self-timer 1 Press [MENU/SET]. 2 Press to select [SELF-TIMER] and then press 3 Press to select [10 SEC.] or [2 SEC.] and then press [MENU/ SET]. EX. OPT. ZOOM D.ZOOM SELF-TIMER AF ASSIST LAMP OIS MODE SELECT 4 Press [MENU/SET] to close the... - Page 69 [AUTO] for auto setting (auto white balance) for recording outdoors on (Daylight) a bright day for recording outdoors on (Cloudy) a cloudy day for recording outdoors in (Shade) the shade for recording under (Halogen) halogen lighting for recording with the (Flash) flash only (White set 1)
-
Page 70: [White Set]
Advanced [WHITE SET] Resetting the white balance Use this to set the white balance manually. 1 Select [ ] with step 2 on ] or [ P68 and then press AUTO AUTO STANDARD STANDARD SINGLE SINGLE 2 Aim the camera at a sheet of white paper, or an object that is white etc. -
Page 71: Setting The Iso Sensitivity
2 Press / / / to finely adjust the white balance and then press [MENU/SET]. WB ADJUST. AUTO AUTO ADJUST. : A (AMBER: ORANGE TINT) : B (BLUE: BLUISH) (GREEN: GREENISH) (MAGENTA: REDDISH) • If you finely adjust the white balance to A (amber), the white balance icon on the LCD monitor will change to orange. -
Page 72: Deciding The Method To Measure Brightness (Metering Mode)
Advanced ISO sensitivity Use in bright places Suitable (e.g. outdoors) Use in dark places suitable Shutter speed Slow Noise Less • To avoid picture noise, we recommend reducing the ISO sensitivity before taking pictures. • The ISO sensitivity cannot be set to [AUTO] in Aperture-priority AE, Shutter-priority AE or Manual exposure. -
Page 73: Menu Settings
Menu Settings Setting Frequently Used Functions You can set two frequently used functions to the buttons [FUNC.1] and [FUNC.2]. This is convenient as you do not need to select the item from a menu. • When you use a lens with no aperture ring, [FUNC.1] is fixed for aperture setting. - Page 74 Menu Settings Functions that can be set to the buttons [FUNC.1] and [FUNC.2] • [EXPOSURE] (P40) – [EXPOSURE] • [FILM MODE] (P76) – STD [STANDARD] – DYN [DYNAMIC] – NATUR [NATURE] – SMOOTH [SMOOTH] – STD [STANDARD] – DYN [DYNAMIC] –...
-
Page 75: Using The [Rec] Mode Menu
Using the [REC] Mode Menu Increase the variety of pictures you can take by setting color effect, picture adjustment etc. • The following example shows how to set [D.ZOOM] when taking pictures with Live View. (Refer to P76 to P83 for each menu item.) •... -
Page 76: [Film Mode]
Menu Settings [FILM MODE] Setting the color tone of the picture to be recorded MENU Press [ ] to display the [REC] mode menu and select the item to set. (P75) Every type of film for film cameras has its own color tone and contrast characteristics. - Page 77 Adjusting each film mode to the desired setting 1 Press several times on the screen shown in step 2 on page 76. 2 Press to select an item, use the command dial and then press [MENU/SET]. ADJUST. STANDARD CONTRAST SHARPNESS SATURATION NOISE RED.
-
Page 78: [Pict.size]/[Quality] Setting A Picture Size And Quality That Match Your Use Of The Pictures
Menu Settings [PICT.SIZE]/[QUALITY] Setting a picture size and quality that match your use of the pictures MENU Press [ ] to display the [REC] mode menu and select the item to set. (P75) A digital picture is made of numerous dots called pixels. -
Page 79: [Raw Rec.]
• If you set [EX. OPT. ZOOM] (P80) to [ON] when taking pictures with Live View, [EZ] is displayed on the screen when the picture size is set to a size other than the maximum picture size for each aspect ratio. -
Page 80: [Ex. Opt. Zoom]
Menu Settings [EX. OPT. ZOOM] Enlarging a picture with no picture quality deterioration (When taking pictures with Live View only) MENU Press [ ] to display the [REC] mode menu and select the item to set. (P75) Normally you can take pictures with a maximum focal length of 50 mm (35 mm film camera equivalent: 100 mm) using the supplied lens. -
Page 81: [D.zoom]
[D.ZOOM] Further extending the zoom (When taking pictures with Live View only) MENU Press [ ] to display the [REC] mode menu and select the item to set. (P75) You can further enhance the zoom magnification that you had when using the optical zoom (this includes when using the extended optical zoom), by 2 the digital zoom. -
Page 82: [Af Assist Lamp] Focusing In Low Light Conditions Becomes Easier
Menu Settings [AF ASSIST LAMP] Focusing in low light conditions becomes easier MENU Press [ ] to display the [REC] mode menu and select the item to set. (P75) Illuminating the subject makes it easier for the camera to focus when recording in low light conditions that make focusing difficult. -
Page 83: [Auto Bracket] Taking Pictures Using Auto Bracket
[AUTO BRACKET] Taking Pictures using Auto Bracket MENU Press [ ] to display the [REC] mode menu and select the item to set. (P75) In this mode, up to 5 pictures are recorded in the selected exposure compensation range each time the shutter button is pressed. -
Page 84: Using The [Custom] Menu
Menu Settings Using the [CUSTOM] Menu You can change the settings for each function using the [CUSTOM] menu. You can then save these settings for future use. (P87) • Set items as required. (Refer to P85 to P87 for each menu item.) •... - Page 85 About the menu screen items • There are 4 menu screens in the [CUSTOM] menu (1/4, 2/4, 3/4 and 4/4). CUSTOM CUSTOM SET CUSTOM CUST. SET MEMORY LCD AUTO FUNC.1 SET CUSTOM AF FRAME FUNC.2 SET FOCUS PRIORITY AF_MF DIREC. EX. COMP. COLOR SPACE AF/AE LOCK HOLD MENU...
- Page 86 Menu Settings [CENTER]: The camera focuses on the subject in the AF frame on the center of the screen. [SELECT]: If you press / , you can select the AF frame setting with Auto Focus-auto, left fix, center fix or right fix.
-
Page 87: Saving Settings In [Cust. Set Mem.]
[LONG SHUTTER NR] Press [ ] to display the [CUSTOM] menu MENU and select the item to set. (P84) This removes picture noise when the shutter speed becomes slower to take pictures of night scenery etc. If you set [ON], the countdown screen is displayed when the shutter button is pressed. -
Page 88: Using The [Play] Mode Menu
Menu Settings 2 Press to select [CUSTOM SET 1], [CUSTOM SET 2] or [CUSTOM SET 3] and then press [MENU/SET]. CUST.SET MEM. CUSTOM SET 1 CUSTOM SET 2 CUSTOM SET 3 CANSEL SELECT 3 Press to select [YES] and then press [MENU/SET]. -
Page 89: [Slide Show] Playing Back Pictures In Order For A Fixed Duration
About the menu screen items • There are 2 menu screens in the [PLAY] mode menu (1/2 and 2/2). PLAY SLIDE SHOW PLAY FAVORITE PROTECT ROTATE DISP. RESIZE ROTATE TRIMMING DPOF PRINT ASPECT CONV. MENU SELECT FORMAT SELECT • You can also use the command dial when the instructions indicate to use when selecting menu items. -
Page 90: [Favorite]
Menu Settings • Power save mode is not activated during a slide show. (However, the setting for power save mode is fixed to [10 MIN.] while pausing a slide show or playing back a [MANUAL] slide show.) [FAVORITE] Setting your favorite pictures MENU Press [ ] to display the [PLAY] mode... -
Page 91: [Rotate Disp.]/[Rotate] To Display The Picture Rotated
[ROTATE DISP.]/[ROTATE] To display the picture rotated MENU Press [ ] to display the [PLAY] mode menu and select the item to set. (P88) This mode allows you to automatically display pictures vertically if they were recorded holding the camera vertically or rotate pictures manually in 90°... -
Page 92: [Dpof Print]
Menu Settings • When [ROTATE DISP.] is set to [ON], pictures recorded holding the camera vertically are played back vertically (rotated). • If you take pictures when aiming the camera up or down, it may not be possible to display the pictures vertically. (P31) •... - Page 93 Multi setting 1 Press to select the picture to print and then press the number of prints. DPOF SET MULTI COUNT DATE SELECT • The number of prints icon [ appears. • Repeat the above procedure. (You cannot set all the pictures at one time.) •...
-
Page 94: [Protect]
Menu Settings [PROTECT] Preventing accidental erasure of pictures MENU Press [ ] to display the [PLAY] mode menu and select the item to set. (P88) You can set protection for pictures you do not want to be deleted by mistake. Press to select [SINGLE], [MULTI] or [CANCEL] and then... -
Page 95: [Trimming]
2 Press to select the size and then press RESIZE SELECT EXIT RESIZE • Sizes smaller than the recorded picture are displayed. Aspect Ratio • The message [DELETE ORIGINAL PICTURE?] appears. 3 Press to select [YES] or [NO] and then press [MENU/SET]. RESIZE DELETE ORIGINAL PICTURE? -
Page 96: [Aspect Conv.] Changing The Aspect Ratio Of A 16:9 Picture
Menu Settings 3 Press / / / to move the position of the part to be trimmed. TRIMMING ZOOM TRIM : SHUTTER EXIT 4 Press shutter button. • The message [DELETE ORIGINAL PICTURE?] appears. 5 Press to select [YES] or [NO] and then press [MENU/SET]. -
Page 97: [Format]
3 Press to determine the horizontal position and then press the shutter button to set. ADJUST EXIT SET : SHUTTER • Use to set the frame position for pictures rotated vertically. • The message [DELETE ORIGINAL PICTURE?] appears. 4 Press to select [YES] or [NO] and then press [MENU/SET]. -
Page 98: Connecting To Other Equipment
Connecting to other equipment Connecting to other equipment Connecting to a PC You can acquire recorded pictures to a PC by connecting the camera and the PC. The software “Adobe Photoshop ® Elements “ 4.0 (win)/3.0 (Mac) on the CD-ROM (supplied) allows you to easily acquire pictures recorded with the camera to a PC, print them and send them by e-mail. - Page 99 [Macintosh] The drive is displayed on the screen. • The drive is displayed as [NO_NAME] or [Untitled]. Folder Composition Folders are displayed as shown in the following illustration. Folder number Color space L: sRGB _: AdobeRGB File number JPG: pictures RAW: RAW files •...
-
Page 100: Printing The Pictures
Connecting to other equipment • Do not use any other USB connection cables except the supplied one. • Do not disconnect the USB connection cable while [ACCESS] is displayed. • If battery power is exhausted while the camera and the PC are communicating, the recorded data may be damaged. - Page 101 1 Turn on the camera and the printer. 2 Connect the camera to a printer via the USB connection cable (supplied). • Align the [ ] mark on the USB connection cable and the [ on the terminal of the adaptor when connecting.
- Page 102 Connecting to other equipment Setting date printing, the number of prints, the paper size and the page layout Select and set each item in step • Items not supported by the printer are displayed in gray and cannot be selected. •...
- Page 103 3 Disconnect the USB connection cable after printing. Setting the date printing with the DPOF print in advance We recommend setting DPOF date printing with [DPOF PRINT] (P93) in advance when the printer supports it. If you select [DPOF PICTURE], printing starts and the recording date is printed.
-
Page 104: Playing Back Pictures On A Tv Screen
Connecting to other equipment Playing Back Pictures on a TV Screen Playing back pictures using the Video cable (supplied) • Set the aspect of the TV on the camera. (P30) • Turn the camera and the TV off. 1 Connect the video cable [V OUT/REMOTE] socket on the camera. -
Page 105: Others
Others Using an External Flash If you use an external flash, the available flash range increases compared to the camera’s built in flash. Using a dedicated flash 1 Attach the dedicated flash to the hot shoe and then turn on the camera and the dedicated flash. -
Page 106: Using Filters
Others • You can set the aperture value, the shutter speed and the ISO sensitivity on the camera even when attaching the external flash. • Some commercial external flashes have synchro terminals with high-voltage or reversed polarity. Using such external flashes may cause a malfunction or the camera may not operate normally. -
Page 107: Using The Remote Control Unit
2 Attach the UVa or the polarizing filter • You cannot attach the UVA and the polarizing filter at the same time. • If the UVA/polarizing filter are tightened too much, you may not be able to remove them. Do not tighten them too much. •... -
Page 108: Displaying The Time At The Travel Destination (World Time)
Others Displaying the Time at the Travel Destination (World Time) If you set your home area and the travel destination area when traveling abroad etc., the local time at the travel destination area can be displayed on the screen and recorded on the pictures taken. - Page 109 Finishing setting the home area • If you are setting the home area for the first time, the screen returns to the screen shown in step of “Setting the home area [HOME]” after you press [MENU/ SET] to set your home area. Press return to the screen shown in step then press [MENU/SET] to close the menu.
-
Page 110: Location Candidates For World Time Settings
Others Location candidates for World Time settings Offset from Midway Islands Hawaii Alaska Vancouver Denver Chicago Toronto Caracas -3:30 Newfoundland Rio de Janeiro Fernando de Noronha Azores London Berlin Helsinki Moscow +3:30 Tehran Dubai +4:30 Kabul Islamabad +5:30 Delhi +5:45 Kathmandu Dacca +6:30... -
Page 111: Cautions For Use
Cautions for Use Optimal use of the camera Take care not to drop or knock the unit or put a lot of pressure on it. • Take care not to drop or knock the bag that you inserted the unit in as it may strongly shock the unit. - Page 112 Others About dirt on the image sensor This camera features an interchangeable lens system so dirt may get inside the camera body when changing lenses. Depending on the recording conditions, dirt on the image sensor may appear on the recorded picture. Do not change lenses where there is a lot of dust, and always attach the body cap when a lens is not attached to the camera,...
- Page 113 About the recorded data • Recorded data may be damaged or lost if the camera breaks down due to inappropriate handling. Leica Camera AG will not be liable for any damage suffered due to loss of recorded data. About tripods...
-
Page 114: Message Display
Others Message Display Confirmation messages or error messages will be displayed on the screen in some cases. The major messages are described below as examples. [THIS MEMORY CARD IS PROTECTED] The Write-Protect switch on the SD Memory Card or the SDHC Memory Card is slid to the [LOCK] side. -
Page 115: Troubleshooting
Troubleshooting If you return the menu settings to the initial settings at the time of purchase, the condition may improve. Select [RESET] in the [SETUP] menu. (P29) Battery and power source 1: The camera cannot be operated even when it is turned on. •... - Page 116 Others 6: The recorded picture is blurred. The optical image stabilizer is not effective. • The shutter speed will become slower and the optical image stabilizer function may not work properly when taking pictures especially in dark places. In this case, we recommend holding the camera firmly with both hands when taking pictures (P31, 51).
- Page 117 3: The folder number and the file number are displayed as [ ] and the screen turns black. • Is the picture edited with a PC or recorded with a digital camera from another manufacturer? This may happen if you remove the battery immediately after recording or you record with an exhausted battery.
- Page 118 Others TV, PC and printer 1: The picture does not appear on the television. • Is the camera connected to the TV correctly? • Set the TV input to external input mode. 2: The display areas on the TV screen and the camera’s LCD monitor are different.
- Page 119 5: The camera becomes warm. • The surface of the camera may become warm during use. This does not affect the performance or quality of the camera. 6: The clock is reset. • If you do not use the camera for a long time, the clock may be reset.
-
Page 120: Number Of Recordable Pictures
Others Others Number of recordable pictures • The number of recordable pictures is an approximation. (These vary depending on the recording conditions and the type of card.) • The number of recordable pictures depends on the subjects. • The numbers in brackets are when [RAW REC.] is set to [ON]. Aspect ratio Picture size Quality... - Page 121 Aspect ratio Picture size Quality 2 (0) 16 MB 5 (1) 32 MB 13 (3) 64 MB 27 (6) 128 MB 55 (13) Card 256 MB 110 (27) 512 MB 220 (54) 1 GB 450 (110) 880 (125) 1700 (135) 700 (120) 1360 (130) 2560 (135) 2 GB 880 (210) 1740 (240) 3350 (260) 1380 (230) 2680 (260) 5020 (270) 4 GB...
-
Page 122: Specifications
Others Specifications Camera Body Power Source: Power Consumption: Camera effective pixels: 7,500,000 pixels Image sensor: Digital zoom: Extended optical zoom (Except for the maximum picture size for each aspect ratio): Focus: Shutter System: Continuous recording Frequency: Number of recordable pictures: ISO sensitivity: Shutter speed: White balance:... - Page 123 [USB]: [V OUT/REMOTE]: [DC IN]: Dimensions: Mass: Operating temperature: Operating humidity: AC Adaptor (LEICA ACA-DC3) Output: Input: Battery Pack (lithium-ion) (LEICA BP-DC3) Voltage/capacity: Built-in pop up flash Flash range: Approx. 2.5 m (8.2 feet) to 7.0 m (23.0 feet) (Supplied lens attached, Wide, When the ISO sensitivity is set to [AUTO].)
- Page 124 Mount Max. diameter Overall length Mass LEICA D VARIO-ELMARIT 14– 50 mm f/2.8– 3.5 ASPH. f=14 mm to 50 mm (35 mm film camera equivalent: 28 mm to 100 mm) 7 leaf/iris diaphragm F2.8 (Wide) to F3.5 (Tele) 16 elements in 12 groups (2 aspherical lenses) 0.29 m (0.95 feet) to...
-
Page 125: Accessories
Description Figure UVa Filter Polarizing Filter (Circular Type) Remote Control Unit Neoprene camera bag for LEICA DIGILUX3 and LEICA D VARIO-ELMARIT 14–50 mm f/2.8–3.5 Combination bags “Billingham” black/khaki Adapter for using LEICA R Lenses on 4/3-standard cameras Others... -
Page 126: Index
Others Index AC Adaptor ...18, 19, 98, 100 AC Mains Lead Caution...130 Adjusting the flash output ...61 AF Assist Lamp ...82 AF Frame ...85 AF+MF ...86 AF/AE Lock ...63 AF/AE Lock Hold ...86 AFC ...35 AF-LED ...86 AFS ...32, 54 Aperture-Priority AE ...36 Aspect Ratio ...79 Auto Bracket ...66, 83... - Page 127 Layout ...102 LCD Auto ...85 LCD monitor ...14 Leica Academy ...130 Leica Customer Service...131 Leica information Service ...131 Leica on the Internet ...130 Lens ...16 Lens Cap ...17 Lens Hood ...23 Lens rear cap ...16 Live View ...50 LONG SHUTTER NR ...87 MANUAL ...89...
-
Page 128: Installing The Software On The Cd
Others Installing the Software on the CD The supplied CD contains Adobe ® ® Photoshop Elements (Windows ® V3.0 ) and Apple QuickTime ® (English) for Windows Installation of Adobe Photoshop ® Elements Notice: The serial numbers for Adobe ® ®... - Page 129 Installation of Quick Time for Windows (Windows 2000 and higher): ® Notice: Apple QuickTime playback AUDIO and VIDEO files. Insert the CD into your CD/DVD drive. Usually the Adobe Photoshop installer will start automatically. Cancel the installer and open the CD/DVD drive in the Windows Explorer.
-
Page 130: Leica Academy
As well as outstanding high-performance products for taking, reproducing and viewing photographs, for many years we have also been offering the special services of the Leica Akademie, with practical seminars and training courses, which are intended to share our knowledge about the world of photography, projection and magnification with both beginners and advanced photographic enthusiasts. -
Page 131: Leica Customer Service
Leica information service The Leica information service can provide you with an answer to any technical questions relating to the Leica range either in writing, on the telephone or by e-mail. Leica Camera AG Informations-Service Postfach 1180 D-35599 Solms Tel:... -
Page 132: Ac Mains Lead Caution
A replacement fuse cover can be purchased from your local Leica Dealer. IF THE FITTED MOULDED PLUG IS UNSUITABLE FOR THE SOCKET OUTLET IN YOUR HOME THEN THE... - Page 133 Others...
- Page 134 Others...
- Page 135 Others...
- Page 136 Leica Camera AG / Oskar-Barnack-Str. 11 / D-35606 Solms www.leica-camera.com / info@leica-camera.com Telefon +49 (0) 64 42-208-0 / Telefax +49 (0) 64 42-208-333...
Need help?
Do you have a question about the Digilux 3 and is the answer not in the manual?
Questions and answers