Advertisement
Advertisement

Subscribe to Our Youtube Channel
Related Manuals for Growatt GroBoost

Summary of Contents for Growatt GroBoost
- Page 1 GroBoost quick installation guide SHENZHEN GROWATT NEW ENERGY TECHNOLOGY CO.,LTD...
-
Page 2: Table Of Contents
Catalog 一、Overview ..................... 1 二、Installation ....................6 三、Multiple Work Modes ................. 11 四、Device parameters ..................21 五、Common Problem ..................22 六、APP Register .................... 23 七、GroBoost Setting the Groboost via Shinephone APP ........ 25... -
Page 3: 一、Overview
Open the package, take out all the accessories, and check the quantity of all the components in the box according to the package list, As shown in Figure 1-1 and Table 1-1. Figure 1-1 Accessories Number GroBoost whole machine PT1000 temperature sensor Antenna Quick installation guide Wall-mounted bracket Screws Seal bottom cover screw 4+2(More than)... - Page 4 Among them, GroBoost could control the temperature of the water heater, and work automatically when the solar system has surplus power exporting to the grid to maximize solar self-consumption.
- Page 5 1-2, in which the Inverter is communicated with the meter through RS485, and communicate with the LanBox through ShineRFStick. This application scenario is suitable for the Growatt new generation inverter, like MIN, MID, MOD, SPH and SPA series, which could support to upload the energy meter date to the server.
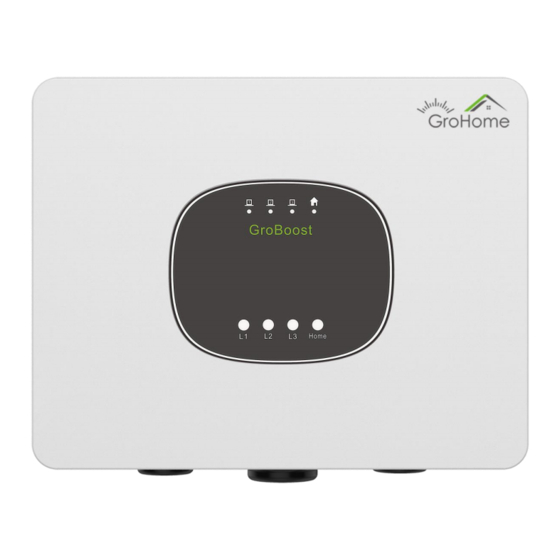
- Page 6 Figure 1-4 Description Name Description Indicator lights LED1 Indicator lights for phase Buttons LED2 Indicator lights for phase Indicator lights for phase 电源线接线头 LED3 L3,and for the RF communication status 负载线接线头 LED4 Power indicator 信号线接线头 Phase L1 control button Phase L2 control button...
- Page 7 Phase L3 control button Home RF pairing / Reset / Factory Reset Table 1-2 The following figure 1-5 is the wiring interface of GroBoost, and its functions and definitions are detailed in Table 1-3. Figure 1-5 Description Description Relay A input port...
-
Page 8: 二、Installation
⚫ Make sure to read the instructions to understand product information and safety precautions before installation; ⚫ The installer must use insulated tools and wear safety equipment during the installation procedure; ⚫ Construct sun and rain shelters to avoid GroBoost directly exposed to sunlight and rain. Figure 2-1 ◆ Installation Process ⚫... - Page 9 tube, and screw into the wall, to fix the wall hanging. Figure 2-2 ⚫ There are four screws on the bottom cover of the whole machine, please use a screwdriver to dismantle the screws Loosen these screws Figure 2-3 ⚫ Remove the lower cover and start to wire it Figure 2-4...
- Page 10 ⚫ The wire harness passes through the corresponding three terminals and screwed themon the terminals. A 5 pin three-phase power input terminal is for power input line, 3 pin power output terminals is for loads, and the 3 pin RS485 and 12Vdc terminals are for the communication of the future application.
- Page 11 ⚫ Adjust the length of the power and load lines, screw the covers, adjust the wiring head to reduce the space, and make the sealing degree higher. Figure 2-8 ⚫ Fix the GroBoost on the wall, and tighten the screws on the side.
- Page 12 Figure 2-9 GroBoost Notice for wiring: ⚫ Remove the lower cover of GroBoost, and you need to pass the wire harness through the corresponding three terminals to prevent the wire harness from being twisted. ⚫ Use a no less than 4mm2 copper core wire for the power line, ground line, and load line.
-
Page 13: 三、Multiple Work Modes
◆ Load Wiring The diverse load situation corresponds to different wiring ways. In addition, if the immersion heater doesn’t have a temperature sensor, and the GroBoost needs to use the temperature sensors (Pt1000). The following table 3-1 shows the wiring diagram of a diverse load situation.The following figure is the overall detailed wiring diagram. - Page 14 Relay OUT1, and L2/L3 phase power output, Three-phase load is linked with the PT1000 of the T2 terminal. Table 3-1 The following figure is the overall detailed wiring diagram: Load situation one: A single-phase resistive load, such as the immersion heater for water heater.
- Page 15 Figure 3-1 Load situation two: two single-phase resistive loads, such as two immersion heaters for each water heater. ⚫ Three-phase power input, a single-phase L1 adjustable power output mode and a singlephase L2 fixed power output mode. Two PT1000 temperature sensors for loads of each phase. Figure 3-2 Load situation three: three single-phase resistive loads, such as one immersion heater for water heater and two heating spaces.
- Page 16 Figure 3-3 Load situation four: a three-phase resistive load. ⚫ Three-phase power input, among three-phase L1/L2/L3, the power of phase L1 is adjustable while that of L2/L3 is fixed, and one PT1000...
- Page 17 temperature sensor for threephase load. Figure 3-4 Load situation five: a three-phase resistive load and a single-phase resistive load(automatically switchover between two loads through dry contact relay) Three-phase power input, among three-phase L1/L2/L3, the power of ⚫ phase L1 is adjustable while that of L2/L3 is fixed. The power of the single-phase load in phase L1 is adjustable.
- Page 18 Figure 3-5 注意 ⚫ Phase L1 has an adjustable power output mode while phase L2/L3 is a fixed power output mode. The adjustable power output mode is used for the PV linkage application,the power output will be adjusted for the resistive load according to the surplus solar power.
- Page 19 Smart mode: The GroBoost will accord to the timing period and the temperature being set to work, which has 5 groups of settable time periods. During the smart mode, the device will work based on its rated power, however, the power...
- Page 20 Mandatory mode: Triggered by manual button, and it could enable the GroBoost to work forcedly, and stop until it reaches the maximum temperature (default temperature is 65 °C), often being used in an emergency situation. For security, the maximum duration of mandatory mode is 2 hours by default.
- Page 21 The machine is during Smart mode LED3 to LED1 Led3 Flash once every 5S RF device is not connected Table When GroBoost is working normally, the real-time operating status will be displayed through LEDs. The specific content is shown in Table 3-4: Button Button Indicator...
- Page 22 Table Pairing process: ⚫ STEP1 Press the Home button of GroBoost for 15S, the LED3 light flashes at a frequency of 0.5S ⚫ STEP2 Short press the pairing button of host (ShineLanBox), as shown on the left...
-
Page 23: 四、Device Parameters
Figure 5.1, the pairing light ④of the host flashes quickly, they are pairing; ⚫ STEP3 The GroBoost LED3 light does not flash, the host (ShineLanBox) pairing light ④ is off, the device light ③ flashes, and the pairing is successful; Note: The flash number of times of the ShineLanBox device light③... -
Page 24: 五、Common Problem
⚫ Check whether the GroBoost antenna is well connected; ⚫ Check whether the GroBoost has been paired with ShineLanbox, try to pair again; ⚫ Check the distance between GroBoost and ShineLanbox, is it too far or is blocked by a wall, try to move ShineLanbox closer to GroBoost. -
Page 25: 六、App Register
5.3 RS485 can’t communicate ⚫ Check whether the 485 connection is wired, try to replace the 485 cable; ⚫ Check whether the communication parameters are correct, the baud rate, etc. 六、APP Register ◆ Register Before using ShinePhone APP first time, the user must register an account in advance. - Page 26 (2)Add Plant Figure 6-2 a) Add power station name, installation date, country and city, detailed address, time zone, total power of components, power station type, capital gains, power station pictures. (3)Add datalogger Figure 6-3 a) You can add a data logger by entering the serial number or scanning the collector's barcode, and entering the collector check code.
-
Page 27: 七、Groboost Setting The Groboost Via Shinephone App
+ single phase + single phase, single phase + three phase), and after setting the load related information, the real-time information of the load can be displayed and the load can be controlled (Groboost can connect up to 3 resistive heating loads). - Page 28 Figure 7-2 Load type: confirm the connected load; You need to configure the basic information of each connected load separately: working power, custom name, settable load icon, and confirm whether the temperature sensor is connected (after connecting the extra temperature sensor, the load can be detected and controlled for temperature ); (2)Mode setting Mode settings can be divided into two types, one is smart mode, the other is PV linkage mode;...
- Page 29 Figure 7-3 ② Photovoltaic linkage mode: Select the load to be controlled, select the priority, enter the linkage name, confirm whether the linkage meter is correct, turn on the linkage enable switch, control linkage execution time, and set linkage tasks. Linkage details need to save at least one load, click on the load to enter the advanced settings: * Recommended settings:...
- Page 30 Figure 7-4 a) When photovoltaic power is fed into the grid, turn on heating and set the working parameters of the device; such as: set the temperature and the maximum operating time of the device to avoid excessive operation and waste of electricity;...
- Page 31 days of the week. When the user does not set the timing, and starts the linkage. Figure 7-6 c) Regarding the heating guarantee function: it belongs to the backup plan setting function. The purpose of the heating guarantee function is to ensure that certain time periods are heated to a fixed temperature value.
- Page 32 Figure 7-7 (3)Reset load information On the GroBoost homepage, click the upper right corner to enter the detailed information, select the connected load, and the system will prompt whether to reset it. After confirming, the original load information will be overwritten.
- Page 33 the maximum temperature when the temperature sensor is not connected. (4)Load management The load management interface has the functions of editing, turning on and off the load, switching the working mode, setting the maximum temperature, current power, power, setting the rated power, graphs (power, current, voltage, temperature), and deleting the load.
Need help?
Do you have a question about the GroBoost and is the answer not in the manual?
Questions and answers