Table of Contents
Advertisement
Quick Links
Advertisement
Table of Contents

Subscribe to Our Youtube Channel
Related Manuals for midiplus Vboard 25


Summary of Contents for midiplus Vboard 25
- Page 1 Vboard 25 User Manual Ver 0.1 MIDIPLUS...
-
Page 2: Table Of Contents
4.5 Logic Pro X (MMC) ............................... 18 4.6 Reaper (MMC) ..............................19 5. Bluetooth MIDI Connect(iOS) ..........................20 6. Appendix ................................22 6.1 Specifications ............................... 22 6.2 Scales ..................................22 6.3 MIDI CC List ................................23 6.4 MIDI DIN to 3.5mm TRS Adapter ........................24 Vboard 25 User Manual... -
Page 3: Introduction
Vboard 25 built-in rechargeble battery for Bluetooth MIDI connection. The screen will blink and the Vboard 25 will turn off after 3 minutes when the battery is low power. Continual use of the Vboard 25 while the battery is low power may impair its performance and can decrease the life-span of the battery. -
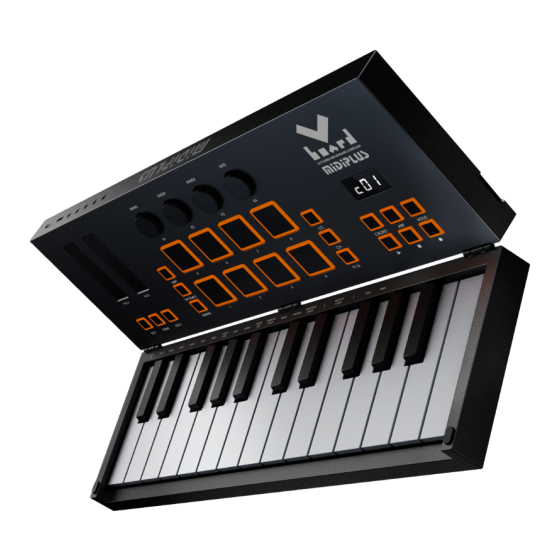
Page 4: Overview
⑭ Transport: Offers MMC and MIDI CC modes, controls your DAW’s transport or MIDI Learn functions. ⑮ Displsy: Provides real time feedback of control information. ⑯ Keyboard: Trigger notes on/off, and easy access to select scales when hold down the Shift button. Vboard 25 User Manual... -
Page 5: The Rear Panel
Use with computer: Connect Vboard 25 to your computer using the included USB cable. Hold down the Power button to turn on the power. Vboard 25 is a class-compliant USB device, so its drivers are automatically installed when connecting to a computer. - Page 6 Use with external MIDI device: Connect to a USB 5V power adapter using the included USB cable, connect the MIDI OUT of Vboard 25 to MIDI IN of external MIDI device with a 5 pin MIDI cable. Use with iOS device: Hold down the power button to turn on the power, and turn on Bluetooth on your iOS device, lanuch the APP which support Bluetooth MIDI and connect Vboard 25 in setup menu.
-
Page 7: Keyboard
Use with analog synthesizer: Connect the Vboard 25’s pitch out, gate out and mod out to the analog synthesizer’s CV inputs using 1/8” TS cables, Vboard 25 can be power by the build-in battery. 2.2 Keyboard Vboard 25 has 25 velocity sensitive keys for playing and sending note on/off messages. These keys also can be used as shortcuts to access edit more parameters when hold down the SHIFT button. -
Page 8: Pitch And Modulation
2.3 Pitch and Modulation Two capacitive touch strips of Vboard 25 allows for real-time pitch bend and modulation control. Sliding up or down on the Pitch touch strip will raise or lower the pitch of the selected tone. The range of this effect is set within the hardware or software instrument being controlled. -
Page 9: Knobs
2.5 Knobs Vboard 25 features 4 assignable knobs, which has dual functions: turning knobs to send MIDI CC# message, or hold down the SHIFT button, then turning knobs to set the Swing, Order, Range and Rate of Arpeggiator (please refers to 2.9.1 Arpeggiator... -
Page 10: Chord Mode
“Up/Down”, and “Random”, the screen displays “ord up dn ud rnd” default is “ord”. Order: Plays the current notes in the order they were originally played. Up: Plays the current notes from lowest to highest. Down: Plays the current notes from highest to lowest. Vboard 25 User Manual... -
Page 11: Transport
Hold: Hold the arpeggiator pattern when you lift your hands from the keyboard. 2.10 Transport The Transport buttons of Vboard 25 has 2 working mode: MMC (MIDI Machine Control) and MIDI CC, When hold down the Shift button, then press the transport button to toggle the working mode, the DAW’s transport control settings please refers to 4. -
Page 12: Pads And Pad Mode Buttons
2.11 Pads and Pad mode buttons Vboard 25 features 8 velocity and pressure sensitive pad with backlit, they has 3 working modes included MIDI Note, MIDI CC and MIDI Channel. The default is MIDI Note mode, 8 Pads sends MIDI note from C1 to G1, when activate the 9-16 button, 8... -
Page 13: Restore To Factory Settings
CH 4 3. Restore to Factory Settings To perform a factory reset on your Vboard 25, please follow these steps: 1. Turn off the power of Vboard 25, 2. Hold down the "OCT+" and "OCT-" buttons simultaneously, then turn on the power, 3. -
Page 14: Daw Settings
1. Go to menu: Transport > Project Synchronization Setup... 2. Select the Machine Control and enable MMC Slave Active, set the MIDI Input and MIDI Output as Vboard 25, then set the MMC Device ID as 116 3. Click on OK to finish setup Note: Cubase LE/AI/Elements does not support MMC. -
Page 15: Fl Studio(Mmc)
4.2 FL Studio(MMC) 1. Go to menu: Options > MIDI settings (keyboard shortcut F10) 2. In the Input tab, find and Enable Vboard 25, then close the window to finish setup 4.3 Studio One (MMC) 1. Go to menu: Studio One > Options...(keyboard shortcut: Ctrl+, ) - Page 16 3. Then click on Add... 4. Select New Keyboard 5. Set both Receive From and Send To as Vboard 25 6. Click on OK to finish this part * Step 7 and 8 applies to Studio One 3 and earlier version...
- Page 17 7. Click on Add... 8. Find the PreSonus folder in the list and select MMC, set both Receive From and Send To Vboard 25, then click on OK to finish setup. * Step 9 and 10 applies to Studio One 4 and later version 9.
-
Page 18: Pro Tools (Mmc)
10. Select the Advanced and select the Synchronization, enable the Sync to External Devices, set MIDI Machine Control is Vboard 25, then click on OK to finish setup. 4.4 Pro Tools (MMC) 1. Go to menu: Setup > Peripherals... Vboard 25 User Manual... -
Page 19: Logic Pro X (Mmc)
ID as 116, then close the window to finish setup. 4.5 Logic Pro X (MMC) 1. Go to menu: Control Surfaces > MIDI... 2. Select the Sync window, find the MIDI sync Project Settings... and click on it Vboard 25 User Manual... -
Page 20: Reaper (Mmc)
3. Enable the Listen to MIDI Machine Control (MMC) Input , then close the window to finish setup. 4.6 Reaper (MMC) 1. Go to menu: Options > Preferences... (keyboard shortcut: Ctrl + P) Vboard 25 User Manual... -
Page 21: Bluetooth Midi Connect(Ios)
2. In the Preferences window, click on the MIDI Devices tab, find and right click on the the Vboard 25 from the Device list, select Enable input and Enable input for control messages, then close the window to finish setup. - Page 22 4. Tap on the Advanced menu 5. Tap on the Bluetooth MIDI Devices 6. Find “Vboard 25” in the list and tap to connect Note: Bluetooth MIDI communication has a certain delay, and its connection stability will be affected by transmission distance, environment, obstacles, data volume, devices and other factors.
-
Page 23: Appendix
C, Db, E, F, G, Ab, B Harmonic Minor C, D, Eb, F, G, Ab, B Minor C, D, Eb, F, G, Ab, Bb Phrygian C, Db, Eb, F, G, Ab, Bb Hung Min C, D, Eb, F#, G, Ab, B Vboard 25 User Manual... -
Page 24: Midi Cc List
All Notes Off 46 ~ 48 Undefined Omni Mode Off 49 ~ 52 General Purpose Controller LSB 1 ~ 4 Omni Mode On 53 ~ 63 Undefined Mono Mode On Sustain Poly Mode On Portamento On/Off Vboard 25 User Manual... -
Page 25: Midi Din To 3.5Mm Trs Adapter
6.4 MIDI DIN to 3.5mm TRS Adapter Vboard 25 features a 3.5mm mini jack MIDI OUT, if you want to connect to the standard 5 pin MIDI IN, you need to use a 3.5mm TRS to MIDI DIN adapter, please note that there are 3 most common type adapter, make sure you are using the Type A, the MIDI-pin arrangement as below: MIDI 4 (Source) >... - Page 26 Vboard 25 User Manual...
Need help?
Do you have a question about the Vboard 25 and is the answer not in the manual?
Questions and answers