Table of Contents
Advertisement
Quick Links
Advertisement
Table of Contents

Related Manuals for Harman JBL Professional Ivx HP-DS170


Summary of Contents for Harman JBL Professional Ivx HP-DS170
- Page 1 Installation Manual JBL Professional Intellivox - High Power series* Models Ivx HP-DS170 and Ivx HP-DS370 (Part Nos. 587870 & 587890) *This manual is valid for hardware series 2. Ivx HP-DS370 with serial number 15700092 and up are hardware series 2. All Ivx HP-DS170 are hardware series 2.
-
Page 2: Reference To Ec Statement Of Conformity
REFERENCE TO EC STATEMENT OF CONFORMITY USER’S NOTICE AND DISCLAIMER: This document confirms that products manufactured by Harman Professional Kft bearing the CE label meet all the No part of this manual including the software described requirements in the EMC Directive 2014/30/EU, LV... -
Page 3: Table Of Contents
Intellivox HP series Installation Manual Rev 2.1 ® TABLE OF CONTENTS Reference To EC Statement Of Conformity....2 User’s Notice and Disclaimer ......2 1. -
Page 4: Important Safety Instructions
Intellivox HP series Installation Manual Rev 2.1 ® 1. IMPORTANT SAFETY INSTRUCTIONS This symbol is intended to alert you to the 14) Refer servicing to qualified service personnel. Servicing presence of uninsulated dangerous voltages is required when the apparatus has been damaged in any within the product’s enclosure that may be way, such as power-supply cord or plug is damaged, liquid of sufficient magnitude to constitute a risk of... -
Page 5: Introduction
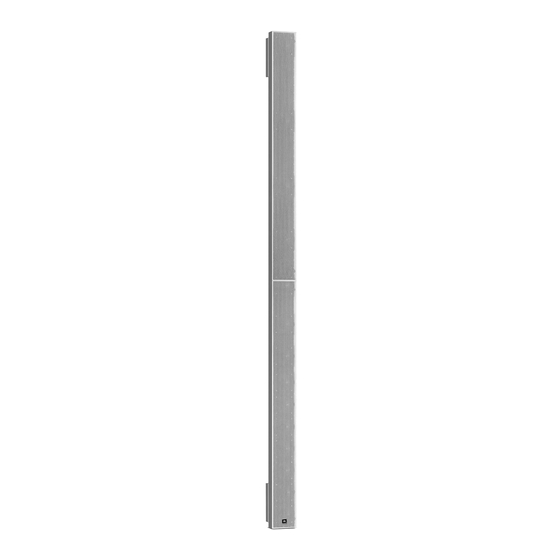
Intellivox HP series Installation Manual Rev 2.1 ® 2. INTRODUCTION This manual describes the recommended installation APPLICABLE MODELS AND VARIANTS procedure for the JBL Professional Intellivox HP (High This manual applies to the following JBL Intellivox models*: Power) series of loudspeakers. Intellivox HP-DS170 The JBL Intellivox is a type of loudspeaker known as an Intellivox HP-DS370 (HW series 2) -
Page 6: What's In The Packaging
Intellivox HP series Installation Manual Rev 2.1 ® WHAT’S IN THE PACKAGING In addition to the loudspeaker itself, each unit is shipped with the following items: • Two mounting hinge brackets, pre-attached* to the loudspeaker • Installation manual (this document) •... -
Page 7: Installation Guide
Intellivox HP series Installation Manual Rev 2.1 ® 3. INSTALLATION GUIDE PREPARING FOR INSTALLATION • All cables to the Intellivox should pass through glands or flexible conduit at the rear of the unit. If the particular Before starting to install the Intellivox loudspeaker, a installation circumstances permit (i.e., the height of the number of points should be considered. - Page 8 Intellivox HP series Installation Manual Rev 2.1 ® • Network connection: all Intellivox products are • Ambient Noise Sensing: the DSP section of the configured, and may also be monitored, from a PC running Intellivox incorporates an autogain algorithm which can WinControl software.
-
Page 9: Connector And Wiring Details
Intellivox HP series Installation Manual Rev 2.1 ® CONNECTOR AND WIRING DETAILS All permanent connections to the Intellivox are made at the rear of the unit. 1: RS-485, 1=DGND, 2=Y (+xmt), 3=Z (-xmt), 4=B (-rcv), 5=A (+rcv) 2: Failure Relay, 1=Common, 2=10k/20k Ohm, 3=short/open 3: Audio line input 2 (0 dBV), 1=+, 2=GND, 3=- 4: Audio line input 1 (0 dBV), 1=+, 2=GND, 3=- 5: 100 V input, 1=+, 2=-... -
Page 10: Ac Mains
Intellivox HP series Installation Manual Rev 2.1 ® AC MAINS US wiring shown in example. Warning – ensure that the mains supply is switched off at the source before starting work. Warning – risk of electric shock. Do not Fig.6 Mains wiring (without cover fitted). remove the cover plate unless the mains supply has been disconnected. -
Page 11: Audio Inputs
Intellivox HP series Installation Manual Rev 2.1 ® AUDIO INPUTS If the Intellivox is being fed from equipment whose outputs are on 3-pin XLR connectors, follow the wiring procedure The Intellivox is normally fitted with two transformer- below: balanced line inputs and one input for connection to a 100 V-line system. - Page 12 Intellivox HP series Installation Manual Rev 2.1 ® Due to the complex architecture of some large audio systems, unexpected hum or noise may occur due to ground loops, or injected noise from other equipment elsewhere in the system. If this occurs, please refer to the appendix of this manual (“Common Analogue Grounding Issues”...
-
Page 13: Network Connection
Intellivox HP series Installation Manual Rev 2.1 ® NETWORK CONNECTION Note that two-pair, individually-screened cable should be used for RS-485 communications. The transmit (Tx) The RS-485 network connection should be wired if the and receive (Rx) balanced data lines must be wired via Intellivox is to be constantly monitored in operation. -
Page 14: Fault Monitoring
Intellivox HP series Installation Manual Rev 2.1 ® FAULT MONITORING The relay connections are available either as volt-free, or with additional internal resistors to allow them to be The Intellivox includes a failure relay whose contacts connected directly to impedance-sensing line monitoring are accessible on a 3-pole 3.81 mm-pitch screw terminal equipment such as the AXYS Cerberus. - Page 15 Intellivox HP series Installation Manual Rev 2.1 ® • Impedance sensing mode: When wired for impedance- Fault Monitoring when using the 70 V/100 V input. sensing use, the impedance between ‘Common’ and pin 2 If the Intellivox’s 100 V input is in use, a simple failure is 10 kOhm.
-
Page 16: Status Led
Intellivox HP series Installation Manual Rev 2.1 ® STATUS LED There are 2 additional indications: The Intellivox is equipped with an LED that can be * The dot on the display is lighted as soon as it is detected configured to indicate the status of the failure relay. The that the power supply is present. -
Page 17: Mechanical Installation Of The Loudspeaker
Intellivox HP series Installation Manual Rev 2.1 ® MECHANICAL INSTALLATION OF THE LOUDSPEAKER Because of the extreme tight vertical radiation pattern of the Intellivox, a small deviation ACOUSTIC CENTRE from the calculated mounting height may Mounting an Intellivox loudspeaker is a straightforward cause severe degradation of the expected performance. -
Page 18: Mounting Options
Intellivox HP series Installation Manual Rev 2.1 ® MOUNTING OPTIONS The standard hinge brackets allow mounting of the Intellivox on a straight wall with a gap of 95 mm The Intellivox has two attachment points at the rear of (3.75”) between the rear of the enclosure and the wall. the enclosure;... -
Page 19: Mounting Procedure
Intellivox HP series Installation Manual Rev 2.1 ® 2. The second method is to mount the column within a MOUNTING PROCEDURE recess in the wall or dedicated mounting panel so The general mounting procedure using the standard hinge that the front of the unit is flush. This is a specialised brackets is described below. - Page 20 Intellivox HP series Installation Manual Rev 2.1 ® Proceed as follows: 1. Using the drilling template in the Appendix of this 5. Lift the Intellivox and slide the brackets over the heads manual, mark the wall for the wall plugs. Refer also of the hex-head screws protruding from the wall.
-
Page 21: System Checks
Intellivox HP series Installation Manual Rev 2.1 ® 4. SYSTEM CHECKS SETTINGS FILE UPLOAD • Apply mains power to the Intellivox, turn on the PC and launch WinControl. Open Options > After installation and connection are complete, the Communications options, confirm that the installer should upload the settings file into the Intellivox Off-line box is unchecked and that the correct COM with WinControl software. - Page 22 Intellivox HP series Installation Manual Rev 2.1 ® • Select the Intellivox to have its settings file uploaded by To navigate to the location containing the settings clicking on it once, highlighting its model number and file to be uploaded, click on the Browse button address, if it is not already highlighted.
-
Page 23: Appendix
Intellivox HP series Installation Manual Rev 2.1 ® 5. APPENDIX OPTIONAL ACCESSORIES Listed below are a number of additional components which may be required for an individual installation. Other installation-reated accessories: DESCRIPTION ORDER SKU Intellivox HP-series Cable gland plate with two M25 holes IVX-802140 Network Accessories DESCRIPTION... -
Page 24: Drilling Template
TOP COLUMN Verify all dimensions after printing. 150mm [5.906 Inch] Drill Hole 10 mm Drill Hole 10 mm Drill template for Intellivox HP-DS/DC For more information see install manual and mechanical details Print on A4, No scaling! Reference point for acoustical mounting height in case of lower bracket. -
Page 25: Common Analogue Grounding Issues
Intellivox HP series Installation Manual Rev 2.1 ® COMMON ANALOGUE GROUNDING ISSUES SOFTWARE AND FIRMWARE UPDATES Correctly connecting the Intellivox to ground has several The JBL WinControl application is freely available and can benefits: be downloaded from our website; www.jblpro.com. We advise installers, users and engineers to check our site Safety –... - Page 26 JBL Professional 8500 Balboa Boulevard Northridge, CA 91329 U.S.A. © Copyright 2020 JBL Professional www.jblpro.com...
Need help?
Do you have a question about the JBL Professional Ivx HP-DS170 and is the answer not in the manual?
Questions and answers