
Related Manuals for MaxxGarden 20733


Summary of Contents for MaxxGarden 20733
- Page 3 WARNINGS • Outdoor use only. DO NOT use the grill indoors or in an enclosed or non-ventilated area. • Keep a fire extinguisher near this product at all times. • For household use only. DO NOT operate this grill for other than its intended use. •...
-
Page 4: Parts List
Parts List Desc. Pic. Desc. Pic. shelf e for lid Charcoal door handle washer Charcoal door locking part grip Side handle Side handle washer Ash tray handle ... -
Page 5: Part List
Part List Desc. Pic. Desc. Pic. p i l M6*20 shoulder screw M6*70 screw... - Page 6 Assembly Note: Please do not tight the screws and nuts till all assembly steps completed. 1. Fix side panels LH*RH (10, 11) with 8pcs M6x12 screws (B) to front panel (13) and rear panel (9). Fix 2 pcs air vents (24) onto the side panels by 2pcs M6*12 screws (B) and 2pcs M6 nuts (A).
- Page 7 Assembly 2. Fix leg end cover (16) on two of legs (14 & 15).
- Page 8 Assembly 3. Fix two legs (14 & 15) with 4pcs M6x12 screws (B) to the left side panel. Fix the two remaining legs (25 & 26) to the right side panel with 4pcs M6x12 screws (B) .
- Page 9 Assembly 4. Fix bottom shelf (21) to the legs with 4pcs M6x12 screws (B). Fix the wheel axle (22) into the legs (25&26). Then fix the 2 wheels (23) by 2pcs M10 nuts (J).
- Page 10 Assembly 5. Fix the charcoal door handle (28), the charcoal door handle washer (29) and charcoal door locking part (30) to the front panel by 1pc M6 nut (A).
- Page 11 Assembly 6. Charcoal pan (17) is fixed into the body with 6pcs M6*12 screws (B).
- Page 12 Assembly 7. Handle grip (32) is fixed to the front panel (13) with 2 pcs M6*12 screws (B).
- Page 13 Assembly 8. The lever handle (31) goes thru the front panel hole. 1pc M6*20 shoulder screw (H) goes thru charcoal tray connecting bar hole from inside, then fixed with lever handle thread hole at the top end.
- Page 14 Assembly 9. Fix Ash tray handle (20) and 2pcs washers (3) to Decorating strip (19) and ash tray (18) by 2pcs M6*16 screws (D). Then fix the ash tray to the body.
- Page 15 Assembly 10. Lower hingers (8) are fixed to the back panel (9) with 4pcs M6*40 screws (C).
- Page 16 Assembly 11. Bottle opener (12) is fixed on the left front leg with 2 pcs M6*12 screws (B). Fix side handle (34) and side handle washer (35) with 2 pcs M6*70 screws (I).
- Page 17 Assembly 12. Fix side table (27) to right side by 4pcs M6*20 shoulder screws (H). Fix the hooks (7) to end of side table which has thread holes already, using 4pcs M4*8 screws (K).
- Page 18 Assembly 13. Fix handle for lid (4), handle washer (3) to lid (1) by 2pcs M6*40 screws (C). Fix the upper hinges (33) to lid by 4pcs M6*40 screws (C) and 4pcs M6 nuts (A).
- Page 19 Assembly 14. Fix the 2pcs air vents (24) to the lid by 2 pcs M6*12 screws (B) and 2pcs M6 nuts (A). Fix the thermalmeter (2) on the top of lid by its own nut.
- Page 20 Assembly 15. Lid is fixed to the body by locking the upper and bottom hinges by 2pcs pins (F) and 2pcs R clips (G).
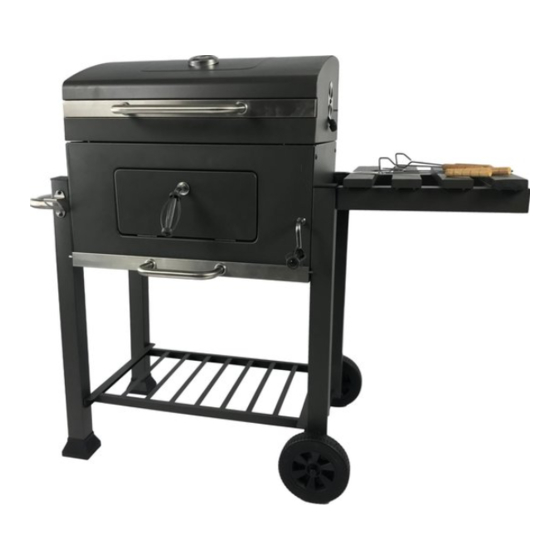
- Page 21 Assembly 16. Fix the warming grid (5) into the lid and body. See detailed for fixing into the body. Put the cooking grids (6) on and ready for cooking. Tight all screws before use Assembly completed...
Need help?
Do you have a question about the 20733 and is the answer not in the manual?
Questions and answers