Table of Contents
Advertisement
Quick Links
Advertisement
Table of Contents

Related Manuals for Vimar ELVOX 40610.S


Summary of Contents for Vimar ELVOX 40610.S
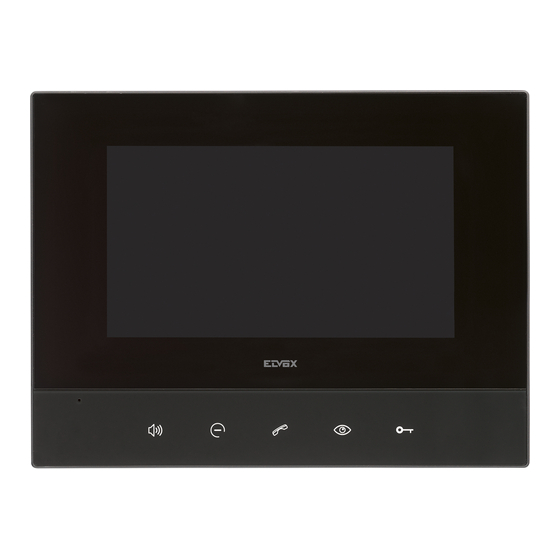
- Page 1 User manual 40610.S SIP 7" video entryphone...
- Page 2 40610.S - SIP 7" video entryphone...
-
Page 3: Table Of Contents
40610.S - SIP 7" video entryphone Table of Contents General information .............................. 3 Description ..............................3 Warnings ............................... 3 1.2.1 Maintenance ............................3 1.2.2 Warnings for the user ........................... 3 Characteristics .............................. 3 1.3.1 Calls ..............................3 1.3.2 Connectivity ............................3 1.3.3 Video .............................. - Page 4 40610.S - SIP 7" video entryphone Dashboard ..............................76 Phonebook ..............................78 9.3.1 Create a contact ........................... 79 9.3.2 Edit a contact ............................80 9.3.3 Delete a contact ........................... 81 Settings ................................. 83 9.4.1 VoIP ..............................83 9.4.2 Networking ............................90 9.4.2.1 Wi-Fi ..............................
-
Page 5: General Information
40610.S - SIP 7" video entryphone General information Description Wall-mounted hands-free video entryphone for seamless integration into new and existing SIP solutions, integrated Wi-Fi and Ethernet, with touch-screen colour LCD display, capacitive keyboard for video door entry functions and intercom calls. Warnings 1.2.1 Maintenance... -
Page 6: Web User Interface (Web Ui)
40610.S - SIP 7" video entryphone 1.3.5 Display User Interface (Display UI) • Android-base user interface. • Device configuration via graphic interface. • Versatile contacts list for easy interaction with all system devices. • Configurable and user-defined background. • Pin-protected access to installer configurations. 1.3.6 Web User Interface (Web UI) •... -
Page 7: Device Start-Up
40610.S - SIP 7" video entryphone Device start-up The first time that the device is powered on requires to follow this start-up procedure that comprehends only three simple steps that are described in this section. However, in order to start placing or receiving calls, the Network and the VoIP... - Page 8 40610.S - SIP 7" video entryphone • Confirm the data entered in the previous steps A dialog will ask again to confirm the previous parameters: Once this procedure is completed it will not appear anymore, except after a Factory Reset since the user configuration is completely removed.
-
Page 9: From The Web Ui
40610.S - SIP 7" video entryphone From the Web UI Before connecting to the device using a browser, a Device Discovery needs to be executed in order to know the device IP address. Once it’s known, enter it in the browser’s URL bar and follow this web-based steps that are equivalent to the above procedure: First step •... - Page 10 40610.S - SIP 7" video entryphone • Confirm the data entered in the previous steps Then the device will ask to log in again with the new credentials: Once this procedure is completed it will not appear anymore, except after a Factory Reset since the user configuration is completely removed.
-
Page 11: Main Screen
40610.S - SIP 7" video entryphone Main screen The Main screen is the entry point for any interaction with the device. This screen is the first one to be displayed after the device is powered up and when it exits the Stand-by mode. It’s organized in three main areas: 1. - Page 12 40610.S - SIP 7" video entryphone Icon Action Open the Calls screen from where calls can take place. Open the Calls history screen where all the calls are listed. Open the Monitoring screen to execute a self-start to a SIP external panel Open the Camera screen to start a streaming from an IP cam.
-
Page 13: Call Functions
40610.S - SIP 7" video entryphone Call functions Answering calls When the device receives a call, the incoming call screen shows the video preview of the remote caller to the left and a set of controls to the right and bottom of the screen: The controls at the right are the following: •... -
Page 14: Declining Calls
40610.S - SIP 7" video entryphone After accepting the call, this icon and the Decline icon are removed, the End call icon appears, and the controls that were previously disabled, Open door, Keyboard, More, Volume and Mute, become enabled. Notice that depending on the calling peer characteristics, some controls may be disabled. 4.1.1 Declining calls When an incoming call is waiting to be answered, the Decline call icon or the Back icon can be used to decline the... -
Page 15: Ending Calls
40610.S - SIP 7" video entryphone 4.1.2 Ending calls After the call has been accepted, the Accept call and Decline call icons are hidden and the End call icon becomes available and when this icon or the Back icon are pressed, the call is finished: 4.1.3 Adjusting audio settings If the calling peer supports audio, during a call the volume can be adjusted with the Volume bar and the Mute icon... -
Page 16: Opening The Door
40610.S - SIP 7" video entryphone 4.1.4 Opening the door During a call, if the Open door icon is pressed, the actuator associated to that icon, normally a door lock, is activated: Notice that the DTMF code for the actuator has to be configured when creating the contact. -
Page 17: Activating An Actuator
40610.S - SIP 7" video entryphone 4.1.6 Activating an actuator During a call, an actuator can be activated in two different modes: • The Keyboard icon: By pressing this icon, a dialog with a numeric keypad appears where the DTMF code of the desired actuator can be entered: •... - Page 18 40610.S - SIP 7" video entryphone By pressing this icon, a dialog with the list of actuators associated to the current calling peer appears and the desired actuator can be selected: Notice that in order for an actuator to appear in the list of actuators, it must had been registered as a contact of type Actuator in the Contacts list.
-
Page 19: Placing Calls
40610.S - SIP 7" video entryphone Placing calls The Calls icon in the Main screen allows to place calls: The Calls screen that is opened allows to dial the desired number by using the dial pad in the right: or by selecting directly the desired contact in the left:... - Page 20 40610.S - SIP 7" video entryphone After the number is entered or the contact is selected, the Place call icon is selected to actually place the call: The screen that appears when placing the call is exactly the same as when an incoming call takes place and all the controls behave similarly:...
- Page 21 40610.S - SIP 7" video entryphone Once the call is taking place, if the other peer ends it, the current screen is closed and returns to the Calls screen. The call can also be prematurely terminated before the other peer answers by pressing the End call icon or the Back icon: Afterwards, the current screen is closed going back to the Calls...
-
Page 22: Calls History
40610.S - SIP 7" video entryphone Calls history The Calls history icon in the Main screen opens a list of all the previous calls that took place in the device: The Calls history screen allows to visualize in chronological order all the incoming, outgoing and missed calls: The information is organized in several columns. - Page 23 40610.S - SIP 7" video entryphone Icon Call type An incoming call An outgoing call A missed call An self-start call addressed specifically to the external panel The second column indicates the call number in chronological order. The third column shows the contact name if the peer is registered as a contact or just the dialed number. The fourth column shows the date and time of the call.
- Page 24 40610.S - SIP 7" video entryphone After the Call icon was pressed, the call will take place as described in the Placing calls section. The Delete icon at the bottom of the screen erases all the calls in the history. One or more entries can also be selected for removal, the first one is selected by a long-press, while the next ones can be selected just by a normal press: In both cases, before removing them, a dialog appears asking for a confirmation:...
- Page 25 40610.S - SIP 7" video entryphone...
-
Page 26: Monitoring Functions (Auto-Start)
40610.S - SIP 7" video entryphone Monitoring functions (auto-start) The Monitoring icon in the Main screen is useful for watching the external panel’s camera without the need that someone in the external panel places a call. This functionality is also called auto-start: The Monitoring screen has a similar look &... - Page 27 40610.S - SIP 7" video entryphone • Snapshot: Take a snapshot of the current call. The snapshot can be seen in the Calls history screen. It is disabled until the call is established. • Keyboard: Show a keyboard used for entering a DTMF code. It is disabled until the call is established. •...
-
Page 28: Camera Functions
40610.S - SIP 7" video entryphone Camera functions The Camera icon in the Main screen is useful for watching the streaming from an IP cam or a CCTV: The Camera screen has a similar look & feel as the answering calls screen. - Page 29 40610.S - SIP 7" video entryphone • Stop/Restart streaming: Stop/Restart a streaming. When a streaming is being received, the Stop icon is displayed and when the streaming is stopped, the Restart icon is displayed: • Snapshot: Take a snapshot of the current streaming. The snapshot can be seen in the Snapshot history screen below.
- Page 30 40610.S - SIP 7" video entryphone • Snapshot history: Displays the list of the taken snapshots and is described later in this section. • The Device name string is also an icon that when selected, a dialog is shown with a list of the available cameras.
- Page 31 40610.S - SIP 7" video entryphone The controls at the bottom are the following: • Back: Return to the previous screen ending the streaming. • Volume: Adjust the volume. It is disabled until the streaming is started. • Mute: Allow/Deny the audio. It is disabled until the streaming is started. It’s recommend to configure the streaming resolution in the IP cam to equal or less than Full HD (1920 x 1080).
- Page 32 40610.S - SIP 7" video entryphone The first column indicates the incremental number of the snapshot. The second column shows the name of the camera that took the snapshot. The third column shows the date and time in which the snapshot was taken. The fourth column shows a snapshot icon that indicates that a snapshot was taken while receiving the streaming.
- Page 33 40610.S - SIP 7" video entryphone The Delete all icon at the bottom of the screen erases all the snapshots in the history. One or more entries also can be selected, the first one is selected by a long-press, while the next ones can be selected just by a normal press: In both cases, before removing them, a dialog appears asking for a confirmation:...
- Page 34 40610.S - SIP 7" video entryphone...
-
Page 35: Contacts List
40610.S - SIP 7" video entryphone Contacts list The Contacts list icon in the Main screen opens the list of contacts: This screen allows to add, edit, remove and visualize in alphabetical order the list of current contacts registered in the device and is composed of three parts: the top bar, the bottom bar and the main area: The top bar includes: •... - Page 36 40610.S - SIP 7" video entryphone • The Sort by icon allows to order the contacts alphabetically by Name. By default they are ordered from A to Z. • The Delete all icon erases the selected contacts. One or more entries can be selected, the first one is selected by a long-press, while the next ones can be selected just by a normal press:...
- Page 37 40610.S - SIP 7" video entryphone Before removing them, a dialog appears asking for a confirmation since this operation cannot be undone: The main area shows the contacts in an organized list with the following columns:...
- Page 38 40610.S - SIP 7" video entryphone The first column shows the icon that represents the contact’s type that can be: Icon Contact type Indoor monitor External panel Switchboard Camera Actuator The second column shows the name of the contact along with additional information. If it’s an indoor monitor, an external panel or a switchboard, its SIP ID appears;...
- Page 39 40610.S - SIP 7" video entryphone The bottom bar of the Contacts list screen contains only the Add icon at the right that allows to create a new contact.
-
Page 40: Create A Contact
40610.S - SIP 7" video entryphone Create a contact The contents of this screen vary according to the contact’s type: • The indoor monitor contact provides two fields: • Contact name • SIP ID • The external panel contact provides three fields: •... - Page 41 40610.S - SIP 7" video entryphone • The switchboard contact provides two fields: • Contact name • SIP ID • The camera contacts provides four fields: • Contact name • URL from where to get the streaming. The protocol type such as rtsp:// is optional. The required parts of the URL are the IP address, port and path.
- Page 42 40610.S - SIP 7" video entryphone • The actuator contact provides two fields • Contact name • DTMF code for activating an actuator such as the lights For entering the optional DTMF code, a numerical keypad appears where the code can be entered:...
- Page 43 40610.S - SIP 7" video entryphone After the contact’s fields have been entered, independently of the contact’s type, the flag at the top right saves the contact, but before it shows a dialog that asks for a confirmation and then returns to the Contacts list screen:...
-
Page 44: Edit A Contact
40610.S - SIP 7" video entryphone Edit a contact The contents of this screen are exactly the same as when adding a contact in the Create contact screen, but the difference resides in that the fields are already filled with the contact’s info: After editing one or more fields, the flag at the top right edits the contact, but before it shows a dialog that asks for a confirmation and then returns to the previous screen:... -
Page 45: View A Contact
40610.S - SIP 7" video entryphone View a contact The view contact screen is opened by selecting the first and second columns, the contact’s icon and name, respectively, of the Contacts list screen. All the contact’s information is visualized in this screen with the possibility to modify or remove it. The contact’s information may vary according to the contact’s type, but it’s always organized in three areas: The top bar includes: •... -
Page 46: Delete A Contact
40610.S - SIP 7" video entryphone Delete a contact There are several ways to delete a contact: • From the main Contacts list the fourth column deletes only the contact of the selected row. • From the View contact screen the Delete icon allows to delete the contact. -
Page 47: Settings
40610.S - SIP 7" video entryphone Settings The Settings icon in the Main screen opens the Settings screen where all the device configuration takes place: The Settings are a couple of standard Android screens with several options organized by functionality. All the system configuration can take place from these items:... - Page 48 40610.S - SIP 7" video entryphone Some of these screens for security reasons are protected by the password that has been set during the device start- procedure:...
-
Page 49: Voip
40610.S - SIP 7" video entryphone VoIP This screen allows to configure the parameters needed for receiving/placing calls from/to any SIP device: • SIP ID: Identifier string. It’s a mandatory parameter. • Authentication ID: Authentication string normally not required by the SIP server. It’s an optional parameter that can be left blank. - Page 50 40610.S - SIP 7" video entryphone If this configuration and the network interface are also correct, the SIP status in the Main screen should become green: If this is a first start-up, this is the last step of the configuration before being able to place/receive calls. Credentials are required for accessing this screen.
-
Page 51: Credentials
40610.S - SIP 7" video entryphone Credentials This password is used for accessing the VoIP, Networking, Date & Time, Touch buttons Factory reset screens as well as for accessing the Web UI and are needed to avoid accidental changes that could affect the device behavior: It will ask for the current password and the new password twice. -
Page 52: Networking
40610.S - SIP 7" video entryphone Networking The device provides two network interfaces: Wi-Fi and Ethernet. Only one of the two interfaces can be enabled at any given time. The default interface during the first start-up is the Wi-Fi: The Interface option allows to select the desired network interface: Credentials are required for accessing this screen. -
Page 53: Wi-Fi
40610.S - SIP 7" video entryphone 8.3.1 Wi-Fi This section allows to configure the wireless interface. This is the default interface and its screen is organized in two areas: The top bar includes at the right a couple of elements: •... - Page 54 40610.S - SIP 7" video entryphone If the password is correct, it automatically connects to the network: The DHCP server in the network automatically assigns an IP address. If the password is invalid or the network is not available at this moment, an error message appears:...
- Page 55 40610.S - SIP 7" video entryphone If this is a first start-up, the VoIP configuration is the next step before being ready for placing/receiving calls. Advanced configuration If a static IP address needs to be configured, after selecting the desired network, in the dialog the advanced options checkbox needs to be selected and the following parameters need to be entered along with the password: •...
- Page 56 40610.S - SIP 7" video entryphone • WEP • WPA/WPA PSK The WPA/WPA PSK security standard is strongly recommended. Some networks allow to have automatic or manually configured addresses. In the former case there’s only need to select DHCP in the IP settings at the bottom of the dialog: In the latter case, the IP settings must be set in the same dialog: •...
- Page 57 40610.S - SIP 7" video entryphone Then before disconnecting from it, a dialog appears asking for a confirmation:...
-
Page 58: Ethernet
40610.S - SIP 7" video entryphone 8.3.2 Ethernet Since the Ethernet is not the default interface, it needs to be manually selected in the Interface option of the main Networking screen. By default it uses a statically assigned configuration: • IP address: 192.168.1.142 •... -
Page 59: Date & Time
40610.S - SIP 7" video entryphone Date & time This screen allows to configure the date and time of the device and their format: The following options can be selected: • NTP configuration: Use the default NTP servers. This servers are used by the device to synchronize the date and time. - Page 60 40610.S - SIP 7" video entryphone • Use 24-hour format: Select between a 12 hour AM/PM clock and a 24 hour clock. In order to keep the date and time updated also between reboots, the device needs to contact an NTP server, otherwise it cannot provide the correct date and time since it does not have an internal Real Time Clock (RTC).
-
Page 61: Display
40610.S - SIP 7" video entryphone Display This screen allows to configure all the display parameters in the system including the background image of the Main screen: The following parameters can be configured: • Brightness level: A bar that changes the luminosity of the display. •... - Page 62 40610.S - SIP 7" video entryphone • Font size: The size of the fonts in all the screens including the Main screen. There are four possible sizes: • Small • Normal (default) • Large • Huge • Background: It allows to choose the background image for the Main screen.
- Page 63 40610.S - SIP 7" video entryphone When the desired image has been found, it can be selected and a dialog appears asking for a confirmation: Then the selected image is highlighted and it will be displayed in the Main screen.
- Page 64 40610.S - SIP 7" video entryphone • The user background images can only be uploaded through the Display settings in the Web UI. • Up to 20 images can be uploaded and their size cannot exceed 8MB each. • The six default images that cannot be deleted even after a Factory Reset.
-
Page 65: Sound
40610.S - SIP 7" video entryphone Sound This screen allows to configure all the audio parameters in the system including the volume for the different types of actions: The following parameters can be configured: • Media volume: Audio level when a call arrives. •... -
Page 66: Language
40610.S - SIP 7" video entryphone Language This screen allows to change the language of the display. Currently it supports: • English (default) • Italian • French • German • Greek • Portuguese • Polish • Swedish • Dutch • Russian When selecting the language, a pop-window with the above languages appear where the desired one can be selected: The Current Keyboard option is read-only and just for informational purposes. -
Page 67: Touch Buttons
40610.S - SIP 7" video entryphone Touch buttons This screen allows to configure the behavior of the touch buttons. It contains two parts, a left area that is a column with the icons of the touch buttons. When the icon of a touch button in this area is selected, the main area at the right shows the options that can be configured for that specific touch button. - Page 68 40610.S - SIP 7" video entryphone The fifth touch button, also called Unlocking, can be configured to activate an actuator. For example, assume that there are three external panels in the building complex and each one of them opens a different door;...
-
Page 69: Reboot
40610.S - SIP 7" video entryphone Reboot This screen allows to reboot the device. This option is seldomly used, but when it’s selected, all the system functionality will be halted and after the reboot it will return to the normal operation: Before proceeding, a dialog appears asking for a confirmation: Credentials are required for accessing this screen. -
Page 70: 8.10 Factory Reset
40610.S - SIP 7" video entryphone 8.10 Factory reset This screen allows to execute a Factory reset: The operations that take place during this procedure are described in the Factory Reset section. Before proceeding, a dialog appears asking for a confirmation: This procedure may take several minutes during which the device will be rebooted. -
Page 71: 8.11 About
• Status: The current system status such as the device uptime: • Legal information: The software licenses such as Open source Licenses. • Model number: The device model. This code can be used for searching information about this device in Vimar’s website. • Android version: The base Android version. -
Page 72: Web Interface (Web Ui)
40610.S - SIP 7" video entryphone Web interface (Web UI) The purpose of the Web UI is to provide a remote mechanism to configure the device. For most of the configuration this is just an alternative to the display UI, but there are some options that can only be set from this interface since they need to upload or download files that cannot be done from the UI. - Page 73 40610.S - SIP 7" video entryphone Enter the credentials in the browser’s pop-up window and press the Sign in button: During the first device start- up or a factory reset, the default credentials are: Username: admin Password: admin...
-
Page 74: Interface Organization
40610.S - SIP 7" video entryphone Interface organization The Web UI is organized in three areas that are described and illustrated in the image below: Top bar... - Page 75 40610.S - SIP 7" video entryphone It’s a fixed element that cannot be moved or hidden. It displays the current section name and allows to logout and to change the Web UI language, this will not affect the language in the display UI. These operations are accessible through a cascade menu and the supported languages are the same as the ones supported for the UI: English, Italian, French, German, Spanish, Greek, Portuguese, Polish, Swedish, Dutch and Russian.
- Page 76 40610.S - SIP 7" video entryphone It’s used as a menu to easily reach any configuration parameter. It allows to move efficiently from one of sections to another. Its contents are the following: • Dashboard • Phonebook • Settings • VoIP •...
- Page 77 40610.S - SIP 7" video entryphone • Image list (not present in the display UI) • About • System control • Credentials • Update (not present in the display UI) • Backup, restore and factory reset (Backup and restore are not present in the display UI) Some menu items are not present in the display UI since they require to upload and/or download a file that can only be done from this interface.
-
Page 78: Dashboard
40610.S - SIP 7" video entryphone Dashboard The Dashboard is the entry point and the main page that provides an at-a-glance overview of the most relevant parameters and is organized in four sections: • Device info • Product code • Device name •... - Page 79 40610.S - SIP 7" video entryphone • Network parameters - WiFi • MAC address • IP address • SSID. It is displayed in the table header next to the string “Network parameters - WiFi - “ • Plant info • Plant name •...
-
Page 80: Phonebook
40610.S - SIP 7" video entryphone Phonebook The Phonebook, also called Contact list in the display UI, provides the same functionality as in the display UI: it’s useful to add, edit, remove and visualize the contacts registered in the device. When entering in the Phonebook page, a table of contacts is displayed with all their info: The meaning of each column is the following: •... -
Page 81: Create A Contact
40610.S - SIP 7" video entryphone 9.3.1 Create a contact At the top right of the Phonebook page, the Add button opens a pop-up window whose parameters depend on the type of contact that is the first parameter that has to be chosen. Then the following parameters are filled according to the device type: •... -
Page 82: Edit A Contact
40610.S - SIP 7" video entryphone 9.3.2 Edit a contact The last table’s column in the Phonebook page contains the Edit icon that allows to change the info of the contact of the selected row. A pop-up window appears whose parameters depend on the type of contact exactly as when a contact is created, the difference is that the fields are already filled with the contact’s info. -
Page 83: Delete A Contact
40610.S - SIP 7" video entryphone 9.3.3 Delete a contact The first column in the Phonebook page contains a checkbox that allows to select the contact for removal. When it’s selected, the Delete selected users button appears at the top right of the page: If this button is pressed, a pop-up confirmation appears: For deleting all users at the same time there is a couple of methods. - Page 84 40610.S - SIP 7" video entryphone If the checkbox in the table header of the contact’s table is selected, all the contacts are automatically selected. Then the above Delete selected users button can be used for deleting all the contacts at the same time. A more direct method for deleting all the contacts is to select the Delete all contacts button at the top right of the page.
-
Page 85: Settings
40610.S - SIP 7" video entryphone Settings 9.4.1 VoIP This page contains two areas: the SIP configuration area and the Trusted certificates area. The SIP configuration area in the upper part allows to configure the parameters needed for receiving/placing calls from/to any SIP device: •... - Page 86 40610.S - SIP 7" video entryphone If this configuration and the network interface are also correct, after clicking the Save button the SIP status in the Main screen should become green: And the SIP connection in the Dashboard should show that is Connected:...
- Page 87 40610.S - SIP 7" video entryphone If this is a first start-up, this is the last step of the configuration before being able to place/receive calls.
- Page 88 40610.S - SIP 7" video entryphone Add CA certificates This page also allows to upload the CA certificate needed for validating the SIP server and establishing an encrypted communication. Notice that this operation can only take place from this page and not from the display UI since it requires to upload the certificate.
- Page 89 40610.S - SIP 7" video entryphone This table contains four columns: • Checkbox column: The first column allows to select the certificate for removal. If the checkbox in the table header is selected, all the certificates are automatically selected. • Issued by: The authority that issued the certificate.
- Page 90 40610.S - SIP 7" video entryphone Delete CA certificates The first column in the Trusted Certificates page contains a checkbox that allows to select the certificate for removal. When it’s selected, the Delete selected certificates button appears at the top right of this area: For deleting all certificates at the same time there is a couple of methods.
- Page 91 40610.S - SIP 7" video entryphone...
-
Page 92: Networking
40610.S - SIP 7" video entryphone 9.4.2 Networking The device provides two network interfaces: Wi-Fi and Ethernet. Only one of the two interfaces can be enabled at any given time. 9.4.2.1 Wi-Fi The default interface during the first start-up is the Wi-Fi. When entering the Network page, the list of the currently accessible Wi-Fi networks is displayed in the SSID list: Once the SSID is selected and its password is entered, by clicking the Connect button the device will try to connect to the selected network and a dynamic IP address will be assigned to it. - Page 93 40610.S - SIP 7" video entryphone Notice that the PC must be inside the same network in order to connect to this web interface. If for any reason the device cannot obtain a dynamic IP address, the device will auto assign a local-link IP address that can be known after executing a device discovery.
-
Page 94: Ethernet
40610.S - SIP 7" video entryphone 9.4.2.2 Ethernet Since the Ethernet is not the default interface, it needs to be manually selected in the Interface option of the Networking page: By default it uses a statically assigned configuration: • IP address: 192.168.1.142 •... - Page 95 40610.S - SIP 7" video entryphone Notice that the PC must be configured in the same network as the device in order to connect to this web interface. If a dynamic IP address is desired, the DHCP checkbox is selected and all the below fields for the static IP address become disabled: By clicking the Save button, a pop-up appears with the result of the operation and a warning that the device will be unreachable through the previous IP address.
-
Page 96: Date & Time
40610.S - SIP 7" video entryphone 9.4.3 Date & Time This page allows to configure the date and time of the device and their format: The following options can be selected: • NTP configuration: Use the default NTP servers. This servers are used by the device to synchronize the date and time. - Page 97 40610.S - SIP 7" video entryphone This option is useful if the device is inside a network that cannot reach the default NTP servers. • Automatic timezone: Use the timezone provided by the NTP servers. If disabled, the next option appears at the bottom of the page.
- Page 98 40610.S - SIP 7" video entryphone • Use 24-hour format: Select between a 12 hour AM/PM clock and a 24 hour clock. In order to keep the date and time updated also between reboots, the device needs to contact an NTP server, otherwise it cannot provide the correct date and time since it does not have an internal Real Time Clock (RTC).
-
Page 99: Display
40610.S - SIP 7" video entryphone 9.4.4 Display This page allows to configure all the display parameters in the system: The following parameters can be configured: • Brightness level: A bar that changes the luminosity of the display. - Page 100 40610.S - SIP 7" video entryphone • Sleep: The elapsed time before the display enters in the Stand-by mode. The different options are: • 15 seconds • 30 seconds • 1 minute (default) • 2 minutes • 5 minutes • 10 minutes •...
- Page 101 40610.S - SIP 7" video entryphone • Font size: The size of the fonts in all the screens including the Main screen. This option does not change the font size in this web interface. There are four possible sizes: • Small •...
-
Page 102: Sound
40610.S - SIP 7" video entryphone 9.4.5 Sound This page allows to configure all the audio parameters in the system including the volume for the different types of actions: The following parameters can be configured: • Media volume: Audio level when a call arrives. •... - Page 103 40610.S - SIP 7" video entryphone • Touch sounds: Enable/Disable the sound when typing in the keyboard or pressing a button. • Screen locking sounds: Enable/Disable the sound when the display enters in Stand-by mode.
-
Page 104: Ui Language
40610.S - SIP 7" video entryphone 9.4.6 UI language This screen allows to change the language of the display. Currently it supports: • English (default) • Italian • French • German • Greek • Portuguese • Polish • Swedish • Dutch •... -
Page 105: Touch Buttons
40610.S - SIP 7" video entryphone 9.4.7 Touch buttons This page allows to configure the behavior of the touch buttons. It contains two parts, a left area that is a column with the icons of the touch buttons. When the icon of a touch button in this area is selected, the main area at the right shows the options that can be configured for that specific touch button. - Page 106 40610.S - SIP 7" video entryphone If None is chosen, the touch button is disabled and no call or streaming takes places. If there is only one external panel or CCTV camera, the self-start call or the video streaming is started automatically when pressing the button.
- Page 107 40610.S - SIP 7" video entryphone...
-
Page 108: Images List
40610.S - SIP 7" video entryphone 9.4.8 Images list This page shows the list of thumbnails of the images that can be used as a background for the Main screen: There are six default images to choose from. When passing the mouse over the default images, the View icon appears and the image can be clicked:... - Page 109 40610.S - SIP 7" video entryphone This action will zoom the image in a pop-up window that allows to select the image as a background for the Main screen by clicking in the Set as background icon:...
- Page 110 40610.S - SIP 7" video entryphone From this pop-window all images can be visualized by selecting the Next or Previous arrows. From this moment the selected image is visible as background in the Main screen: This page also allows to upload custom images by clicking the Add images button. Once the image has been selected in the PC, the Start upload button that appears can be clicked.
- Page 111 40610.S - SIP 7" video entryphone Once the image has been uploaded it’s displayed as a thumbnail below the default images. Up to 20 images can be uploaded and their size cannot exceed 8MB each. As with the default images, the custom ones can be set as background: When passing the mouse over the custom images, besides the View icon that works similarly to the default images, the Delete icon appears and if it’s clicked the image is removed:...
- Page 112 40610.S - SIP 7" video entryphone Notice that for uploading and removing images, only this page can be used, the display UI does not have this functionality.
-
Page 113: System Control
40610.S - SIP 7" video entryphone System control The System control section allows to manage specific device operations such as the access to this Web UI, the backup of the configuration and the software update. 9.5.1 Credentials This password is used for accessing the VoIP, Networking, Date &... -
Page 114: Update
40610.S - SIP 7" video entryphone 9.5.2 Update This page allows to update the software by selecting the update file from the PC using the Select File button: Once the file has been selected, the Start upload button becomes enabled and can be clicked. A pop-up appears indicating that the file is being uploaded: After the file has been uploaded, it is validated and then the proper update procedure starts and during this process several standard operations are disabled:... - Page 115 40610.S - SIP 7" video entryphone If there is an error at any stage of the update process, an error message appears in a pop-up window and the device reboots: Independently of the update results, the device always reboots at the end of the process. During the update procedure, the display UI also shows a screen with the following behavior: •...
- Page 116 40610.S - SIP 7" video entryphone • If the update is successful: The spinner and previous text disappear and an OK icon with the text “Update successful! The system will reboot…” appears for 5 seconds in the screen before a reboot is performed: •...
- Page 117 40610.S - SIP 7" video entryphone After the device reboots, the new software version can be seen in the Dashboard or in the About screen in the display UI.
-
Page 118: Backup And Restore
40610.S - SIP 7" video entryphone 9.5.3 Backup and restore The backup functionality allows to create a backup file of the whole device configuration, while the restore functionality allows to upload a file and overwrite the current configuration. This functionality is useful for saving a device configuration for backup purposes or for a multi-device installation in which several devices with the same configuration have to be installed. - Page 119 40610.S - SIP 7" video entryphone The resulting backup is an encrypted file with the name <mac_address>_backup_<date>.dbk that stands for: • <mac_address> is the device MAC address of the Ethernet interface without the “:” separator. Useful for differentiating on device from another in a plant where there are multiple devices. •...
- Page 120 40610.S - SIP 7" video entryphone After the file has been uploaded, it is validated and then the proper restore procedure starts and during this process several standard operations are disabled: • The display UI is disabled. • The SIP calls are disabled. If the restore procedure finishes successfully, a pop-up window notifies the event: If there is an error at any stage of the restore process, an error message appears in a pop-up window and the device reboots:...
- Page 121 40610.S - SIP 7" video entryphone Independently of the restore results, the device always reboots at the end of the process. During the restore procedure, the display UI also shows a screen with the following behavior: • While executing the configuration restore: A moving spinner and the text “Restoring configuration… Please do not power-off the device…”...
- Page 122 40610.S - SIP 7" video entryphone • If the configuration restore fails: The spinner and previous text disappear and a Fail icon with the text “Configuration restore failed!” appears for 5 seconds before restoring the normal operation: Notice that for downloading and uploading the backup file only this page can be used, the display UI does not offer this functionality.
-
Page 123: Restart
40610.S - SIP 7" video entryphone 9.5.4 Restart From this page the device can also be restarted: After this button is pressed the device halts cleanly all its current operations and executes a restart. -
Page 124: Factory Reset
40610.S - SIP 7" video entryphone 9.5.5 Factory reset The Factory Reset button can be found at the bottom of the Backup and restore page: If this button is pressed, a pop-up window appears asking for a confirmation:... - Page 125 40610.S - SIP 7" video entryphone The operations that take place during this procedure are described in the Factory Reset section. This procedure may take several minutes during which the device will be rebooted. Afterwards, the device first start- will be displayed in the display UI.
-
Page 126: 10 System
40610.S - SIP 7" video entryphone 10 System 10.1 Device discovery When the device active network interface is configured for obtaining a dynamic IP address from a DHCP server, a zeroconf application that executes a device discovery is needed for finding its IP address. Even if the device has a static IP address, but it’s not know, a zeroconf application becomes quite useful. - Page 127 40610.S - SIP 7" video entryphone...
- Page 128 Viale Vicenza, 14 36063 Marostica VI - Italy MU_EN_40610.S 00 2206 www.vimar.com...
Need help?
Do you have a question about the ELVOX 40610.S and is the answer not in the manual?
Questions and answers