Table of Contents

Related Manuals for EIJKELKAMP M1


Summary of Contents for EIJKELKAMP M1
- Page 1 Nijverheidsstraat 9, 6987 EN Giesbeek, The Netherlands T +31 313 880 200 E info@eijkelkamp.com royaleijkelkamp.com Mini Current Meter M1 User Manual : 1313 Product no. Rev ision File : Arch-Orig Last change : 26.11.2008 M-1313E...
-
Page 2: Table Of Contents
User manual Mini Current Meter M1 Content: PRODUCT DESCRIPTION ..................... 3 SAFETY AND DANGER INSTRUCTIONS ..............3 PARTS SURVEY......................3 CURRENT METER MOUNTINGS .................. 4 CABLE CONNECTION ....................4 CHANGE OF PROPELLERS ..................5 STARTUP AND OIL CHANGE..................6 DETERMINATION OF VELOCITY .................. 7 REED-SWITCH ....................... -
Page 3: Product Description
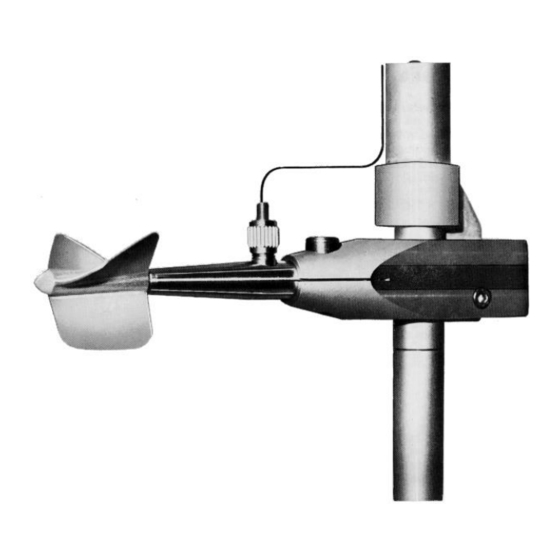
User manual Mini Current Meter M1 1. Product description The current meter M I (art. no. 1313) is provided for determination of current velocities. It is a high quality precision measuring instrument, so please handle it carefully and consider all points of this service manual. -
Page 4: Current Meter Mountings
User manual Mini Current Meter M1 4. Current meter mountings The current meter M I is mainly used with rod 9 mm diameter. The rod (3 sections, 1,5 m long) is stored in the instrument case. The parts have to be screwed together and sticked to the bottom part. -
Page 5: Change Of Propellers
User manual Mini Current Meter M1 6. Change of propellers The propellers are manufacturerd of high quality seawater resistant aluminium and are anodized. The propeller will be slipped on the slot of the axle. Change of propellers in the same way. -
Page 6: Startup And Oil Change
User manual Mini Current Meter M1 7. Startup and oil change The meter axle with ball bearings is running in a chamber, filled with special oil. The delivery of the instrument is without oil filling. Do not start the current meter before filling special oil into the chamber. -
Page 7: Determination Of Velocity
User manual Mini Current Meter M1 8. Determination of velocity The calibration of the current meter is determined individually with each propeller in a hydraulic towing channel. The current velocity (v) is determined according to the calibration equation: v = flow velocity m/sec. -
Page 8: Reed-Switch
User manual Mini Current Meter M1 9. Reed-switch The counting impulse, necessary for measuring, will be effected by means of the reed-switch and the magnet, once per revolution of propeller. 10. Exchange of reed-switch Separate front part of meterbody (1) from rear part (19) by screwing. Carefully pull out reed- switch (28) with tension spring. -
Page 9: Ball Bearings
User manual Mini Current Meter M1 11. Ball bearings Extremely smooth running ball bearings are used. They have to be protected absolutely from dirt and dust, otherwise the instrument will not run smoothly. In case there should penetrate dirt into the ball bearings during exchange of oil, clean the ball bearings in purified benzine only. -
Page 10: Shortening Of The Cable
User manual Mini Current Meter M1 13. Shortening of the cable If the cable is damaged at the plug or has to be shortened, go ahead as follows: a) cut off the damaged part of the cable b) insulate cable according to drawing and twist wire together.
Need help?
Do you have a question about the M1 and is the answer not in the manual?
Questions and answers