Advertisement
Quick Links
DTS
DELUXE
TYPING STAND
IM P O RTA NT !
Assembly may require the assistance of
another person.
Before you begin assembly:
READ THE DIRECTIONS all the way through one
time. This will speed up the process and help you
understand the sequence of steps.
COUNT THE PARTS AND HARDWARE before
assembly. This ensures you have received all
necessary parts before you begin.
TOOLS: You may need a Phillips head screwdriver,
a medium slotted screwdriver or a plastic mallet. To
protect your new furniture from damage during
assembly, it is recommended to work on a carpeted
surface.
0522
In the event any parts are missing from
this package, send your name, address,
telephone number, and a description of
the missing part(s) to: PARTS, Box 1420,
Missoula, MT 59806 or call:
1-800-769-5693 or FAX 1-800-445-5281.
CAUTION: On assemblies requiring glue, make
sure the unit is assembled correctly before gluing.
Once this unit is assembled with glue, the
manufacturer will not be responsible for damaged
parts. Keep a damp cloth or sponge handy to wipe
off excess glue.
To care for this furniture, simply wipe with a cloth
dampened with glass cleaner containing ammonia-D.
Advertisement

Subscribe to Our Youtube Channel
Related Manuals for Ironwood DTS


Summary of Contents for Ironwood DTS
- Page 1 DELUXE TYPING STAND IM P O RTA NT ! In the event any parts are missing from Assembly may require the assistance of this package, send your name, address, another person. telephone number, and a description of Before you begin assembly: the missing part(s) to: PARTS, Box 1420, Missoula, MT 59806 or call: READ THE DIRECTIONS all the way through one...
-
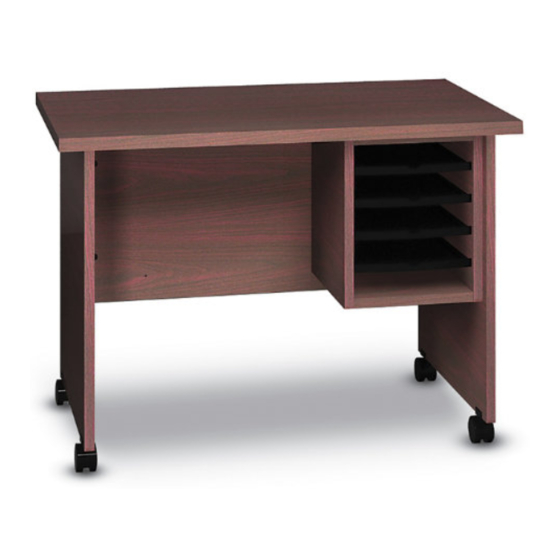
Page 2: Parts Diagram
PARTS DIAGRAM Left Side Panel 05850141 1 ea. Right Side 05850341 1 ea. Worksurface 05850101 1 ea. Paper Rack Top 05850118 1 ea. Paper Rack Side 05850116 2 ea. Back 05850152 1 ea. Paper Rack 1/4" black 05850119 1 ea. 4 ea. - Page 3 HARDWARE Rafix Bolt 909925 15 ea. Rafix Flush 909911 8 ea. Rafix Cam 909909 9 ea. Caster H1192 2 ea. 2 ea. Locking Caster Washer Head 920201 2 ea. Screw 4 ea. Caster Screw Shelf Pins H1021 16 ea. Label Holders H3402 4 ea.
- Page 4 Screw four Rafix Bolts (H1) into the pre-drilled holes of the Worksurface (C) where indicated. Screw two Rafix Bolts (H1) into pre-drilled holes of each Side (A and B) where indicated. Insert two Rafix Cams (H3) facing out into each Side (A and B) as shown.
- Page 5 Insert four (H2) into the Back (D) as shown. Position the Back onto the Left Side (A) as shown. NOTE: Note the hole orientation on Back (D). Rotate Minifix Cams clockwise to lock in place. Position the Right Side (B) onto the Back (D) as shown.
- Page 6 Take Paper Rack Side (E) and place 4 rafix bolts (H1) in designated holes. Position Side panel and insert bolts into rafix cams of (F) and (G). Turn cams to secure. Select either a left or right-hand Paper Rack placement. Attach Paper Rack unit to the underside of the Worksurface (C) using two Washerhead Screws (H8) in the pre-drilled holes as shown.
- Page 7 # 10 Insert eight Shelf Pins into the pre-drilled holes in both Paper Rack sides as shown. # 11 Put label holders on shelves. Insert shelves to sit on shelf pins Assembly of the Deluxe Typing Stand is now complete.
Need help?
Do you have a question about the DTS and is the answer not in the manual?
Questions and answers