Advertisement
Quick Links
BY
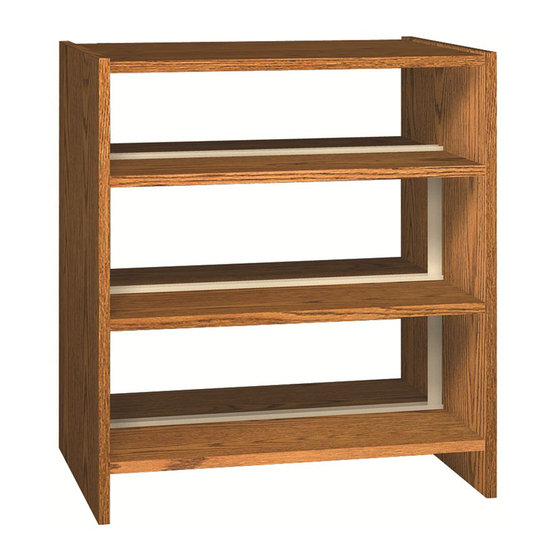
LIBRARY SHELVING UNIT
LS42DB LS48DB
LS60DB LS72DB
LS84DB
DOUBLE BASE UNIT
IM P ORTANT !
Assembly may require the assistance of
another person.
Before you begin assembly:
READ THE DIRECTIONS all the way through one
time. This will speed up the process and help you
understand the sequence of steps.
COUNT THE PARTS AND HARDWARE before
assembly. This ensures you have received all
necessary parts before you begin.
TOOLS: You may need a Phillips head screwdriver,
a medium slotted screwdriver or a plastic mallet. To
protect your new furniture from damage during
assembly, it is recommended to work on a carpeted
surface.
0920
Thank you for purchasing Ironwood Shelving.
Please consult your local building codes when
installing shelving. It is recommended that all single
face shelving be attached to the wall, while double
face shelving over 60" in height should be attached
to the floor. These are guide lines and vary from
state to state.
In the event any parts are missing from
this package, send your name, address,
telephone number, and a description of
the missing part(s) to: PARTS, Box 1420,
Missoula, MT 59806 or call:
1-800-769-5693 or FAX 1-800-445-5281.
CAUTION: On assemblies requiring glue, make
sure the unit is assembled correctly before gluing.
Once this unit is assembled with glue, the
manufacturer will not be responsible for damaged
parts. Keep a damp cloth or sponge handy to wipe
off excess glue.
To care for this furniture, simply wipe with a cloth
dampened with glass cleaner containing ammonia-D.
Advertisement

Related Manuals for Ironwood Glacier LS42DB


Summary of Contents for Ironwood Glacier LS42DB
- Page 1 Thank you for purchasing Ironwood Shelving. Please consult your local building codes when installing shelving. It is recommended that all single face shelving be attached to the wall, while double face shelving over 60” in height should be attached to the floor. These are guide lines and vary from LIBRARY SHELVING UNIT state to state.
-
Page 2: Parts Diagram
PARTS DIAGRAM The diagram show one size for ease of viewing. Any differences will be indicated in each part’s description. 2 ea. LS42DB 01300101 1 ea. 2 ea. LS48DB Side LS60DB 01300141 2 ea. LS72DB 2 ea. LS84DB 2 ea. LS42DB 6 ea. - Page 3 If you have purchased an Adder unit to be assembled in conjunction with this Base unit, it is important to read all the way through the Adder instructions (enclosed in the Adder carton) before beginning. It will be necessary to substitute a Divider (J) for a Right Side (B) during assembly. If you have purchased the Back option or the Toe Space option to be assembled in conjunction with this Base unit, it is important to read through the Back option...
- Page 4 Using the Rafix System: Insert the Rafix Cams into the appropriate holes. The flat edge of the cam should be facing the edge Flat of the panel. edges must be Slide Rafix Cams of the panel to be aligned attached onto the corresponding posts. When screwing post into hole, Do Not over tighten.
- Page 5 Install eight Rafix Cams (H1) into the Top Panel (C) as shown.
-
Page 6: Metal Frame
Place both Side (A)’s on a clean, carpeted surface as shown. Place Rafix bolts (H4) in each S ide Panel into the selected pre-drilled holes as indicated. SIDE PANELS TOP SET OF HOLES FOURTH SET OF HOLES FROM BOTTOM For a Metal Frame, attach the Frame (H7) as For a 3/4"... - Page 7 With the assistance of another person, stand the assembly upright and attach the other Side Panel. METAL FRAME: 3/4" BACK : NOTE: If you are installing the Toe Space option, it is recommended to install the Toe Space at this time. Follow the directions included with the Toe Space option. Attach the Top Panel (C) using the Rafix System.
- Page 8 Attach two Fixed Shelves (E) in the same manner. METAL FRAME: 3/4" BACK : Placement of the Adjustable Shelves is optional. The diagram below shows a recommended placement for the spacing of the 55TH SET OF HOLES FROM THE BOTTOM shelves.
- Page 9 Insert Rafix Shelf Pin(H6) into both Sides at the preferred heights for the Adjustable Shelves. # 10 Place the Adjustable Shelves (E) into each side of the unit by sliding the Rafix Shelf Cams(H5) in to Rafix Shelf Pin(H6) FINISHED EDGE...
- Page 10 # 11 Your Glacier Library Shelving unit is now assembled and ready for use.
Need help?
Do you have a question about the Glacier LS42DB and is the answer not in the manual?
Questions and answers