Table of Contents
Advertisement
Quick Links
Owner's Instruction and Operation Manual
Model Number:
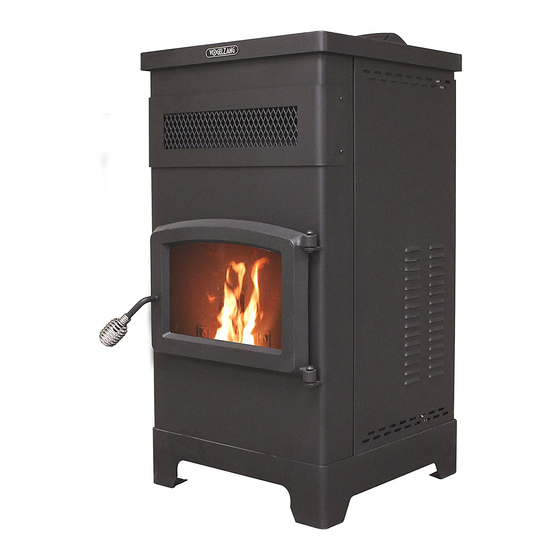
VG5770
Report #: F20-578
Certified to ASTM E1509-12 (2017)
and ULC-S627-00-REV1
Mobile Home Approved
* All Pictures In This Manual Are For Illustrative Purposes Only. Actual Product May Vary.
Save These Instructions In A Safe Place For Future Reference.
SAFETY NOTICE: If this heater is not properly installed, a house fire may result. For
your safety, follow the installation instructions. Never use make-shift compromises
during the installation of this heater. Contact local building or fire officials about
permits, restrictions and installation requirements in your area. NEVER OPERATE THIS
PRODUCT WHILE UNATTENDED.
CAUTION! Please read this entire manual before you install or use your new room
heater. Failure to follow instructions may result in property damage, bodily injury, or
even death. Improper Installation Will Void Your Warranty!
U.S. Environmental Protection Agency
Certified to comply with 2020 particulate
emissions standards.
THIS MANUAL IS SUBJECT TO CHANGE WITHOUT NOTICE.
© 2021 United States Stove Company, 227 Industrial Park Rd., South Pittsburg, TN 37380
All manuals and user guides at all-guides.com
R
CALIFORNIA PROPOSITION 65 WARNING:
This product can expose you to chemicals
including carbon monoxide, which is known to the
State of California to cause cancer, birth defects,
and/or other reproductive harm. For more
information, go to
www.P65warnings.ca.gov
852050L-0204K
Ph. 800-750-2723
Advertisement
Table of Contents

Subscribe to Our Youtube Channel
Related Manuals for Vogelzang International VG5770


Summary of Contents for Vogelzang International VG5770
- Page 1 All manuals and user guides at all-guides.com Owner’s Instruction and Operation Manual Model Number: VG5770 Report #: F20-578 Certified to ASTM E1509-12 (2017) and ULC-S627-00-REV1 Mobile Home Approved * All Pictures In This Manual Are For Illustrative Purposes Only. Actual Product May Vary.
-
Page 2: Specifications
Your pellet stove has been approved for installation in the USA and Canada. It may also be installed in a manufactured or mobile home. This manual describes the installation and operation of the Vogelzang, VG5770 wood heater. This heater meets the 2020 US Environmental Protection Agency’s wood pellet emissions limits for wood heaters sold after May 15, 2020. -
Page 3: Installation Checklist
All manuals and user guides at all-guides.com INSTALLATION CHECKLIST Your Wood Stove should be installed by a qualified installer only. An NFI qualified Installer can be found at www.nficertified. org/public/find-an-nfi-pro/ CUSTOMER SERVICE 1-800-750-2723 ext 5050 Text to 423-301-5624 Email to: Customerservice@usstove.com COMMISSIONING CHECKLIST This checklist is to be completed in full by the qualified person who installs this unit. -
Page 4: Installation
All manuals and user guides at all-guides.com INSTALLATION CAUTION: SAFETY NOTICE BURNING FUEL CREATES CARBON MONOXIDE AND • IF THIS STOVE IS NOT PROPERLY INSTALLED, A CAN BE HAZARDOUS TO YOUR HEALTH IF NOT HOUSE FIRE MAY RESULT. TO REDUCE THE RISK OF PROPERLY VENTED. -
Page 5: Outside Air Supply
All manuals and user guides at all-guides.com INSTALLATION protection must extend under and 2” (51 mm) to each side of the chimney tee for an interior vertical installation. Canada: Require a minimum of 475 mm [18”] beyond the front of the unit and 203 mm [8”] beyond each side of the unit. -
Page 6: Venting Requirements
All manuals and user guides at all-guides.com INSTALLATION SECURING APPLIANCE TO THE FLOOR VENTING REQUIREMENTS Use the designated holes to secure the unit to the floor. WARNING: • INSTALL VENT AT CLEARANCES SPECIFIED BY THE VENT MANUFACTURER. • DO NOT CONNECT THE PELLET VENT TO A VENT SERVING ANY OTHER APPLIANCE OR STOVE. -
Page 7: Pellet Vent Type
All manuals and user guides at all-guides.com INSTALLATION PELLET VENT TYPE D. Minimum 7-foot (2.13m) clearance from any grade when adjacent to public walkways. A certified 3-inch or 4-inch type “PL” pellet vent exhaust system must be used for installation and attached to the E. -
Page 8: Through The Wall Installation
All manuals and user guides at all-guides.com INSTALLATION THROUGH THE WALL INSTALLATION a 3” (76 mm) clearance should be maintained from the (RECOMMENDED INSTALLATION) outside wall and a clean out tee should be placed on the pipe with a 90-degree turn away from the house. At this point, a 3ft (0.91m) (minimum) section of pipe should be added with a horizontal cap, which would complete the installation. -
Page 9: Panel Controls
All manuals and user guides at all-guides.com OPERATION INSTRUCTIONS NEVER OPERATE THIS PRODUCT WHILE UNATTENDED PANEL CONTROLS D. MODE (M/T) BUTTON • The Mode of the stove can be switched between manual and controlled with a Thermostat. Separate LEDs to the left of the two digit display indicate the mode of operation –... -
Page 10: Proper Fuel
All manuals and user guides at all-guides.com OPERATION INSTRUCTIONS This heater is designed to burn only PFI Premium grade not over 1” long. Longer or thicker pellets sometimes pellets. DO NOT BURN: bridge the auger flights, which prevents proper pellet feed. -
Page 11: Damper Control
All manuals and user guides at all-guides.com OPERATION INSTRUCTIONS 2. DO NOT open the viewing door. OPEN 3. DO NOT open the damper, the damper needs to be closed during start up. 4. DO NOT add pellets to the burn pot by hand. NOTE: During the first few fires, your stove will emit an odor as the high-temperature paint cures or becomes seasoned to the metal. -
Page 12: Shutdown Procedure
All manuals and user guides at all-guides.com OPERATION INSTRUCTIONS occurs as this may indicate a more serious problem. A CAUTION: service call may be required. • THE HOPPER AND STOVE TOP WILL BE HOT 2. If the combustion blower fails, an air pressure switch DURING OPERATION;... -
Page 13: Maintenance
All manuals and user guides at all-guides.com MAINTENANCE NEVER OPERATE THIS PRODUCT WHILE UNATTENDED FLY ASH CAUTION: This accumulates in the horizontal portion of an exhaust • FAILURE TO CLEAN AND MAINTAIN THIS UNIT AS run. Though non-combustible, it may impede the normal INDICATED CAN RESULT IN POOR PERFORMANCE, exhaust flow. -
Page 14: Painted Surfaces
All manuals and user guides at all-guides.com MAINTENANCE out the chimney, exposure to the gases in closed or from your U.S. Stove dealer. If glass is broken, follow these confined areas can be dangerous. Make sure you stove removal procedures: gaskets and chimney joints are in good working order 1. -
Page 15: Maintenance Schedule
All manuals and user guides at all-guides.com MAINTENANCE MAINTENANCE SCHEDULE Monthly or Daily Weekly Use the following as a guide under average use conditions. as needed Gaskets around door and door glass should be inspected Burn Pot Stirred Empty and repaired or replaced when necessary. Combustion Brushed Chamber... -
Page 16: Troubleshooting Guide
All manuals and user guides at all-guides.com TROUBLE SHOOTING GUIDE When your stove acts out of the ordinary, the first reaction is to call for help. This guide may save time and money by enabling you to solve simple problems yourself. Problems encountered are often the result of only five factors: 1) poor fuel;... - Page 17 All manuals and user guides at all-guides.com TROUBLE SHOOTING GUIDE If there is no current going to the combustion blower, check all wire Control board not sending power to combustion connections. If all wires are properly connected, you have a bad blower.
- Page 18 All manuals and user guides at all-guides.com TROUBLE SHOOTING GUIDE Display is Flashing “E4” Possible Causes Possible Remedies: (Unplug stove first when possible) The air inlet, burnpot, interior combustion air Follow all cleaning procedures in the maintenance section of the chambers, combustion blower, or exhaust pipe owner’s manual.
- Page 19 All manuals and user guides at all-guides.com TROUBLE SHOOTING GUIDE STOVE FEEDS PELLETS, BUT WILL NOT IGNITE Possible Causes Possible Remedies: (Unplug stove first when possible) Push the air damper in closer to the side of the stove for startup. In some situations it may be necessary to have the damper completely Air damper open too far for ignition.
- Page 20 All manuals and user guides at all-guides.com TROUBLE SHOOTING GUIDE STOVE WILL NOT FEED PELLETS, BUT FUEL FEED LIGHT COMES ON AS DESIGNED Possible Causes Possible Remedies: (Unplug stove first when possible) Wait for the stove to cool for about 30 - 45 minutes. Locate the High Limit High limit switch has tripped or is thermodisc and press the reset button on the back of it.
-
Page 21: Wiring Diagram
All manuals and user guides at all-guides.com WIRING DIAGRAM ENSURE THE WIRES ARE CONNECTED TO THE BOTTOM TWO PRONGS OF THE HOPPER SWITCH AS SHOWN. CORRECT WRONG © 2021 United States Stove Company... -
Page 22: Repair Parts
All manuals and user guides at all-guides.com REPAIR PARTS © 2021 United States Stove Company... - Page 23 All manuals and user guides at all-guides.com REPAIR PARTS Part # Description 80599 T-Disc, Exhaust 892183 Main Weldment 892203 Hinge Pin 83538 Shaft Collar - Ignitor Tube 80630 PCBA, Controller 892184 Hopper 892200 Vented Side Panel, Right 892185 Auger Housing Weld. 892201 Vented Side Panel, Left 892186 Plate, Auger Bushing 892202 Vented Back Panel...
-
Page 24: Service Record
All manuals and user guides at all-guides.com SERVICE RECORD It is recommended that your heating system is serviced regularly and that the appropriate Service Interval Record is completed. SERVICE PROVIDER Before completing the appropriate Service Record below, please ensure you have carried out the service as described in the manufacturer’s instructions. - Page 25 All manuals and user guides at all-guides.com...
- Page 26 All manuals and user guides at all-guides.com...
- Page 27 All manuals and user guides at all-guides.com...
- Page 28 All manuals and user guides at all-guides.com...
- Page 29 All manuals and user guides at all-guides.com...
- Page 30 All manuals and user guides at all-guides.com...
- Page 31 All manuals and user guides at all-guides.com...
- Page 32 All manuals and user guides at all-guides.com...
- Page 33 All manuals and user guides at all-guides.com...
- Page 34 All manuals and user guides at all-guides.com...
- Page 35 All manuals and user guides at all-guides.com...
- Page 36 All manuals and user guides at all-guides.com...
- Page 37 All manuals and user guides at all-guides.com...
- Page 38 All manuals and user guides at all-guides.com...
- Page 39 All manuals and user guides at all-guides.com...
- Page 40 All manuals and user guides at all-guides.com...
- Page 41 All manuals and user guides at all-guides.com...
- Page 42 All manuals and user guides at all-guides.com...
- Page 43 All manuals and user guides at all-guides.com...
- Page 44 All manuals and user guides at all-guides.com...
- Page 45 All manuals and user guides at all-guides.com...
- Page 46 All manuals and user guides at all-guides.com...
- Page 47 All manuals and user guides at all-guides.com...
- Page 48 All manuals and user guides at all-guides.com...
Need help?
Do you have a question about the VG5770 and is the answer not in the manual?
Questions and answers