Table of Contents
Advertisement
Quick Links
Advertisement
Table of Contents

Related Manuals for AEG KMR721000B


Summary of Contents for AEG KMR721000B
- Page 1 KMR721000B User Manual Microwave Oven USER MANUAL...
-
Page 2: Table Of Contents
16. ENERGY EFFICIENCY..................... 30 FOR PERFECT RESULTS Thank you for choosing this AEG product. We have created it to give you impeccable performance for many years, with innovative technologies that help make life simpler features you might not find on ordinary appliances. Please spend a few minutes reading to get the very best from it. -
Page 3: Safety Information
ENGLISH SAFETY INFORMATION Before the installation and use of the appliance, carefully read the supplied instructions. The manufacturer is not responsible for any injuries or damages that are the result of incorrect installation or usage. Always keep the instructions in a safe and accessible location for future reference. - Page 4 Always use oven gloves to remove or put in • accessories or ovenware. Before carrying out any maintenance, disconnect the • appliance from the power supply. Ensure that the appliance is switched off before • replacing the lamp to avoid the possibility of electric shock.
-
Page 5: Safety Instructions
ENGLISH warming pads, slippers, sponges, damp cloth and similar may lead to risk of injury, ignition or fire. If smoke is emitted, switch off or unplug the appliance • and keep the door closed in order to stifle any flames. Microwave heating of beverages can result in delayed •... - Page 6 • Do not use the appliance as a work out by our Authorised Service Centre. surface or as a storage surface. • Do not let mains cables touch or • Open the appliance door carefully.
- Page 7 ENGLISH 2.4 Care and cleaning 2.5 Internal light • The type of light bulb or halogen WARNING! lamp used for this appliance is only Risk of injury, fire, or damage for household appliances. Do not use to the appliance. it for house lighting. •...
-
Page 8: Product Description
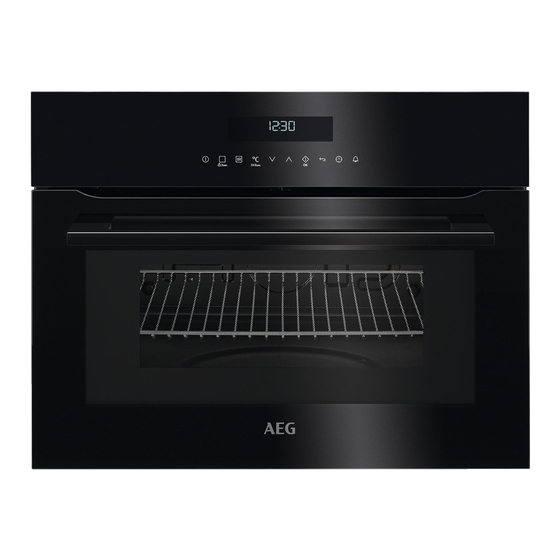
3. PRODUCT DESCRIPTION 3.1 General overview Control panel Electronic programmer Heating element Microwave generator Lamp Shelf support, removable Shelf positions 3.2 Accessories For cakes and biscuits. Grill- / Roasting pan Wire shelf To bake and roast or as a pan to collect For cookware, cake tins, roasts. -
Page 9: Control Panel
ENGLISH 4. CONTROL PANEL 4.1 Electronic programmer Use the sensor fields to operate the appliance. Sensor Function Comment field Display Shows the current settings of the appliance. ON / OFF To activate and deactivate the appliance. Grilling or Assis- Touch the sensor field once to choose a heating ted Cooking function or the menu: Assisted Cooking. - Page 10 Sensor Function Comment field Time and addi- To set different functions. When a heating func- tional functions tion operates, touch the sensor field to set the timer or the functions: Function Lock, Favourites, Heat + Hold, Set + Go.
-
Page 11: Before First Use
ENGLISH 5. BEFORE FIRST USE 5.2 First Connection WARNING! Refer to Safety chapters. When you connect the appliance to the mains or after the power cut, you have to 5.1 Initial Cleaning set the language, the display contrast, the display brightness and the time of Remove all accessories and removable the day. - Page 12 Sym- Submenu Description Time Indication When ON, the display shows the current time when you deactivate the appliance. Set + Go To set a function and activate it later with a press of any symbol on the control panel.
-
Page 13: Microwave Mode
ENGLISH 7. MICROWAVE MODE 7.1 Microwave • Use flat, wide dishes. • Do not use cookware made of General: porcelain, ceramic or earthenware with unglazed bottoms or small holes, CAUTION! e.g. on handles . Moisture going into Do not let the appliance the holes can cause the cookware to operate when there is no crack when it is heated. - Page 14 7.2 Suitable cookware and materials Cookware / Material Microwave Grilling Defrost- Heating Cooking Ovenproof glass and porcelain with no metal components, e.g. heat- proof glass Non-ovenproof glass and porcelain Glass and glass ceramic made of ovenproof / frost-proof material...
- Page 15 ENGLISH 7.3 Tips for the microwave Result Remedy You cannot find details for the amount Find details for similar type of food. Increase or of food prepared. shorten the length of the cooking time according to the following rule: double the amount - almost double the time, half the amount - half the time.
- Page 16 7.5 Setting the Microwave If you touch or open the function door, the function stops. To 1. Activate the appliance. start it again, touch . 2. Touch to activate the Microwave 7.6 Setting the Combi function function. 3. Touch . The function: Duration is 1.
-
Page 17: Clock Functions
ENGLISH Power setting • 1000 Watt Heating liquids • 900 Watt Searing at the start of the cooking process • 800 Watt Cooking vegetables • 700 Watt Melting gelatine and butter • 600 Watt Defrosting and heating frozen meals • 500 Watt Heating one-plate meals Simmering stews Cooking egg dishes... -
Page 18: Automatic Programmes
• The set temperature is more than 80 If you use the clock °C. functions: Duration, End • The function: Duration is set. Time, the appliance The function: Heat + Hold keeps deactivates the heating prepared food warm at 80 °C for 30 elements after 90 % of the minutes. -
Page 19: Using The Accessories
ENGLISH 9.2 Assisted Cooking with 1. Activate the appliance. 2. Select the menu: Assisted Cooking. Recipe Automatic Press to confirm. This appliance has a set of recipes you 3. Select the category and dish. Press can use. The recipes are fixed and you to confirm. -
Page 20: Additional Functions
Wire shelf and baking tray / deep pan Small indentation at the top together: increase safety. The Push the baking tray / deep pan between indentations are also anti-tip the guide bars of the shelf support and devices. The high rim the wire shelf on the guide bars above. -
Page 21: Hints And Tips
ENGLISH function operates and you do not 3. Press again and again until the change any settings. display shows: Function Lock. 4. Press to confirm. Temperature (°C) Switch-off time (h) To deactivate the function, press . The 30 - 115 12.5 display shows a message. - Page 22 • Set the shelf into the shelf position as The temperature and baking recommended in the grilling table. times in the tables are • Always set the pan to collect the fat guidelines only. They into the first shelf position.
- Page 23 ENGLISH Food Power Quantity Time (min) Standing Comments (Watts) (kg) time (min) Goulash 10 - 15 10 - 15 Turn halfway through, re- move defros- ted parts. Defrosting poultry Food Power Quantity Time (min) Standing Comments (Watts) (kg) time (min) Chicken 25 - 30 10 - 20...
- Page 24 Defrosting sausage Food Power Quantity Time (min) Standing Comments (Watts) (kg) time (min) Sliced saus- 2 - 4 20 - 40 Turn halfway through. Defrosting dairy products Food Power Quantity Time (min) Standing Comments (Watts) (kg) time (min) Quark 0.25...
- Page 25 ENGLISH Food Power Quantity Time (min) Standing Comments (Watts) time (min) Bread 1 kg 15 - 20 10 - 15 Turn halfway through. Sliced bread 0.5 kg 8 - 12 10 - 15 Turn halfway through. Bread rolls 4 rolls 5 - 8 5 - 10 Turn halfway...
- Page 26 Food Power Quantity Time (min) Standing Comments (Watts) time (min) Convenience 0.4 - 0.5 kg 14 - 20 Remove any food aluminium lids, turn half- way through. Frozen ready 0.4 - 0.5 kg 4 - 6 Remove any meals...
- Page 27 ENGLISH Food Power Quantity Time (min) Standing Comments (Watts) time (min) Vegetables, 0.5 kg 14 - 18 Add approx. short cooking 50 ml water, cook cov- time, frozen ered, stir halfway through. Vegetables, 0.5 kg 14 - 20 Add approx. long cooking 50 ml water, cook cov-...
-
Page 28: Care And Cleaning
Food Ovenware Pow- Tem- Time Shelf Comments pera- (min) posi- (Watt ture tion (°C) au gratin po- Gratin dish 10 min stand- tatoes (1 kg) ing time. Roast pork Glass dish with strainer Turn in be- neck (1.1 kg) tween, 10 min standing time. -
Page 29: Troubleshooting
ENGLISH The top lamp 2. Clean the glass cover. 3. Replace the lamp with a suitable 300 1. Turn the lamp glass cover °C heat-resistant lamp. counterclockwise to remove it. 4. Install the glass cover. 14. TROUBLESHOOTING WARNING! Refer to Safety chapters. 14.1 What to do if... -
Page 30: Technical Data
Problem Possible cause Remedy Steam and condensation You left the dish in the oven Do not leave the dishes in settle on the food and in the for too long. the oven for longer than 15 - cavity of the oven. - Page 31 ENGLISH Use metal dishes to improve energy Residual heat saving, but only when you use a non- If a programme with the Duration or End microwave function. Time selection is activated and the cooking time is longer than 30 minutes, When possible, do not preheat the oven the heating elements automatically before you put the food inside.
- Page 32 www.aeg.com/shop...
Need help?
Do you have a question about the KMR721000B and is the answer not in the manual?
Questions and answers