Polycom CX5000 Deployment Manual
Hide thumbs
Also See for CX5000:
- Deployment manual (38 pages) ,
- User manual (38 pages) ,
- Setup manual (20 pages)

Related Manuals for Polycom CX5000


Summary of Contents for Polycom CX5000
- Page 1 ® Polycom CX5000 Deployment Guide January 2010 Edition Polycom P/N: 1725-31217-001 Rev. C...
- Page 2 Polycom CX5000 User’s Guide POLYCOM®, the Polycom "Triangles" logo and the names and marks associated with Polycom's products are trademarks and/or service marks of Polycom, Inc. and are registered and/or common law marks in the United States and various other countries.
-
Page 3: Table Of Contents
Safety Notices ..........................34 Regulatory Information Regulatory information for the countries in which thePolycom ® CX5000 is approved for use can be found in the Polycom ® CX5000 Regulatory Manual, which is shipped with the Polycom CX5000 product and is also available online at http://www.polycom.com/global/documents/support/user/products/voice/Polycom_CX5000_Regulator... -
Page 4: Introduction
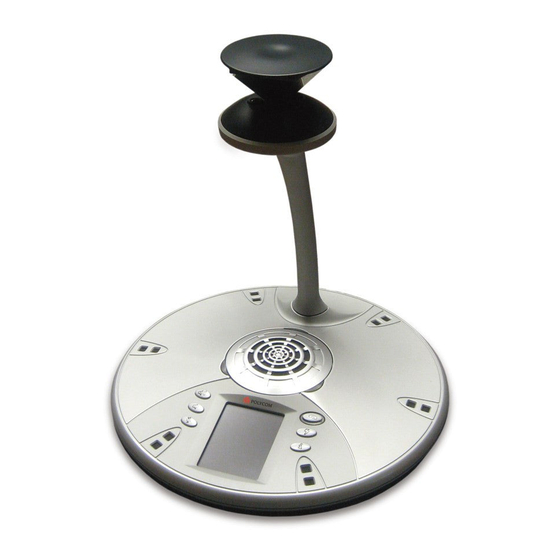
Polycom CX5000 (provided inside the Polycom CX5000 package). • Polycom CX5000 Setup Guide Designed for getting the device out of the box and running: explains how to install, configure, and begin using Polycom CX5000 (provided inside the Polycom CX5000 package). - Page 5 From left to right, the status indicators show whether an external dial pad is connected, whether the Polycom CX5000 device is connected to a computer via USB, whether a phone line is connected to the Polycom CX5000 device, and whether there is an Ethernet connection to the Polycom CX5000 device.
- Page 6 The Diagnostics screen (see Figure 4) displays four icons that represent the main subsystems of a Polycom CX5000 device. (This screen also displays the previously discussed status indicators.) From left to right and top to bottom, the icons represent audio subsystem diagnostics, video subsystem diagnostics, systems diagnostics, and network subsystem diagnostics.
-
Page 7: Device Configuration
Connecting the Polycom CX5000 Device to the Computer To configure and manage the Polycom CX5000 device using CX5000Manage.exe, plug the Polycom CX5000 device's USB cable into an available USB port on the computer (shown in Figure 5, below). USB 2.0 is required. -
Page 8: Using Cx5000Manage.exe
Configuration mode commands are used for a variety of purposes, including resetting the password, setting the device time, and uploading a device configuration to the image update server. All but two operations prompt the user for the Polycom CX5000 password. The operations that do not require a password are listed here. - Page 9 The device must be rebooted before the new configuration takes effect. After performing any of the image mode commands you must reboot the Polycom CX5000 device. You can do this by using the CX5000Manage boot command as shown in the following command.
-
Page 10: Configuring The Polycom Cx5000 Device
Polycom CX5000 User’s Guide Configuring the Polycom CX5000 Device This section describes how to apply new settings to a Polycom CX5000 device. Before starting, make sure that you have a supported version of Microsoft Office InfoPath installed— Office InfoPath 2003 or Office InfoPath 2007. - Page 11 Polycom CX5000 Deployment Guide | Page 11 Table 4. Room Settings Field Description Factory default Room name A text description (at most 63 (empty string) characters) for the conference room. Room size The approximate comfortable seating 7 – 11 people (Medium) capacity of the conference room.
- Page 12 Reserved (empty string) Table 8. Telephony Settings Field Description Factory default Phone number Phone number for the Polycom CX5000 (empty string) device Flash timing 10 ms through 990 ms, in 10 ms Default settings for the target country's increments recommended regulatory compliance...
- Page 13 Polycom CX5000 Deployment Guide | Page 13 Table 9. Pre-Programmed Speed Dials Field Description Factory default Name Short name (at most 63 characters) of (empty string) the number in the speed dial Number Telephone number (at most 63 (empty string) characters) By default, the form shows one speed dial entry.
- Page 14 Polycom CX5000 User’s Guide Maximum log size in memory Configurable size of memory reserved 1024 KB for the log. It is recommended that you leave this set to 1024 KB. Server Name of the update server Ucupdates Port Port for device-server communication...
- Page 15 Polycom CX5000 Deployment Guide | Page 15 The lighting frequency setting should ensure that Lighting frequency is set match the AC power frequency of the accordingly. deployment location to ensure good video quality. If it is set to Auto, the device will attempt to detect the frequency from the power source.
- Page 16 Polycom CX5000 User’s Guide Country LCD Display Settings – Time Settings – Telephony Settings – Advanced Settings – Display Language Time Zone Flash Timing Lighting Frequency (see Table 7) (see Table 6) (see Table 8) (see Table 13) Ireland English...
-
Page 17: Common Configuration Tasks
%ProgramFiles%\Polycom CX5000\Device Management\. Set the Time The following command uses the computer's time to reset the time on the Polycom CX5000 device. CX5000Manage.exe -m:cfg -t:now Change the Display Language To change the display language 1. - Page 18 CX5000Manage.exe -m:img -i:nk -f:<file path to nk.bin> -s:<file path to nk.cat> Reset the Device to Factory Settings A Polycom CX5000 device stores two copies of its firmware: a read-only copy that is installed at the factory, and an updateable working copy. A Polycom CX5000 device ordinarily runs the updateable copy.
-
Page 19: Device Management Best Practices
If you do not hold this button long enough, the factory reset will not occur and the device will reboot. After you perform a factory reset, apply the latest Polycom CX5000 firmware to the device to ensure the most secure operation and best performance. After a factory reset you will need to reapply the device configuration for your device. -
Page 20: Security Best Practices
If you plan to use the Polycom CX5000 Ethernet port for remote configuration of the device, diagnostics logging, or automatic image update, make sure that the device is configured properly. If you are not planning to use the Polycom CX5000 Ethernet port for such purposes, do not plug in the Ethernet cable. - Page 21 Polycom CX5000 Deployment Guide | Page 21 Figure 6. Circular table with one display device Figure 7 below shows a configuration with the Polycom CX5000 device (1) and three display devices (2). The circular table is 5 feet in diameter.
- Page 22 12 to 16 people, and one display device (3). The table shown is approximately 5 feet x 10 feet. In this configuration, two satellite microphones (2) are shown connected to the Polycom CX5000 device (1). Figure 8. Rectangular table with one display device Figure 9 below shows a configuration with a rectangular table in a conference room capable of holding 12 to 16 people, and three display devices (3).
-
Page 23: Troubleshooting Techniques
This section provides several techniques for solving commonly occurring problems, and also contains a list of frequently asked questions (FAQ). If you run into problems using a Polycom CX5000 device, the techniques listed here might be of use to you. - Page 24 Polycom CX5000 User’s Guide • In Control Panel, double-click Display. • On the Display Properties page, click the Settings tab, and then click Advanced. • On the monitor's property page, click the Troubleshoot tab. • Decrease hardware acceleration one step at a time and see if the problem disappears.
- Page 25 If the problem persists after multiple attempts, contact Polycom Customer Support. Device plays beeping sound and red LCD lights flash at startup Symptom The Polycom CX5000 device starts up, but plays a beeping sound and shows red LCD lights for a few seconds after the device boots up. Resolution Press the Info button, press the diagnostics icon, and then press the video diagnostics icon.
- Page 26 The device is not recognized on the network because it does not have an IP address assigned to it. After you connect the Polycom CX5000 power data box to the network, you must reboot the Polycom CX5000 device. To verify that Polycom CX5000 is on the network, press the Information button , then press the Device Diagnostics icon (in the upper right corner of this screen), and then press the Network Diagnostics icon (in the lower right corner of this screen).
-
Page 27: Interpreting The Diagnostics Logs
Open a command prompt, and execute the following command line. CX5000Manage.exe -m:diag -l:flush This command causes the Polycom CX5000 CE log to be uploaded to a server share on the Office Communications Server 2007 Update Service. See the Office Communications Server 2007 documentation for the location of the file share. - Page 28 The CE log contains a benign erroneous entry, similar to the following: 0:00:01.530.221 : Raw data 38 (wchar), ,,,NORFLASH VERIFY,,FAIL,0xFFFFFFFF,, The NORFLASH VERIFY test is not run and does not need to be run. In the event of a NOR Flash failure, the Polycom CX5000 device will not boot.
- Page 29 Polycom CX5000 Deployment Guide | Page 29 Diagnostics Logging If the Log to the server field is checked in the Logging section of the Polycom CX5000 device configuration, the device writes self-diagnostic data to the Microsoft Office Communications Server 2007 Update Service. For the file name and location of the log, refer to the documentation for Office Communications Server 2007 Update Service.
- Page 30 Polycom CX5000 User’s Guide LoggingType POST Device Name Value of [Device Name] Component System | ADSP | VDSP When Component = System, only the Property, Value2, and Value3 columns are used. The Property column contains the name of the test. The Value2 column contain the status (PASS | FAIL | NOT DONE | NA).
- Page 31 Polycom CX5000 Deployment Guide | Page 31 The Property column contains the name of the test. The Value2 column contains the status (PASS | FAIL | NOT DONE | NA). The Value3 column contains the detailed status code. These entries indicate the general health of the video subsystem.
- Page 32 Polycom CX5000, a PcAudio usage entry is logged with the start time and end time. When video streams are used in Polycom CX5000, a PcVideo usage entry is logged with the start time and end time. When Polycom CX5000 is used as an analog phone, a PstnCall usage entry is logged with the start time, end time, originating phone number (configured in the Polycom CX5000 device configuration), and the first digit of the dialed phone number.
-
Page 33: Known Tools Issues
Value of [Image Update Success/Fail] Watson Dumps If the Log to the server field is checked in the Logging section of the Polycom CX5000 device configuration, the device automatically logs to the same server in case of a crash. The dump files are in kdmp format. -
Page 34: Support
Polycom CX5000 User’s Guide Support Polycom® Customer Support (800)POLYCOM (765-9266) Visit: https://www.polycom.com/support/ Online Documentation Visit: http://www.polycom.com/support/voicedocumentation/ Type CX5000 to search the Knowledge Base. Available documentation: • Polycom®CX5000 Users Guide • Polycom®CX5000 Deployment Guide • Polycom®CX5000 Release Notes • Polycom® Quick Reference Card •...