Table of Contents
Advertisement
Quick Links
User Guide | CG000542 | Rev A
Visium CytAssist
with Readiness Test
For use with:
Visium CytAssist & Accessory Kit, 12-Month Warranty, PN-1000441
Visium CytAssist Instrument Accessory Kit, PN-1000433
Visium CytAssist & Accessory Kit, 24-Month Warranty, PN-1000442
Visium CytAssist Instrument Accessory Kit, PN-1000433
10xgenomics.com
Advertisement
Table of Contents

Related Manuals for 10x Genomics Visium CytAssist


Summary of Contents for 10x Genomics Visium CytAssist
- Page 1 User Guide | CG000542 | Rev A Visium CytAssist with Readiness Test For use with: Visium CytAssist & Accessory Kit, 12-Month Warranty, PN-1000441 Visium CytAssist Instrument Accessory Kit, PN-1000433 Visium CytAssist & Accessory Kit, 24-Month Warranty, PN-1000442 Visium CytAssist Instrument Accessory Kit, PN-1000433...
- Page 2 © 2022 10x Genomics, Inc. (10x Genomics). All rights reserved. Duplication and/or reproduction of all or any portion of this document without the express written consent of 10x Genomics, is strictly forbidden. Nothing contained herein shall constitute any warranty, express or implied, as to the performance of any products described herein.
- Page 3 CG000542 | Rev A User Guide | Visium CytAssist Instrument | Document Revision Summary Document Document Number CG000542 | Rev A Revision Summary Title Visium CytAssist Instrument User Guide with Readiness Test Revision Rev A Revision Date July 2022 Link to TOC |...
-
Page 4: Table Of Contents
CG000542 | Rev A User Guide | Visium CytAssist Instrument | Table of Contents Table of Introduction Introduction Contents Product Identification Label Product Specifications Safety & Compliance Information Safety Regulatory System Components System Components Accessory Kits Tips & Best Practices... -
Page 5: Introduction
Introduction Introduction Product Identification Product Specifications... - Page 6 CG000542 | Rev A User Guide | CytAssist Instrument | Introduction The Visium CytAssist is a compact, bench top instrument that automates Introduction the transfer of transcriptomic analytes from standard microscope slides to Visium slides, enabling spatial profiling insights from more samples.
- Page 7 CG000542 | Rev A User Guide | CytAssist Instrument | Introduction Visium CytAssist LBL-00042-01 Regulatory Label Image of label for reference only Product Identification Label ● Must be legible from 18 inches ● Electrical shock warning required, but included. M...
-
Page 8: Safety & Compliance Information
Safety & Compliance Information Safety Regulatory... -
Page 9: Safety
Pinch risk: Ensure no obstructions or fingers present near closing lid. Warning: Avoid using the Visium CytAssist in a manner not specified by 10x Genomics. The Visium CytAssist has been designed to protect the user. If used improperly, the intended user protections can be impaired. -
Page 10: Regulatory
CG000542 | Rev A User Guide | CytAssist Instrument | Safety & Compliance Information The Visium CytAssist has been designed, tested, and certified to be in Regulatory compliance with the following standards: Certification Standards TUV Certification only for Visium CytAssist UL 61010-1:2012 and CAN/CSA C22.2 No. -
Page 11: System Components
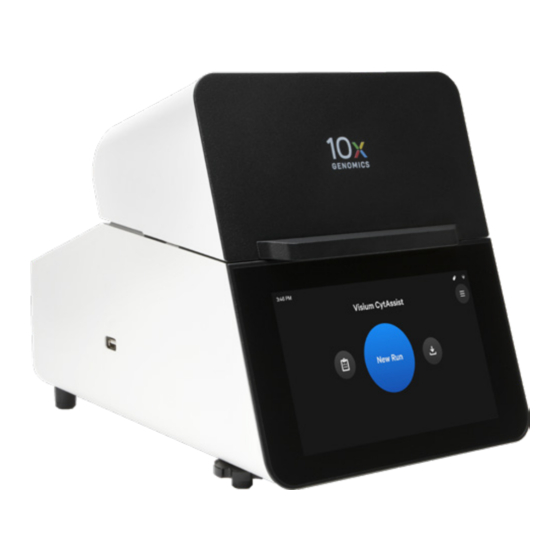
System Components System Components Accessory Kits... - Page 12 CG000542 | Rev A User Guide | CytAssist Instrument | System Components System Components Exterior Handle Base USB Port Touchscreen Corner Bumper Adjustable Feet Interior Tissue Slide Clips Slide Alignment Guides Tissue Alignment Windows Tissue Slide Stage Visium Slide Stage Visium Slide Lock Visium Alignment Windows Back...
-
Page 13: Accessory Kits
3000603 PN-1000433 (IEC 60320 C-14, with C-13 Detachable Adapters) USB, 8 GB 3000664 The Visium CytAssist instrument is compatible with VFAT and exFAT formatted USBs. Visium CytAssist Quick Reference Cards – for CG000548 Accessory Kit Instruction Visium CytAssist Training Kit... -
Page 14: Icons
Tips & Best Practices Icons Check Tissue Placement on Slide Tissue Slide Placement on Tissue Slide Stage Visium Slide Placement on Visium Slide Stage 10x Genomics Cloud... - Page 15 Use this section to determine if the tissue section is located in an area that results in Ensure that the slide surface with the tissue successful analyte transfer and imaging. The Visium CytAssist Quick Reference Cards – is facing the user. for Accessory Kit Instruction (CG000548), located within the Instrument Accessory Kit (laminated document with concise instructions).
- Page 16 Examples of Bad Tissue Placement Examples of Good Tissue Placement ++++++++ ++++++++ ++++++++ ++++++++ ++++++++ Blank Slide Frosted Slide Blank Slide Frosted Slide Refer to the Visium CytAssist Training Kit User Guide (CG000549) for further guidance. Link to TOC | 10xgenomics.com...
- Page 17 Use this section to determine if the tissue section is located in an area that results in Tissue Slide Stage successful analyte transfer and CytAssist-mediated imaging. The Visium CytAssist Quick Reference Cards – for Accessory Kit Instruction (CG000548), located within the Instrument Accessory Kit, contain a concise and cleanable version of this content.
- Page 18 11 mm alignment guides. Refer to the Visium CytAssist Training Kit User Guide (CG000549) for further guidance. Load Tissue Slides onto the Tissue Slide Stage a. Press down on the wide end of clip to lift and pivot the narrow end of the clip.
- Page 19 CG000542 | Rev A User Guide | CytAssist Instrument | Tips & Best Practices b. Lay the tissue slide flat against the stage surface. Both hands needed: Tissue Slide use one hand to hold the slide in place and the other to pivot the clips Placement on and overlap the slide.
- Page 20 CG000542 | Rev A User Guide | CytAssist Instrument | Tips & Best Practices e. Secure the slide by pivoting the Visium Slide Lock gently to the left, Visium Slide ensuring that the slide is not impacted. The lock will partially Placement on obscure the slide label when correctly secured.
- Page 21 User Guide | CytAssist Instrument | Tips & Best Practices The image below demonstrates how movement of the tissue slides affects where target molecules will end up on the Visium CytAssist Spatial Gene Expression Slide. POSITION OF TISSUE ON TISSUE SLIDE STAGE...
- Page 22 The Visium Slide Stage holds one of the following at a time: Visium Slide Stage • Visium CytAssist Spatial Gene Expression Slide v2, 6.5 mm • Visium CytAssist Spatial Gene Expression Slide v2, 11 mm • Visium CytAssist Training Slide •...
- Page 23 Each Visium CytAssist instrument is required to be registered to the 10x Genomics Cloud during the First Time Use (FTU) set up process. Users may register multiple instruments to their accounts, and each instrument can optionally be registered to multiple 10x Genomics accounts.
-
Page 24: Menu Options
Menu Options Menu Options Firmware Update Procedure... - Page 25 • Support Package - includes Run Data plus instrument telemetry and sensor information (captured both during instrument run and instrument idle* time); Size ~100s of mb/run Share Support Package with 10x Genomics Technical Support for troubleshooting purposes. Click an entry for more details. Upload to Support...
- Page 26 CG000542 | Rev A User Guide | CytAssist Instrument | Menu Overview Data export ranges in size from 10s to 100s of MB, depending on how Menu Options many runs are selected. If Automatic Upload is turned on, instrument contd. and system data are automatically exported or uploaded after a run but the CytAssist images and Support Packages are not.
- Page 27 Internet connectivity is not required, but is highly recommended so that the instrument may receive security/firmware updates and automatically upload system log files to the 10x Genomics Cloud. 10x Genomics has no remote access to the instrument. Users may separately configure connectivity settings related to firmware updates and log upload behavior.
-
Page 28: Firmware Update Procedure
Download the desired updates onto a USB. The Visium CytAssist instrument is compatible with VFAT and exFAT formatted USBs. c. Insert USB into the back of the instrument. d. Onscreen, navigate through the menu to System > Firmware Update >... - Page 29 Button on the touchscreen. Enter the serial number located on the Visium CytAssist Calibration Slide label. b. Locate two blank slides and the Visium CytAssist Calibration Slide in the Instrument Accessory Kit. Clean with compressed air. c. Follow onscreen instruction and see...
-
Page 30: System Operation
System Operation Step 1: Installation Step 2: First-Time Use Step 3: Readiness Test Step 4: Main Operation... -
Page 31: Step 1: Installation
• Provides a minimum of 4” (10 cm) clearance around unit to allow free air circulation. Warning: Avoid using the Visium CytAssist in a manner not specified by 10x Genomics. The Visium CytAssist has been designed to protect the user. If used improperly, the intended user protections can be impaired. General Power Safety Grounding is required to prevent electric shock. - Page 32 DO NOT POWER ON until ready for First-Time Use setup Accessory Kit Visium CytAssist Lift instrument from sides Retain packaging for future transportation a. Open box according to box label “this side up.” Carefully cut or remove the tape on the top of the box and open the top flaps. Ensure that cut is not too deep as it may damage the Instrument Accessory Kit box.
-
Page 33: Step 2: First-Time Use
Attach the correct country adaptor to the Installation universal adaptor. contd. h. Plug the Visium CytAssist into a properly grounded outlet of proper voltage (see Product Specifications). If using an Ethernet cable (not provided) to connect to the network, connect cable directly to the instrument. - Page 34 Internet connection: After registration, the instrument will automatically search for the latest firmware update. Confirm data transmission settings for automatic upload/download. No Internet connection: Download the latest firmware update from your 10x Genomics account to the USB provided in the Instrument Accessory Kit. Insert USB into the back of the instrument.
- Page 35 CG000542 | Rev A User Guide | CytAssist Instrument | System Operation Step 2: f. Proceed to Leveling Mode. To level the instrument, turn the adjustable feet at the front of the instrument. Adjust left-right tilt first by adjusting First-Time Use one foot first and adjust the front back tilt using both feet at the same contd.
-
Page 36: Step 3: Readiness Test
OR press the blue Run Start Button to initiate a run. Enter the Readiness Test serial number (located on the Visium CytAssist Calibration Slide label). b. Locate the two blank slides and the Visium CytAssist Calibration Slide in the Instrument Accessory Kit. Inspect for any chips or cracks. - Page 37 CG000542 | Rev A User Guide | CytAssist Instrument | System Operation Clean Up After a Readiness Test Step 3: Readiness Test h. Upon test completion, open the lid and unload the blank slides and calibration slides. Calibration slide may be cleaned with lens paper or contd.
-
Page 38: Step 4: Main Operation
This section is meant as a general overview of instrument operation and its placement within the steps of the Visium CytAssist Spatial Gene Expression assay. When performing the protocol, follow the steps listed in the appropriate assay kit user guide and use this section only as a reference. - Page 39 User Guide | CytAssist Instrument | System Operation b. Enter new run information, including: Step 4: Main Operation • Visium CytAssist Slide serial number contd. • Custom run name, temperature and time (37 °C for 30 min is recommended for most applications) See the appropriate assay kit user guide for further guidance.
- Page 40 Click the “Done” button and open lid. DO NOT power off the instrument at this time, as it needs to process support data. j. IMMEDIATELY remove the Visium CytAssist slide from the instrument, and proceed with the protocol workflow as specified in the appropriate assay kit user guide (save cleanup for later).
-
Page 41: Maintenance
View and verify the tissue samples were accurately aligned within the Visium CytAssist Slide fiducial frame. See the relevant assay kit user guide for further guidance. The instrument requires a ~20 min cool down between runs. -
Page 42: System Maintenance
Maintenance System Maintenance Moving & Shipping the Instrument... - Page 43 Interior The Visium Slide Stage of the Visium CytAssist has been designed to catch and contain drips and a small volume of liquid spills. Occasionally, use a soft lab towel to clean these areas with a mixture of mild detergent and distilled water.
- Page 44 10x Genomics service personnel. Environmental Requirements It is the design intent of the Visium CytAssist that it be used in a typical indoor laboratory environment. The instrument’s operating temperature is 18–28°C (64–82°F), humidity 80% Max (Non-Condensing) (see Product Specifications).
- Page 45 CG000542 | Rev A User Guide | CytAssist Instrument | Maintenance If the Visium CytAssist will be transported in a vehicle or shipped, Moving & Shipping it should be repackaged according to the instructions below. Run a the Instrument new Readiness Test (see...
- Page 46 CG000542 | Rev A User Guide | CytAssist Instrument | System Operation c. Open lid. Apply glass protective film or laboratory labeling tape to the Moving & Shipping Visium and Tissue Alignment Windows (placement indicated by red the Instrument dashed line in the illustration below). contd.
- Page 47 Unless directed otherwise, do not include any parts of the Accessory Kit (which includes the power cord). j. Coordinate with 10x Genomics Support for further return instructions (some required paperwork will be placed in the box). Place the required documents into the box.
-
Page 48: Troubleshooting
Troubleshooting Troubleshooting Error Screens... - Page 49 CG000542 | Rev A User Guide | CytAssist Instrument | Troubleshooting Troubleshooting Issue • Upon opening the lid after a successful run, the Visium slide has popped out of the grooves on the Visium Slide Stage. This does not impact assay performance or slide quality. Visium Slide Popped out of the Grooves •...
- Page 50 CG000542 | Rev A User Guide | CytAssist Instrument | Troubleshooting • Instrument is hot: If the Visium CytAssist overheats during an Troubleshooting experiment run, the run will fail. A warning message will appear contd. instruting users to carefully remove slides and contact support@10xgenomics.com...
- Page 51 Support will request log files for troubleshooting. Upload pertinent logs to 10x Genomics by navigating to the Logs menu option on screen. (See Run Data section). There are two types of errors: Critical Errors –...
Need help?
Do you have a question about the Visium CytAssist and is the answer not in the manual?
Questions and answers