
Related Manuals for Maruyama SSD600


Summary of Contents for Maruyama SSD600
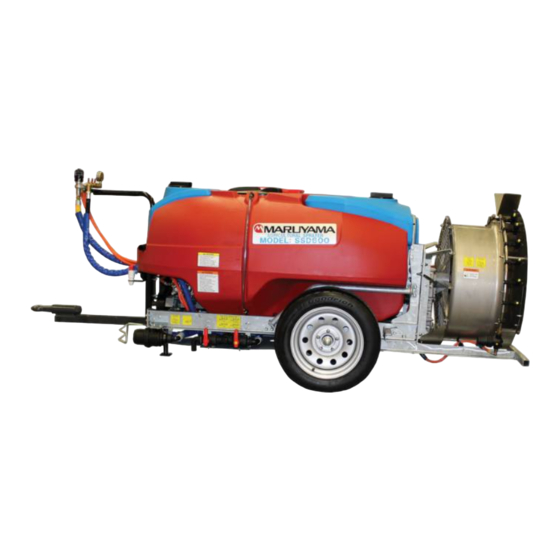
- Page 1 Operation Manual Tractor-trailed Sprayer SSD600 Please Read This Document Before Use.
- Page 2 Please note that information contained in this manual may not exactly match the product you purchased due to specification changes of the product, etc. If you have any feedback on this product, please contact the Maruyama dealer or sales office near you. Scope of Use This product is designed for spraying pesticide and gibberellin in orchards.
-
Page 3: Table Of Contents
Table of Contents 1 For Safe Work ..............................3 2 Name of Each Part and Accessories ......................11 3 Main Specifications ............................13 4 Handling of Warning Labels ......................... 15 5 Installing/Removing the Sprayer on/from the Tractor .................. 18 6 How to View/Use Each Unit ......................... 24 Main tank (Chemical tank) ........................ -
Page 4: For Safe Work
For Safe Work (1) Introduction (3) Driving Carefully read the “Operation Manual” and Clean water is sprayed for adjustment of spray instruction manual of the agrichemical used, to pressure and spray check. carry out work correctly and safely. [1] Before driving the tractor, check the [1] When using the tractor-trailed sprayer connection of the universal joint, etc. - Page 5 Please pay attention to the drift of agricultural chemicals. Air assist sprayer spreads using a powerful blast to spread pesticide to the high part of the fruit tree. Therefore, the drift amount of agricultural chemicals is very large, and sprayed particles that soar are carried far.
- Page 6 Points of safety Please improve the road before you leave this machine in the field. Please also arrange the inside of the field, as well as the entrance to the field and the way to the field. Please reinforce where the shoulder is weak.
- Page 7 Please observe these items. [1] Are you physically and mentally healthy? Such a person should not work.. (If you are not in a physical condition that you can concentrate on your work, do not do work.). Drunk person Injured person A person under 15 years old.
- Page 8 [4] About chemicals. Warning Do not spray strongly acidic chemicals, strong alkaline chemicals, paint, thinner, gasoline, ● kerosene, benzine, alcohol etc. There is a possibility of burns or fire. Do not use highly flammable chemicals as they may cause fire. ●...
- Page 9 About public road driving. Please strictly observe. There is such a danger. When it is necessary to go through public It may be a violation of laws and regulations. roads for the movement of the machine, you Please follow the laws and regulations. load the machine on a truck and move.
- Page 10 When doing control work. Please strictly observe. There is such a danger. Please take enough sleep and improve your Even if you use low-toxicity agricultural physical condition the day before the control chemicals you have a bad effect when you are work.
- Page 11 After control work. Please strictly observe. There is such a danger. Wash the machine and spraying equipment It may break due to freezing. after use thoroughly. Please drain the water in the pump and piping. After the day's work is finished. Please strictly observe.
-
Page 12: Name Of Each Part And Accessories
Name of Each Part and Accessories Right Rear [12] [11] [10] Left Front [21] [15] [18] [16] [17] [20] [19] [23] [13] [22] [14] 11 11 11 11... - Page 13 ■ Name of Each Part and Accessories Name Reference page in the manual Main tank (Chemical tank) Cleaning tank Hand wash tank Hitch 18,21 Stand 19,21 Strainer Drain cock Feed valve Tire [10] Wheel [11] Tire scraper [12] Bumper [13] Pump [14] Input shaft...
-
Page 14: Main Specifications
17.7 kW ~ (24Ps ~) *1 Place weights on the front as necessary. Also note that installation may not be possible depending on the tractor.Consult the Maruyama dealer near you. *2 The applicable tractors are subject to change. *3 Values measured at the exit of the fan... - Page 15 SSD600 Machine Dimensions 2990 to 3130 mm (Three steps) 1175 or 1275 mm 1025 to 1325 mm (Six steps) The specifications are subject to change without notice for the purpose of improvement. 14 14 14 14...
-
Page 16: Handling Of Warning Labels
Constantly remove soiling and mud over the labels so that the information provided on them remains clearly visible. If you find a damaged warning label, order a new label from the Maruyama dealer near you and replace the old label. - Page 17 16 16 16 16...
- Page 18 17 17 17 17...
-
Page 19: Installing/Removing The Sprayer On/From The Tractor
Installing/Removing the Sprayer on/from the Tractor Warning For safety reasons, one person should work alone to install or remove the sprayer on/from the tractor. When installing or removing the sprayer on/from the tractor, make sure the main tank (chemical tank) is empty. -
Page 20: Stand
[4] Carefully back up the tractor until the draw bar aligns with the hitch. Next, insert the hitch pin and put the hair pin in. [5] Confirm that the machine is securely connected to the tractor, and then remove the stand. Stand R pin Remove the pin and take out the stand. -
Page 21: Input Shaft
If the overlap is longer, cut the universal joint by referring to the attached instruction manual for the universal joint. If the overlap is shorter, contact the Maruyama dealer near you, and please purchase a shaft of proper length. Turn the tractor until just before it [3] When the shafts have been connected, be sure contacts the machine. - Page 22 How to Remove the Universal Joint from the Tractor [1] Remove the universal joint from the machine. [3] Remove the hitch pin. [4] Carefully move the tractor forward to separate the draw bar from the hitch. [2] Install the stand on the machine. Install the stand at positions where the hitch does not contact the draw bar.
- Page 23 Adjusting the Sprayer Tread/Height The tread of the machine can be adjusted by changing the position at which the axle is locked. Also, the height of the machine can be adjusted by changing the direction in which the axle is locked. Use the machine by adjusting its tread and height according to the shape of the field.
-
Page 24: Tire Scraper
(b) Changing the height [1] Follow steps [1] to [3] in (a) to lift the [4] Follow steps [4] to [6] in (a) to secure the machine and loosen the axle bolts. axle and then slowly lower the sprayer. [2] Loosen the tire scraper bolts and shift them [5] Change the axle position up/down in the to the rearmost positions. -
Page 25: How To View/Use Each Unit
How to View/Use Each Unit Main tank (Chemical tank) A container in which to store mixed chemical. A level gauge is provided on both sides of the The maximum capacity is 600 L. main tank (chemical tank). To open the lid of the main tank (chemical tank), When checking the level in the main tank turn it counterclockwise to unlock and open the (chemical tank), make sure the machine is level. -
Page 26: Mixer
Mixer Hand wash tank The mixer is used to circulate and thereby This tank stores clean water for washing hands. agitate the chemical in the main tank (chemical The maximum capacity is 18 L. tank). To open the lid of the hand wash tank, turn it Actuate the spray pump. -
Page 27: Strainer
Strainer Feed valve/drain cock The strainer filters out contaminants that have You can choose to absorb water from the main entered main tank (chemical tank). tank (chemical tank) or from the cleaning tank The strainer can be removed from the strainer using the feed valve. -
Page 28: Spray Pump
Spray pump Pressure adjustment dial This pump is used to suction and pressure-feed This pressure adjustment dial is used to adjust chemical in the main tank (chemical tank). the discharge pressure of the spray pump. Turn the pressure adjustment dial clockwise to raise the pressure, or turn it counterclockwise to lower the pressure. -
Page 29: 2-Way Switching Nozzle
2-way switching nozzle The sprayer comes standard with two different Line filter The line filter filters out contaminants that may nozzles. Turn the holder 180° to switch the otherwise enter the spray pipe. The filter can be nozzle from which to spray. The spray direction can be changed to ±22.5°... -
Page 30: Fan Transmission
Fan transmission Adjustment plate The fan transmission is used to run and stop the The adjustment plates are used to adjust the fan. direction in which air comes out. Move the lever toward the front of the machine The adjustment plates can be moved by to connect the gear, and the fan will run. -
Page 31: Spray Plan
Spray Plan Before actually commencing work, set a spray plan for the day. Set a spray plan that will not cause chemical to remain. Caution Caution ● Select a nozzle so that the total spray amount from the nozzle will not exceed 31.4 L/min. The spray pump may malfunction. -
Page 32: How To Calculate Spray Speed
How to calculate spray speed How to Calculate the Spray Speed (1) Determine the spray amount per acre and the spray pressure. (2) Calculate the spray speed using the formula below. Total nozzle spray amount [L/min] Spray Speed [km/h] ≈ 242.8 x Spray amount per acre [L/acre]x Furrow width [m] <<Example>>... - Page 33 GA60 x 10 Traveling velocity Spray amount [km/h] Spray pressure Spray pressure Spray pressure L/acre L/10a 1.0 [MPa] 1.5 [MPa] 2.0 [MPa] 12.4 14.8 17.3 19.8 22.2 24.7 27.2 29.7 32.1 34.6 GA60 x 8 Traveling velocity Spray amount [km/h] Spray pressure Spray pressure Spray pressure...
- Page 34 YL6002 x 12 Traveling velocity Spray amount [km/h] Spray pressure Spray pressure Spray pressure L/acre L/10a 1.0 [MPa] 1.5 [MPa] 2.0 [MPa] 54.4 56.8 59.3 61.8 64.2 66.7 69.2 71.7 74.1 76.6 79.1 81.5 84.0 86.5 89.0 91.4 93.9 96.4 98.8 101.3 103.8...
- Page 35 YL6002 x 10 Traveling velocity Spray amount [km/h] Spray pressure Spray pressure Spray pressure L/acre L/10a 1.0 [MPa] 1.5 [MPa] 2.0 [MPa] 46.9 49.4 51.9 54.4 56.8 59.3 61.8 64.2 66.7 69.2 71.7 74.1 76.6 79.1 81.5 84.0 86.5 89.0 91.4 93.9 96.4...
- Page 36 66.7 The values in the reference guide table may not apply due to slipping of tires. In this case, consult the Maruyama dealer near you. When spraying at levels outside the quick reference guide, the nozzle must be replaced. Consult the Maruyama dealer near you.
-
Page 37: Startup Inspection
Startup Inspection The startup inspection refers to the inspection performed before commencing work. By performing the startup inspection every time, accidents associated with the machine, machine malfunctions, etc., can be prevented. Be sure to perform the startup inspection, because it is a very important inspection. * Startup inspection includes the items denoted by “Before start of work”... -
Page 38: Precautions For Spraying
Precautions for Spraying Warning Caution ● The person performing spraying should ● Keep only the required amount of spray wear protective gears for agrichemical agent in the main tank (chemical tank) to spraying (such as a pest control mask, prevent leftovers. protective glasses, boots, rubber gloves ●... -
Page 39: Stopping The Spraying
Stopping the Spraying [1] When the spraying is done, set the spray cock [3] Idle the tractor engine. in the “Close” position. [4] Stop the PTO of the tractor. [2] Turn the pressure adjustment dial counterclockwise until it stops, to lower the pressure. -
Page 40: Maintenance And Inspection
● Stop the tractor engine and remove the key before performing maintenance/inspection. ● If any inspection or servicing item requires the tractor engine to remain running, do not perform such item on your own, but always contact the service personnel at your Maruyama dealer instead. ● Dispose of oils, etc., properly. -
Page 41: Mounting Bolt/Nut
Mounting bolt/nut [2] Every 100 hours, add around 3 to 5 drops of oil Walk around the machine and inspect the into the three holes (oil filler ports) in the crank tightening points (bolts, nuts, etc.) for looseness. case as shown in the figure. Add SAE#10W-30 Securely tighten any loose bolt/nut found. -
Page 42: Chemical Piping Connection Parts
Adjustment bolt If the water flow is low, the nozzle may be clogged. Contact your Maruyama dealer to Fan transmission clean the jet nozzle. Replace the jet nozzle every 100 hours. -
Page 43: Tire
The tire must be replaced once the slip Tighten the nuts in the order specified below. sign appears. Tightening torque: 115 N•m Contact your Maruyama dealer to replace. Standard air pressure: 240 kPa New tire Slip sign Wheel nut... -
Page 44: Lubricant List
Lubricant List Lubricating location Applicable oil Volume Periodic change Initial: 50 hours Spray pump crank SAE10W-30 1.15 liters Thereafter: Every 100 case SH class hours (*1) Oil filler port Base of spray SAE10W-30 3 to 5 drops Every 100 hours (*2) pump cylinder SH class Oiler... -
Page 45: Long-Term Storage
If the machine is not used for a long period of time, follow the care procedure below: [1] Perform the maintenance and inspection items. [2] Service any problem locations found. Perform any service item after consulting with your Maruyama dealer. -
Page 46: Piping Diagram
Piping Diagram Main tank (chemical tank) Cleaning tank Water distributor/ pressure adjustment dial Mixer Jet nozzle Excess water Drain cock Spray pump Feed valve Left nozzle Right nozzle Hand wash tank Cock 45 45 45 45... -
Page 47: Troubleshooting
● Stop the tractor engine and remove the key first. If any troubleshooting item requires the tractor engine to remain running, do not perform such item on your own, but always contact the service personnel at your Maruyama dealer instead. Phenomenon... -
Page 48: List Of Key Consumables
List of Key Consumables Location of use Item name Part number Quantity Water absorption valve seat 100611 Piston gasket set 091259 Water absorption valve collar 027796 Water absorption valve stopper 100614 Spring washer 015850 Nylon nut 115598 Seal gasket 100015 Spray pump Cylinder pipe 100615... - Page 49 MEMO 48 48 48 48...
- Page 50 MEMO 49 49 49 49...
- Page 51 We recommend periodic inspection and servicing We recommend periodic inspection and servicing so that you can use the machine for many years. so that you can use the machine for many years. Feel free to contact your Maruyama dealer for details. 50 50 50 50...
- Page 52 [1] Product model and serial number [2] Date of purchase [3] Dealer MARUYAMA MFG., CO. INC. Head office: 3-4-15, Uchikanda, Chiyoda-Ku, Tokyo 101-0047 TEL (03)3252-2281 (Sales/Main) The part number of this Operation Manual is P/N. 568461...
Need help?
Do you have a question about the SSD600 and is the answer not in the manual?
Questions and answers