Advertisement
Quick Links
SERVICE MANUAL
Knobs
Knobs
Knobs
Knobs
F a d e r s
F a d e r s
F a d e r s
F a d e r s
Buttons
Buttons
Buttons
Buttons
Connections
Connections
Connections
Connections
Power
Power
Power
Power
Dimensions
Dimensions
Dimensions
Dimensions
( w i d t h x d e p t h x h e i g h t )
Weight
Weight
Weight
Weight
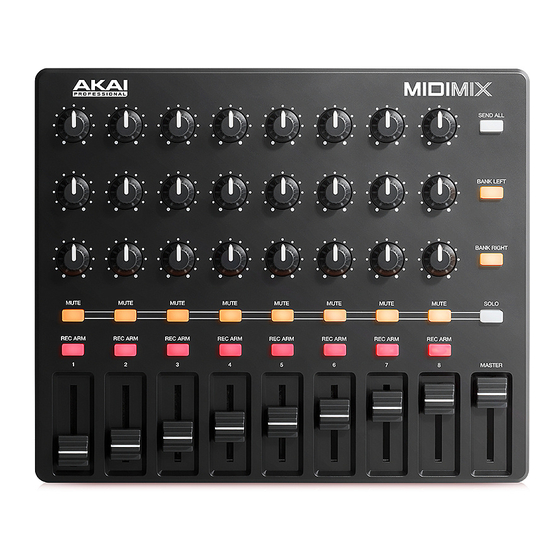
SPECIFICATIONS
2 4 2 4 2 4 2 4 2 7 0 ° a s s i g n a b l e k n o b s
B a n k s a c c e s s i b l e v i a B a n k L e f t / R i g h t
B a n k L e f t / R i g h t b u t t o n s
B a n k L e f t / R i g h t
8 8 8 8 3 0 m m a s s i g n a b l e f a d e r s
1 1 1 1 3 0 m m a s s i g n a b l e m a s t e r f a d e r
B a n k s a c c e s s i b l e v i a B a n k L e f t / R i g h t
B a n k L e f t / R i g h t b u t t o n s
B a n k L e f t / R i g h t
8 8 8 8 a s s i g n a b l e m u t e b u t t o n s , a m b e r - b a c k l i t w i t h s o l o f u n c t i o n a l i t y
1 1 1 1 a s s i g n a b l e s o l o b u t t o n t o c h a n g e f u n c t i o n a l i t y o f 8 M u t e
8 8 8 8 a s s i g n a b l e r e c o r d - a r m b u t t o n s , r e d - b a c k l i t
2 2 2 2 a s s i g n a b l e b a n k b u t t o n s : l e f t , r i g h t
1 S e n d A l l b u t t o n
1 S e n d A l l
1 S e n d A l l
1 S e n d A l l
1 1 1 1 U S B p o r t
1 K e n s i n g t o n l o c k s l o t l o t l o t l o t
1 K e n s i n g t o n l o c k s
1 K e n s i n g t o n l o c k s
1 K e n s i n g t o n l o c k s
U S B - b u s - p o w e r e d
9 . 4 " x 7 . 9 " x 1 . 2 "
2 3 . 9 c m x 2 0 . 1 c m x 3 . 0 c m
1 . 5 l b s .
0 . 7 k g
B a n k L e f t / R i g h t
B a n k L e f t / R i g h t
MODEL: APC MIX
M u t e b u t t o n s
M u t e
M u t e
Advertisement

Related Manuals for Akai APC MIX


Summary of Contents for Akai APC MIX
- Page 1 SERVICE MANUAL MODEL: APC MIX SPECIFICATIONS Knobs Knobs Knobs Knobs 2 4 2 4 2 4 2 4 2 7 0 ° a s s i g n a b l e k n o b s B a n k s a c c e s s i b l e v i a B a n k L e f t / R i g h t...
-
Page 2: Disassembly Procedures
DISASSEMBLY PROCEDURES DISASSEMBLE THE BOTTOM PANEL. (A) REMOVE 24 PCS KNOB AND 9 PCS SLIDER VR CAP FROM THE TOP PANEL. (B) REMOVE 10 SCREWS FROM THE BOTTOM PANEL. (Fig1) DISASSEMBLE THE MAIN PCB ASSEMBLY. (A)REMOVE 5 SCREWS FROM THE MAIN PCB ASSEMBLY. (Fig2) -
Page 3: Packing Diagram
PACKING DIAGRAM (US) -
Page 4: Explode Diagram
EXPLODE DIAGRAM (US) EQUENCIAL NO EXPLODE DIAGRAM WILL BE MARKED ON REF.COLUMM OF BOM LIST... - Page 5 ADA7AKA01 DESCRIPTION LEVEL ADA7AKA01 APCMIX USB USA BAAR-0137 Rubber Feet Pad CA040210002 USB 2.0 Cable 1m A/B Type Black Core GEAKA17 Ableton Card LAC22AKA379 Serial Number Label 0.25 LAC22AKA42 Sticker S/N Ableton LAC57AKA411 Label LAC62AKA380 Bar Code Label(CODE39) 0.25 LAC62AKA381 Bar Code Label(GTIN14) 0.25 LAC67MAR681...
- Page 6 ECS47525B Ecap 4.7uF/25V 4*5.4mm SMD C30,49,59,69 IC74HC595 Integrated Circuit U7,8 ICUSBLC62SC6 IC USBLC62SC6 SOT-23-6L ICYH103M14 IC(STM32F072C8T6+Program V1.00) LQFP-48 ICSTM32F072C8T6 IC STM32F072C8T6 LQFP-48 (U1) LDKPT-1608SURCK Liquid-emitting Diode Red SMD 0603 LD9~16 angle 120° LDKPT-1608SYCK Liquid-emitting Diode Yellow SMD 0603 LD1~8,17,18 angle 120° PC14A021 Main PCB 2Layer 225x203mm 1.6T ENIG RS000004J06...
- Page 7 ADA7 MIDI production testing operations Guidebook Appearance models Testing software installation Test Software Operation Revision Issue Date Comments Author V0.1 2015/1/26 Initial Version Alex Tsai...
- Page 8 ▓ Appearance models...
- Page 9 ▓ Testing software installation If you have installed, you can skip this Midi ProjectInstaller installation STEP 1 STEP 1 STEP 1 STEP 1 Please be ready "Midi ProjectInstaller - v2.0.0.33 (noscript) .exe" (Please attention to version update status), Then start the software installation.(MidiProjectInstaller - v2.0.0.33(noscript).exe for example) If the computer OS is 64bit,Then install MidiProjectInstaller - v2.0.0.33(noscript)-x64.exe...
- Page 10 STEP 3 STEP 3 STEP 3 STEP 3 When you see the following window, press the I Agree STEP 4 STEP 4 STEP 4 STEP 4 First, when you see the following window, press Next...
- Page 11 STEP 5 STEP 5 STEP 5 STEP 5 First, when you see the following window, press Next STEP 6 STEP 6 STEP 6 STEP 6 First, when you see the following window, press Install...
- Page 12 STEP 7 STEP 7 STEP 7 STEP 7 Wait for the installation is complete STEP 8 STEP 8 STEP 8 STEP 8 When you see the following window, press Finish, installed complete.
- Page 13 STEP 9 STEP 9 STEP 9 STEP 9 If you have checked Run Midi Project in STEP8, then you will see the following window, please turn off this window. STEP 10 STEP 10 STEP 10 STEP 10 Please ready "ADA7 Script Low Resolution Installer V0.1_2015.01.26.exe" (Please attention to version update status), then Begin software installation.
- Page 14 STEP 11 STEP 11 STEP 11 STEP 11 First, when you see the following window, press Next STEP STEP STEP STEP 12 12 12 12 When you see the following window, press the I Agree...
- Page 15 STEP 13 STEP 13 STEP 13 STEP 13 When you see the following window, press Install STEP 14 STEP 14 STEP 14 STEP 14 When you see the following window, press Finish, installed complete.
- Page 16 ▓ ▓ ▓ ▓ 測試軟體操作方法 測試軟體操作方法 測試軟體操作方法 測試軟體操作方法 Note: During the test, The figure indicates that no test;Yellow, green shows they in test;Blue shows the test is correct. Because during the test is pressed SEND ALL buttom will be calibrated and stored value for Knob and fader,Therefore, you must first make knob, fader then the buttom test after test.
- Page 17 STEP 3 STEP 3 STEP 3 STEP 3 The right of the window that will appear in the test screen ADA7...
- Page 18 STEP 4 Click Connect, Version appears underneath the machine Edition T The right of the window into the red , zone to be tested. Confirm the connection, the version is correct,Then press Run, begin testing. STEP 5 STEP 5 STEP 5 STEP 5 Knob Test Red: Not tested.
- Page 19 Button, LED test STEP 7 STEP 7 STEP 7 STEP 7 – Press the button the software will show green, blue will not pressed Press the button, the corresponding LED will light up STEP 8 STEP 8 STEP 8 STEP 8 Completion of the above test, the test screen below will appear Complete...
Need help?
Do you have a question about the APC MIX and is the answer not in the manual?
Questions and answers