Table of Contents
Advertisement
Quick Links
Advertisement
Table of Contents

Related Manuals for General Components BISON 2200A


Summary of Contents for General Components BISON 2200A
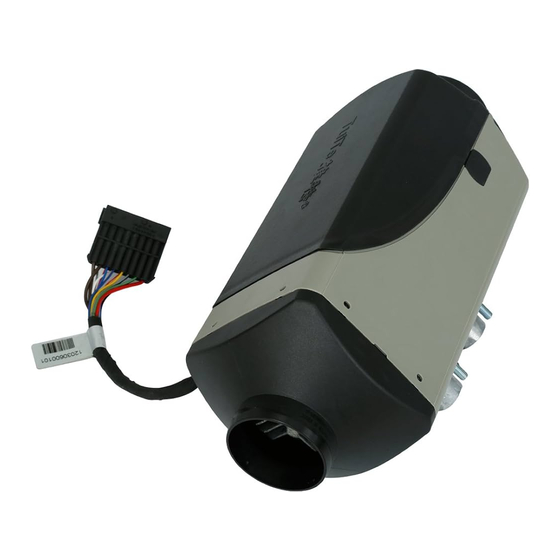
- Page 1 BISON 2200A OWNER’S MANUAL...
-
Page 2: Table Of Contents
Contents Uses and Applications ..........3 Safety Information ............3 Technical Specifications ..........4 Kit Contents ..............4 Dimensions, mm ............5 Installation ..............5 Installation: Angle............6 Wiring Harness Connector Positions ......6 Installation: Mounting ..........7 Installation: Mounting (Continued) ......8 Installation: Ducting and Pipework ...... -
Page 3: Uses And Applications
Preface NOTE The most common faults that occur are Thank you for purchasing the BISON 2200A diesel generally due to poor fuel quality, dirty (or heater (hereinafter referred to as ‘the heater’). This empty) fuel tanks or drops in voltage;... -
Page 4: Technical Specifications
Technical Specifications Heat Output Range Minimum Maximum Heat Output: BTU/hr (kW/hr) 2900 (0.85) 7506 (2.2) Diesel Fuel Consumption: U.S Gal./hr (L/hr) 0.03 (0.1) 0.07 (0.28) 12 Volt DC 0.58 (7) 2.83 (34) Electric Power Consumption: Amps (Watts) 24 Volt DC 0.29 (7) 1.42 (34) 12 Volt DC... -
Page 5: Dimensions, Mm
Dimensions, mm A. Minimum clearance required for opening lid and dismantling glow pin and E.C.U. B. Minimum clearance required for proper air intake. Installation Figure II: Minivan Figure I: Motorhome 1. In front of the passenger seat 2. Between driver’s and passenger’s seat 1. -
Page 6: Installation: Angle
Figure III: Construction Equipment Figure V: Position Angles 1. In seat box 2. On rear wall 3. In a protective case outside Figure IV: Truck 1. Heater air intake 2. Glow pin position 3. Direction of air flow Figure V shows the ideal installation position of the heater;... -
Page 7: Installation: Mounting
simply pulling it off. Next, remove the top cover by Figure VI: Mounting Gasket and Plate lifting up the two front flaps near the air inlet. Be careful, as flaps are fragile and may break off easily. You can then lift out the entire innards of the heater (heat exchanger, fan motor, etc.) removing the cable from the rubber securing bush and rerouting it underneath the fan motor where it can then sit in the... -
Page 8: Installation: Mounting (Continued)
Installation: Mounting (Continued) Installation: Ducting and Pipework Figure VII: Mounting Positions Figure VIII: Ducting 1. Ducting and/or Grill Above: Securing heater to the floor 2. Main Heater Body 3. 60mm Hose Clamp 4. 60mm Air Ducting 5. 60 mm Reducer 6. -
Page 9: Installation: Ducting And Pipework (Continued)
Installation: Ducting and Pipework (Continued) Figure IX: Air Intake and Exhaust Ducting can be installed as shown on the previous page. Extra outlets can be installed to fit your own needs however you should ideally not fit more than the maximum of 3 outlets, to ensure you are receiving sufficient hot air output. -
Page 10: Installation: Fuel Lines
Installation: Fuel Lines Figure X: Fuel Connector Installation NOTE When installing, priming, repairing fuel lines etc. there is always a risk of injuries due to flammable and toxic sources. Take all the necessary safety precautions when fitting any fuel line or fuel line parts. Above: Improper Connection When working on or near any fuel lines or parts! DO NOT... -
Page 11: Installation: Fuel Line Length And Order
Installation: Fuel Line Length and Order Figure XII: Fuel Line Setup 1. Fuel Tank 6. Fuel Filter 2. Fuel Pick-up Tube 7. Fuel Pump 3. Fuel Connector Clamp 8. Fuel Pump Damper 4. Fuel Line 9. Heater Fuel Intake 5. Fuel Connector Installation Fuel Pump Angle Installation: Fuel Tank Head A. -
Page 12: Installation: Fuel Tank (Continued)
Installation: Fuel Tank (Continued) Pick-up Tube: Option 2 (GC0100) 1. Connection to heater body 2. Maximum fuel level To Install this type of Pick-up Tube: 3. Minimum Fuel Level If possible, remove the sender Suction Height for Fuel Pump: unit from the vehicle’s fuel tank, A. -
Page 13: Controller Connections
Alternatively, to fit the digital timer, simply fit the Wire Harness Connections appropriate screw inside the hole located at the center of the timer. Both plug into the corresponding black and clear plugs on the loom. BLUE/WHITE RED/WHITE BLACK BLUE NOTE Only one controller can be used at a time. -
Page 14: Electrical Diagram
Electrical Diagram Page 14 of 19... -
Page 15: Operation: Analog Controller
Operation: Analog Controller 1. LCD Screen A. Days of the Week 2. Left Arrow Button B. Heating Symbol 3. Right Arrow Button C. Fan Symbol 4. Power/Back Button D. ‘P’ (Program) Symbol 5. OK Button E. Clock Symbol 6. Fixing Screw Hole F. - Page 16 Changing Language Changing Date and Time The language should be set to English. However, if it 1. To change the date and isn’t or the control has been reset to default settings it will revert to Chinese. Please follow these steps to time, navigate to the clock convert the language to English.
- Page 17 Switching to Thermostatic Mode Programming Heater Start Times The digital timer can be programmed for three To switch the heater to individual start times per day on any combination of thermostatic mode, turn the seven days. heater on manually, as 1.
-
Page 18: Fault Codes
Fuel Line Priming Feature Fault Codes Analog Controller ATTENTION: When the ECU had discovered a fault, the analog Not to be used during normal heater operation. controller will flash a fault code. The controller should therefore be ideally placed where it can be ... -
Page 19: Parts List
Parts List GC0187 Inline Fuel Filter GC0427 Fuel Line Connector, 3.5 mm, 50 mm Length (Gasoline) GC0500 Fuel Pump Damper GC0095 L-Shaped Mounting Plate GC0101 Fuel Pick-up Tube GC0168 Self-Tapping Screw GC0158 Fuel Pipe Clamp, 11 mm GC0361 Self-Drilling and Self-Tapping Screw GC0160 Fuel Pipe Clamp, 14 mm GC0555...
Need help?
Do you have a question about the BISON 2200A and is the answer not in the manual?
Questions and answers