MINOLTA-QMS PagePro 9100 Installation Manual
Konica minolta pagepro 9100: installation guide
Hide thumbs
Also See for PagePro 9100:
- User manual (192 pages) ,
- Technical manual (56 pages) ,
- Maintenance manual (21 pages)
Table of Contents
Advertisement
Quick Links
Advertisement
Table of Contents

Related Manuals for MINOLTA-QMS PagePro 9100


Summary of Contents for MINOLTA-QMS PagePro 9100
- Page 1 PagePro 9100 ® Installation Guide 1800659-001B...
-
Page 2: Thank You
Thank You Thank you for purchasing a MINOLTA-QMS printer. You have made an excellent choice. Trademarks The following are registered trademarks of MINOLTA-QMS, Inc.: QMS and the MINOLTA-QMS logo. Minolta and PagePro are trademarks of Minolta Co., Ltd. Other product names mentioned in this guide may also be trademarks or registered trademarks of their respective owners. -
Page 3: Table Of Contents
Contents Hardware Installation Guide Getting Acquainted with Your Printer ... 1 PagePro 9100 Features Space Requirements Locate your Printer... Printer Parts Documentation Set ... 4 Setting up Your Printer ... 5 Shipment Contents Unpacking the Printer Installing the Toner Cartridge... - Page 4 Configuration Menu Overview ... 17 Security Menu Operator Control Menu Administration Menu Administration/Communications/Optional NIC/CrownNet Submenu for Networking About the Control Panel Selecting a Message Window Language Control Panel Indicators Control Panel Keys Menu, Select, Previous, and Next Keys About the Interface Panel ... 24 c Ethernet Port 24 d Parallel Port 24 e USB Port 24...
- Page 5 Windows—Parallel Connection Plug and Play Installation 56 Manual Installation of the Printer Driver 62 Select Driver Options/Defaults 63 Installing Printer Drivers and Utilities, Macintosh Environments ... 64 Some Notes to Consider Macintosh—EtherTalk Interface Configuration 65 Macintosh—PPDs 65 Macintosh—PPDs and Utilities (OS 8/9) Installation 66 Macintosh OS 9.x—USB 66...
-
Page 7: Hardware Installation Guide
Hardware Installation Guide... -
Page 9: Getting Acquainted With Your Printer
Internal IDE Hard Disk Time-of-Day Clock Manual Duplexing Autoduplex Printing Space Requirements Refer to the User’s Guide (in PDF on the Documentation CD-ROM) for printer space requirements with options attached. Side View 21.7" (551 mm) 18" (457 mm) 24" (611 mm) 53.6"... -
Page 10: Locate Your Printer
Close to an easily accessible grounded power supply (on an exclusively dedicated power outlet) that meets printer specifications. Near your computer. At the length 6.5' (2 m) or less for an IEEE 1284 bidirectional parallel connection. With enough space to allow easy servicing, and adequate ventilation. -
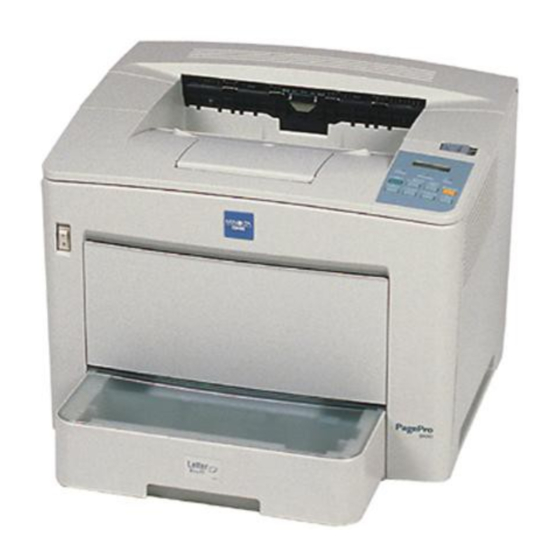
Page 11: Printer Parts
Printer Parts The following drawings illustrate the parts of your printer referred to through- out this guide, so please take some time to become familiar with them. Front View 1—Top cover release lever 2—Output tray extension 3—Control panel 4—Power switch 5—Ventilation grilles... -
Page 12: Documentation Set
Software: This guide provides information about the software configuration and driver installation. Maintenance Keep this guide close to the printer for Guide quick reference information regarding operation and care. User’s Guide This guides you through the day-to-day operation of your printer, including printing files, refilling print media, and replacing toner. -
Page 13: Setting Up Your Printer
We strongly suggest that you save the packaging materials in case you ever need to move or ship the printer. After removing the consumables from the printer carton, use the following instructions to unpack your printer. With another person’s help, lift the printer from the carton. -
Page 14: Installing The Toner Cartridge
Remove the tape from the printer. Attention Do not plug in the power cord until told to do so. Installing the Toner Cartridge The toner cartridge contains the OPC (Optical Photo Conductor) and toner that form the image that is developed and transferred to the media. - Page 15 (since the inside reaches temperatures of about 392 °F (200 °C), touching any part in this area may result in burns). Remove the new toner cartridge from its protective box. Peel off the packing tape. Setting up Your Printer...
- Page 16 (click on Online Help & Drivers). Align the tabs on the cartridge (one on each side) with the notches in the printer, and then insert the cartridge as far as possible into its compartment. Setting up Your Printer...
-
Page 17: Installing The Exhaust Filter
The toner cartridge should not be opened under any circumstances. Installing the Exhaust Filter Insert the exhaust filter in the exhaust port on the back of the printer. Attention If you will be installing an optional duplexer, it is not necessary to install the exhaust filter. -
Page 18: Loading The Upper Media Tray
Pull out the upper media tray until it stops. While pressing the release buttons c (one on each side of the media tray), remove the tray d. Remove the media tray cover. Setting up Your Printer... - Page 19 Attention Pressing down on the lever before sliding the retainer to the left causes the sides of the tray to bulge and fit improperly in the printer. Setting up Your Printer...
- Page 20 500 letter/A4 sheets of 20 lb (75 g/m Attention The media should fit easily between the guides. Improperly adjusted guides may cause poor print quality, media jams, or printer damage. Long Edge Feed Short-edge Feed Examples A3, B4, and Ledger...
- Page 21 Install the media tray cover. Insert the media tray as far as possible into the printer. It should snap into place. Attach the appropriate media-size label to the the media tray. Media-size labels are supplied with this printer. When printing on media larger than B4, open the output tray extension.
-
Page 22: Loading The Multipurpose Tray
Fan a stack of approximately 200 sheets of paper. Align the edges of the paper, and then load it with its printing-side up and short edge toward the printer. Often, an arrow on the paper package label indicates the printing-side of the media. -
Page 23: Installing Accessories
Installing accessories always requires that both the printer and the accessories are turned off and unplugged during installation. If you purchased any additional printer accessories (such as a duplexer or additional memory), then install them now. If installation instructions are included with the accessory, follow them. -
Page 24: Plugging In/Turning On The Printer
The printer automatically switches to power-saving (energy-saving) mode after 30 minutes of inactivity. You can change the number of minutes in the Administration/Engine/Energy Saver menu. Attention Never turn the power off while the printer is receiving data or printing. Plugging in/Turning on the Printer... -
Page 25: What's Next
Connect the printer to your computer or a network (refer to the MINOLTA-QMS Software Installation Guide ). „ Install a PagePro 9100 printer driver (refer to the MINOLTA-QMS Software Installation Guide). Configuration Menu Overview The printer’s configuration menu allows you to customize the printer settings for your printing environment. -
Page 26: Operator Control Menu
Mode, Disk Space, ResetAccounting, File Segment Plain Paper, Transparency, Thick Stock [Job Name 1 - 50] Print Statistics Configuration Menu Overview Security Note: For more menu details and printer configuration information, refer to the CrownBooks in PDF on the Documentation CD-ROM. -
Page 27: Administration Menu
New System Image Format Disk** Restore Disk** Backup Hard Disk** Operator Control Page Recovery Energy Saver Toner Low Action Edge-to-Edge Print Quality Density Note: For more menu details and printer configuration information, refer to the CrownBooks in PDF on the Documentation CD-ROM. -
Page 28: Administration/Communications/Optional Nic/Crownnet Submenu For Networking
E therT alk About the Control Panel The control panel, located on the right of the printer, allows you to direct the printer’s operation. In addition, it displays the current status of the printer, including any condition that needs your attention. -
Page 29: Selecting A Message Window Language
Selecting a Message Window Language When you receive your printer, the message window language is set to English. However, status messages and configuration menus can be displayed in the message window in Czech, English, French, German, Italian, Japanese, Portuguese, and Spanish. Chinese (Simplified), Chinese (Traditional), and Korean, don’t display in the control panel message window,... -
Page 30: Control Panel Keys
CrownBooks on the Documentation CD-ROM for complete information.) It also allows you to end a job. If the printer is on line, press the Cancel key to cancel the job currently printing. To cancel the entire print job if the computer has not completely sent the job, use the printer driver. -
Page 31: Menu, Select, Previous, And Next Keys
Menu, Select, Previous, and Next Keys Before using any of these printer configuration keys, press the Online key to take the printer off line. Function The Menu key provides access to the configuration menu. First press the Online key to take the printer off line, and then press the Menu key to access the configuration menu. -
Page 32: About The Interface Panel
10BaseT/100BaseTX network connection. d d d d Parallel Port Use a Centronics IEEE 1284 bidirectional parallel cable, when connecting the parallel port on the printer to the parallel port on your computer. e e e e USB Port Use a USB cable (Type B), when connecting the USB port on the printer to the USB port on your computer. -
Page 33: Solving Installation Problems
Troubleshooting Solution Make sure there is power supplied to the AC outlet. Turn the printer off, plug in the power cord securely, and then turn the printer back on. Turn on the printer. Make sure the line voltage matches the printer’s power requirements. -
Page 34: Accessories And Consumables
Avoid jarring the printer . Check for a media jam. Reconfigure the port to the specific printer emulation of the file you are trying to print. If a PostScript file prints PostScript statements while the printer is in... -
Page 35: Consumables
Up to three 500-sheet media trays may be added. Form-creation utility Form-creation utility Emulation A real-time clock that allows for advanced accounting features Allows the user to access and use printer features from the VMS operating system. Message Window Display/Remark(s) Not applicable. - Page 36 Description Toner cartridge Transfer roller Notes: Refer to the User’s Guide in PDF on the Documentation CD-ROM for consumable life expectancies. Use only media approved for laser products. Check www.minolta-qms.com/ support (click on Answer Base) for currently approved media. To order approved media, go to www.q-shop.com.
-
Page 37: Regulatory Compliance
Regulatory Compliance CE Marking International (EU) and Immunity IEC 61000-4-2 Requirements IEC 61000-4-3 (EU) IEC 61000-4-4 IEC 61000-4-5 IEC 61000-4-6 IEC 61000-4-8 IEC 61000-4-11 cTick Mark ACA (Australia) AS/NZS 3548 Electro- FCC (USA) magnetic Title 47 CFR Ch. I, Emissions (EMI) Industry Canada (Canada) -
Page 38: Ce Marking (Declaration Of Conformity)
CE Marking (Declaration of Conformity) For European Users This product complies with the following EU directives: 89/336/EEC, 73/23/EEC, and 93/68/EEC directives. This declaration is valid for the areas of the European Union (EU) only. This devise must be used with a shielded parallel interface cable and shielded USB interface cable. -
Page 39: Interference-Causing Equipment Standard (Ices-003 Issue 3)
CAUTION: Keep out of reach of children. Laser Safety This printer is a page printer which operated by means of a laser. There is no possibility of danger from the laser, provided the printer is operated according to the instructions in this manual. -
Page 40: Internal Laser Radiation
The Laser Diode and Scanning Polygon Mirror are incorporated in the toner cartridge. The print head (in the interior of the printer in front of the toner cartridge) consists of the print head unit and the mirror unit. The laser beam is emitted from the print head unit, passes through the mirror unit, then is radiated through the laser aperture of the mirror unit to the interior of the printer. -
Page 41: Laser Caution Label
Laser Caution Label For United States Users—CDRH Regulations This printer is certified as a Class I laser product under the Regulation Performance Standard according to the Food, Drug, and Cosmetic Act of 1990. Compliance is mandatory for laser products marketed in the United States, and is reported to the Center for Devices and Radiological Health (CDRH) of the U.S. -
Page 42: Laser Safety Label-Cdrh Requirement
Laser Safety Label—CDRH Requirement Safety Information... -
Page 43: International Notices
International Notices Power Cord The following power cord requirements are in effect for your 220 V printer. Minimum 0.75 mm Minimum H05 VV - F The male plug is certified in the country in which the equipment is to be installed, and the female plug is an IEC 320 connector. -
Page 44: Warranty Considerations
Read your printer warranty carefully. For information about your warranty, go to www.minolta-qms.com/support, then click on the Answer Base. If MINOLTA-QMS printer failure or damage is found to be directly attributable to the use of non-MINOLTA-QMS approved consumables, print media, and/or accessories, MINOLTA-QMS will not repair the printer free of charge. -
Page 45: Software Installation Guide
Software Installation Guide... -
Page 47: Software Utilities Cd-Rom
Software Utilities CD-ROM Automatic System Software Update The auto-installer will locate and download the file containing the system software to the printer, if it is present on the Software Utilities CD-ROM. Attention Operator intervention is required to prevent the system software update. -
Page 48: Drivers And Utilities
Drivers and Utilities The printer driver and additional software found on the Software Utilities CD-ROM can be installed on PCs using any of the following: „ Windows Me „ Windows 98 „ Windows 95 (B minimum) „ Windows XP „ Windows 2000 „... -
Page 49: Drivers/Location Use/Benefit
The PCL drivers support the same networks and connectivity that the PostScript drivers do; however, on the Device Options tab in the PCL5 9 x driver, the only selectable option is Printer Memory. The Printer Memory drop-down box allows you to specify the amount of memory installed in the printer. -
Page 50: Utilities And Ppds
98/95 as well as Windows XP/2000/ NT4. This utility provides the ability to download fonts, and overlays to the printer’s hard disk. It also allows you to download fonts to printer memory. These PPDs can be used with third-party Linux print filters that use PPDs. -
Page 51: Installing Printer Drivers And Utilities, Windows Environments-Auto-Loading Installation
UNIX-based queues and filters for the specific features of the Crown printer. Installing Printer Drivers and Utilities, Windows Environments—Auto-loading Installation Insert the PagePro 9100 Software Utilities CD-ROM in your CD-ROM drive. 5 " If the CD-ROM does not automatically start up, double-click setup.exe in... -
Page 52: Usb
Follow the instructions on the screen. Follow the instructions on the screen to install printer software and documentation. All Other (except USB, TCP/IP, and Parallel) Follow the instructions on the screen to install printer software and documentation. TCP/IP If you chose TCP/IP, click First Time Setup. -
Page 53: Parallel
Parallel connection. Parallel If you choose Parallel, select a language for your driver from the available list. Click After reading the Program License Agreement, choose I Accept Click Next Installing Printer Drivers and Utilities, Windows... - Page 54 Software and Documentation to the directory shown in the box. Choose Browse different directory. Choose the setup type that best suits your needs—Easy or Custom. Click Next Installing Printer Drivers and Utilities, Windows to install Printer to install to a...
- Page 55 TCP/IP. „ Local printers lists the printers already installed. If your printer is listed, select it by highlighting its name and clicking Next If your printer is not listed, select Not Found instructions on the screen.
- Page 56 Add a port with the Add Crown Port wizard. Click Finish Select Default Printer to select the printer as the default device, or print a test page to confirm that the printer is ready for use. Click Next Installing Printer Drivers and Utilities, Windows...
- Page 57 Parallel Wait while the software loads to the chosen directory. Select the language for your Download Manager from the available list. Click The Download Manager setup screen appears. Click Next Installing Printer Drivers and Utilities, Windows...
- Page 58 When the installation is complete, click If the printer already has the code version you’re attempting to load or has a newer one, an error page will print a message saying that the printer will not replace a current or newer version with an older version.
-
Page 59: Installing Printer Drivers And Utilities, Windows Environments-Manual Installation
Installing Printer Drivers and Utilities, Windows Environments—Manual Installation If you wish to install printer drivers and utilities manually, the steps are included below. Some Notes to Consider „ In the following sections, we assume that you are installing the software for the first time. -
Page 60: Windows-Ethernet Tcp/Ip
If you identify a subnet mask, automatic sensing is disabled. If you want to refer to the printer by host name instead of IP address, edit the system host table by adding the following line to the host file:... -
Page 61: Manually Assigning A Crown Port
Crown port, follow the instructions in this section. From the Start menu, choose Settings Choose Printers. In the Printers window click the right mouse button on the PagePro 9100 printer icon to display the printer’s menu. Choose Properties. Choose the Details tab (Windows Me/98/95) or Ports tab (Windows XP/2000/NT4). -
Page 62: Select Driver Options/Defaults
(found on the Device Manager). Turn the printer on and make sure the message window displays IDLE. Plug one end of the USB cable into the PC and the other into the printer’s USB port. -
Page 63: Select Driver Options/Defaults
MINOLTA-QMS PostScript Driver Select Select Driver Options/Defaults Before you start working with your printer, you are advised to verify/change the default driver settings. Also, if you have options installed, you should “declare” the options in the driver. If you installed available options, proceed with the next step; otherwise, proceed with step 5. -
Page 64: Windows-Parallel Connection
Play installation and install the driver using the CD-ROM installer for easy access to online documentation. With your PC turned off, turn on the printer (the power switch is on the side of the printer), and then turn on your PC. A Hardware message appears. - Page 65 Click Browse... to open a window to locate the driver files. Browse to the appropriate language directory (for example PCL, PPD, or PS) within the Drivers\WINDOWS XP directory. Click OK. Verify your selection, and click Next. Installing Printer Drivers and Utilities, Windows...
- Page 66 Insert the Software Utilities CD-ROM, and close the CD-ROM auto-installer window. In the first window of the Found New Hardware Wizard, click Next. Select the option to Search for a suitable driver for my device. Then select Next. Installing Printer Drivers and Utilities, Windows...
- Page 67 Browse to the appropriate language directory within the Drivers\Windows 2000 directory. Click OK. In the Driver Files Search Results window, verify your selection, and click Next. Click Finish. Installing Printer Drivers and Utilities, Windows...
- Page 68 Use the Browse For Folder window to browse to the \Drivers\Windows Me, 9x directory. Select the language for your driver from the available list in the Driver directory. Click OK. Installing Printer Drivers and Utilities, Windows...
- Page 69 Windows Me/98/95 Verify your selection, and click Next. The next window show you what driver will be installed. Click Next. Give the printer a name, or leave the default name. Click Next. Installing Printer Drivers and Utilities, Windows...
-
Page 70: Manual Installation Of The Printer Driver
Choose to print a test page or not, and click Finish. Remove the CD-ROM from the PC, and store it in a safe place. Manual Installation of the Printer Driver Connect your printer to your PC. Insert the Software Utilities CD-ROM. -
Page 71: Select Driver Options/Defaults
Choose the MINOLTA-QMS PagePro 9100. Click If the Replace Existing Driver window appears, select it, and click Next . If the driver installed correctly, you will not see that choice. Choose the LPT port. Click again. Next Select Printer Name and whether you want to printer to be the default printer. -
Page 72: Installing Printer Drivers And Utilities, Macintosh Environments
„ The current version of Macintosh OS X has limited support for PPD (PostScript Printer Definition) files. Although MINOLTA-QMS printers can be used with OS X, not all advanced printing features will be available. Advanced printing features are still available under OS 9.1, or when printing from the Classic Environment in OS X. -
Page 73: Macintosh-Ethertalk Interface Configuration
Administration/Communications/Optional NIC/ CrownNet/EtherTalk/Zone Name/Zone Part 1 and Zone Part 2 menus to enter the name of the zone to which the printer is attached if you want it to appear in a zone different than the one it shows in. -
Page 74: Macintosh-Ppds And Utilities (Os 8/9) Installation
Install icon. Follow the instructions on the screen to install the PagePro 9100 PPD and utilities. After the PPD and utilities installation is complete, choose Quit. Remove the CD-ROM from your CD-ROM drive and store it in a safe place. -
Page 75: Macintosh Os 9.X-System Software
(sys_ x _ x _ x .ps). Drag the sys_ x _ x _ x .ps icon and drop it on the PagePro 9100 printer icon on your desktop to perform the system software upgrade. -
Page 76: Macintosh-Ppds And Utilities (Os X) Installation
Note: If your printer’s system software version is later than the version on the CD-ROM that you are downloading, an error page will print on the printer. In this case, go to step 5. You do not need to upgrade the printer’s system software. -
Page 77: Macintosh Os X-Usb
Drag the appropriate PPD from the directory in step 4 to the Language Abbreviation .lproj directory. PPD installation is complete. Macintosh OS X—USB Plug one end of the USB cable into the PC and the other into the printer’s USB port. The operating system displays Device Locate and double-click the Print Center utility to open it. -
Page 78: Macintosh-System Software (Os X)
PagePro 9100 PPD, and choose Add. The printer should appear in the Printer List. Macintosh—System Software (OS X) Insert the PagePro 9100 Software Utilities CD-ROM in your Macintosh’s CD-ROM drive. Installing Printer Drivers and Utilities, Macintosh... - Page 79 Note: If your printer’s system software version is later than the version on the CD-ROM that you are downloading, an error page will print on the printer. In this case, go to step 7. You do not need to upgrade the printer’s system software.
-
Page 80: Unix, Netware, And Ndps
UNIX, NetWare, and NDPS For UNIX, NetWare 3, NetWare 4, NetWare 5, and NDPS installation, refer to the CrownBooks on the Documentation CD-ROM. Linux For Linux PPD and PDQ installation, refer to the readme file on the Software Utilities CD-ROM. UNIX, NetWare, and NDPS...
Need help?
Do you have a question about the PagePro 9100 and is the answer not in the manual?
Questions and answers