Table of Contents
Advertisement
Quick Links
XX056-02-00
MODEL V1411A SERIES
VIDEO SWITCHERS WITH TELEMETRY
CONTROL
Copyright © 2008 Vicon Industries Inc. All rights reserved.
Product specifications subject to change without notice.
Vicon and its logo are registered trademarks of Vicon Industries Inc.
VICON INDUSTRIES INC., 89 ARKAY DRIVE, HAUPPAUGE, NEW YORK 11788
TEL: 631-952-CCTV (2288) FAX: 631-951-CCTV (2288) TOLL FREE: 800-645-9116
24-Hour Technical Support: 800-34-VICON (800-348-4266)
UK: +44 (0) 1489-566300
WEB: www.vicon-cctv.com
Vicon part number 8009-8056-02-00
Rev 208 Section 2
Advertisement
Table of Contents

Subscribe to Our Youtube Channel
Related Manuals for Vicon V1411A Series


Summary of Contents for Vicon V1411A Series
- Page 1 Copyright © 2008 Vicon Industries Inc. All rights reserved. Product specifications subject to change without notice. Vicon and its logo are registered trademarks of Vicon Industries Inc. VICON INDUSTRIES INC., 89 ARKAY DRIVE, HAUPPAUGE, NEW YORK 11788 TEL: 631-952-CCTV (2288) FAX: 631-951-CCTV (2288) TOLL FREE: 800-645-9116...
- Page 4 400 (120) 530 (160) 820 (250) * Longer cable runs may produce a dim, faint picture. Use a Vicon Video Amplifier to obtain a usable picture for long cable runs. Usable Vicoax Signal vs. Cable Length Maximum Cable Length ft (m)
-
Page 5: Table Of Contents
Connecting a Fixed Camera ........................11 Connecting a Dome or Fully-Functional Camera..................11 RS-422 Telemetry-Controlled Receivers ....................11 Alarm Inputs ............................11 Installing the V1411A Expander Board.......................11 Setting Up Procedure...........................12 Communications Delay..........................13 OPERATION........................14 MAINTENANCE........................14 Fuse Replacement............................14 SHIPPING INSTRUCTIONS ....................15 TECHNICAL INFORMATION .....................16 VICON STANDARD EQUIPMENT WARRANTY..............19... -
Page 7: Introduction
Introduction The information in this manual covers the installation, operation, and maintenance for the V1411A Series of Video Switchers. This equipment should only be installed by a qualified technician using approved materials in accordance with national, state, and local electrical codes. Read these instructions through completely before attempting installation. - Page 8 The V1411A has 8 looping inputs (16 with V1411A-EXP) that can be looped to a multiplexer or VCR. The monitor output can be connected to a VCR and the VCR output fed back in as camera input. There is an alarm output relay contact to trigger an alarm on a VCR (or other device).
-
Page 9: Quick Installation Guide
Quick Installation Guide For experienced installers, use the installation diagram below. For complete detailed instruction on how to install the V1411A, continue reading the Installation section. Figure 2 Typical Installation V1411 Function Function Pin No. RJ-45 V1300X-DVC/RVC KBRD Keypad Command OUT + Command IN + Command OUT - Command IN - Keypad... -
Page 10: Installation
Installation Unpacking and Inspection All Vicon equipment is tested and inspected before leaving the factory. It is the carrier’s responsibility to deliver the equipment in the same condition as it left the factory. Inspection For Visible Damage Immediately inspect the cartons upon delivery. Make a note of any visible damage on all copies of the carrier’s freight bill. -
Page 11: Power Requirements
Power Requirements Warning: Strict adherence to the following items is essential to ensure electrical safety. Caution: Voltages may be exposed when the unit is opened. Caution: The unit must be properly grounded via the earth core of the power cable. Warning: Do not connect any unit to a power source until installation is complete. -
Page 12: Connections
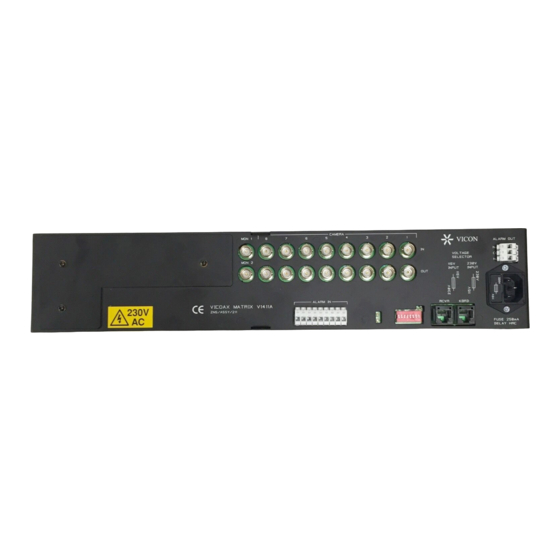
Connections Video Input Connections Video signals are connected by BNC connectors. The video inputs are permanently terminated with 75 ohms and there is no need to terminate unused loop out connections. A BNC connector is provided for looping out each video input. The video loop outputs are buffered and do not need to be terminated if not used. On RS-422 receivers, the address switch must be set at the same address as the camera input number used for its video. -
Page 13: Rs-422 Communications
RS-422 Communications Two RJ-45 connectors are provided for RS-422 communications with keypads and receivers. Two Telco (breakout) boxes are provided for connections. There are three keypad connection arrangements. Refer to Figure 3 and RS-422 Communications table. The connections are as follows: If a single local V1411X-DVC, V1411J-DVC or V1410X-DVC is used, it can be connected directly to the V1411A system using the KBRD RJ-45 connector and cable supplied (Telco/breakout box not required). - Page 14 If keypads other than V1411X-DVC, V1411J-DVC or V1410X-DVC are used, there are no local keypads or it is not desired to power a local keypad from the V1411A, refer to the figure below. Figure 3C: Remote Keypad(s) or Other Keypad Types The receiver connection (other than Vicoax II) requires the RJ-45 connector cable and one Telco/breakout box provided.
- Page 15 RS-422 Communications V1411 Function Function Pin No. RJ-45 KBRD V1300X-DVC/RVC Keypad Command OUT + Command IN + Command OUT - Command IN - Keypad Response IN + Response OUT + Connections Response IN - Response OUT - Ground Ground V1411X-DVC Keypad Junction Box Terminal Command OUT +...
-
Page 16: Wiring The Unit
Wiring the Unit Refer to Figures 2 and 3 for typical installations. Keypads and receivers can be connected to the V1411A in either a star configuration or a daisy-chain configuration. In star configuration, a V1400X-IDL Intelligent Distribution Line Control (IDL) is required. Refer to Figure 4 for a sample configuration. Figure 4 Star and Daisy-Chain Configurations V1300X-DVC/RVC Keypad... -
Page 17: Connecting The Monitor
Connecting the Monitor There are two (2) monitor outputs on the basic V1411A; with the addition of the V1411A-EXP, two (2) monitor outputs are added, for a total of four (4) monitor outputs. Connections should be made to the monitor using RG-59 or URM70 coaxial cable fitted with BNC connectors. Each monitor must be terminated with 75 ohms at the monitor. -
Page 18: Setting Up Procedure
1. Be sure there is no power to the V1411A and unplug all connectors. 2. Remove the eight (8) M3 machine screws and washers that secure the cover, four (4) from the rear, two (2) from each side, and the two (2) countersunk M3 screws from the top and bottom. Remove the cover. Note that it might be necessary to slightly spring the ends of the enclosure to remove the cover. -
Page 19: Communications Delay
Comms Failure message. Failure to observe the parameters listed can result in significant degradation of the response to keypad operation. Consult Vicon Technical Support when in doubt of how to use this feature. Installation • 13... -
Page 20: Operation
In the Dwell Set mode, select the monitor below; the figure set in the dwell time is the delay (in milliseconds). The V1411A restricts delays (timeouts) to a minimum of 4 ms and a maximum of 100 ms. Monitor Delay (Timeout) Set for Keypad 1 Keypad 2 Keypad 3... -
Page 21: Shipping Instructions
Shipping Instructions Use the following procedure when returning a unit to the factory: 1. Call or write Vicon for a Return Authorization (R.A.) at one of the locations listed below. Record the name of the Vicon employee who issued the R.A. -
Page 22: Technical Information
Technical Information ELECTRICAL 115 or 230 VAC, 60/50 Hz. Input Voltage: 10 W. (Associated equipment is not included in power ratings.) Power Consumption: 0.6 btu/min. (0.1 kg-cal/min). Heat Equivalent: NOTE: These figures represent the conversion of 100% of the electrical energy to heat. Actual percentage of heat generated will be less and will vary from product to product. - Page 23 Less than 1%. Tilt: Less than 1%. Field/Line Short-Time Distortion: Chrominance to Luminance Delay: Less than 50 nsec. Typically 60 dB at 4.2 MHz between two adjacent input channels Crosstalk Isolation: routed to two adjacent output channels. 60 dB below 1 V p-p up to 5 MHz. Hum and Noise: Greater than 65 dB.
- Page 24 MECHANICAL Height: 3.5 in. (88 mm). Dimensions: Width: Rack Mount: 19.0 in. (483 mm). Desk Top: 17.5 in. (445 mm). Depth: 4.5 in. (115 mm). 7.1 lb (3.2 kg). Weight: Steel chassis. Construction: Black paint. Finish: ENVIRONMENTAL Operating Temperature 32° to 122° F (0° to 50°C). Range: Up to 90% relative, noncondensing.
-
Page 25: Vicon Standard Equipment Warranty • 19
Software supplied either separately or in hardware is furnished on an “As Is” basis. Vicon does not warrant that such software shall be error (bug) free. Software support via telephone, if provided at no cost, may be discontinued at any time without notice at Vicon’s sole discretion. - Page 26 Vicon Industries Inc. Corporate Headquarters 89 Arkay Drive Hauppauge, New York 11788 631-952-CCTV (2288) 800-645-9116 Fax: 631-951-CCTV (2288) Vicon Europe Headquarters Brunel Way Fareham, PO15 5TX United Kingdom +44 (0) 1489 566300 Fax: +44 (0) 1489 566322 Germany vin-videotronic infosystems gmbh...
Need help?
Do you have a question about the V1411A Series and is the answer not in the manual?
Questions and answers