Table of Contents
Advertisement
Quick Links
Advertisement
Table of Contents

Related Manuals for Thermal Care Accuchiller KSE


Summary of Contents for Thermal Care Accuchiller KSE
-
Page 3: Table Of Contents
Table of Contents Foreword ..........................................1 Safety Guidelines ........................................1 Pre-Installation ........................................2 Receiving Inspection ....................................... 2 Unit Storage ........................................3 Installation - Chiller ......................................3 Unit Location ........................................3 Figure 1 – KSE 40 to 60 Unit Location ..............................3 ... - Page 4 Figure 15 – Diagnostics Circuit Interlock Screen ..........................11 Figure 16 – Diagnostics Pumps Screen .............................. 11 Figure 17 – Diagnostics Process Screen ............................11 Figure 18 – Diagnostics Hardware Screen ............................11 Figure 19 – Diagnstics Export Data Screen ............................11 ...
- Page 5 Table 7 – Discharge Control Setup Parameters ..........................18 User Setup – Dynmic Lift Setup ..................................18 Dynamic Lift Setup Screen ..................................18 Figure 43 - User Setup – Dynamic Lift Setup Screen ........................18 Table 8 – Dynamic Lift Parameters ..............................18 ...
- Page 6 System Fill Water Chemistry Requirements ............................. 24 Table 10 – Fill Water Chemistry Requirements ..........................25 Freeze Protection ......................................25 Step 3 - Check Condenser ..................................26 Step 4 – Check Refrigerant Valves ................................26 Step 5 –...
-
Page 7: Foreword
Foreword Safety Guidelines The central chiller consists of a refrigeration circuit to Observe all safety precautions during installation, provide cooling water to coolant. start-up, and service of this equipment. The following is a list of symbols used in this manual and This manual is to serve as a guide for installing, their meaning. -
Page 8: Pre-Installation
Only qualified personnel should install, start-up, and Pre-Installation service this equipment. When working on this equipment, observe precautions in this manual as Receiving Inspection well as tags, stickers, and labels on the equipment. When the unit arrives, verify the information on the unit nameplate agrees with the order WARNING: Any use or misuse of this equipment acknowledgement and shipping papers. -
Page 9: Unit Storage
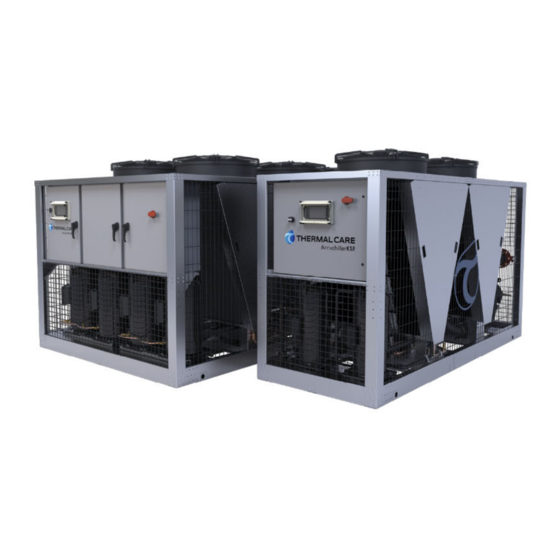
Chillers designed for use with a remote air-cooled Figure 1 – KSE 40 to 60 Unit Location condenser and the remote condensers themselves ship with a nitrogen holding charge. Check the remote condenser for signs of leaks prior to rigging. This will ensure no coil damage has occurred after the unit left the factory. - Page 10 Figure 3 – Mounting Platform Figure 4 – Rigging...
-
Page 11: Process Fluid Piping
Process Fluid Piping at the main disconnect before opening access panels for repair or maintenance. Proper insulation of chilled process fluid piping is crucial to prevent condensation. The formation of CAUTION: Wear eye protection when installing, condensation adds a substantial heat load to the maintaining, or repairing the equipment to protect against chiller. -
Page 12: Installation - Electrical
field piping. Mount the flow sensor in a minimum in mechanical damage to the compressors. Check pipe size of 2”. Insert the stem of the sensor into the the phasing with a phase sequence meter prior to compression fitting so the tip of the sensor is at the applying power. -
Page 13: Control Operation
Control Operation these areas brings up a keypad. Use the keypad to enter the appropriate user and password to gain The units uses a Programmable Logic Controller access. (PLC) and color touch-screen operator interface display that serves as the Human to Machine The user-level password allows access to the most Interface (HMI). -
Page 14: Home - Chiller Home Screen
Home – Chiller Home Screen Table 1 – System Overview Functions Screen Function Description System Overview Reference This screen provides an overall synopsis of the chiller Informs the operator of the Comp(s) ON compressors in operation in each None system, quick links to other views, as well as other circuit additional information. -
Page 15: Starting And Stopping The Chiller
Starting and Stopping the Chiller Menu 1 - Overview Starting the Chiller The Menu 1 Screen Figure 9 contains buttons to allow navigation to various sections of the control This screen provides the ability to start chiller system. Some parameters are password protected. operation. -
Page 16: Menu 1 - Alarms
Menu 1 - Alarms Warning Glycol If the Chiller Setpoint goes below 45°F, the Glycol Alarms Active Warning Screen will appear as in Figure 12. The When a critical system fault occurs, the controller amount of antifreeze will vary depending on the logs the faults to the HMI alarm handler. -
Page 17: Menu 1 - Diagnostics
Menu 1 – Diagnostics Figure 16 – Diagnostics Pumps Screen Diagnostics Menu The diagnostics screens provide detailed information about the various portions of the system. Figure 13 – Diagnostics Menu Screen Figure 17 – Diagnostics Process Screen Figure 14 – Diagnostics Circuit Details Screen Figure 18 –... - Page 18 Menu 1 – Security Figure 22 - Security – Add User Screen Security Menu To add protection to sensitive areas of the control program and provide some level of supervisory control to some operating parameters, the control system includes some security level protections. Figure 20 –...
- Page 19 Figure 24 - Security – Delete User Screen Menu 1 – Inputs / Outputs The Input / Output screens display the status of the various system inputs and outputs. This provides a detailed level of information for monitoring system operation and for diagnosing any performance issues or alarms that arise.
- Page 20 Figure 29 - Inputs/Outputs – Analog Inputs Screen Menu 1 – User Setup The control system allows for customization and adjustment of many parameters. In most cases, the factory default settings are sufficient; however, adjustment of parameters and settings is possible through the User Setup menus.
- Page 21 User Setup – Alarm Setup User Setup – Hot Gas Bypass Figure 36 - User Setup - Alarm Setup Screen Figure 37 - User Setup – Hot Gas Bypass Setup Screen Table 2 – Alarm Setup Parameters Table 3 – Hot Gas Bypass Valve Setup Parameters Menu Item Description Default Value...
- Page 22 User Setup – Pump Control User Setup – EEV Control Pump Control Screen The electronic expansion valve meters the amount of refrigerant into the evaporator in the precise This screen displays pertinent pump status quantity in order to maintain superheat. The information for a system with the optional integral difference between the saturated suction pump controls and provides the ability to change...
- Page 23 User Setup – Compressor Staging User Setup – Stage Order Figure 40 - User Setup – Compressor Staging Setup Compressor Stage Order Screen Screen The Compressor Stage Order Screen depicts the stage order of the local chiller. The stage order calculation uses the hours entered in the auto stage threshold parameter.
-
Page 24: User Setup - Dynmic Lift Setup
User Setup – Discharge Control Setup User Setup – Dynmic Lift Setup Discharge Control Setup Screen Dynamic Lift Setup Screen The EC fans modulate in order to maintain the The Dynamic Lift control logic adjusts the chiller discharge refrigerant pressure setpoint. head pressure to improve energy efficiency. -
Page 25: User Setup - Temperature Retransmit
User Setup – Temperature Retransmit User Setup – Remote Setpoint Figure 45 - User Setup – Temperature Retransmit When the remote setpoint option is active, an Setup Screen incoming 4-20mA or 0-10VDC signal controls the setpoint of the master chiller. The signal will span from the MINIMUM TEMPERATURE to the MAXIMUM TEMPERATURE as defined in the following figure. -
Page 26: User Setup - Chiller Capacity
User Setup – Chiller Capacity User Setup – Pump Down Chiller Capacity Screen Pump Down Screen This screen allows for adjustment of the nominal This screen allows for adjustments to the pump pipe size in which the flow sensor is located. down sequence. -
Page 27: User Setup - Miscellaneous Process Control
User Setup – Miscellaneous Process Menu 1 – Trending Control A graphical representation of the core operating parameters of the system is in the trending screen. The chiller setpoint can be controlled via process The trending screen displays the setpoint supply or process return. -
Page 28: Modbus
Modbus Modbus RTU and Modbus TCP/IP are both standard. Default Modbus TCP/IP IP: 192.168.2.1, Default Modbus RTU: Baud-57600, Data Length-8, Parity-Odd, Stop Bits-1. Table 9 – Modbus Table Types Index Size Variable Name Data Type Coil HMI_START Bool Coil SYSTEM_RUNNING Bool Coil HMI_STOP... - Page 29 Table 9 – Modbus Parameters (continued) Types Index Size Variable Name Data Type HoldingRegister CHILLER_SETPOINT Real InputRegister PLC_VERSION Real InputRegister COMPRESSORS_RUNNING_TOTAL InputRegister SYSTEM_DEMAND_PERCENT InputRegister PROCESS_SUPPLY_FLUID Real InputRegister PROCESS_RETURN_FLUID Real InputRegister PROCESS_DELTA_T_HMI Real InputRegister CKT1_EVAP_IN_FLUID_HMI Real InputRegister CKT1_EVAP_OUT_FLUID_HMI Real InputRegister CKT2_EVAP_OUT_FLUID_HMI Real InputRegister CKT1_EVAP_DELTA_T_HMI...
-
Page 30: Start-Up
Start-Up CAUTION: The unit requires the main power to remain connected during off-hours to energize the compressor’s crankcase heater. Disconnect main Every unit is factory set to deliver chilled water in power only when servicing the chiller. The crankcase accordance with the standard operating heater should remain on when the compressor is off to specifications for that particular chiller. -
Page 31: Freeze Protection
minerals, scale forms. The life giving properties of Table 10 – Fill Water Chemistry Requirements water can also encourage biological growth that can Water Characteristic Quality Limitation foul heat transfer surfaces. Alkalinity (HCO 70-300 ppm Aluminum (Al) Less than 0.2 ppm To avoid the unwanted side effects associated with Ammonium (NH Less than 2 ppm... -
Page 32: Step 3 - Check Condenser
CAUTION: When your application requires the use of Step 6 – Turn On Control Power glycol, use industrial grade glycol specifically designed Turn on the control power by turning the control for heat transfer systems and equipment. Never use power switch to "On". The panel displays should now glycol designed for automotive applications. -
Page 33: Step 8 - Initial Unit Operation
Step 8 – Initial Unit Operation simple procedures will result in substantially reduced downtime, reduced repair costs, and an extended Enter the desired leaving fuid temperature on the useful lifetime for the chiller. Any monetary costs of chiller HMI. Unless otherwise specified, the chiller is implementing these procedures will usually more factory set to deliver coolant at 50°F. -
Page 34: Once A Month
Once a Month 17. Check system refrigerant charge and verify the system is still full charged. Repeat items 1 through 5 and continue with the following. 18. Check the operation of the compressor crankcase heater. Energize the heater while the 6. -
Page 35: General Troubleshooting
General Troubleshooting Problem Possible Cause Remedy Three-phase power monitor tripped Check correct phasing of incoming power Compressor overload Check supply voltage, amperage of each leg, contactor and wiring, overload set point Compressor will not start Compressor contactor Replace if faulty PLC output card Replace if faulty Compressor failure... -
Page 36: Preventive Maintenance Checklist
Preventive Maintenance Checklist The following is a sample of a typical dual-circuit chiller checklist. Week Number Maintenance Activity Date Temperature Control Pump Discharge Pressure Refrigerant Suction Pressure #1 Refrigerant Suction Pressure #2 Refrigerant Discharge Pressure #1 Refrigerant Discharge Pressure #2 Refrigerant Sight Glass #1 Refrigerant Sight Glass #2 Check and clean evaporator Y-strainer... - Page 37 Notes...
- Page 40 New Equipment Sales Customer Service Parts Department 5680 W. Jarvis Ave. Niles, IL 60714 • 847-966-2260 info@thermalcare.com 847-966-2260 847-966-2636 847-966-8560 847-966-9358(fax) • • www.thermalcare.com sales@thermalcare.com service@thermalcare.com tcparts@thermalcare.com October 2021 KSE IOM 05...
Need help?
Do you have a question about the Accuchiller KSE and is the answer not in the manual?
Questions and answers