Table of Contents
Advertisement
Quick Links
Advertisement
Table of Contents

Related Manuals for Thermal Care Accuchiller TCF


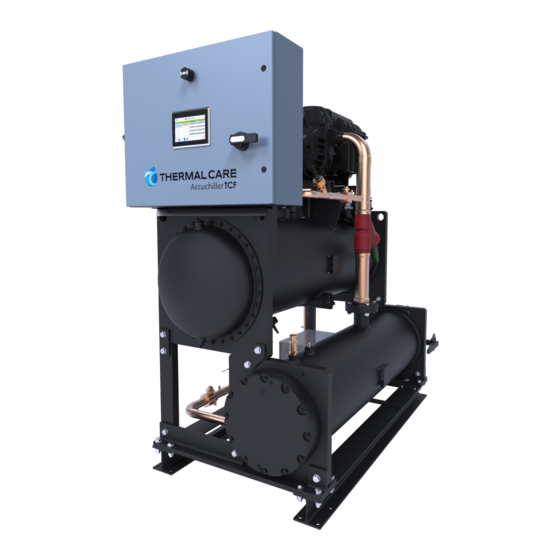
Summary of Contents for Thermal Care Accuchiller TCF
-
Page 3: Table Of Contents
Table of Contents Foreword ..........................................1 Safety Guidelines ........................................1 Pre-Installation ........................................2 Receiving Inspection ....................................... 2 Unit Storage ........................................3 Installation - Chiller ......................................3 Foundation .......................................... 3 Unit Location ........................................3 Rigging..........................................3 Process Fluid Piping ......................................3 Condenser Water Piping .................................... - Page 4 Figure 9 – Interlocks ....................................9 Figure 10 – Critical Interlocks .................................. 9 Menu 1 – Circuit Demand ....................................9 Circuit Demand Screen ....................................9 Figure 11 – Demand Circuit ..................................9 Menu 1 – Logging ........................................ 9 Figure 12 – Logging Screen ..................................9 Menu 1 –...
- Page 5 Figure 25 – Compressor Staging Screen ............................14 Table 8 – Compressor Staging Parameters ............................14 Menu 1 – Stage Order ...................................... 15 Compressor Staging Setup Screen ................................15 Figure 26 – Compressor Stage Order Screen ..........................15 Table 9 – Compressor Staging Local Parameters .......................... 15 Menu 1 –...
-
Page 6: Foreword
Foreword Safety Guidelines The central chiller consists of a refrigeration circuit to Observe all safety precautions during installation, provide cooling of water or coolant. start-up, and service of this equipment. The following is a list of symbols used in this manual and This manual is to serve as a guide for installing, their meaning. -
Page 7: Pre-Installation
Only qualified personnel should install, start-up, and Pre-Installation service this equipment. When working on this equipment, observe precautions in this manual as Receiving Inspection well as tags, stickers, and labels on the equipment. When the unit arrives, verify the information on the unit nameplate agrees with the order WARNING: Any use or misuse of this equipment acknowledgement and shipping papers. -
Page 8: Unit Storage
Unit Storage disconnect fittings, and manifolds wherever possible as they offer high resistance to water flow. When When storing the unit it is important to protect it manifolds are required, install them as close to the from damage. Blow out any water from the unit; use point as possible. -
Page 9: Master Temperature Sensor
Master Temperature Sensor Vx = phase with greatest difference from Vavg This section only applies to installations where For example, if the three measured voltages were multiple chillers are in a common system where one 442, 460, and 454 volts, the average would be: chiller is the master with the other chillers serving as slaves. -
Page 10: Compressor Control Logic
CAUTION: Wear eye protection when installing, General Control Operation maintaining, or repairing the equipment to protect against any sparks, debris, or fluid leaks. System Initialization Upon power-up, the first screen to appear is the CAUTION: Wear protective gloves when installing, Start-Up Splash Screen. -
Page 11: Home - Full Screen
Table 1 – System Overview Functions Home - Full Screen Screen Function Description Reference The Full Screen (Figure 3) provides a simplified view Provides information about any of the TC Chiller. The SETPOINT and PROCESS Alarm warnings or alarms which may temperatures display in a large font easily seen from Messaging have occurred. -
Page 12: Menu 1 - Overview
Menu 1 - Overview Table 2 – Menu 1 Functions Screen Function Description Reference The Menu 1 Screen (Figure 4) provides a common A listing of all active, history, and Figure 5 location for most setting adjustments. Some Alarms frequency of system alarms. Figure 6 parameters are password protected. -
Page 13: Menu 1 - Alarms
Menu 1 - Alarms Menu 1 – Circuit Details Alarms Active Circuit Details Screen When a critical system fault occurs, the controller To access the Circuit Details Screen (Figure 7) use activates the HMI alarm handler (Figure 5). The alarm Menu 1 (Figure 4) or touch the option Details on the screen will display the current faults. -
Page 14: Circuit Details Screen - Interlocks
Circuit Details Screen – Interlocks Menu 1 – Logging Touching the I-LOCK button of the Circuit Details The HMI is constantly logging key registers internal Screen displays the Interlocks Screen shown in to the HMI. In the event that the data and/or alarm Figure 9. -
Page 15: Menu 1 - Inputs / Outputs
Menu 1 – Inputs / Outputs Figure 17 – Analog Inputs Screen Inputs / Outputs Screens The Inputs/Outputs screens provide the status of all digital inputs, digital outputs, analog inputs, and outputs. When the PLC input LED is on, the corresponding input or output is on. -
Page 16: Menu 1 - Hot Gas Bypass
Menu 1 – Hot Gas Bypass Menu 1 – Expansion Valve Setup Hot Gas Bypass Setup Screen EXV Control Setup Screen Figure 19 – Hot Gas Bypass Screen Figure 20 – EXV Control Screen Table 3 – HGBP Setup Parameters Table 4 –... -
Page 17: Menu 1 - Discharge Control Setup
Menu 1 – Discharge Control Setup Table 5 – Discharge Setup Parameters Menu Item Description Default Value Discharge Control Setup Screen In Auto Mode, the valve adjusts to maintain optimum An electric condenser water-regulating valve is Mode Automatic performance. In manual mode, it standard on chillers with a water-cooled condenser. -
Page 18: Menu 1 - Modbus Compressor(S)
Menu 1 – Modbus Compressor(s) Menu 1 – Flow / Capacity Compressor Modbus Screen Flow/Capacity Screen The controller communicates with the compressor The graph displays trend data for the process fluid via Modbus communications. This communication is flow measured at the outlet of the evaporator on critical for compressor operation. -
Page 19: Menu 1 - Pump Control
Menu 1 – Pump Control Menu 1 – Staging Pump Control Screen Compressor Staging Setup Screen This screen displays pertinent pump status information for a system with the optional integral Figure 25 – Compressor Staging Screen pump controls and provides the ability to change mode selection. -
Page 20: Menu 1 - Stage Order
Menu 1 – Stage Order Menu 2 – Overview Compressor Staging Setup Screen Figure 28 – Menu 2 Screen Figure 26 – Compressor Stage Order Screen Table 10 – Menu 2 Functions Screen Function Description Reference Table 9 – Compressor Staging Local Parameters Provides the ability to restore the Figure 29 Menu Item... -
Page 21: Menu 2 - Defaults
Menu 2 – Defaults Menu 2 – Remote Mode CAUTION: The Defaults screen provides the ability to The Remote Mode toggle indicates if the chiller is restore the control system back to factory defaults in set to use a remote contact closure for remote the case that an unknown setting modification start/stop. -
Page 22: Start-Up
Step 1 – Connect Main Power Start-Up Connect main power properly ensuring it matches Every unit is factory set to deliver chilled water in the voltage shown on the nameplate of the unit. accordance with the standard operating Check the electrical phase sequence prior to start- specifications for that particular chiller. - Page 23 To avoid the unwanted side effects associated with Table 11 – Fill Water Chemistry Requirements water cooling, proper chemical treatment and Water Characteristic Quality Limitation preventive maintenance is required for continuous Alkalinity (HCO3-) 70-300 ppm Aluminum (Al) Less than 0.2 ppm plant productivity.
-
Page 24: Step 3 - Check Condenser
Step 3 - Check Condenser Set water flow using a discharge throttling valve or flow control valve (by others). The valve should be Check the condenser water lines to make sure all the same size as the To Process connection of the connections are secure. -
Page 25: Preventive Maintenance
CAUTION: A clear sight glass alone does not mean Check the main power supply to ensure it is that the system is properly charged. Also, check system acceptable, connected properly, and the unit has superheat, subcooling, and unit operating pressures. If a proper ground (see Installation section of this both suction and discharge pressures are low but manual for details). -
Page 26: Once Every 5 Years
17. Check operation of all system safety devices and Maintenance interlocks. Cleaning the Operator Interface 18. Check physical condition of all exposed circuit Use of abrasive cleaners or solvents may damage the boards for dust build-up and clean if necessary. window. -
Page 27: Troubleshooting
Troubleshooting Symptom Possible Cause Action Required Low water flow Check fluid flow is within design Chilled water temperature too low Check set point Faulty pressure sensor Check sensor Low suction Low refrigerant charge Check sub-cooling and discharge temperatures pressure Restriction in refrigerant piping Check electronic liquid level valve and filter drier Inlet guide vane (IGV) stuck open Check position and operation... -
Page 28: Drawings
Troubleshooting (continued) Symptom Possible Cause Action Required No motor cooling Check motor cooling solenoid valve Drive temperature Insufficient sub-cooling Check refrigerant charge too high Faulty temperature sensor Check sensor Winding temperature Faulty power bolt Check power bolt continuity too high No cooling demand signal Check temperature set points Faulty chilled water temperature sensors... - Page 32 New Equipment Sales Customer Service Parts Department 5680 W. Jarvis Ave. Niles, IL 60714 • 847-966-2260 info@thermalcare.com 847-966-2260 847-966-9358(fax) 847-966-2636 847-966-8560 847-966-9358(fax) • • • www.thermalcare.com info@thermalcare.com service@thermalcare.com tcparts@thermalcare.com TCF IOM 00...
Need help?
Do you have a question about the Accuchiller TCF and is the answer not in the manual?
Questions and answers