
Related Manuals for Clarion VX807AU


Summary of Contents for Clarion VX807AU
- Page 1 Owner’s Manual VX807AU DVD MULTIMEDIA STATION WITH BUILT-IN NAVIGATION & 7 ’’ TOUCH PANEL CONTROL...
- Page 2 NOTICES / WARNINGS Navigation: (SD807AU sold separetely) Your VX807AU is navigation ready. If you did not include navigation in your original purchase, you can very easily add navigation to your unit at any stage by purchasing the Clarion SD807AU Installation is as simple as inserting the MicroSD card.
-
Page 3: Table Of Contents
Registering Your Bluetooth Audio Player (Pairing) ..........31 Selecting the Bluetooth Audio Player ..............32 Controlling the Bluetooth Audio Player ...............32 13. Bluetooth TELEPHONE OPERATIONS ............33 Select the BT Phone Mode .................33 Bluetooth Telephone Settings ................33 Registering Your Phone (Pairing) ................34 VX807AU... - Page 4 Others Setup Menu .....................52 Set the Anti-Theft Code ..................52 25. TROUBLESHOOTING ..................53 General ........................53 DVD Player ......................53 USB Device ......................54 Bluetooth ......................54 TFT Screen ......................55 26. ERROR DISPLAY.....................56 DVD/CD Player ....................56 27. SPECIFICATIONS ....................57 28. WIRE CONNECTION GUIDE ................59 VX807AU...
-
Page 5: Features
External Power External Sound Rear Monitor Rear Vision Camera Amplifier Processor iPod ® Memory VX807AU iPhone ® iPhone/Smartphone via HDMI Bluetooth Telephone Connect via CCA-771,CCA-802 NOTE: The items listed outside of the frames are the commercial products generally sold. •... -
Page 6: Precautions
• For the installation of this unit or a change in the installation, ask your authorized dealer or a nearest Clarion service center for safety. Professional skills and experiences are required to do • This navigation system should not be used to replace your own judgment. No itinerary suggested by this navigation system should ever override any highway regulations, your own judgment, or a knowledge of safe driving practices. - Page 7 • Improper connection of speed pulse signal may result in serious damage or injury including electrical shock, and interference with the operation of the vehicle’s anti-lock braking system, automatic gearbox and speedometer indication. VX807AU...
- Page 8 1.When the inside of the car is very cold and the player is used soon after switching on the VX807AU heater, moisture may form on the disc (DVD/ CD) or the optical parts of the player and proper playback may not be possible. If moisture forms on the disc (DVD/CD), wipe it off with a soft cloth.
-
Page 9: Cautions On Handling
The surface is easily scratched, so do not rub cloth. it with hard objects. Do not use benzene, thinner, car cleaner, etc., as these substances may damage the cabinet or cause the paint to peel. Also, leaving rubber or plastic products in contact with the cabinet VX807AU... -
Page 10: Handling Discs
The MicroSD card slot is for Navigation ONLY.Only insert SD807AU navigation card. • When using a SD card, we recommend that you backup your data stored on it before using a personal computer etc. VX807AU... - Page 11 ® trademarks owned by the Bluetooth SIG, Inc. And any use of such marks by Clarion Co., Ltd. is under license. Other trademarks and trade names are those of their respective owners. • Pandora, the Pandora logo, and the Pandora trade dress are trademarks or registered trademarks of Pandora Media, Inc.
-
Page 12: Operation Panel
Micro SD card slot (Navigation ONLY) • Press this button to hardware reset the unit. When open the front panel, micro SD card slot appears. Only for Clarion navigation map card. (Sold separately) Inserting anything other than specific Note: When the [RESET] button is pressed, frequencies of radio navigation card may cause damage to the unit or your stations, titles, etc. -
Page 13: Remote Control
• Batteries (battery pack or batteries installed) the same direction that you removed it. must not be exposed to excessive heat such as Please ensure the tray is inserted in the sunshine, fire or the like. correct direction. VX807AU... -
Page 14: Remote Control Functions
• If the battery leaks, wipe the remote control completely clean and install a new battery. Remote Control Functions You can use the remote control to operate the VX807AU. Note: • The wireless remote control operation may not be optimal in direct sunlight. - Page 15 • Press to display Video menu in iPod mode. [ANGLE] Button • Press to switch the different ANGLE while playing DVD. (No all DVD disc supports this function) • Press to display Audio menu in iPod mode. [OPEN] Button • Press to eject disc from the unit. VX807AU...
-
Page 16: Main Menu
1. Touch and hold any of the mode buttons on the main menu for more than 2 seconds. 2. When it begins to “float”, drag the floating button to a new location. 3. Lifting up your finger will drop the button in the new location. VX807AU... -
Page 17: Dvd Video Player Operations
Also, it may not be possible to play depending on its recording conditions. • You cannot play SuperAudio CD. The CD player is not supported even if it is a hybrid disc. VX807AU... -
Page 18: Change Dvd System Settings
The disc will not be viewable until the correct password is entered. If you force a disc in before auto reloading, it may damage a disc. Set rating for parental level control 1.Select Others screen while in Setting mode. Touch VX807AU... -
Page 19: Showing Dvd Player Mode Screen
A large segment to divide the data area of the disc. 7 - Seek bar • Chapter 8 - Total time A small segment to divide the data area of the disc. 9 - Menu List button 10 - System time VX807AU... -
Page 20: Showing Video Files Player Mode Screen
2. Touch the screen of the playing video file to display with the directional buttons. Video files player menu , touch the screen again to 4. Touch [ ] button to fix on the selected item. return the playback screen. The display will return to VX807AU... -
Page 21: Operate The Video Files Player Menu
Disc Audio player mode. Please refer to CD Player 1. Touch [ ] button to pause during playback. Operations. 2. Touch [ ] button again to resume playback. Switch to Previous/Next File 1. Touch [ ] or [ ] button during playback to play previous/next file VX807AU... -
Page 22: Playable Video Disc Formats
• Format: MPEG4 Visual Simple @L1 • Picture size: 720 x 405 • Audio format: AAC • Audio sampling frequency: 32/44.1/48 KHz *.mpg files • Format: MPEG2 • Picture size: 720 x 480 • Audio format: MP3 • Audio sampling frequency: 32/44.1/48 KHz VX807AU... -
Page 23: Cd Player Operations
9 - Shortcut button. 3. Touch the desired track title button. The 10 - Play/Pause button corresponding track is started playback. 11 - Next Track/Fast Forward button 12 - Shuffle button 13 - Direct Searching button 14 - Scan Start/Stop button VX807AU... -
Page 24: Listening To Compressed Audio
1.1 and 1.0. played in the order displayed on the PC). In displaying, this unit gives priority to the Version 2.3 • Some noise may occur depending on the type of and 2.4 TAGs. encoder software used while recording. VX807AU... -
Page 25: Playback Mp3/Wma/Aac Menu
] button to stop playback. 2. Touch [ ] button again to resume playback. Playback resumes from the start of the folder which the playing track is in. • Other operations about playing MP3/WMA/AAC are almost the same as CD Player mode. VX807AU... -
Page 26: Usb Audio Operations
• The maximum allowable number of folders is 65535 (including root directory and folders with no MP3/ WMA/AAC/FLAC file). • The maximum allowable number of files in a folder is 65535. • You can store the MP3/WMA/AAC/FLAC files together in a folder. VX807AU... -
Page 27: Playing Audio Files In Usb Memory
1. Touch the [ ] button to shuffle the tracks in playing folder during playback. 2. Touch this button again to turn off the feature. Alphabet Search Touch the [ ] button to search with alphabet in current list. VX807AU... -
Page 28: Usb Video Operations
6 - Repeat button * The display will return to the playback screen, if you 7 - System time do not touch the screen for 10 seconds. 8 - Bluetooth status indicator 9 - Playback information 10 - Shortcut button VX807AU... - Page 29 This operation is the same as in the USB Audio mode. 6 - Shuffle button Searching with the Track Number 7 - Video files in list This operation is the same as in the USB Audio mode. 8 - System time VX807AU...
-
Page 30: Ipod Operations
• This system will not operate or may operate improperly with unsupported versions. • For detailed information on the playable iPod/iPhone models, see our home page: www.clarion.com The playback starts, from where the iPod/iPhone has been paused. Notes on Using an iPod/iPhone •... -
Page 31: Ipod Audio Playlist Mode Screen
Audio mode. The Category List operation is same as the normal iPod Audio mode. Select different song categories to play. The category is same as on the iPod/iPhone. iPod Audio Playlist Mode Screen VX807AU... -
Page 32: Bluetooth Audio Player Operations
• This system will not operate or may operate improperly Select screen. with some Bluetooth audio players. • For detailed information on the playable Bluetooth audio players, see our home page: www.clarion.com Selecting the Bluetooth Audio Mode 1. Touch the [BT Audio] button to select the Bluetooth Audio mode. -
Page 33: Selecting The Bluetooth Audio Player
3. Touch the desired device button you wish to use. Touch the [ ] button to select it as your active device. The corresponding phone is set as the current telephone. 4. Touch the [ ] button to return to the previous screen. VX807AU... -
Page 34: Bluetooth Telephone Operations
Note: • The input level of the microphone can be affected by its surroundings. Adjust the level if the person on the other end of the telephone has a reception problem. VX807AU... -
Page 35: Registering Your Phone (Pairing)
5. If entering the Pass Key code is prompted on your phone, enter the Pass Key code set in this unit. • You can change the Pass key setting of this unit from the Bluetooth Info screen under the Telephone Settings screen. VX807AU... -
Page 36: Answering An Incoming Call
2. When the call is finished, touch the [ ] button Note: to hang up. • Depending on some phones, the Telephone Interrupt screen may be closed and the connection with this system may be disconnected when entering the Private mode. VX807AU... -
Page 37: Tuner Operations
1. Touch the [FM1/2/3/AM] button to select the radio The volume of TA can be set during TA interruption. band (FM or AM). 2. Touch the [ ] or [ ] button in frequency menu to tune up or down by one step. VX807AU... -
Page 38: Auto Store
3. When the desired station is tuned in, touch the ] button again to stay in that station. DX/Local Setting The DX/Local setting changes the tuner sensitivity in order to separate closely spaced stations. This feature is useful in areas that have many radio stations in close proximity. VX807AU... -
Page 39: Dab Operations
OTHERS. By selecting each PTY in the list, 6. Previous Service in Current Ensemble button it will show the Services in this PTY category. To go 7. Next Service in Current Ensemble button back to Ensemble list just touch “back” button. VX807AU... - Page 40 4. When scanning the services, this image will display. Notes: After service scan, currently available services will be updated in the Ensemble List and PTY List. DAB Band When touch the DAB band button, the band will change as below DAB1->DAB2->DAB3->DAB1··· VX807AU...
-
Page 41: Pandora ® Operations
13 - Current album name • Skipping a track (Pandora mode) Touch the [ ] button during playback, tracks are skipped and start playback from the beginning of the next track. Note: • Some track are not able to be skipped. VX807AU... -
Page 42: Pandora Bluetooth Mode
Pandora when in the Pandora mode. 5. During Pandora playback in the Pandora mode with the Bluetooth connection, the volume level is controlled also on the mobile phone side. (Both iOS and Android devices) VX807AU... -
Page 43: Hdmi Mode
Note: The following are wiring examples. Depending on the device, it might be able to connect to the Clarion device directly with the CCA-771. Depending on the adapter or device, audio and/or video noise might be experienced. (1) Connection with the iPhone 5, iPhone 5s, iPhone 5c, iPhone 6, iPhone 6 Plus, iPhone 6s, iPhoe 6s Plus,... -
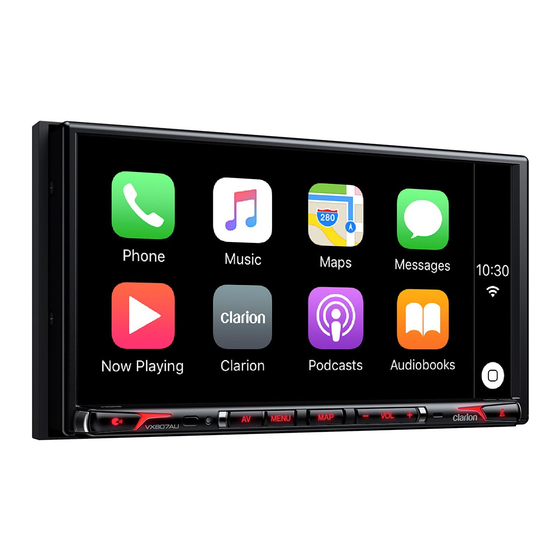
Page 44: Select Hdmi Source
18. Apple CarPlay To start Apple CarPlay: Apple CarPlay is immediately started when you connect iPhone to VX807AU via Lightning to USB cable. Apple CarPlay UI is automatically displayed in any situation except Note.1. *Note1: Original navigation guidance is active, VX807AU continues navigation guidance. Won’t change to Apple CarPlay UI. -
Page 45: To Go To Apple Carplay Screen
1. When you press and hold “MAP” button for 2 seconds, “CarPlay maps” screen is displayed. 2. When you press “AV” button, “CarPlay now playing” screen is displayed if active source is CarPlay. 3. When you press “VOICE” button, “Siri” screen is displayed. The indicator displays as follows. VX807AU... -
Page 46: To Return To Original Screen
To return to original screen: 1. Press “MENU” button, Main menu screen is displayed. 2. Press “MAP” button, original navigation screen is displayed. 3. Press “AV” button, original screen is displayed if original audio source is active. The indicator displays as follows. VX807AU... -
Page 47: Aux
Press MENU button on Operational Panel to return to the Main Menu. Note: If the reverse cable is connected correctly to the car, the unit goes to camera mode automatically when the car is in reverse. VX807AU... -
Page 48: Rear Source Operations
3. Touch the Front button to access the main menu but DVD Video Rear Source Control Direct not close the Rear Source. Mode. DVD Video in Rear NOTE: More detail please refer to DVD Video Front source. VX807AU... -
Page 49: Aux Video In Rear
More detail please refer to AUX Front source. 22. FULL DIGITAL SOUND SYSTEM The VX807AU has a Digital (Optical) output which allows it to connect to Clarion’s high fidelity Full Digital Sound System. Clarion’s Full Digital Sound System is a break through in audio technology. -
Page 50: Navigation (Sold Separately)
Top right corner: Cursor location. information ] /[ ]: Move left/right. ] /[ ]: Move up/down. Control Buttons ] /[ ]: Enlarge/reduce the map. Short [Back]: Hide the buttons. [More]: Show more informations. Setting Distance/ Menu Time [Select]: Select the route. VX807AU... -
Page 51: Setting Operations
Steering Wheel: Change the position of Apple CarPlay home button. Time: Set system clock. Version: Display the software version information. Note: • Time and 24-Hour Format can be adjusted when set the system time not to be synchronized with GPS local time. VX807AU... -
Page 52: Video Setup Menu
90Hz and 120Hz. Magna Bass EX: Choose the loudness On or Off. Audio Setup Menu Amp Cancel: Selecting ON turns off the internal amplifier in the VX807AU. Note: Optional cable (sold separately) is necessary when you use Audio line out. -
Page 53: Others Setup Menu
Note: If the anti-theft code is lost or forgotten, a charge will be incurred at the owner’s expense by a Clarion service station to unlock the VX807AU. Set Password: Set the password for the DVD parental control. -
Page 54: Troubleshooting
Check that the parking brake is displayed. engaged. engaged. Disc cannot play with Feature exceeds set parental Release the view limitation or the display “PARENTAL level. change the parental level. VIOLATION” shown. See the subsection “Setting up the parental level” VX807AU... -
Page 55: Usb Device
The audio quality is poor after The Bluetooth reception is Move the device closer to the connection with a Bluetooth poor. car audio system or remove enabled device. any obstacle between the device and the system. VX807AU... -
Page 56: Tft Screen
(The liquid crystal panel is produced according to technology with very high precision. Note that, though there are effective pixels of 99.99% or more, pixel missing or normally lit pixels account for 0.01%). VX807AU... -
Page 57: Error Display
Eject the disc then reload it inside the DVD deck and does properly. not play. PARENTAL VIOLATION Parental level error. Set the correct Parental level. Region code error Region code error. Eject the disc, and replace correct region code disc. VX807AU... -
Page 58: Specifications
Video output voltage: 1.0 V Screen Size: 6.95” wide type Pixels: 1,152,000 Resolution: 800 x 480 x 3 (RGB) Bluetooth Specification: Bluetooth Ver 2.1+EDR Profile: HPF1.5 (Hands Free Profile) HSP1.0 (Headset Profile) A2DP (Advanced Audio Distribution Profile) AVRCP1.2,1.3,1.4 (AV Remote Control Profile) VX807AU... - Page 59 VX807AU dimensions: VX807AU weight: 2.74 kg VX807AU...
-
Page 60: Wire Connection Guide
WHITE WHITE HDMI CABLE DAB404E (Sold separately) GPS Antenna Note: For prevent the disconnection of the Optical cable, please fix the cable to VX807AU with vinyl tie. Radio Antenna Optical Cable (Sold in the market) iPod/iPhone Z3 Commander (Included Z3) - Page 61 Parking brake cord Purple/white Reverse gear cord Purple/black Rear right - Purple Rear right + Gray/black Front right - Gray Front right + White Front left + White/black Front left - Green Rear left + Green/black Rear left - VX807AU...
- Page 62 Parking brake cord Purple/white Reverse gear cord Purple/black Rear right - Purple Rear right + Gray/black Front right - Gray Front right + White Front left + White/black Front left - Green Rear left + Green/black Rear left - VX807AU...
- Page 63 Clarion Co., Ltd. All Rights Reserved. Copyright © 2017: Clarion Co., Ltd. 2016/12...
Need help?
Do you have a question about the VX807AU and is the answer not in the manual?
Questions and answers