Advertisement
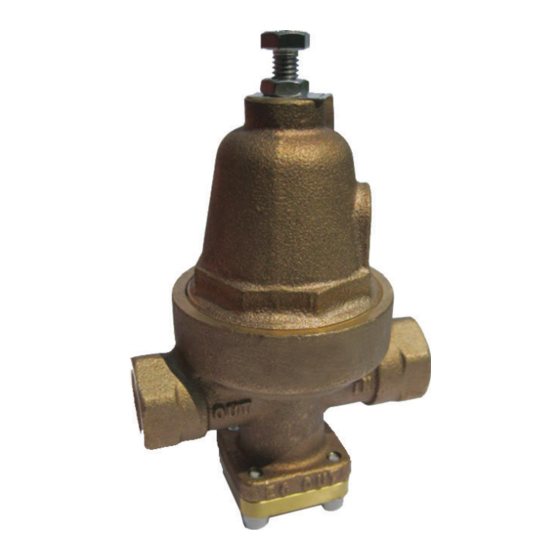
CASH TYPE A-401 CRYOGENIC PRESSURE REGULATOR
INSTALLATION, OPERATION AND MAINTENANCE INSTRUCTIONS
Before installation, these instructions must be read carefully and understood.
DESCRIPTION
The Type A-401 regulator is a fully automatic
pressure regulating valve designed for
cryogenic service in the pressure build-up
circuit. Because it may be used for either
cryogenic liquids or gases, it may be installed
either before or after the pressure build-up
coil.
SPECIFICATION DATA
Service: Cryogenic liquids and gases
(pressure reducing or pressure build-up
service)
Sizes: ½"
Connections: Threaded internal inlet
and outlet.
Body Material: Bronze
Temperature Rating:
-320°F (-195.5°C) to +150°F (65.5°C)
Maximum Initial Pressure: 600 psig (41.4 bar)
Emerson.com/FinalControl
INSTALLATION INSTRUCTIONS
The Type A-401 regulator should be installed in
the horizontal position with the spring chamber
upright or down. Install a Y-Type or equivalent
strainer upstream of the Type A-401. For
other installation requirements, consult the
factory. For easy operation and maintenance,
it is suggested that manual shut-off valves be
installed upstream and downstream from the
valve. Before installing the valve, the piping
and valve should be thoroughly flushed out
to remove any foreign material. In order to
prevent contamination from entering the valve,
an in-line screen is recommended. Install
the valve with the inlet pipe fitted to the inlet
connection identified on the valve body. Use a
compatible sealant on the male pipe threads
and do not over-tighten the valve connections.
CONSTRUCTION
See component description for materials of
construction.
All parts are commercially cleaned for oxygen
service.
OPERATING INSTRUCTIONS
Adjusting the Delivery Pressure
The regulator's delivery pressure setting is
adjusted by turning the adjusting screw (1)
at the top of the spring chamber (3) after
loosening the adjusting screw lock nut (2).
To increase the delivery pressure, turn the
adjusting screw clockwise (into the spring
chamber). To decrease the delivery pressure,
turn the adjusting screw counter-clockwise (out
of the spring chamber). Tighten the adjusting
screw lock nut after the adjustment has been
made (and reinstall optional cap).
© 2018 Emerson. All rights reserved.
MAINTENANCE INSTRUCTIONS
CAUTION
Before attempting to replace any spare parts,
be sure to shut off all pressure connections to
the valve. With the valve closed however, system
pressure could still be locked between the shut
off valve and the inlet and/or outlet sides of the
regulator. Before proceeding with any valve
service, be certain to relieve the pressure from
both sides of the regulator.
After reassembly and before pressurizing the
valve, tighten the adjusting screw to ensure there
is force on the pressure plate. This will help avoid
damage to parts that will cause the valve to leak
and not function correctly.
Refer to section view on the following page for
parts identification. Repair parts can easily be
installed without removing the regulator from the
line.
VCIOM-10805-EN 20/08
Advertisement
Table of Contents

Related Manuals for Emerson CASH A-401


Summary of Contents for Emerson CASH A-401
- Page 1 To decrease the delivery pressure, turn the adjusting screw counter-clockwise (out of the spring chamber). Tighten the adjusting screw lock nut after the adjustment has been made (and reinstall optional cap). Emerson.com/FinalControl VCIOM-10805-EN 20/08 © 2018 Emerson. All rights reserved.
- Page 2 VCIOM-10805 © 2018, 2020 Emerson Electric Co. All rights reserved 08/20. Cash Valve is a mark owned by one of the companies in the Emerson Automation Solutions business unit of Emerson Electric Co. The Emerson logo is a trademark and service mark of Emerson Electric Co. All other marks are the property of their prospective owners.
Need help?
Do you have a question about the CASH A-401 and is the answer not in the manual?
Questions and answers