Table of Contents

Related Manuals for Dover PSG Quattroflow Q-Control


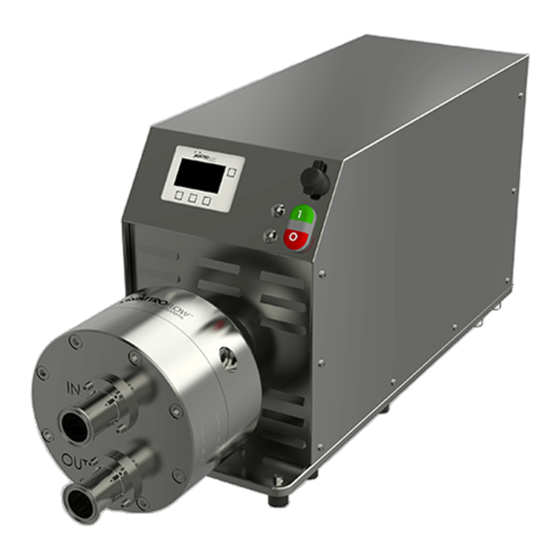
Summary of Contents for Dover PSG Quattroflow Q-Control
- Page 1 Quattroflow Q-Control Operating Manual (Supplement to original Operating Manuals for Quattroflow Pumps) Operator and Control Unit for Quattroflow pumps models QF30Qcon, QF150Qcon, QF1200Qcon, QF2500Qcon and QF4400Qcon Revision 0...
- Page 2 PSG Germany GmbH Hochstraße 150-152 47228 Duisburg, Germany Phone +49 (0) 2065 89205-0 Fax: +49 (0) 2065 89205-40 Email: psg-germany@psgdover.com Internet: www.quattroflow.com Keep this Operating Manual on hand near the device. Include it if the device is sold • Note Follow warning and safety instructions! →...
-
Page 3: Table Of Contents
Contents Contents Notes on reading ............... 8 Abbreviations, synonyms, symbols for this manual ......... 8 Risk mitigation by means of user information .......... 8 Technical Documentation ..............10 Legal provisions .............. 11 Directives and standards applied ............11 2.1.1 Evaluation of conformity ................11 Exclusion of Liability ................11 2.2.1 Modifications ..................11... - Page 4 Contents Battery ....................22 USB ......................22 Signal connections and cabling .............23 5.8.1 Type and pin-allocation ................23 5.8.2 Port X1 ....................24 5.8.3 Port X2 ....................25 5.8.4 Port X3 ....................26 5.8.5 Port RS485 ....................26 Maintenance ..............27 Warning notices ..................27 Inspections .....................27 6.2.1 Check safety equipment regularly ............27 Maintenance ..................28 6.3.1...
- Page 5 Contents 9.3.1 General information ................50 9.3.2 Commissioning and parameterization ...........51 Operating modes (description, configuration, and use) ................... 52 10.1 Manual RPM (rotation speed) ..............54 10.1.1 Installation ....................54 10.1.2 Use ......................54 10.1.3 Option: Display sensor value ..............55 10.1.4 Option: Totalizer ..................55 10.2 Manual flow ....................57 10.2.1...
- Page 6 Contents Integrated functions ............84 12.1 Totalizer ....................84 12.1.1 Internal ....................84 12.1.2 Sensor ....................85 12.2 Calibration factor / displacement volume (Cal) ........86 12.2.1 Determining the calibration factor ............87 12.2.2 Standard values ..................88 12.2.3 Influence of the calibration factor on the dispensing operating mode ......................88 12.3 Maximum Values (user limits) ..............90...
- Page 7 Contents 17.2 Parameter table and standard values ..........116 Predefined manufacturer’s parameters ..........119 17.3 Units and abbreviations ..........120 Revision history operating manual ......121 Notes ................122 Original Operating Manual Quattroflow Q-Control Rev 0 7 / 126...
-
Page 8: Notes On Reading
Notes on reading Abbreviations, synonyms, symbols for this manual Notes on reading • Note Quattroflow 4-piston membrane pump models QF30Qcon, QF150Qcon, QF1200Qcon, QF2500Qcon, and QF4400Qcon are equipped with a control device, referred to below as “Q-Control.” The control device is preconfigured as standard and includes the connecting cables required for commissioning the pump. - Page 9 Notes on reading Risk mitigation by means of user information In addition to potential Type C standards, the directives, standards, and regulations include, for example: • 2006/42/EC – Machinery Directive, Annex I, Section 1.7.4 • EN ISO 12100 – Safety of machinery - General principles for design - Risk assessment and risk reduction •...
-
Page 10: Technical Documentation
Notes on reading Technical Documentation Signal word Level of risk of Meaning the hazard • DANGER high Death or severe injury will occur if the hazard is not avoided. • WARNING medium Death or severe injury can occur if the hazard is not avoided. •... -
Page 11: Legal Provisions
Legal provisions Directives and standards applied Legal provisions 2.1 Directives and standards applied See the respective EC Declaration of Conformity The fundamental rule is that in EU countries, only such products may be marketed for which a declaration has been made that they conform to the provisions of the harmonization directives and the requirements of associated standards. -
Page 12: Safety
Safety Intended use Safety 3.1 Intended use The Q-Control control device is used for controlling and regulating membrane pump models QF30Qcon, QF150Qcon, QF1200Qcon, QF2500QCon, and QF4400con. The device may: • be used only in the commercial and industrial sector, • be used only in a building, such as a production facility, •... -
Page 13: Safety Instructions
Safety Safety instructions 3.2 Safety instructions This Operation Manual contains fundamental instructions that must be following during installation, operation, and maintenance. Therefore, the installer and the responsible technical personnel/operators must read the Operation Manual prior to installation and commissioning, and it must always be available at the point of use of the device. - Page 14 Safety Safety instructions Electrical energy Depending on the size, the pump is connected to a supply voltage of 115V, 230V, or 400V. Contact with current-carrying parts can cause fatal electrocution (danger). → Operate the device only at the specified voltage and frequency in order to prevent damage. →...
-
Page 15: Label On The Device
Safety Safety instructions Other warnings and safety instructions The following instructions warn against improper operation or potential operating errors that can cause damage and endanger the life and limb of the user and other people. → The maximum permissible delivery pressure depends on the temperature of the medium being transported. -
Page 16: Operator
Safety Operator 3.3 Operator The operator: ...assumes obligations related to operation the device under labor law. • Operates the device safely and without manipulation through all phases of its life. • Ensures that personnel read and understand the Operation Manual. •... - Page 17 Safety Personnel ...are instructed prior to commissioning the following technicians are required for operation of the device: • For work on electrical equipment • For controls and programming • For setup and testing • For maintenance and repairs • For troubleshooting •...
-
Page 18: Limited Access
Safety Personnel • Instructions and safety training by authorized persons must be performed and documented prior to starting work. • The work by third-party personnel must be coordinated with internal employees to prevent mutual endangerment. • Prior to starting work, one direct contact person in the form of an internal employee must be defined who is informed of the nature and location of the work being performed. -
Page 19: Transport, Storage, Installation, Decommissioning, Disposal, Recommissioning
Transport, storage, installation, decommissioning, disposal, recommissioning Transport Transport, storage, installation, decommissioning, disposal, recommissioning 4.1 Transport The pump with Q-Control is packaged in a protective carton and/or on a pallet as a standard and can thus be transported using typical industrial trucks and lifting gear with slings. The center of gravity is not necessarily in the middle. -
Page 20: Disposal
Transport, storage, installation, decommissioning, disposal, recommissioning Disposal → The following measures are necessary: • Switch off and disconnected all sources of energy. • Prevent unauthorized persons from restoring energy sources. • Perform regular visual inspections. Disposal The device contains components or substances that can endanger the environment if not disposed of properly. -
Page 21: Installation
Installation Electrical connection Installation The time of commissioning is the point at which a product reaches its intended use. Commissioning is done in accordance with this manual and is the responsibility of the operator. Follow intended use and observe the technical data. ... -
Page 22: Analog Output
Installation Analog output 5.4 Analog output There are two 16-bit output channels, one control output for the pump and one monitor output. The monitor output (2) can be set for 4-20 mA current. This output can be used by the user (see section 12.6.1). The control output channel (1) can be configured as a current (4-20 mA fixed or 4-20 mA freely configurable), voltage (0-5V, 0-10V fixed or 0-10V freely configurable) or as a pulsed output. -
Page 23: Signal Connections And Cabling
Installation Signal connections and cabling 5.8 Signal connections and cabling 5.8.1 Type and pin-allocation All ports are designed with the same connection type: M12, female (connection jack), 8-pin Pin-allocation: Figure 1 Connection jack and pin-allocation Each connection is delivered with a suitable mating connector (M12, 8-pin, male). The user can use this connector to wire own sensor and signals with the Q-Control Pump. -
Page 24: Port X1
Installation Signal connections and cabling 5.8.2 Port X1 PIN Function Comment 24V+ Power supply Power supply DI 3 Digital input 3 DI 2 Digital input 2 DI 1 Digital input 1 Digital output Table 1 Allocation Port X1 Connection example: Digital input 1 Digital input 2 Digital input 3... -
Page 25: Port X2
Installation Signal connections and cabling 5.8.3 Port X2 PIN Function Comment 24V+ Power supply Power supply AI 1+ Analog input 1+ AI 1- Analog input 1- AI 3+ Analog input 3+ AI 3- Analog input 3- Table 2 Allocation Port X2 Connection example: Analog input 1 Analog input 3... -
Page 26: Port X3
Installation Signal connections and cabling 5.8.4 Port X3 Function Comment 24V+ Power supply Power supply AI 2+ Analog input 2+ AI 2- Analog input 2- AI 4+ Analog input 4+ AI 4- Analog input 4- AO + Analog output + AO - Analog output - Table 3 Allocation Port X3... -
Page 27: Maintenance
Maintenance Warning notices Maintenance 6.1 Warning notices Regular maintenance and care reduce the risk of potential interruptions in operation and help to extend the service life of your device. We are not liable for damage arising from incorrect repair attempts. Damage due to incorrect repair attempts will void all warranty claims. -
Page 28: Maintenance
Maintenance Maintenance 6.3 Maintenance 6.3.1 Changing the battery The integrated button cell must be replaced approx. Every 5 years. The configuration remains in the flash memory of the Q-CONTROL, even if the button cell is removed. The time and date must be adjusted after the change. The button cell is installed on the back of the Q-CONTROL control unit. -
Page 29: Malfunctions And Troubleshooting
Maintenance Malfunctions and Troubleshooting 6.4 Malfunctions and Troubleshooting In the event of malfunctions, first check whether there is an operating error or another cause that cannot be attributed to a defect in the device - such as a power failure. As soon as an (error) message appears in a particular operating mode or if a particular parameter is changed, read the associated section in this Operation Manual. -
Page 30: Rma Process
Maintenance RMA process 6.5 RMA process If you have purchased the pump from a Quattroflow distributor, please contact your distributor. They will help you along with the process. If a pump is to be sent to a Quattroflow location in Germany for inspection or repair, please contact the service team at PSG Germany / Quattroflow. -
Page 31: General Operation And Menu Structure
General operation and menu structure Display and softkeys General operation and menu structure All Quattroflow pump models that are shipped with Q-Control have a main switch installed, to switch the power to the pump on or off. When the main switch is pressed, the Q-Control display switches on automatically. -
Page 32: Navigation
General operation and menu structure Navigation Button Display Function Increase or decrease value in various operating modes. ↑ ↓ Vertical menu selection A, C ← → Horizontal menu selection (browsing) Confirm or start action START Start the pump STOP Stop the pump SELECT Select element SAVE... -
Page 33: Settings (Configuration)
General operation and menu structure Navigation NOTE Please note that the selection list for operating modes is adapted dynamically to the configuration in the settings. For more information, see Table 16. 7.2.3 Settings (configuration) To get to the settings (configuration), proceed as follows: MENÜ... - Page 34 General operation and menu structure Navigation To change the value, press the buttons → or - + (depending on the type of parameter). To apply the value setting, press the NEXT button. The next line is then selected and its parameter flashes slowly. Picture 9 Choose next parameter / next line (example) To save the changes, press NEXT several times until the bottom line and the bottom parameter have been selected.
-
Page 35: User Levels, Login, And Pin
General operation and menu structure User levels, login, and PIN 7.3 User levels, login, and PIN The settings (configuration) are divided into two user levels: ▪ Open settings, without any PIN ▪ Settings at the Supervisor level with PIN code A PIN code is required to pull up the tabs in the Supervisor level. -
Page 36: Menu Structure And Brief Description Of Settings
General operation and menu structure Menu structure and brief description of settings 7.1 Menu structure and brief description of settings The following picture and table shows the sequence of individual tabs that can be found within the settings. The tabs, which can be scrolled through from left to right in Q-Control, are shown from top to bottom in this table. - Page 37 General operation and menu structure Menu structure and brief description of settings Parameter Unit Values Brief description Open settings without entering a PIN code Dispense Unit ml, l, gal Unit for dispensing volume Volume numeric value Dispensed volume Number of numeric value Number of cycles for dispensing cycles...
- Page 38 General operation and menu structure Menu structure and brief description of settings Parameter Unit Values Brief description Digital 3 USB Logging Active On, Off Activates USB logging Dezimal Selects the decimal point for USB logging Interval numeric value Interval for data logging Modbus RS485 Protocol RTU, ASCII...
- Page 39 General operation and menu structure Menu structure and brief description of settings Parameter Unit Values Brief description Type Flow, Set according to sensor Pressure, raw Unit mlPM, LPM, Only for flow and pressure Types LPH, GPM Set according to sensor bar, PSI Min value numeric value...
- Page 40 General operation and menu structure Menu structure and brief description of settings Parameter Unit Values Brief description Digital 2 On, Off Digital 3 On, Off Analog output Type Off, 4-20 mA Activate the analog output Motor speed feedback PID Flow control numeric value Parameters for the controller numeric value...
-
Page 41: Usage Of Analog And Digital Sensors
Usage of analog and digital sensors Using sensors with analog signal Usage of analog and digital sensors 8.1 Using sensors with analog signal Q-Control has a total of four analog inputs, and one sensor can be connected to each. Please note that the input signal of the analog input matches the output signal of the sensor. - Page 42 Usage of analog and digital sensors Using sensors with analog signal Picture 14 Analog input; configuration, part 1 (example) Picture 15 Analog input; configuration, part 2 (example) NOTE Not all sensors are scaled from 0 to the maximum measured value, and for many sensors, the scaling of the analog signal is adjustable.
-
Page 43: Assign Sensor As Master Sensor For The Operating Modes
Usage of analog and digital sensors Using sensors with analog signal 8.1.2 Assign sensor as master sensor for the operating modes If the sensor is to be used for the operating modes (e.g., flow or pressure control, displaying sensor values in the Manual RPM mode), then the sensor must be assigned as a master sensor. Use the following parameters to assign the sensors: MENU >... -
Page 44: Using Sensors With A Digital Signal
Usage of analog and digital sensors Using sensors with a digital signal 8.2 Using sensors with a digital signal Q-Control has a total of three digital inputs, and one sensor can be connected to each. Digital sensors, unlike analog sensors, cannot be used for transmitting dynamic process data. For this reason, digital sensors cannot be used as master sensors. -
Page 45: Usage Of Supplied Sensors (By Quattroflow)
Usage of supplied sensors (by Quattroflow) Pressure sensor Labom Pascal CS2110 (multiple-use) Usage of supplied sensors (by Quattroflow) 9.1 Pressure sensor Labom Pascal CS2110 (multiple-use) 9.1.1 General information As an option for multiple-use pumps, Quattroflow offers the following pressure sensor with a switched output in various sizes: Pressure transducer / switch Manufacturer: Labom... -
Page 46: Commissioning And Parameterization
Usage of supplied sensors (by Quattroflow) Pressure sensor Labom Pascal CS2110 (multiple-use) 9.1.2 Commissioning and parameterization ▪ Plug must be connected to the sensor. ▪ Plug must be connected to Q-Control: AI2 (Port X3) ▪ The sensor must be configured according to the following table: MENU >... -
Page 47: Flow Sensor Em-Tec Bioprott Clamp-On / Flow Track Plus
Usage of supplied sensors (by Quattroflow) Flow sensor em-tec BioProTT Clamp-On / Flow Track Plus 9.2 Flow sensor em-tec BioProTT Clamp-On / Flow Track Plus 9.2.1 General information In cooperation with em-tec Clamp-On, Quattroflow offers flow sensors for use with Quattroflow pumps. The exact model depends on the pump size and the type and size of the hose. - Page 48 Usage of supplied sensors (by Quattroflow) Flow sensor em-tec BioProTT Clamp-On / Flow Track Plus NOTE The Flow Track Plus device receives the required 24 VDC power supply via the cable assembled by Quattroflow, which connects the Flow Track Plug with the Q-Control pump. The external power pack supplied by em-tec as standard is therefore not required and must not be connected additionally.
-
Page 49: Commissioning And Parameterization
Usage of supplied sensors (by Quattroflow) Flow sensor em-tec BioProTT Clamp-On / Flow Track Plus 9.2.2 Commissioning and parameterization ▪ Plug must be connected to the Flow Track Plus: Flow 4-20 mA ▪ Plug must be connected to Q-Control: AI1 (Port X2) ▪... -
Page 50: Diaphragm Monitoring (Multiple-Use And Single-Use)
Usage of supplied sensors (by Quattroflow) Diaphragm monitoring (multiple-use and single-use) 9.3 Diaphragm monitoring (multiple-use and single-use) 9.3.1 General information This function is implemented as standard with a capacitive sensor with NPN switched output, which is available from Quattroflow as an accessory. If diaphragm monitoring is to be used, it is recommended that the pump is equipped with a sensor at the factory. -
Page 51: Commissioning And Parameterization
Usage of supplied sensors (by Quattroflow) Diaphragm monitoring (multiple-use and single-use) The sensor is shipped with an assembled cable from Quattroflow in the following configuration: Plug type Signal Connection Switch signal Permanently wired to the sensor M12, 8-pin, male Switch signal Connection at Q-Control. -
Page 52: Operating Modes (Description, Configuration, And Use)
Operating modes (description, configuration, and use) Diaphragm monitoring (multiple-use and single-use) Operating modes (description, configuration, and use) The following section describes the function, installation, and use of the various operating modes provided by Q-Control. Some modes can only be used in combination with connected sensors. The following table shows an overview of which operating modes require a sensor, and what type of sensor: Operating mode Brief description... - Page 53 Operating modes (description, configuration, and use) Diaphragm monitoring (multiple-use and single-use) The selection list for operating modes is adapted dynamically to the settings. The following table shows the conditions for when which mode appears in the Operating mode selection window. Operating mode Conditions for displaying and selecting the operating mode Manual RPM...
-
Page 54: Manual Rpm (Rotation Speed)
Operating modes (description, configuration, and use) Manual RPM (rotation speed) 10.1 Manual RPM (rotation speed) The pump with Q-Control can be operated as a stand-alone unit with no sensor connection, and without being integrated in an external control system. In this case, it is possible to set the pump speed manually. -
Page 55: Option: Display Sensor Value
Operating modes (description, configuration, and use) Manual RPM (rotation speed) 10.1.3 Option: Display sensor value The Manual RPM mode provides the option of displaying the sensor values from the flow sensor and/or the pressure sensor, if they are connected and configured. Conditions for use: ▪... - Page 56 Operating modes (description, configuration, and use) Manual RPM (rotation speed) Picture 30 Manual RPM; totalizer (example) The volume can be calculated either internally or by means of a flow sensor. For more information, see section 12.1 Original Operating Manual Quattroflow Q-Control Rev 0 56 / 126...
-
Page 57: Manual Flow
Operating modes (description, configuration, and use) Manual flow 10.2 Manual flow In this mode, the volume flow rate can be entered manually as a specified value. Using the setting for displaced volume per revolution (calibration factor), Q-Control calculates the pump speed required and sets it automatically. -
Page 58: Option: Totalizer
Operating modes (description, configuration, and use) Manual flow Symbol button Function button Reduce volume flow rate. Press and hold to change the value quickly. Increase volume flow rate. Press and hold to change the value quickly. START Start pump STOP Stop pump Table 18 Manual Flow;... -
Page 59: External Upm (Rotation Speed Via An External Remote Control)
Operating modes (description, configuration, and use) External UPM (rotation speed via an external remote control) 10.3 External UPM (rotation speed via an external remote control) The pump with Q-Control provides the ability to be controlled by a customer’s automated process control system. -
Page 60: Use
Operating modes (description, configuration, and use) External UPM (rotation speed via an external remote control) 10.3.3 Use The main window shows the current speed [RPM] and the current volume flow calculated from the speed and displacement volume. The unit for the volume flow rate is based on the following settings: MENU >... - Page 61 Operating modes (description, configuration, and use) External UPM (rotation speed via an external remote control) NOTE: The maximum values defined by the user in MENU > Settings > Max values are used in the External RPM mode. The following diagram shows an example of a characteristic curve for the QF150 Q-Control pump, with a maximum speed of 3000 RPM: Picture 35 Graph for scaling current signal for mode External RPM;...
-
Page 62: Dispensing
Operating modes (description, configuration, and use) Dispensing 10.4 Dispensing In this mode, automated batch dispensing can be performed. For example, this function can perform filling tasks in which the same volume needs to be dispensed multiple times within a particular time. Q- Control uses various parameter settings to calculate the necessary speed for the pump. - Page 63 Operating modes (description, configuration, and use) Dispensing Picture 36 Dispense; configuration (example) Q-Control uses the following parameters to calculate the necessary speed for the pump. ▪ Volume ▪ Running time ▪ Slope MENU > Settings > Parameter 1 > Slope [%/s] ▪...
-
Page 64: Use
Operating modes (description, configuration, and use) Dispensing 10.4.3 Use The following exemplary picture shows the main window for the operating mode Dispense. Picture 38 Dispense; main window (example) Symbol button Function button START Start automatic dispensing function STOP Stop pump Table 22 Dispense;... -
Page 65: Example Application: Dispense
Operating modes (description, configuration, and use) Dispensing 10.4.4 Example application: Dispense The pump has a filling mode that can be used to dispense a predefined volume of fluid automatically. This mode can be used for dividing a volumes into equal size in separate containers by means of the Quattroflow pump. - Page 66 Operating modes (description, configuration, and use) Dispensing Quattroflow pump with Q-Control Dispensing e.g. into bottles Picture 41 Example of a setup for a filling application The maximum filling amount per unit of time for various pump sizes can be found in the following graph.
-
Page 67: Flow Control And Pressure Control
Operating modes (description, configuration, and use) Flow control and pressure control 10.5 Flow control and pressure control The two control modes allow a target value to be set manually for the volume flow or backpressure. The pump automatically controls the speed in order to reach or maintain the target value. The control is implemented as a PID (Proportional Integral Differential) controller, which provides fast and stable control in many process situations. - Page 68 Operating modes (description, configuration, and use) Flow control and pressure control Picture 43 Flow-Control; main window (example) Picture 44 Pressure-Control; main window (example) Symbol button Function button Reduce target value (SP). Press and hold to change the value quickly. Increase target value (SP). Press and hold to change the value quickly.
-
Page 69: Pid Values And Autotune
Operating modes (description, configuration, and use) Flow control and pressure control NOTE: The maximum values defined by the user in MENU > Settings > Max values > Max RPM are not used in the Flow and pressure control mode. WARNING Depending on the process characteristics and the parameters set in the Q-Control, it is possible that the pump could automatically increase the speed or volume flow rate of the pump in a short time. - Page 70 Operating modes (description, configuration, and use) Flow control and pressure control Picture 45 Flow-Control; configuration (example) Autotune Autotune is a procedure to automatically determine the control parameters Kp, Ki, and Kd. In this method, the pump starts at a predefined speed and maintains it constantly for a particular length of time.
- Page 71 Operating modes (description, configuration, and use) Flow control and pressure control WARNING Depending on the process characteristics and the parameters set in the Q-Control, it is possible that the pump could automatically increase the speed or volume flow rate of the pump in a short time.
- Page 72 Operating modes (description, configuration, and use) Flow control and pressure control ▪ Confirm popup with YES Picture 49 Popup Really do Autotune? In case of a displaying error message, please see the section “error message” below. ▪ Wait until the autotune procedure has stopped automatically. While autotune is running, a popup is displayed: Picture 50 Popup Autotuning Please Wait ▪...
- Page 73 Operating modes (description, configuration, and use) Flow control and pressure control Error message Autotune: If the following error message appears when starting the autotune, the autotune cannot be performed because no flow sensor has been configured. Picture 52 Error message autotune (Example for Flow control) In this case please check if a flow or pressure sensor is correctly connected and configured to the pump.
- Page 74 Operating modes (description, configuration, and use) Flow control and pressure control Manually adjustment the PID parameters The PID parameters can be changed manually. Either an autotune can be started to get preliminary starting values, or the starting values recommended below can be used or changed. The following instructions provide basic overview of the effects of the individual parameters.
-
Page 75: Influence Of The Slope Parameter On The Controller And Autotune
Operating modes (description, configuration, and use) Flow control and pressure control 10.5.5 Influence of the Slope parameter on the controller and autotune In order to obtain stable control and good values from the autotune function, the parameter Slope should not be set too low. In this case, the motor would respond only very slowly, which can negatively influence the controller and the autotune function. -
Page 76: Example Application: Filtration With Pressure Control
Operating modes (description, configuration, and use) Flow control and pressure control 10.5.7 Example application: Filtration with pressure control The backpressure in a filtration application depends among other influences on the volume flow rate of the medium to be filtered. The pressure can thus be controlled indirectly by changing the pump speed. To implement pressure-controlled filtration, a pressure sensor with a 4-20mA analog output is wired to the Quattroflow pump. -
Page 77: Example Application: Flow Control With Tangential Flow Filtration
Operating modes (description, configuration, and use) Flow control and pressure control 10.5.8 Example application: Flow control with tangential flow filtration In tangential flow filtration (TFF), the necessary cross- flow is controlled via the speed of the recirculation pump. The cross- flow is measured by a flow sensor that is typically located at the outlet of the TFF module (retentate flow). -
Page 78: Alarms
Alarms Alarms Analog Alarms The Q-Control provides users the ability to set up process alarms for the digital and analog inputs. One alarm is assigned to each analog and digital input. ▪ An activated alarm is active in every operating mode. ▪... - Page 79 Alarms Alarms Analog When this value is reached, the pump stops automatically and a pop-up message is displayed: Picture 57 Alarm message (example) The alarm message shows the following information: 1st line: Analog input that triggered the alarm 2nd line: Numerical value at which the alarm was triggered (in the unit configured in the settings for the analog input concerned) 3rd line: Set alarm value that has been exceeded The alarm can be acknowledged by pressing the OK button.
-
Page 80: Alarms Digital
Alarms Alarms digital 11.2 Alarms digital Conditions for use: ▪ The corresponding sensor for which the alarm is to be used must be connected to the pump. ▪ Alarm must be activated: MENU > Setting > Alarms digital > Digital 1…3 > On Picture 58 Alarm digital;... -
Page 81: Influence Of A Filter Time On The Alarms
Alarms Influence of a filter time on the alarms 11.3 Influence of a filter time on the alarms Many sensors have the ability to set a filter time. In most cases, this means that the measured values are averaged in the sensor across a set period of time and the average value is then sent s a signal to Q-Control. -
Page 82: Broken Wire Detection And Sensor Monitoring
Alarms Broken wire detection and sensor monitoring 11.5 Broken wire detection and sensor monitoring If an alarm is activated for an analog or digital input, the corresponding sensor and signal input are monitored. This function is present for the analog inputs with current input (AI1, AI2, AI3) and for the digital inputs (DI1, DI2, DI3). -
Page 83: Trigger Conditions For A Digital Alarm
Alarms Broken wire detection and sensor monitoring If at least one of the alarm conditions listed above is already present before the pump is started, the error message appears as soon as START is pressed. The pump cannot be started as long as the error persists. -
Page 84: Integrated Functions
Integrated functions Totalizer Integrated functions This section describes other integrated functions of the Q-Control that can be used in one or more operating modes. These functions cannot be set from the Operating mode window, but instead are based on the parameters selected under Settings. -
Page 85: Sensor
Integrated functions Totalizer NOTE The feed chamber must be completely filled and bled in order to use the internal calculation of the transported volume. 12.1.2 Sensor Evaluating the volume flow rate with a flow sensor. Conditions for use: ▪ MENU > Settings > Manual modes > Input > Sensor ▪... -
Page 86: Calibration Factor / Displacement Volume (Cal)
Integrated functions Calibration factor / displacement volume (Cal) 12.2 Calibration factor / displacement volume (Cal) The calibration factor is the displacement volume, indicated in the unit milliliters per revolution of the pump shaft [ml/rev]. The calibration factor can be set in the following menu: MENU >... -
Page 87: Determining The Calibration Factor
Integrated functions Calibration factor / displacement volume (Cal) To obtain the greatest possible accuracy when converting between speed and volume flow, the displacement volume can be determined on a process basis. This calibration should be performed with the same process and system properties as will be used in the actual process. Please note that the Quattroflow feed chamber should be completely bled in order to obtain the highest possible accuracy and repeatability. -
Page 88: Standard Values
Integrated functions Calibration factor / displacement volume (Cal) Example: = 500 ml Desired dispensing volume V spec Current calibration factor Cal = 9.6 ml/rev = 495 ml Actual dispensed volume determined V Calculation for the new calibration factor: 495���� ���� ����... - Page 89 Integrated functions Calibration factor / displacement volume (Cal) The parameters for dispensing are also automatically adapted to the new calibration factor: ▪ The previous setting for the parameter Run [s] is retained ▪ The previous setting for the parameter Wait [s] is retained ▪...
-
Page 90: Maximum Values (User Limits)
Integrated functions Maximum Values (user limits) 12.3 Maximum Values (user limits) The user can set own various maximum values in order to operate the pump only under particular operating and process conditions. These maximum values are used in various operating modes and limit the target values that can be set during operation. -
Page 91: Influence Of Max Rpm In The Manual Flow Operating Mode
Integrated functions Maximum Values (user limits) 12.3.1 Influence of Max RPM in the Manual flow operating mode Q-Control calculates the maximum speed from the following two parameters: MENU > Settings > Maximum values > Max F MENU > Settings > Parameter 1 > Cal [ml/rev] This calculated value for the speed is compared with the set value for Max RPM. -
Page 92: Influence Of The Parameter Max Rpm On The Dispensing Operating Mode
Integrated functions Maximum Values (user limits) 12.3.2 Influence of the parameter Max RPM on the Dispensing operating mode The maximum value for the speed, Max RPM is used in the dynamic calculation of limit values in the menu Dispensing. If the parameter for Max RPM contradicts the values for Dispensing, the following message appears: Picture 68 Message Check dispense settings In this case, the settings in the Dispensing menu must be changed. -
Page 93: Slope (Motor Acceleration)
Integrated functions Slope (motor acceleration) 12.4 Slope (motor acceleration) The function is used to set the motor acceleration individually. The smaller the value for the slope, the slower the motor accelerates. The slope influences the positive and negative acceleration of the motor. - Page 94 Integrated functions Slope (motor acceleration) NOTE Please see the notes on the influence of the Slope on the flow and pressure control modes and the autotune functions. See section 10.5.5. The upper limit that can be set by the user for the Slope depends on the pump model and is defined by the manufacturer.
- Page 95 Integrated functions Slope (motor acceleration) Example 2: Slow slope QF150 pump with a maximum speed of 3000 RPM Slope [%/s]: 20 ������ 3000 ������ ∗ = 600 �� �� → The motor changes its speed at a rate of 600 RPM per second. →...
-
Page 96: External Start/Stop
Integrated functions External start/stop 12.5 External start/stop All operating modes provide the ability to start or stop the pump via an external control system. An analog signal (with threshold value) or a digital signal can be used for this. WARNING It must be ensured that the pump is operated safely when the pump is started or stopped externally. - Page 97 Integrated functions External start/stop Parameter Description External RPM For external speed setting via analog-signal See Section 10.3 Start/Stop Select the signal source with which the pump is to be started and stopped externally. The following conditions apply to the selection of the signal source: ▪...
-
Page 98: Function Of The Parameter External Trigger
Integrated functions External start/stop 12.5.1 Function of the parameter External Trigger OFF for analog signal Start: Signal ≥ threshold value Stop: Signal < threshold value Picture 74 External Start/Stop, Ext. trigger OFF, analog OFF for digital signal Start: Signal changes its logic (rising flank) Stop: Signal changes its logic (falling flank) Note: Function depends on the logic setting (Settings >... - Page 99 Integrated functions External start/stop ON for analog signal Start: Signal ≥ threshold value Stop: Signal < threshold value → Signal ≥ threshold value Picture 76 External Start/Stop, Ext. trigger ON, analog ON for digital signal The pump starts/stops at the rising flank of the digital signal. For use, for example, when a foot pedal is used for start/stop.
-
Page 100: Function Of External Start/Stop In All Operating Modes
Integrated functions External start/stop 12.5.2 Function of External start/stop in all operating modes Setting / Operating state Depiction in main window / Function Keylock OFF The middle button is labeled as: External start/stop is EXTERNAL STOP activated The pump can be stopped by means of the EXTERNAL STOP The pump was started by button. -
Page 101: Signal Outputs
Integrated functions Signal outputs 12.6 Signal outputs The Q-Control has two signal outputs that can be used optionally by the user. 12.6.1 Analog output (AO) Make the settings in the following menu: MENU > Setting > Analog output Parameter Description Type Function is deactivated 4-20 mA... -
Page 102: Digital Output (Do)
Integrated functions Signal outputs 12.6.2 Digital output (DO) The digital output of the Q-Control cannot be configured in the settings. As standard, the digital output is directly connected to the drive and indicates the following status: Digital signal Meaning Motor / drive has no errors and is ready Motor / drive is not ready Table 32 Digital output;... -
Page 103: Screensaver
Integrated functions Screensaver 12.7 Screensaver The Q-Control display has a screen saver. The user can set a time interval before the screen saver is active. Make the settings in the following menu: MENU > Setting > Screensaver The screen saver is active in all operating modes, regardless of whether the pump is stopped or started. -
Page 104: Usb Logging
USB Logging Screensaver USB Logging Q-Control has an option for data logging to a USB stick. NOTE When the USB stick is connected to the pump, the IP protection level specified in the Q- Control data sheet is not met. The user must ensure that no dust or liquids get into the USB port. - Page 105 USB Logging Screensaver Make the settings in the following menu: MENU > Setting > USB logging Parameter Description Active On: USB logging is activated. During logging, the following symbol is displayed at the top right of the main window: Picture 82 USB logging active; symbol Data is logged whenever the pump is running.
- Page 106 USB Logging Screensaver Date Time Rotation speed Flow Calculated [YYYY-MM-DD] [HH:MM:SS] [UPM] [dyn. unit] dyn. type [dyn. unit] dyn. type [dyn. unit] dyn. type [dyn. unit] dyn. type [dyn. unit] AO [mA] Alarm AI1 Alarm AI2 Alarm AI3 Alarm AI4 Alarm DI1 Alarm DI2 Alarm DI3...
- Page 107 USB Logging Screensaver Digital input: shown as “0” or “1”, depending on the logic setting. Alarms Shown as “0” as long as the pump is running. If the alarm has tripped, this value is shown as “1”. Logging then stops automatically, as the pump has been stopped by the alarm. For digital alarms, the 0/1 can be reversed, depending on the logic setting.
-
Page 108: Saving And Loading Configuration
Saving and loading configuration Screensaver Saving and loading configuration The current configuration (parameter set) can be saved to a USB stick by the user. A configuration can also be loaded to Q-Control from a USB stick. NOTE The USB stick must not be removed while the parameter file is being loaded or saved. This could damage the data and settings. - Page 109 Saving and loading configuration Screensaver Perform the actions in the following menu: MENU > Setting > Configuration Parameter Description USB write > OK confirm > Press YES to confirm the popup Another message indicates that the file was successfully saved to the USB stick: Picture 84 Message;...
-
Page 110: Firmware Update
Firmware update Screensaver Firmware update The user can perform a firmware update if the manufacturer has provided new firmware versions. The USB stick is used for the firmware update. NOTE While the firmware is being loaded, the power supply to the pump must be maintained and the USB stick must not be removed. - Page 111 Firmware update Screensaver ▪ Press and hold the three bottom buttons on the pump display at the same time Picture 87 Starting Firmware update ▪ While holding the buttons, switch on the pump at the main switch (power on). The first line is displayed for the bootloader with the appropriate version.
-
Page 112: Rs485 Modbus
RS485 Modbus Configuration RS485 Modbus The pump with Q-Control has an RS485 Modbus Slave interface for externally controlling the pump or reading data. It can be configured in Modbus RTU or Modbus ASCII mode. This interface can be used to actuate the pump directly, for example by a process control system (PLC), or for external data logging. -
Page 113: Technical Documentation
Technical Documentation Technical data Q-Control Technical Documentation This chapter lists the technical data for the Q-Control. The technical data and specifications for the complete pumps with Q-Control can be found in the standard operating instructions for the respective Quattroflow pump series. 17.1 Technical data Q-Control 17.1.1 Panel... -
Page 114: Inputs
Technical Documentation Technical data Q-Control 17.1.3 Inputs Digital inputs (DI1, DI2, DI3) Connection type Min. voltage source Max. voltage source Floating contact 1 VDC 5 VDC Voltage source Internal “Pull Up” circuit Table 37 Specification Digital inputs Analog inputs Type of signal Max. -
Page 115: Usb Port
Technical Documentation Technical data Q-Control 17.1.5 USB port Function Formatting Type OTG capable FAT, FAT32, exFat Type A Table 41 Specification USB port 17.1.6 RS485 Modbus Protocol Baudrate Modbus RTU, Modbus ASCII 9600, 19200, 38400, 115200 Table 42 Specification RS485 Modbus 17.1.7 Outputs for internal use The following outputs are used internally and cannot be used by the operator. -
Page 116: Parameter Table And Standard Values
Technical Documentation 17.2 Parameter table and standard values The following tables show the standard factory values for various Quattroflow pumps. A total of 8 different parameter sets are present, based on the pump series and the eccentric shaft. There is no differentiation between multiple-use and single-use pumps. - Page 117 Technical Documentation Parameter table and standard values Parity No, even, odd 1 … 600 Parameter 2 Screensaver Minute 00000 … 99999 PIN Code 00000 External control External AIN1, AIN2, AIN3, AIN4, Off Start/Stop AIN1, AIN2, AIN3, AIN4, DIN1, DIN2, DIN3, Off Threshold AIN1,2,3: 4.1 mA...
- Page 118 Technical Documentation Parameter table and standard values Alarms digital Digital 1 On, off Digital 2 On, off Digital 3 On, off DIN inverted Digital 1 On, off Digital 2 On, off Digital 3 On, off Analog output Type Off, 4-20 mA PID Flow Control numeric value numeric value...
-
Page 119: Predefined Manufacturer's Parameters
Technical Documentation Predefined manufacturer’s parameters 17.3 Predefined manufacturer’s parameters The following parameters are configured in the software by the manufacturer for the specific pump when shipped and cannot be changed by the user. These values influence the upper limits of the following parameters, which can be changed by the customer: MENU >... -
Page 120: Units And Abbreviations
Units and abbreviations Units and abbreviations Units / Symbol Description mlPM Milliliters per minute. Unit for volume flow with the unit [ml/min] Liters per minute. Unit for volume flow with the unit [l/min] Liter per hour Unit for volume flow with the unit [l/min] US gallons per minute. -
Page 121: Revision History Operating Manual
Revision history operating manual Revision history operating manual Version Date Changes from previous version / comment 12. Nov. 2020 Initial version Table 49 Revision history operating manual Original Operating Manual Quattroflow Q-Control Rev 0 121 / 126... -
Page 122: Notes
Notes Notes Original Operating Manual Quattroflow Q-Control Rev 0 122 / 126... - Page 123 Notes Original Operating Manual Quattroflow Q-Control Rev 0 123 / 126...
- Page 124 Notes Original Operating Manual Quattroflow Q-Control Rev 0 124 / 126...
- Page 125 Notes Original Operating Manual Quattroflow Q-Control Rev 0 125 / 126...
- Page 126 PSG Germany is committed to the continuous improvement of its products and reserves the right to make changes in technology and/or design without prior notice. Despite careful checking, PSG Germany cannot give any warranty for the validity and completeness of all listed data. Quattroflow is a brand of PSG Germany GmbH since April 2020.
Need help?
Do you have a question about the PSG Quattroflow Q-Control and is the answer not in the manual?
Questions and answers