Table of Contents
Advertisement
Quick Links
Advertisement
Table of Contents

Related Manuals for Dover MIDLAND A-1402C Series


Summary of Contents for Dover MIDLAND A-1402C Series
- Page 1 Installation, Operation & Maintenance Manual External-Style Pressure Relief Valve A-1402C Series Installation, Operation & Maintenance (IOM) Manual Part No.: A-1402C, Rev. 1.3 Issue Date: May 2, 2022 Supersedes: A-1402C, Rev. 1.2 (Sept. 27, 2016) www.midland.com...
-
Page 2: Table Of Contents
Installation, Operation & Maintenance Manual SECTION 1 | INTRODUCTION ............................4 Technical Specifications ..........................4 Valve Perspectives ............................. 6 Pre-Installation Regulations / Requirements....................8 1.3.1 Regulations ............................8 1.3.2 Safety Precautions ..........................8 1.3.3 Precautions for Mounted-Valve Repair ....................8 1.3.4 Required Tools ............................. - Page 3 SECTION 5 | VALVE ASSEMBLY ........................... 22 SECTION 6 | SPECIAL GUIDELINES AND PRECAUTIONS ON PRESSURE TESTING AND ADJUSTMENT ..... 23 6.1.1 Determining Applicable Pressure Values ....................23 6.1.1 Test Stand and Gauge Requirements ......................23 SECTION 7 | VALVE PRESSURE TESTING PROCEDURE ....................24 Without Rupture Disc Installed ........................
-
Page 4: Section 1 | Introduction
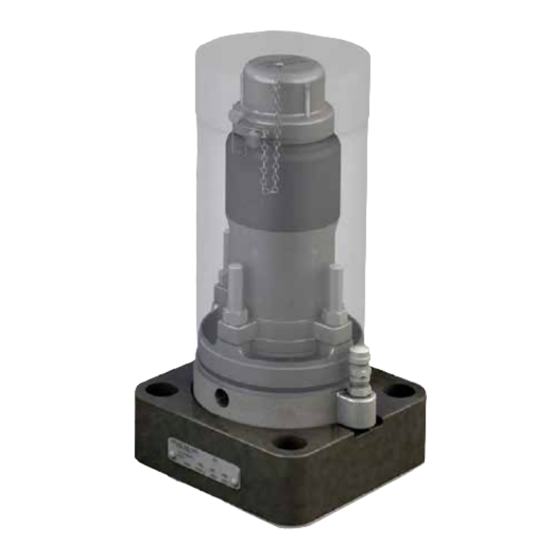
Installation, Operation & Maintenance Manual 1.0 INTRODUCTION The A-1402C Series External-Style Pressure Relief Valves are corrosion-resistant safety valves improved to include redundant seals to atmosphere, eliminating potential leak paths and further increasing the long life and reliability in Chlorine transportation. •... - Page 5 Flow Rate @ 10% Minimum Vapor Minimum Vapor Rupture Disc Valve Model > R.D. Setting Tight Pressure Tight Pressure Setting (PSIG) (SCFM) (PSIG) (PSIG) A-14377C-ML 7070 A-14227C-ML 4367 Adjusting Screw Rupture Disc Valve Model Outer Spring Inner Spring Name Plate Part # Part # A-14377C-ML...
-
Page 6: Valve Perspectives
Installation, Operation & Maintenance Manual 1.2 VALVE PERSPECTIVES Figure 1-2 Exploded View External-Style Pressure Relief Valve A-1402C Series... - Page 7 Item Qty. Part Name Top Guide Stem Plug Body Outer Spring Follower Guide Top Nut Top Gasket Shaft Seal Adjusting Seal Seal Retainer Inner Spring Seal Screw Stud Wire Seal Retainer Seat O-Ring Plug O-Ring Flue O-Ring Rupture Disc Flue Rupture Disc Flange Bolts Rupture Disc Flange Purge Valve...
-
Page 8: Pre-Installation Regulations / Requirements
Installation, Operation & Maintenance Manual 1.3 PRE-INSTALLATION REGULATIONS / REQUIREMENTS 1.3.1 Regulations Midland External-Style Valves are used in contact with a variety of products, many of which are hazardous materials. The acceptance and transportation of products are regulated by the DOT and AAR in the U.S.A., and in Canada by CTC and Transport Canada. -
Page 9: Required Tools
1.3.4 Required Tools Before arriving at the installation site obtain the required tools and supplies prior to performing the procedures indicated in this guide. Recommended Wrenches Component Torque (ft.-lbs.) Item # 3/8” Rupture Disc 5/16” Hex Flange Bolt 9/16" 1/2" Top Guide Nut 1-1/2"... -
Page 10: Section 2 | Valve Installation
Installation, Operation & Maintenance Manual 2 VALVE INSTALLATION 2.1 PRELIMINARY CONSIDERATIONS 2.1.1 New valves are tested, adjusted and sealed at Midland. If a new valve has been left in its original packaging, is undamaged and is not more than six months old, it may be installed on a tank car without retesting or recalibration. - Page 11 2.2.7 Inspect the tongue of a reconditioned or retested valve by running your fingernail around its inner and outer edges to check for damage. The tongue dimensions have diameter tolerances of ±0.003", thus any excess material on these diameters will make it difficult to fit the tongue into the groove.
-
Page 12: Leak Inspection
Installation, Operation & Maintenance Manual 2.3 LEAK INSPECTION 2.3.1 Test all newly installed valves under pressure to confirm that no leaks are present WARNING: Valve Leakage. Improper valve-tongue seating in the flange groove, loose nuts and damaged gaskets may result in leaks at the valve-mounting joint. Also, valves equipped with rupture discs should only be tested to 50% of rupture disc setting. -
Page 13: Section 3 | Valve Disassembly
3 VALVE DISASSEMBLY 3.1 PROCEDURE CAUTION: Spring-loaded Assembly. During valve-spring disassembly, the valve contains springs under load. DO NOT attempt to disassemble the valve without first reading these instructions or injury may result. CAUTION Spring pressure must be adjusted to minimum and a bench clamp or press used for disassembly. Figure 3-1 Valve Cap Removal Figure 3-2 Flue and Protective Cap 3.1.1... - Page 14 Installation, Operation & Maintenance Manual 3.1.8 Loosen the top nut (Item 8 of Figure 1-3) one turn counterclockwise. Figure 3-3 Clamping for Top Guide Removal Raised-Face Rupture Disc Figure 3-4 Underside of Valve Body Flange 3.1.9 With a locking bench clamp (Figure 3-3), apply pressure to the adjusting screw (Item 11 of Figure 1-3).
- Page 15 Figure 3-7 Retainer, Valve Figure 3-8 Retainer with O-Ring Stem, O-Rings and Plug 3.1.17 Remove the two (2) O-Rings (Items 20 and 21 respectively; see Figure 1-3) from the retainer using only a non-scratching tool. 3.1.18 Unscrew and remove the needle valve (Item 27 of Figure 1-3) from the valve body. External-Style Pressure Relief Valve A-1402C Series...
-
Page 16: Section 4 | Valve Inspection
Installation, Operation & Maintenance Manual 4 VALVE INSPECTION Follow the guidelines in this section for inspecting the condition of valve components after disassembly. In some instances a component can be properly evaluated for damage or cracks only with the use of specialized techniques, such as dye-penetration or magnetic-particle testing, according to a qualified procedure by certified trained personnel. -
Page 17: Inspection Procedures
4.1 INSPECTION PROCEDURES 4.1.1 Top Guide 4.1.11 The Top Guide (Figure 4-1) is principally a structural part. There should be no paint on any components covered by the cap, or between adjacent surfaces on the top guide and valve body. The vent area of the valve body must be unobstructed by foreign matter that would hinder free flow of discharging fluid. -
Page 18: Plug
Installation, Operation & Maintenance Manual 4.1.5 PLUG 4.1.5.1 The sealing surface is the plug seat (Figure 4-4) Clean the plug with the emery paper (400 grit) then wipe it clean with a cloth and a suitable solvent. Run your fingernail over the seat surface to detect any flaws. NOTE NOTE: Repair work is limited to cleaning and polishing. -
Page 19: Valve Spring
4.1.7 VALVE SPRING 4.1.7.1 This part is highly stressed. The exterior surface must be free of pitting, cracks, and corrosion. If any corrosion is observed on the spring, use magnetic-particle or dye-penetration inspection (performed by certified trained personnel) to evaluate the exterior surface and ensure that it is free of cracks and corrosion pits. WARNING: Valve Spring Failure. -
Page 20: Rupture Disc
Installation, Operation & Maintenance Manual 4.1.9 RUPTURE DISC 4.1.9.1 These valves include a rupture disc (Figure 4-6) beneath the main valve assembly. Examine the disc for nicks, damage or any signs of stretching. Replace the disc if any defects are observed. Figure 4-6 Rupture Disc 4.1.10 RUPTURE DISC FLANGE... -
Page 21: O-Rings
4.1.11 O-Rings 4.1.11.1 These must be replaced at the time of the periodic valve retest and when the valve is disassembled. CAUTION: O-Ring Degradation. O-rings develop micro cracks, can swell or shrink, and become harder or softer with age and chemical exposure. An O-ring that fits loosely in the cap, or can only be pushed into the O-ring CAUTION retainer with difficulty, is quite likely not the correct size. -
Page 22: Section 5 | Valve Assembly
Installation, Operation & Maintenance Manual 5 VALVE ASSEMBLY For valve assembly, please see valve disassembly instructions. Reassemble in reverse order of those instructions. Figure 5-1 Exploded View of Valve External-Style Pressure Relief Valve A-1402C Series... -
Page 23: Section 6 | Special Guidelines And Precautions On Pressure Testing And Adjustment
6 SPECIAL GUIDELINES AND PRECAUTIONS ON PRESSURE TESTING AND ADJUSTMENT CAUTION: Safety Protection. Wear appropriate safety glasses or face-shield and protective clothing when conducting this procedure. Valve testing involves high-velocity air and water flow that can cause injury. CAUTION 6.1.1 Determining Applicable Pressure Values Refer to AAR publication “Regulations for Tank Cars.”... -
Page 24: Section 7 | Valve Pressure Testing Procedure
Installation, Operation & Maintenance Manual 7 VALVE PRESSURE TESTING PROCEDURE If your company has an approved test procedure, follow it. If it does not, these procedures provide essential guidelines in regards to pressure testing. WITHOUT RUPTURE DISC INSTALLED 7.1.1 Install the valve on the test fixture and tighten down all the nuts alternately. Remove the protective cap NOTE: Make sure a thin plastic ring gasket (or something similar) NOTE is used in between the rupture disc flange and body in place of the... -
Page 25: Section 8 | Valve Adjustment Procedure
8 VALVE ADJUSTMENT PROCEDURE If your company has an approved test procedure, follow it. If it does not, these procedures provide essential guidelines in regards to pressure testing. Figure 8-1 Valve Components External-Style Pressure Relief Valve A-1402C Series... -
Page 26: Procedure Without Rupture Disc Installed
Installation, Operation & Maintenance Manual 8.1 PROCEDURE WITHOUT RUPTURE DISC INSTALLED NOTE: Make sure a thin plastic ring gasket (or something similar) is used in between the rupture disc flange and NOTE body in place of the rupture disc for this step of the procedure. This is recommended so that the sealing surfaces between the rupture disc flange and valve body are not damaged. -
Page 27: Post-Test Procedure
8.2.4 If there is a needle valve (Figure 8-1) pipe plug, or indicator on the side of the valve, open the needle valve or remove the plug or indicator. This is necessary to equalize pressure in the chamber above the disc. 8.2.5 Slowly increase pressure in the test stand to 50% of the disc’s burst pressure (see Table 1-1). -
Page 28: Section 9 | Maintenance
8.3.5 Permanently attach a metal tag to the valve body with repair/test date, repair facility identification and technician I.D. 8.3.5 Store the valve in a clean, dry place until ready to use. 9 MAINTENANCE NOTE: It is essential to establish a periodic retesting and preventive maintenance program for pressure relief NOTE valves. - Page 29 7733 Gross Point Road Skokie, IL 60077 Tel: (847) 677-0333 Fax: ( 847) 677 0138 www.midlandmfg.com...
Need help?
Do you have a question about the MIDLAND A-1402C Series and is the answer not in the manual?
Questions and answers