Table of Contents
Advertisement
Quick Links
We're here to help - Do not return this product !
.
.
If you need help with assembly
.
If you received a damaged or defective part
If you are missing hardware
We will process replacement parts in 3-5 business days
or less. Parts are shipped via FedEx Ground or mail.
Nous sommes là pour vous - Ne retournez pas ce produit !
Appelez, écrivez ou trouvez-nous en ligne d'abord !
.
.
Si vous avez besoin d'aide avec l'assemblage
.
Si vous avez une pièce manquante ou endommagée
S'il vous manque de la quincaillerie
Nous vous enverrons les pièces de rechange dans un délai de
3 à 5 jours ouvrables, ou moins. Les pièces sont expédiées
via FedEx Ground ou par la poste.
132206
product number
numéro de produit
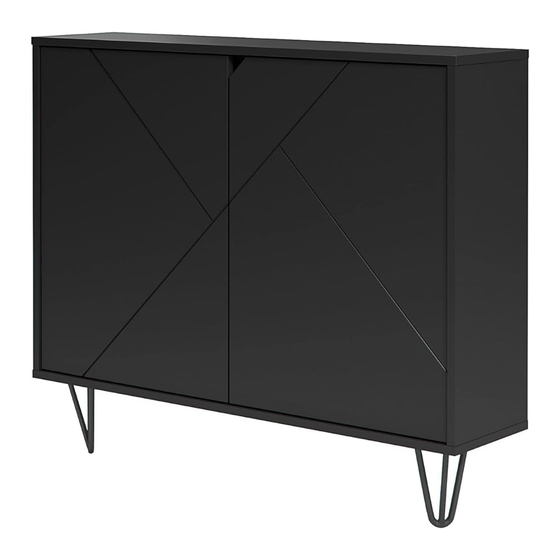
100 lb
Weigth capacity :
25 lb per shelf
Lot #
Capacité par
tablette : 25 lb
How-to videos
VIDEO
Vidéos d'aide
Assembly instructions
Instructions d'assemblage
CANADA / USA
Monday to Friday
7:30 AM - 4 PM - Eastern Time
Lundi au vendredi
7:30h à 16h - Heure normale de l'Est
Email / Courriel
service@nexeradistribution.com
Webpage / Page web
www.nexeradistribution.com
Ressources disponibles en ligne
How-to videos
Vidéos d'aide
FAQ's
Questions fréquentes
Order replacement parts
Commande de pièces de remplacement
A
PA
PB
nexeradistribution.com
1 877 629-9022
Online resources
VIDEO
C
S
E
F
H
H
S
D
R
T
B
65-132206_R0
Advertisement
Table of Contents

Subscribe to Our Youtube Channel
Related Manuals for NEXERa 132206


Summary of Contents for NEXERa 132206
- Page 1 Nous vous enverrons les pièces de rechange dans un délai de 3 à 5 jours ouvrables, ou moins. Les pièces sont expédiées Order replacement parts via FedEx Ground ou par la poste. Commande de pièces de remplacement 132206 product number numéro de produit Lot # 100 lb Weigth capacity : Capacité...
-
Page 2: Tools Required
Read these assembly instructions carefully before beginning. Verify that you have in hands all the wood parts and hardware. Keep this document for future reference. Lisez attentivement ce guide d’assemblage avant de débuter. Assurez vous que toutes les composantes de bois et de quincaillerie sont présentes. Conservez ce document. Two people are required to assemble and move this unit. -
Page 3: Hardware List
Hardware List Liste de quincaillerie # 2200 # 0203 # 0120 # 0205 # 0207 # 0111 # 1121 # 0405 # 2300 # 0508 # 1110 # 0201 # 2230... - Page 4 Insert the 10 cam locks # 0203 into the panels A, B, E and F VIDEO Insérez les 10 excentriques # 0203 dans les panneaux A, B, E et F Pressez fermement dans la cavité # 0203 Add a protection under the parts on all assembly steps Ajoutez une protection sous les pièces à...
- Page 5 Install the 6 push bolts # 2200 into the panel C Installez les 6 boulons # 2200 dans le panneau C VIDEO # 2200 Insert the 4 wood dowels # 0207 into the panel R Insérez les 4 goujons de bois # 0207 dans le panneau R # 0207...
- Page 6 Fasten the panel F to the panel A. Then, tighten the 2 cam locks # 0203 located on panel F. Use the Allen key # 2300 and 1 screw # 0111 to fasten the panel E to the panel F Assemblez le panneau F avec le panneau A.
- Page 7 Fasten the panel B to the pre-assembled unit. Then, tighten the 2 cam locks # 0203 located on panel F Assemblez le panneau B avec l’unité pré-assemblée. Serrez ensuite les 2 excentriques # 0203 se trouvant sur le panneau F IMPORTANT Turn clockwise 2/3 of a turn Tournez vers la droite 2/3 de tour...
- Page 8 Use the Allen key # 2300 and 6 screws # 0111 to fasten the panel D to the panels A, B and E. Then, use the 8 screws # 0120 to fasten the 2 legs # 2230 to the panel D Utilisez la clé...
- Page 9 This unit must be secured to to the wall studs before proceeding montants se trouvant dans les with the next installation steps murs avant de poursuivre les étapes d’installation stud sensor détecteur de montants IMPORTANT Not included - Attach to your wall with the proper achor device 3"...
- Page 10 Use a stud sensor to locate the structural studs of the wall. Then, use 3 long screws (not included) to strongly fasten the wall support T to the wall Utilisez un détecteur de montants pour localiser les montants structuraux du mur. T au mur stud sensor détecteur...
- Page 11 Install the 8 shelf supports # 1110 into the panels A, B and E. Then, install the 2 adjustable shelves H into the unit. Install the 2 stoppers # 1121 into the 2 holes located on the front of panel D Installez les 8 supports à...
- Page 12 Fasten the doors PA and PB to the panels A and B Installez les portes PA et PB sur les panneaux A et B PA/PB A / B Depth Profondeur Horizontal adjustment Ajustement horizontal Height Hauteur...
-
Page 13: Limited 1-Year Warranty
Our furniture products are not intended for outdoor use. This warranty is only applicable in Canada and the USA. Nexera reserves the right to request proof of purchase from an authorized retailer as well as any other proofs to document a warranty claim.
Need help?
Do you have a question about the 132206 and is the answer not in the manual?
Questions and answers