Chapters
Table of Contents

Related Manuals for LINDR 3893


Summary of Contents for LINDR 3893
- Page 1 NÁVOD K POUŽITÍ INSTUCTION MANUAL ČESKY / ENGLISH Number 016-2020 REV00 Valid 2020-07-01 SANITAČNÍ SADA PRO PRŮTOKOVÉ KONTAKTNÍ CHLAZENÍ LINDR SANITAZING SET FOR LINDR FLOW-THROUGH CONTACT COOLER...
- Page 3 Sadová 132 503 15 Nechanice, Czech Republic mob.: + 420 775 715 494 tel. : +420 495 447 239 e-mail: info@lindr.cz web: www.lindr.cz, www.lindr.eu SYMBOLY A ZNAČKY POUŽÍVANÉ V NÁVODU K POUŽITÍ: POZOR: POZNÁMKA: Nedodržení pokynů může být příčinou úrazu, Tento symbol značí...
-
Page 4: Table Of Contents
Obsah: Úvod ........Popis zařízení ........Všeobecné... -
Page 5: Úvod
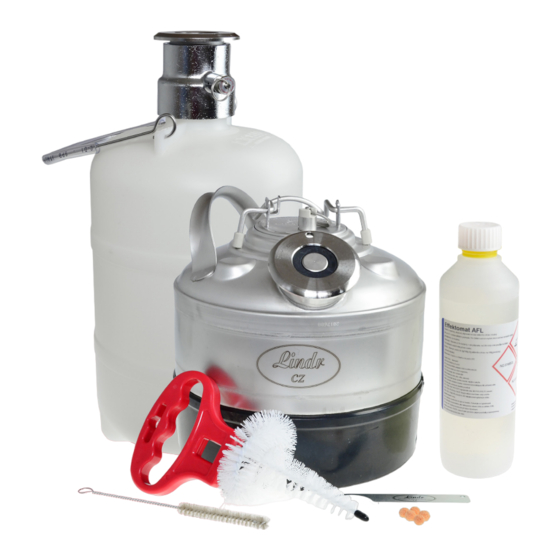
1. ÚVOD: 4. TESTOVÁNÍ: Děkujeme Vám, že jste se rozhodli zakoupit Výrobek je dodáván tak, že je připraven k oka- produkt LINDR. mžitému použití. 2. POPIS ZAŘÍZENÍ: 5. ZÁRUKA: Sanitační sada: Sanitační sada slouží k čištění průtokového Na zařízení je poskytnuta záruka dle obec- kontaktního chlazení. -
Page 6: Demontáž Kompenzátoru Kohoutu
7. DEMONTÁŽ KOMPENZÁTORU KOHOUTU: obrázek Odšroubujte převlečnou matici kohoutu (zůsta- ne na přístroji) a vyjměte kohout z chladiče. obrázek Odšroubujte převlečnou matici (1.) a vyjměte celý díl (2.). obrázek Kompenzátor vytáhněte z těla kohoutu. obrázek Zasuňte zpět (1.) celý díl a dotáhněte převleč- nou matici (2.). -
Page 7: Demontáž Kohoutu
8. DEMONTÁŽ KOHOUTU: obrázek • Pomocí plochého šroubováku vyšroubujte šroub (1.) doleva a vyjměte pružinu (2.). • Odšroubujte matici na páce kohoutu a vy- jměte ji směrem nahoru (3.). • Odšroubujte matici na kompenzátoru a kompenzátor vyjměte (4.). • Vyjměte vnitřní čast kompenzátoru (5.). Vyjměte píst (6.). -
Page 8: Sanitace Vodou
11. SANITACE VODOU: 1. Sanitační adaptér připojte k vodovodnímu řádu pomocí hadice. 2. Až dotočíte sud, naražte naražeč do sanitačního adaptéru stejným způsobem, jako byste na- ráželi sud. 3. Po naražení otevřete páku výčepního kohoutu a čekejte dokud z něj nepoteče čistá voda (vy- pláchnou se všechny zbytky nápoje a částečně... -
Page 9: Tabulka Závad
14. TABULKA ZÁVAD: Závada Příčina Odstranění neteče nápoj sud špatně naražen zkontrolujte, zda je páka naražeče stlačena dolů zařízení s vestavěným kompresorem - sepnout vypínač zamrzla voda po sanitaci vypnout zařízení a nezbývá než čekat, dokud neza- čne nápoj opět téci (může trvat několik minut, ale i hodin!) zavřený... -
Page 10: Technický List Effektomat Afl
16. TECHNICKÝ LIST EFFEKTOMAT AFL:... - Page 11 Sadová 132 503 15 Nechanice, Czech Republic mob.: + 420 775 715 494 tel. : +420 495 447 239 e-mail: info@lindr.cz web: www.lindr.cz, www.lindr.eu SYMBOLS AND MARKINGS USED IN THE MANUAL: WARNING: NOTE: Not following instructions may cause injury or This symbol indicates information and re- damage the device.
- Page 12 Contents: Introduction ........Device description ........General instructions, measures and safety instructions .
-
Page 13: Introduction
1. INTRODUCTION: 4. TESTING: Thank you for purchasing this LINDR product. The product is delivered ready for immediate use. 2. DESCRIPTION OF THE COOLER: Sanitizing set: 5. WARRANTY: The sanitizing kit is used to clean the flow con- tact cooling. -
Page 14: Disassembly Of Tap Compensator
7. DISASSEMBLY OF TAP COMPENSATOR: 14 A figure Unscrew the tap nut (which stays on the machi- ne) and remove the tap from the cooler. 14 B figure Unscrew the union nut (1.) and remove the whole part (2.). 14 C figure Pull the compensator out of the tap body. -
Page 15: Tap Disassembly
8. TAP DISASSEMBLY : 15 A figure • Using a flat-blade screwdriver, unscrew the screw (1.) to the left and remove the spring (2.). • Unscrew the nut on the tap lever and remo- ve it upwards (3.). • Unscrew the nut on the compensator and remove the compensator (4.). -
Page 16: Sanitation By Water
11. SANITATION BY WATER: 1. Connect the sanitizing adapter to the water supply using a hose. 2. After you finish dispensing the keg, push the dispensing head into the sanitizing adapter in the same way as you would tap the keg. 3. -
Page 17: Table Of Malfunctions
14. TABLE OF MALFUNCTIONS: Malfunction Cause Removal beverage does not flow keg tapped incorrectly check that the keg coupler lever is pushed down device with built-in compressor - turn on the switch water from sanitation froze turn off the device; then wait until the beverage starts flowing again (may take a few minutes, or hours!) compensator is closed move the compensator lever on the tap... -
Page 18: Technical List Effektomat Afl
12 kg canister 35 kg canister 250 kg barrel Product code 3893 You can take further information from our safety data sheets as well as operation instructions. If you will still have any question call your responsible sales representative or simply call us.
Need help?
Do you have a question about the 3893 and is the answer not in the manual?
Questions and answers