Advertisement
Quick Links
Ventilation Requirements
For maximum efficiency and fan performance there
are
a few key points to keep in mind when installing your
Tastic.
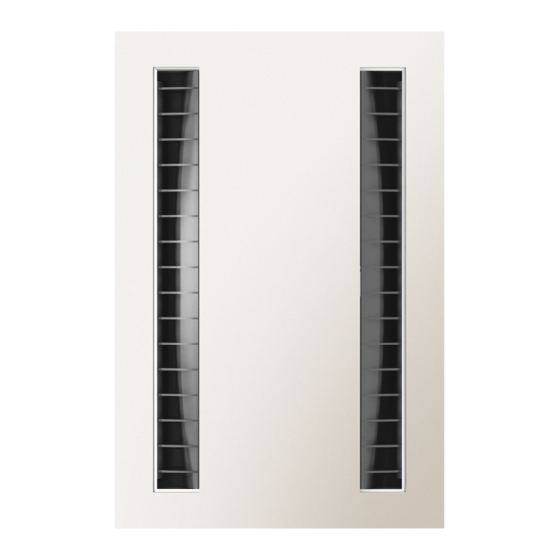
Sufficient air inlet into room
Steam will only be removed if there is sufficient flow of
air through the room. Ensure generous inlets exist
through windows, vents or under the door. Air flow
path from inlet to fan should ideally pass over the
steam sources (see Fig.1).
Bathrooms which have high ceilings, are larger than
average, or have an open shower may all require
additional ventilation. We recommend that you visit our
website for further details and suggestions on
Fig. 1: Ideal placement of Ventilation units.
Sufficient air inlets into room are required
effectively ventilating your bathroom.
B
Clearances
A
All appliances must be mounted so that the lowest
point is at least 2.3 m above the floor. The Vent body
Fig. 2a: Minimum blower clearances
and ducted blower is designed to fit a ceiling cavity or
between – floor space with a minimum height of 245
mm. The modules may be installed between joists
using the spring clips (Fig. 2c). Ensure that the outlet of
the Vent unit is directed towards the outer wall. If the
C
desired orientation of the Vent unit directs the ducting
F
across ceiling joists ensure that the closest ceiling joist
is not within 150 mm of the Vent outlet.
D
Note: Neo Heat Modules (models 36111 & 36112)
must be located at least 1m away from the nearest
wall.
E
Figure 2a
Fig. 2b: Minimum clearances for installation
A: 215 mm B: 15 mm min. clearance above unit
Figure 2b
E
C: Models: 34101, 34102, 35101 & 35102 - 50 mm
Models: 36111 & 36112 - 75 mm
D: Models: 34101, 34102, 35101 & 35102 - 195 mm
Models: 36111 & 36112 - 151 mm
E: Models: 34101, 34102, 35101 & 35102 - 35 mm to
structural member
Fig. 2c: Minimum clearances for installation
Models: 36111 & 36112 - 50mm to structural members.
F: Models: 34101, 34102, 35101 & 35102 - 150 mm.
Figure 2c
Models: 34101, 34102, 35101 & 35102 - 35 mm min.
clearance is required near all joists
Models: 36111 & 36112 - 50 mm min. clearance is
required near all joists.
Overview
Neo Models: 34101, 34102, 35101 & 35102
Eaves
lining
Flexible support
Cable not on 35101 & 35102
Vent unit
Inline Ducted Blower
Exterior
of home
Wall switch (not supplied)
Ducting
Air outlet grille
positioned in eaves lining
Fig. 3: Layout of Neo Vent and Vent n Lite.
Electrical Requirements
Neo modules are fitted with LED centre lamps. To ensure
correct
operation and to prolong the life of the LEDs please wire as per
the following wiring diagrams for the appropriate model.
See the wiring diagrams on the following pages for supply requirements and maximum loadings for each
model. Modules may be connected to a lighting or power circuit if loading permits. These models are for
wired-in installation and wiring must be carried out by a registered electrician. Switches and a wall plate
are not provided with the hardwired Neo modules. Do not use this product with any solid state speed
control or commercial dimming device.
Wiring Diagrams
TERMINAL BLOCK
BODY
FASCIA
FOR SWITCH
ACTIVE
CONNECTION
REFER TO FIGS
NEUTRAL
9 & 11
3 X DOWNLIGHTS
FOR SWITCH
ACTIVE
M
CONNECTION
REFER TO FIG
NEUTRAL
10 & 12
DUCTED FAN
34101 & 34102: 0.4A 50Hz
Fig. 6: Wiring diagram for models 34101 and 34102, Neo Vent n Lite.
FOR SWITCH
ACTIVE
M
CONNECTION
REFER TO FIGS
NEUTRAL
10 & 12
DUCTED FAN
35101 & 35102: 0.3A 50Hz
Fig. 7: Wiring diagram for model 35101 and 35102, Neo Vent.
Wiring Diagrams
BODY
FASCIA
TERMINAL BLOCK
THERMAL SWITCH 65°C
FOR SWITCH
ACTIVE
CONNECTION
REFER TO FIGS
NEUTRAL
9 & 11
HEAT LAMP
36111 & 36112: 3.3A 50Hz
Fig. 8: Wiring diagram for model 36111 and 36112, Neo Heat.
Wiring – Aust & NZ
In all versions a local isolating switch (not supplied)
Wall Switch (not supplied)
must be incorporated in the fixed wiring to the
A
appliance to allow disconnection of supply during
N
maintenance. This isolating switch, and the wall
E
switch, must be located in accordance with Wiring
Rules AS/NZS 3000. They must not be installed where
Fig. 9
it can be reached from the bath or shower recess or
enclosure (see AS/NZS 3000 Section 7).
Wall Switch (not supplied)
A
Vent & Vent n Lite models 34101, 34102, 35101 &
N
35102: Switch the power outlet for the Inline Blower
with a wall switch (not supplied) as per the Wiring
Diagrams. Do not mount the power outlet for the Inline
Fig. 10: Inline Ducted Blower
Blower more than 200 mm from the Inline Blower.
Wiring – UK & Eire
In all versions a local isolating switch (not supplied)
Wall Switch (not supplied)
must be incorporated in the fixed wiring to the
A
appliance to allow disconnection of supply during
N
maintenance. This isolating switch, and the wall
E
switch, must be located in accordance with the
applicable Wiring Rules and it must not be installed
Fig. 11
where it can be reached from the bath or shower
recess or enclosure.
Wall Switch (not supplied)
BROWN
A
BLUE
Vent and Vent n Lite models 34101, 34102, 35101
N
& 35102: Supply should be connected to the Inline
Blower 2-core power lead as per the Wiring Diagrams.
The plug fitted to the power cord is to be cut off and
Fig. 12: Inline Ducted Blower
the wires stripped to allow connection.
* This switch must be double-pole
type
with minimum 3 mm contact gap.
The colours of the wires in the Inline Blower 2-core
lead may not correspond to those in the fixed wiring.
The designation of poles for the Tastic power leads are
as follows:
Tastic Wire
Connect to
Colour
Supply Pole
Brown
Live
Blue
Neutral
Advertisement

Related Manuals for IXL Tactic Neo 34101


Summary of Contents for IXL Tactic Neo 34101
- Page 1 Ventilation Requirements Overview Wiring Diagrams Wiring Diagrams For maximum efficiency and fan performance there Neo Models: 34101, 34102, 35101 & 35102 Eaves a few key points to keep in mind when installing your lining TERMINAL BLOCK Tastic. BODY FASCIA Flexible support Sufficient air inlet into room BODY FASCIA...
- Page 2 Model: 34101 Neo Vent n Lite White - Hardwired Model: 34102 Neo Vent n Lite Silver - Hardwired Model: 35101 Neo Vent White - Hardwired Model: 35102 Neo Vent Silver - Hardwired Model: 36111 Neo Heat White - Hardwired Model: 36112 Neo Heat Silver - Hardwired Electrical Rating 230 ˜...
Need help?
Do you have a question about the Tactic Neo 34101 and is the answer not in the manual?
Questions and answers