Cognivue Clarity User Manual
Hide thumbs
Also See for Clarity:
- User manual (39 pages) ,
- Installation manual (9 pages) ,
- User manual (37 pages)
Table of Contents
Advertisement
Quick Links
Advertisement
Table of Contents

Related Manuals for Cognivue Clarity


Summary of Contents for Cognivue Clarity
- Page 1 User Manual © 2022 COGNIVUE, INC. 7911 Rae Blvd | Victor, NY 14564 585.203.1969...
-
Page 2: Table Of Contents
3.3 Power Alert ..........................5 Recommendations for Use ........................6 4.1 General Testing Location ......................6 4.2 Positioning of Cognivue Clarity® and the Patient ..............6 4.3 Cleaning and Disinfecting Cognivue Clarity® ................6 4.4 Use of Personal Protective Equipment ..................7 Network Connectivity.......................... - Page 3 Support personnel can be reached from 9-5 pm ET at 1- 585-433-2992 support@cognivue.com. UM-410-Q Cognivue Clarity® User Manual, 9/1/2022 © 2022 Cognivue, Inc. | 7911 Rae Blvd | Victor, NY 14564 | 585.203.1969 © 2022 Cognivue, Inc. UM-410-Q Page 2...
-
Page 4: About Cognivue Clarity
SLUMS cut-off scores of < 21 (impairment) and > 26 (no impairment) corresponded to Cognivue® scores of 54.5 (NPA = 0.92; PPA = 0.64) and 78.5 (NPA = 0.5; PPA = 0.79), respectively. Cognivue® classification scores demonstrated good agreement with SLUMS scores (weighted κ 0.57; 95%CI: 0.50-0.63). -
Page 5: Device Description
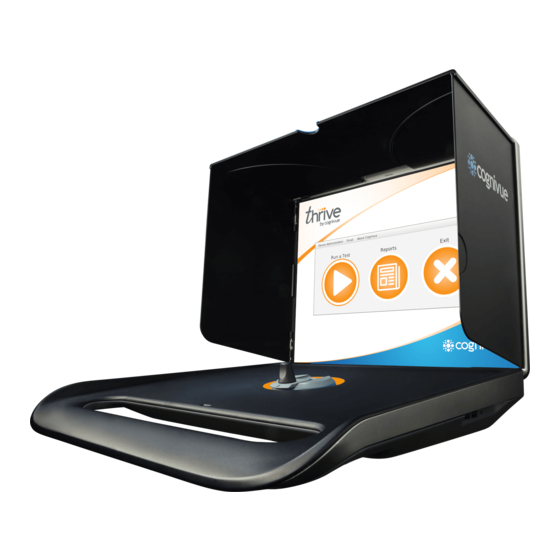
Cognivue Clarity® User Manual 2.0 Device Description The Cognivue Clarity® is a portable, battery-powered, laptop-like device that includes a wireless keyboard with a touchpad, a rotary CogniWheel®, and a CogniCover®. The CogniWheel® is the sole patient input device. The CogniCover® is designed for privacy and to reduce distraction and light reflections on the computer screen. -
Page 6: Power Management
Green 3.1 Screen Sleep When the Cognivue device is not in use for a period of 10 minutes, the screen will go into sleep mode. 3.2 Screen Wake When the screen is asleep, it can be awakened by pressing a key on the keyboard. -
Page 7: Recommendations For Use
Put the device on a flat, stable surface that is ergonomically comfortable for the patient (see below). The patient should be able to comfortably reach and manipulate the CogniWheel® and view the computer screen. Avoid placing the Cognivue Clarity® in a location where there may be distractions behind the device which are visible to the patient. -
Page 8: Use Of Personal Protective Equipment
5.1 Basic Wired Connection 1. Connect one end of a standard network cable to an active network jack at your location 2. Connect the other end to the network port on the back of the Cognivue Clarity® device (see figure 2.2). - Page 9 Cognivue Clarity® User Manual 3. Enter the Wi-Fi password for the selected network Figure 5.2 Wi-Fi Authentication dialog 4. Click Connect 5. Connection can take a few seconds. A successful connection is indicated by when the network icon in the top left changes to the Wi-Fi connection strength icon indicating network connectivity.
-
Page 10: Connection Details
Cognivue Clarity® User Manual 5.3 Connection Details When logged on to a Cognivue Clarity® device, administrators can view and test the current network configuration information on the Network Configuration window. Figure 5.4 Network Configuration window To open the Network Configuration window 1. - Page 11 Cognivue Clarity® User Manual 1. Click on the connection named for your SSID 2. Click the Gear icon. Gear icon Network Connections wizard 3. On the pop-up window that appears, click on the IPV4 Settings tab. Network Configuration Editor © 2022 Cognivue, Inc.
- Page 12 Cognivue Clarity® User Manual 4. Click the Method drop-down-menu button and select Manual. Network Configuration Editor 5. Click the Add button. 6. In the Address field, enter your static or reserved IP (obtained from your network team). 7. In the Netmask field, enter the Subnet mask (obtained from your network team).
-
Page 13: Security
Cognivue Clarity® User Manual 11. On the Network Configuration window, click the Refresh button to display the new settings 12. Then click the Test Connection button to confirm connectivity to the Cognivue back-end systems 6.0 Security 6.1 Logging on to Cognivue Clarity®... -
Page 14: Shutting Down
Note: This is the preferred way to shut down the device. The physical power button should be used only if necessary. 7.0 Managing User Accounts Each Cognivue Clarity® user should have their own user account to ensure audit trail and safety of patient data. User accounts can be assigned as an Administrator or Operator. -
Page 15: Managing User Accounts
2. On the menu bar, select Device Administration >> Settings. 3. Select the Users tab 4. This is the User Management screen *Note: the first time you log in, you will only see the Administrator account defined during Cognivue Clarity® installation and configuration. User Management window The User Management screen lists all the active user accounts that have been set up on the system and allows for adding, modifying, and deleting user accounts. -
Page 16: Creating User Accounts
Cognivue Clarity® User Manual 7.4 Creating User Accounts 1. Click Create User Creation window 2. Fill out form 3. Click Save 4. Click Yes to confirm when prompted © 2022 Cognivue, Inc. UM-410-Q Page 15... -
Page 17: Modifying User Accounts
Cognivue Clarity® User Manual 7.5 Modifying User Accounts 1. Select a user from the list 2. Click Edit User Modification window 3. Make the desired changes 4. Click Save 5. Click Yes to confirm when prompted © 2022 Cognivue, Inc. -
Page 18: Changing Passwords
Cognivue Clarity® User Manual 7.6 Changing Passwords 1. Select a user from the list 2. Click Edit Modify Account window 3. Click Set Password Set User Password window 3. Click Save 4. Click Yes to confirm when prompted © 2022 Cognivue, Inc. -
Page 19: Disabling User Accounts
Disable User Confirmation dialog 7.8 Password Expiration Some organizations have password change policies. To enable this, Cognivue provides the ability to expire user passwords. This feature is off by default and when turned on, is on for all accounts. Users are warned about password expiration for three days before it expires. Once expired, the user will be forced to change their passwords before they can log in. -
Page 20: System Information
Cognivue Clarity® User Manual 8.0 System Information Basic system information about Cognivue Clarity® is available to any logged-in user in the About window (accessed by clicking About >> About on the Primary window). The information displayed here will be useful when contacting support. -
Page 21: Video Options
Cognivue Clarity® User Manual 9.1 Video Options Video Settings Window This screen allows Administrators to ensure certain videos will always be shown to patients. If the option is unchecked here, the choice is left to the Operator who sets up the test for the patient. -
Page 22: Report Configuration
System Settings) 10.1 Report Emailing Cognivue Clarity® provides the ability to send the test report via an encrypted email to a patient following completion of a test (see 16.0 Emailing Reports). This feature is enabled by default. An Administrator can disable this functionality by unchecking the Enable Report Emailing checkbox. -
Page 23: Report Printing
Cognivue Clarity® User Manual 10.2 Report Printing Cognivue Clarity® provides the ability to print the test report to a configured, connected printer. Printing test reports from Cognivue Clarity® (see 15.0 Printing Reports) is enabled by default. An Administrator can disable this functionality by unchecking the Enable Report Printing checkbox. -
Page 24: Practice Information
Practice Information window 11.0 Portal Menu Cognivue Clarity® can sync test data to a secure Provider Portal, when enabled. If enabled, the device will sync test data with the cloud after completion of a test if connected to the internet. -
Page 25: Enabling The Portal
The online portal can be accessed using a web browser at the site https://portal.cognivue.com/ 12.0 Running a Test Test administration is the core feature of Cognivue Clarity®. 1. Login to the device (see 6.1 Logging on to Cognivue Clarity®) © 2022 Cognivue, Inc. UM-410-Q Page 24... - Page 26 Cognivue Clarity® User Manual 2. Click the Run a Test button 3. Fill out patient data (Name, gender/sex, date of birth) 4. Select the patients preferred language for the test (English or Spanish) 5. Select appropriate video options or use the defaults 6.
- Page 27 Note: by checking this box, a patient is opting in to receive email from Cognivue. For more detail on emailing patient reports see 16.0 Emailing Reports. Once the required information is completed, the operator will click the Run Test button to initiate the Clarity test.
-
Page 28: Video Volume Control
Cognivue Clarity® User Manual 10.2 Report Printing, the Operator will be able to click a Print button on the report viewer header bar to print the report. When finished viewing/printing the report, the Operator can click the Close Report button on the header bar of the report viewer to close the report viewer and return to the Main Menu Screen. - Page 29 Cognivue Clarity® User Manual 10.2 Report Printing), the Administrator will be able to click a Print button on the report viewer header bar to print the report. Report List window © 2022 Cognivue, Inc. UM-410-Q Page 28...
- Page 30 Cognivue Clarity® User Manual There are four options for the report. See 10.4 Report Composition for selecting the pages of the report. Note: appropriate clinical contextualization is required. 1. Physician Report: This report is intended for the physician. It displays the average test score and the scores in various areas of cognitive function and health.
- Page 31 Cognivue Clarity® User Manual 2. Reaction Time and Speed Processing: This page is intended for the physician. It provides scores for reaction time and speed processing of the test taker. Clinical contextualization is required. Reaction Time and Speed Processing © 2022 Cognivue, Inc.
- Page 32 Cognivue Clarity® User Manual 3. Patient Report: This report is intended for the patient. It will contain an overall average score. Clinical contextualization is required. Patient Report © 2022 Cognivue, Inc. UM-410-Q Page 31...
- Page 33 Cognivue Clarity® User Manual 4. Physician Information: This page provides general information about the normalized ranges for the overall score. Clinical contextualization is required. Physician Information © 2022 Cognivue, Inc. UM-410-Q Page 32...
-
Page 34: Printing Reports
Cognivue Clarity® User Manual 5. Cogniwell Information Sheet: This page provides information about Cognivue’s Cogniwell program. Cogniwell Informational Sheet 15.0 Printing Reports Test reports may be printed from the device whenever a report is opened in the report viewer (see 10.0 Report Configuration and 14.0 Finding and Viewing Reports), provided the Report Printing option has... -
Page 35: Emailing Reports
Cognivue Clarity® User Manual Printer Configuration window Press the Refresh button to discover network printers (please work with your IT team to connect your printer to your network). Right-click on the desired printer to open a drop-down menu and select the Set as Default option. -
Page 36: Csv Data Export
Cognivue Clarity® User Manual Once the emails have been sent, a dialog box will display indicating the number successfully sent. Note: Due to the additional encryption and network latency, it can take up to 15 minutes or more to send the email. -
Page 37: Patient Management
Users have the ability to pre-enter patient demographic information, and have the ability to run tests with existing patients. To reach the Patient List screen 1. Log in as an Administrator user (see 6.1 Logging on to Cognivue Clarity®) 2. Click the Patients button Patient List window The Patient List screen lists all patients that have already taken a test or have been pre-entered. -
Page 38: Pre-Entering Patients
Cognivue Clarity® User Manual 18.1 Pre-Entering Patients Patient demographic information can be pre-filled to speed up the test setup process. 1. Click on the Create button to display the Patient Creation window Patient Creation window 2. Fill out form 3. Click Save 4. -
Page 39: Technical Specifications
Do not expose to liquids, rain, or moisture except in routine cleaning of surfaces. • • This product contains rechargeable batteries. At end of use, return the device to Cognivue or dispose according to local guidelines. Only use the provided AC Power Adapter with this device. -
Page 40: Product Safety Standards And Symbols
Cognivue Clarity® User Manual any part of Cognivue Clarity®. Otherwise, degradation of the performance of this equipment could result. NOTE: The EMISSIONS characteristics of this equipment make it suitable for use in industrial areas and hospitals (CISPR 11 class A). If it is used in a residential environment (for which CISPR 11 class B is normally required) this equipment might not offer adequate protection to radio-frequency communication services. - Page 41 Cognivue Clarity® User Manual Safety Symbols The following symbols may be used for marking on this equipment: Follow the operating instructions Type B applied part Serial Number DC input Manufacturer Date Manufacturer’s name and address NRTL Mark (Safety Certification Mark)
Need help?
Do you have a question about the Clarity and is the answer not in the manual?
Questions and answers