
Related Manuals for Artsound R8


Summary of Contents for Artsound R8
-
Page 1: Table Of Contents
OPERATING MANUAL ArtSound R8 Internet / DAB+ radio TABLE OF CONTENTS 1. Warnings and safety 16. Alarm Setting 2. Contents of the box 17. Sleep Timer Setting 18. Configuration 3. Location of Controls 19. Remote control via PC / Smart phone 4. -
Page 2: Warnings And Safety
Thank you for buying our ArtSound R9 radio. We hope you’ll enjoy it for years to come. Please read these instruc- tions carefully and keep this manual for later reference. The R9 is a high-quality internet, DAB+ and FM radio with Bluetooth and stereo audio output and input. -
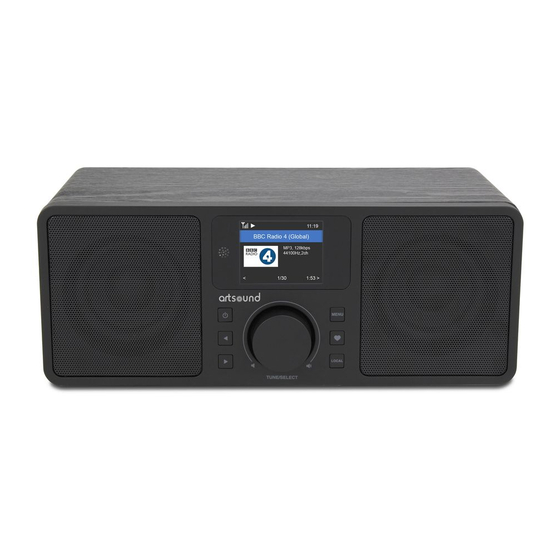
Page 3: Remote Control
1. Power 7. Tune/Select/ Volume Standby on/off [Dial / Select]: Rotate to scroll up / down on the 2. Left arrow main menu / Push to confirm / select menu options Back to previous menu/left cursor / Push to stop / resume playback of radio channel 3. -
Page 4: How To Input Password For Your Wireless Network
5. HOW TO INPUT PASSWORD FOR YOUR WIRELESS NETWORK USING REMOTE CONTROL On the alpha-numeric keypad, press the button repeatedly to cycle through the characters assigned to each but- ton. Refer to the following list. To input a character, highlight it and press the [OK] button to confirm and input the next character. - Page 5 WIRED LAN (ETHERNET) For Wired Ethernet connection to a router with DHCP enabled, the network configuration for Internet connection 12:01am is automatically done and the Radio can be used for Internet radio and UPnP sharing without user interaction. When the network is connected, the Ethernet icon will appear on the top left corner.
-
Page 6: Overview Of Features And Functions
9. OVERVIEW OF FEATURES AND FUNCTIONS Press [ ] to enter the main menu. Scroll by rotating the [Tune/Select] knob or the [ ⊳ / ⊲ ] button on remote: My Favorite To show the list of favorite stations which have been assigned to the presets. There are up to 99 presets available. - Page 7 START PLAYING INTERNET RADIO When a radio station starts playing, more radio information can be displayed. Press the ⊲ button in the state of the playing screen below: Every time you press the ⊲ button, it will show various information at a time such as the streaming bit rate, name of the song, artist name (if available), the big time clock and the radio's station logo (if available): MY FAVORITE Preset icon...
-
Page 8: Media Centre
11. MEDIA CENTRE The device supports UPnP and is DLNA-compatible. This provides the opportunity to stream music from your network. However, this requires you to have a compat- ible device in your network that can function as a server. This can be e.g., a network hard drive or a conventional PC with e.g., Windows 8 via which access to the shared folder or media sharing is permitted. -
Page 9: Fm Radio
⊲ Note – When a DAB radio is playing, press the [ ] button to view more radio information, each time you press ⊲ the [ ] button, it will display various information at a time such as radio frequency, rolling texts (if available) and big time clock. -
Page 10: Aux-In
15. AUX-IN You can listen to the music stored in other audio device or smart phone on the radio, through the connection to the 3.5 mm aux-in jack on the rear side. Use the cable with both ends in 3.5 mm pin, one end to the aux-in jack on the radio, the other end to the earphone jack on the audio device or if it has line out socket. -
Page 11: Configuration
18. CONFIGURATION Here you will find the complete settings / options available to configure your own radio. On the main menu, navigate to Configuration setting. Press OK and you will see a list of options available. NETWORK Network Options Always on: The WLAN function remains switched on (faster access when switching from DAB or FM mode to Internet radio). - Page 12 DATE AND TIME The radio will set your local time automatically after the internet connection is completed. If you want to do manual setting, change it by the following options: • Time zone Auto-set Time Zone: This option is set by default. Manual-set Time Zone: Choose this option if you want to set the time in another region.
- Page 13 • FM Preset Scan You can always carry out a new scanning of FM channels by selecting this option. All current presets and channels will be erased. The radio at the lowest frequency of the scanned values will be highlighted. The preset list will be saved unless a new preset scan is carried out.
-
Page 14: Remote Control Via Pc / Smart Phone Tuning Internet Radio & Manage Favourite
SOFTWARE UPDATE There may be a software update to upgrade features of the radio from time to time. RESET TO DEFAULT You can do the reset to clear all the settings and return to default settings. ** Please note all the Station presets, Settings and configuration will be erased after you have performed the Reset. - Page 15 The IP address can be located on the radio unit as follow: • On the remote control, press the [Info] button, choose Network and scroll to IP to view the IP address • On the radio, return to the main menu. Navigate to Configuration > Information > Network Information > IP Select "Listen to Station", click "Send"...
-
Page 16: Trouble Shooting
20. TROUBLE SHOOTING Problem Cause Solutions Cannot connect to Network down • Confirm that a Wi-Fi or Ethernet Wired connected PC can Wi-Fi network access the internet (i.e. can browse the web) using the same network. • Check that a DHCP server is available, or that you have configured a static IP address on the radio. -
Page 17: Helpful Tips
No sound • Please check if the volume is muted. Tune up the volume and see. • If that happens on a particular internet radio station, please try other channels and see if this is isolated issue on that station. Radio got freeze or no Insert a small paper clip in the reset pinhole and hold the response... -
Page 18: Technical Specification
22. TECHNICAL SPECIFICATION discription internet – DAB+ - FM - bluetooth radio radio internet radio (auto update) FM (RDS) / DAB+ memory programmable radio stations functions search by genre, location or your favourites alarm / clock / sleep timer / internet clock sync (NTP) equalizer antenna telescopic... -
Page 19: Warranty Conditions
2 year warranty from date of purchase. The warranty is limited to the repair of replacement of the defective material insofar as this defect is a result of normal use and the device has not been damaged. Artsound is not responsible for any other costs that ensue as a result of the defect (e.g. - Page 20 House of Music nv, Schoonboeke 10, BE-9600 Ronse...
Need help?
Do you have a question about the R8 and is the answer not in the manual?
Questions and answers