Clarity TELEPHONE W1000 User Manual
Clarity telephone w1000 user guide
Hide thumbs
Also See for TELEPHONE W1000:
- User manual (28 pages) ,
- Brochure (2 pages) ,
- User manual (26 pages)

Related Manuals for Clarity TELEPHONE W1000


Summary of Contents for Clarity TELEPHONE W1000
- Page 1 CLARITY www.clarityproducts.com 1000 User Guide Ñ Ç...
-
Page 2: Table Of Contents
• Hearing Aid Compatibility ... 16 OPERATION: ... 16 • To Place or Receive a Call ... 16 • Programming Numbers Into Memory ... 17 CARE: ... 19 TROUBLESHOOTING GUIDE ... 20 FCC REQUIREMENTS ... 23 CLARITY WARRANTY & SERVICE ... 25... -
Page 3: Safety Instructions
➤ Read and Understand All Instructions 1.Never install telephone wiring during a lightning storm. 2. Never install telephone jacks in wet locations unless the jack is specifically designed for wet locations. 3. Never touch uninsulated telephone wires or terminals unless the line has been disconnected at the network interface. -
Page 4: Save These Instructions
• Avoid using a telephone (other than a cordless type) during an electrical storm. There may be a remote risk of electric shock from lightning. • Do not use this telephone to report a gas leak in the vicinity of the leak. CLARITY W1000... - Page 5 The Load Number (LN) assigned to each terminal device denotes the percentage of total load to be connected to a telephone loop which is used by the device to pre- vent overloading. The termination on a...
- Page 6 UNPACKING THE CLARITY W1000 Inside you will find the following items: A. Handset B. Handset Line Cord (Coiled, 10 ft.) C. Base Unit D. Phone Line Cord (long, flat) E. Desk/Wall-Mounting Bracket F. This User’s Guide Carefully remove all of the contents from the package.
-
Page 7: Select A Location
Clarity W1000 Phone: To install as a Desk Unit: • Plug one end of the telephone line cord (long, flat) into the back of the Clarity telephone. • Plug the other end of the telephone line cord into the wall jack. - Page 8 Coiled cord here INSTALLATION Installation View Flat cord here RJ-11C Note: If you are plugging the phone into an older 4-prong jack, use an RJ11C adapter CLARITY W1000...
- Page 9 To Install As a Wall Unit: Important: A modular wall jack with raised mounting pins is required for installation as a Wall Unit. • Plug one end of the telephone line cord (long, flat) into the back of the Clarity telephone. INSTALLATION Wall Mount Bracket •...
- Page 10 Never leave the cord connected to the wall if it is not also connected to the telephone. • Hold the Clarity telephone so that the holes on the mounting bracket line up with the raised mounting pins on the modular wall jack.
-
Page 11: Features
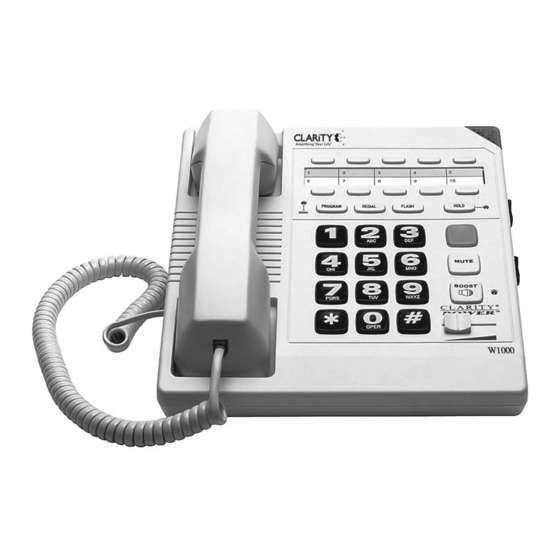
CLARITY W1000 FEATURES ® 1. Clarity Power Control 2. Boost Button 3. Clarity ON/OFF Switch 4. Sound Level Indicator 5. Ringer Volume Control 6. Visual Ringer 7. Ringer Pitch Control 8. Tone/Pulse Selector 9. Last Number Redial 10. Flash Button 11 . -
Page 12: Clarity Power Control
➤ Clarity Effect (On/Off Switch) Smart Tone Control Clarity ON insures the user that the high frequency sounds are being amplified ® more than lower frequencies so that words are not just louder, but clearer and easier to understand. -
Page 13: Ringer Volume Control
➤ Tone/Pulse Selection The Clarity W1000 can be used as either a TONE (touch dial) or PULSE (rotary dial) phone. Tone dialing is required for using special phone services such as long distance calling. -
Page 14: Last Number Redial
2. Press the “Redial” Button once. 3. Stay on the line, and your call will be dialed. The last number dialed will be stored in the Clarity telephone for you until you dial another number. ➤ Flash Flash is a special feature that is required... -
Page 15: Hold
The red hold light will turn on. 2. Hang up the receiver. 3. To take the call off hold: A. Simply lift the Clarity W1000 receiver out of the cradle. -OR- B. Pick up another telephone extension in your home. -
Page 16: Neck Loop/Auxilary
➤ To Place or Receive a Call: 1. Adjust the Clarity Power Control to its lowest setting (zero). 2. Pick up the handset and listen for the caller’s voice or a dial tone. Watch the green sound level light located on the phone base, next to the program button. -
Page 17: Programming Numbers Into Memory
PROGRAMMING NUMBERS INTO MEMORY The Clarity W1000 allows you to program in one emergency number and ten fre- quently dialed numbers into memory for future use. By doing so, you will only have to press one button to place a call. As a... -
Page 18: Change A Stored Number
Note: You can program a pause into the dialing sequence if necessary. Since there is not a pause button on the telephone, the redial button serves this purpose during programming. Programming in a pause will cause the phone to wait 3 seconds before dialing any more numbers. -
Page 19: Care
• Dust the unit regularly. Wipe the unit with a soft, damp cloth. Do not use detergents and avoid excess moisture. • The Clarity W1000 is an electrical device. Avoid electric shock by keeping the phone away from water. (i.e.: bathroom, kitchen... -
Page 20: Troubleshooting Guide
Wait for the sound level indicator to light solid before dialing. ➤ Programming Problems • Can’t Store Numbers Into Memory Your new Clarity phone must charge for two (2) hours before you can program any numbers into it. • Loss Of Numbers Programmed Into Memory... -
Page 21: Transmission Problems
➤ Static On Line • Interference From Household Appliances Your Clarity phone may be located near a touch lamp, microwave or refrigerator which may cause interference. Relocating your phone to another area may eliminate the problem. -
Page 22: Interference Problems
If the trouble persists with the standard tele- phone, inform your telephone company. If the trouble is related to only the Clarity phone, review the installation procedures and the troubleshooting guide before referring to the Limited Warranty stated later in this user guide. -
Page 23: Federal Communications Commission Requirements
FEDERAL COMMUNICATIONS COMMISSION REQUIREMENTS Your Clarity W1000 has been registered with the Federal Communications Commission (FCC). This product complies with standards of Part 68 of the FCC Rules. The FCC requires us to provide you with the following information: 1. Connection and use with the... - Page 24 Your Clarity W1000 has been tested and found to meet the standard for a Class B computing device, as specified in Subpart J of Part 15 of the FCC rules. These...
-
Page 25: Clarity Warranty & Service
Clarity or an authorized service center,is not a defect covered by this warranty. Telephone companies manufacture differ- ent types of equipment and Clarity does not warrant that its equipment is compat-ible with the equipment of a particular phone company. - Page 26 CLARITY WARRANTY & SERVICE How to Obtain Warranty Service To obtain warranty service, please prepay shipment and return the unit to the appro- priate facility listed below. In the United States Clarity Service Center 4289 Bonny Oaks Drive, Suite 106...
- Page 29 CLARITY www.clarityproducts.com W1000 Guía Del Usuario Ñ...
- Page 30 Tabla de Contenido INSTRUCCIONES DE SEGURIDAD: ... 3 INSTALACION:... 7 FUNCIONES: ... 11 • Control de Potencia Clarity ... 12 • Control de Amplificador ... 12 • Interrupter Fijo ... 12 • Efectos de Clarity ... 12 • Indicador del Nivel de Sonido ... 13 •...
-
Page 31: Instrucciones De Seguridad
INSTRUCCIONES DE SEGURIDAD ➤ Lea y entienda todas las Instrucciones 1. Nunca instale los cables de teléfonos durante una tormenta eléctrica (de relámpagos y truenos). 2. Nunca instale el receptáculo en ubicaciones húmedas (donde esté mojado) a menos que el recptáculo esté diseñado específicamente para las localizaciones húmedas o mojadas. - Page 32 CS-03. El número de resistencia del equipo es 20. El código normal para el arreglo de conexión del equipo es CA11A. Nota: La etiqueta del Departamento de Comunicaciones de Canada, identifica la Clarity W1000...
- Page 33 INSTRUCCIONES DE SEGURIDAD certificación del equipo. Esta certificación significa que el equipo satisface ciertos requisitos de seguridad y protección operacionales exigidos por la red de telecomunicaciones. El Departamento no garantiza que el equipo opere a plena satisfacción del cliente. Antes de instalar este equipo, el cliente deberá...
- Page 34 COMO DESEMPACAR EL EQUIPO CLARITY W1000 En el interior hallar los siguientes artículos: A. Un auricular B. Cordón del teléfono (10 pies, enrollado) C. Base de la unidad D. Cordón del teléfono (largo y plano) E. Aparato de montura en la pared/ escritorio F.
-
Page 35: Instalacion
Clarity W1000. • Coloque el auricular en la cuna o asiento de la Unidad Clarity W1000. La Unidad de Clarity W1000 viene armado con su artefacto de montura adherido en posición para colocarse sobre el escritorio. Para la instalación en una pared, simple-... - Page 36 Coloque el Cordón Plano Aquí INSTALACION Figura de Instalación Conecte el cordón enrollado aquí RJ-11C Nota: Si está enchufado su teléfono sobre un receptáculo antiguo de cuatro puntas o dientes, use un adaptador RJIIC, como el que aparece abajo. Clarity W1000...
- Page 37 Posterior del Telefono • Ensamble la montura de pared a la parte inferior de la Unidad Clarity W1000. Esta caerá rápidamente en su lugar. El cordón deberá extenderse por debajo del soporte o artefacto de montura en la pared.
- Page 38 Clarity W1000. • Coloque el auricular en la cuna o asiento de la Unidad Clarity W1000. Las pro- yecciones especiales le sostendrán en su lugar. Interruptor...
-
Page 39: Funciones
FUNCIONES DEL CLARITY W1000 1. Control de Potencia Clarity 2. Control de Amplificador 3. Interruptor de Encendido/ Apagado Clarity 4. Indicador del Nivel de Sonido 5. Control de Volumen de Sonido 6. Timbre Visual 7. Control para Graduar el Tono 8. - Page 40 ➤ Para aumentar la Potencia del Clarity: Deslice el botón marcado Aumento de Claridad hacia la derecha. Para Disminuir la Potencia del Clarity: Deslice el botón hacia la izquierda. La extrema izquierda es el nivel de una conversación normal por teléfono.
-
Page 41: Interruptor De Encendido
➤ Control del Volumen de Sonido La Unidad de Clarity W1000 viene con un control especial del sonido de baja fre- ucuencia disenado para ser escuchado facilmente por cada uno. -
Page 42: Selección Del Tono/Pulso
FUNCIONES DEL CLARITY W1000 ➤ Selección del Tono/Pulso El Clarity W1000 puede ser usado en el modo de TONO (marcado de Toque de botones) o en el modo de pulso (como si fuera marcado con disco giratorio). El modo de TONO es requerido para usar servivios telefónicos especiales, como... -
Page 43: Luz Intermitente
➤ Llamada en Espera Esta función de tecnología avanzada en su unidad Clarity W1000 le permite poner una llamada en espera, volver a colgar y cambiar hacia otra extensión o para tener una conversación privada, la cual no desea que la persona al otro extremo esuche. -
Page 44: Protección Activada
➤ Cómo Hacer o Recibir una llamada: 1. Ajuste el control de la Unidad Clarity W1000 a su grado más bajo (cero). 2. Levante el auricular y escuche el tono de marcar o si es una llamada, escuche la voz de la persona. - Page 45 El Equipo de Clarity W1000 le da la oportunidad a usted de programar en un número de emergencia y diez números frecuentes a marcar en la memoria para uso futuro.
- Page 46 Unidad de base. 6. Repita los pasos 3 al 7 para otros números a marcar que programe en la memoria. Ayuda Emmudecido Amplificador Control de Pontencia Clarity Botones de Emergencia, Enmudecido y Amplificador Programando Números que se llaman frecuentemente Clarity W1000...
-
Page 47: Operacion
2. Oprima el botón de Memoria Programada apropiado. 3. El Número será marcado auto- máticamente. La Unidad de Clarity W1000 ha sido diseñada para darle a usted muchos años de buen servicio con un mínimo de mantenimiento. Para asegurar lo máximo en Operación,... -
Page 48: Guía Para La Corrección De Fallas
➤ Problemas en la Programación • No puede almacenar los Números en la Memoria • Su nueva Unidad Telefónica Clarity W1000 deberá ser cargada por unas 2 horas antes de que pueda programar algún número en la memoria. • Pérdida de Números... - Page 49 ➤ Estática en la Línea • Interferencia de los Utensilios Eléctricos en el Hogar • Su Unidad de Teléfono Clarity W1000 puede que esté ubicada cerca de una ámpara que se enciende tocándola, cerca de un horno de micro-onda o de un re- frigerador;...
- Page 50 Sistemas Digitales PBS • Si una línea sencilla y normal funciona bien, su teléfono W1000 también deberá funcionar normalmente. • Los Teléfonos Clarity No son compatibles con los Sistemas de Teclas Ni con los Sistemas PBS de la Compañía AT&T •...
- Page 51 Guía del Usuario. Luego trate de determinar si la fuente del problema es con Clarity W1000 o con su servicio de teléfonos. Para verificar esto, desconecte la Unidad de Clarity W1000 y conéctela en el receptáculo normal de su teléfono.
- Page 52 REGLAMENTOS DE LA COMISION FEDERAL DE COMUNICACIONES Su Unidad de Clarity W1000 ha sido registrada en la Comisión Federal de Comunicaciones (CFC). Este producto cumple con los requisitos exigidos por la sección 68 de las leyes de la CFC. La CFC requiere que proveamos al cliente de la siguiente información:...
- Page 53 Si su Unidad De Clarity W1000 causa interferencia en las recpciones de radio y televisión cuando está en uso, podría corregir la misma con una o ambas de las siguientes medidas: 1.
-
Page 54: Garantía Y Seruicio
Clarity, o por un centro de servicio no autorizado, no es un defecto cubierto por esta garantía. Las compañías de teléfonos fabrican diferentes tipos de equipos y... - Page 55 En los Estados Unidos: Clarity Service Center (Centro de Servicio Clarity) 4289 Bonny Oaks Drive, Suite 106 Chattanooga, Tennessee 37406 Tel.: (423) 622-7793 ó...
-
Page 57: Guide De L'utilisateur
CLARITY Guide de l’utilisateur www.clarityproducts.com W1000 Ç... - Page 58 Power Control ... 12 • Contrôle de volume “Boost” ... 12 • Touche de réinitialisation ... 12 • Effet Clarity ... 12 • Indicateur de volume ... 13 • Volume de la sonnerie ... 13 • Tonalité de la sonnerie ... 13 •...
-
Page 59: Consignes De Sécurité
CONSIGNES DE SÉCURITÉ ➤ ASSUREZ-VOUS DE BIEN COMPRENDRE TOUTES LES INSTRUCTIONS 1. N’installez jamais de branchements téléphoniques pendant un orage électrique. 2. N’installez jamais de prises téléphoniques sur des surfaces mouillées à moins que la prise ne soit spécifiquement conçue à cet effet. 3. - Page 60 • Ne pas utiliser ce téléphone pour rapporter une fuite de gaz située à proximité. Les éléments suivants font partie des exigences CS-03. Le facteur de charge de l’équipement est 20. Le code de branchement standard pour cet équipement est CA11A. Clarity W1000...
- Page 61 CONSIGNES DE SÉCURITÉ AVIS: L’étiquette du département canadien des Communications identifie certains types d’équipement. Cette certifi- cation signifie que l’équipement rencontre certains critères de sécurité au niveau des réseaux de télécommunications. Le département des communications ne garantit pas que l’équipement fonctionnera à...
-
Page 62: Installation
En plus des articles indiqués ci-haut, vous aurez également besoin des suivants pour compléter l’installation de cette unité: Fiche murale modulaire, ou Adaptateur modulaire RJ-11C (si vous avez une ancienne prise à quatre orifices). Clarity W1000... - Page 63 AVERTISSEMENT: Pour éviter l’électrocution, retirez toujours le cordon de téléphone de la prise murale avant de retirer le cordon du téléphone. Cordon serpentin ici INSTALLATION Cordon plat ici RJ-11C Note: Si vous branchez votre appareil dans une vieille prise à quatre orifices, utilisez un adaptateur RJ-11C.
- Page 64 • Branchez l’autre extrémité du cordon dans la prise située en bordure gauche du W1000. • Déposez le combiné sur son support. Votre appareil Clarity W1000 est pourvu de fonctions qui vous aideront à améliorer vos communications téléphoniques. Clarity W1000...
-
Page 65: Installation Murale
• Branchez une extrémité du fil de télé- phone (long et plat) à l’arrière du Clarity. • Installez la fixation murale à l’arrière du Clarity. Elle s’enclenchera en place. Le fil devrait être placé sous la fixation murale. - Page 66 également branché au téléphone. • Placez les trous de la fixation du Clarity vis à vis les tiges surélevées de la prise modulaire murale. Poussez ensuite le téléphone vers la prise murale, et INSTALLATION faitesle glisser vers le bas jusqu’à...
-
Page 67: Fonctions
FONCTIONS W1000 DE CLARITY ® 1. Clarity Power Control 2. Touche BOOST 3. Interrupteur 4. Indicateur de volume 5. Volume de la sonnerie 6. Avertisseur visuel 7. Tonalité de la sonnerie 8. Sélecteur tonalité/pulsation 9. Recomposition 10. Touche FLASH 11. Mise en garde 12. -
Page 68: Clarity Power Control
FONCTIONS W1000 DE CLARITY Votre appareil Clarity W1000 est pourvu de fonctions qui vous aideront à améliorer vos communications téléphoniques. ➤ Clarity ® Power Control Le CLARITY POWER CONTROL vous permet de contrôler la clarté de vos con- versations téléphoniques. Il vous per- mettra d’entendre clairement des appels... -
Page 69: Indicateur De Volume
FONCTIONS W1000 DE CLARITY mots soient non seulement plus forts mais aussi plus clairs et faciles à comprendre. En position OFF, le Clarity offre les sons les plus forts possibles. ➤ Indicateur de volume Ce voyant LED indique la présence de voix ou de sons sur la ligne. -
Page 70: Recomposition
Important: Vous devez avoir une ligne “touch-tone” pour utiliser le mode tonalité avec le Clarity. Dans le doute, contactez votre compagnie de téléphone. ➤ Pour ajuster le sélecteur tonalité/pulsation 1. Placez le sélecteur dans la position désirée. -
Page 71: Touche Discrétion
Le modèle W-1000 est muni d’une fiche phono 3.5mm pour un circuit bouclé. Le volume de ce circuit est contrôlé par le Clarity Power Control. Lorsque le circuit est branché, le récepteur du combiné n’est plus en fonction. ➤ Compatibilité avec les... -
Page 72: Pour Programmer Des Numéros Fréquemment Utilises
3. Pour placer un appel, composez de la même manière que sur tout autre appareil et attendez que l’on vous réponde. 4. Appuyez sur la touche Boost. 5. Augmentez le CLARITY POWER CONTROL jusqu’à ce que la voix de votre interlocuteur vous parvienne haut et clair; conversez. -
Page 73: Programmation Des Numéros Fréquemment Utilisés
PROGRAMMATION DES NUMÉROS FRÉQUEMMENT UTILISÉS 6. Appuyez sur l’une des touches de mise en mémoire. 7. Replacez le combiné. 8. Reprenez les étapes 3 à 7 pour chacun des autres numéros à programmer. ➤ Pour composer un numéro programmé 1. Prenez le combiné et attendez la tonalité... -
Page 74: Entretien
Le Clarity W1000 a été conçu pour vous offrir des années de service fiable avec un minimum d’entretien. Pour assurer un rendement optimal, suivez ces conseils d’entretien: ENTRETIEN • Évitez d’échapper ou de frapper l’appareil. • Époussetez l’appareil régulièrement. Essuyez-le avec un linge humide doux. -
Page 75: Dépannage
➤ Problèmes de programmation • Il n’est pas possible de programmer un numéro – Votre nouvel appareil Clarity doit être chargé pendant au moins deux (2) heures avant que la programmation ne soit effectuée. • Les numéros ne demeurent pas en mémoire... - Page 76 ➤ Interférences • Interférence par les électro-ménagers – Votre appareil Clarity peut être placé près d’une lampe à contrôle tactile, d’un micro-ondes ou d’un réfrigérateur, ce qui pourrait créer des interférences. Relocaliser l’appareil pourrait régler le problème.
-
Page 77: Volume De Sonnerie
PBX digitaux. – Si un appareil téléphonique standard fonctionne, votre appareil Clarity devrait fonctionner également. • Les téléphones Clarity ne sont pas compatibles avec les systèmes à touche ou avec les systèmes PBX de AT&T. – Ces unités sont munies d’une boîte électronique contrôlant plusieurs appareils... - Page 78 Déterminez ensuite si le prob- lème est causé par le Clarity ou par votre service téléphonique; pour ce faire, débranchez le Clarity et branchez votre téléphone standard. Si le problème persiste, informez votre compagnie de téléphone.
- Page 79 FCC. Votre compagnie de téléphone est libre de modifier ses installations, modes d’opération ou procédures, ce qui pourrait affecter le fonctionnement de votre Clarity. Si cela se produit, vous en serez avisé à l’avance. Article 15 des règlements sur l’interférence...
-
Page 80: Garantie & Service
L’obligation de Clarity selon cette garantie sera limitée à la réparation ou au rem- placement, à l’option de Clarity, de toute pièce ou de tout appareil qui se révèle avoir une défectuosité des matériaux ou de sa fabrication au cours de la Période de garantie. - Page 81 Pour obtenir le service de garantie, veuillez payer d’avance l’expédition et retourner l’appareil à l’installation appro- priée indiquée ci-dessous. Aux États-Unis Clarity Service Center 4289 Bonny Oaks Drive, Suite 106 Chattanooga, Tennessee 37406 Tél : (423) 622-7793 ou (800) 426-3738...
- Page 84 1-800-552-3368 www.clarityproducts.com Made in China ©2005 Clarity, a Division of Plantronics, Inc. All rights reserved. Ameriphone, Amplifying Your Life, Clarity, Clarity Power, Clarity Power Control are trademarks or registered trademarks of Plantronics, Inc. FCC Registration complies with part 68 of FCC rules and regulations.
Need help?
Do you have a question about the TELEPHONE W1000 and is the answer not in the manual?
Questions and answers