Table of Contents
Advertisement
Quick Links
Advertisement
Table of Contents

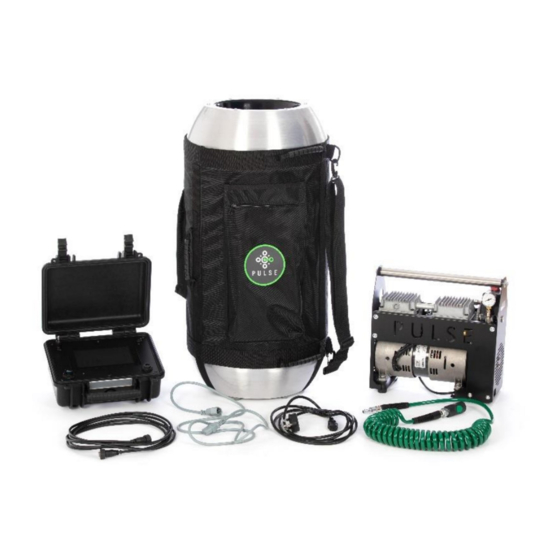
Summary of Contents for BUILD TEST SOLUTIONS BTS-Pulse 2.0
- Page 1 Pulse - Air Permeability Measurement System MODEL: BTS-Pulse 2.0 Instruction Manual and Safety Guidelines Version 6.2 Version number Product: Pulse Air Permeability Measurement Instrument Type: Customer instruction manual and safety guidelines Date of issue 02/07/2021...
-
Page 2: Table Of Contents
Contents General Information..........................3 Warranty and Supply Information ......................4 Warranty ............................... 4 Supply ..............................4 Important Safety Instructions ........................5 Intended use of Pulse ..........................5 General Safety Information ........................5 External Power Supply – 230v and 110v operation ................6 Connections ............................ -
Page 3: General Information
Build Test Solutions (BTS) Ltd. Furthermore, it may not be distributed electronically in any format, without prior consent from Build Test Solutions (BTS) Ltd. -
Page 4: Warranty And Supply Information
2 Warranty and Supply Information 2.1 Warranty All Pulse Units are supplied with a 12 month manufacturer’s warranty from the date of purchase, when purchased, installed and maintained in accordance with the manufacturers guidelines. Only genuine service parts should be used and no modifications made. For further information please contact BTS Ltd. 2.2 Supply All Pulse LLP Units, are securely packaged in bespoke strong cardboard boxes for shipping. -
Page 5: Important Safety Instructions
Do not lubricate any parts or carry out any maintenance or repair work other than that advised in this manual, or as advised by Build Test Solutions Ltd operatives. When transporting the unit, ensure the compressor, air receiver and controller are all secured into place. -
Page 6: External Power Supply - 230V And 110V Operation
Ensure that the equipment is depressurised and electrically isolated prior to carrying out any of the scheduled maintenance instructions specified within this user guide. 3.3 External Power Supply – 230v and 110v operation In the event of a hazard or malfunction, the power should be switched off at the socket before being unplugged from the mains. -
Page 7: Technical Information
4 Technical Information 4.1 Technical Specification Pulse 2.0 Maximum Operating Pressure 10 Bar / 145 Psi / 1,000 kPa Operating Voltage 220-240V 50Hz (110v available) Max Power Consumption 569W, 2.63A (compressor) Min Operating Temperature 4°C (frost free) Max Operating Temperature 40°C Outlet Filtration 5μm (particulate) - Page 8 RJ45 data connection port for auxiliary Air Receiver Compressed air in charge port RJ45 Power over Ethernet port for Control Unit EIC Power out to compressor (110/230v) EIC Power in (240v) Air Exhaust Nozzle Tank pressure gauge 4.2.2 Pulse Control Box The Pulse Control Box contains: ...
-
Page 9: Compressor Unit
Pulse unit. However, if compressors not supplied by Build Test Solutions are used to charge the instrument it is imperative that the compressor is approved and configured for charging to no greater than 10Bar and that the correct couplings necessary for connection to the Pulse unit are used (Prevost S1 series euro connectors). -
Page 10: Service & Maintenance Requirements
5 Service & Maintenance Requirements The Pulse unit requires regular maintenance and calibration to ensure correct measurement. The following service schedule should be maintained for all testing. A fully serviced Pulse unit is mandatory for regulatory testing and where testing results are intended to be used to demonstrate improvements which may be later monetised or promoted. -
Page 11: Cleaning The Air Receiver Unit
Calibration Calibration Component Description Range Accuracy standard Frequency required (i.e. inside the pressurised air tank) Results and the Measuring the date of last service and Room pressure pressure difference Full scale calibration check transducer between building error ±0.5%, ±25 Pa 24 Months should be (Control module) -
Page 12: Scope Of Use
To ensure successful testing, it is recommended that users oversize the Pulse unit to be used. Build Test Solutions maintain a publically accessible Pulse system sizing guide available online here: https://www.pulseairtest.com/sizing-guide.html Above: Example screenshot of the online Pulse system sizing tool. Available at www.pulseairtest.com/sizing-... -
Page 13: Conversion Of 50Pa Figures To 4Pa
This relationship is separately being research further by Build Test Solutions the University of Nottingham and others. 7 Operation 7.1 Assembly and First Use... -
Page 14: Initial Setup
When transporting in a vehicle, it is advised that precautions are made to ensure the unit cannot move around within the vehicle, by strapping or otherwise. When manually handling the instrument, please ensure you have received the correct manual handling training and, if necessary procured the necessary lift aids as per your personal requirements or risk assessment. -
Page 15: Test Preparation
Compressor charge hose connection to air receiver Compressor charge hose with push-fit fittings NOTE: FOR THIRD PARTY SUPPLIED COMPRESSORS, ENSURE YOUR COMPRESSOR IS SET TO CHARGE TO 9- 10BAR TO ENSURE THE TANK’S SAFETY VALVE IS NOT TRIGGERED. When the air receiver has reached fully-charged, the compressor will switch off automatically. This should take approximately 8 minutes for a single standard 40L air receiver to fully charge from empty to its max 10 bar capacity. -
Page 16: Step Tests
Use the control system to set up the test and input testing parameters. Section 8 provides comprehensive guidance on using the control system. When “start test” shows on the screen, the test is ready to launch. PLEASE NOTE: Testing without inputting building envelope area and volume will mean test results will not be provided on-screen and will require calculation later. - Page 17 AP – Air Permeability (m Achieved Pressure Range (Pa) A test ID will also be displayed, this should be noted for records. At the end of the test the results are automatically captured in the unit’s memory. These may be exported as .csv or .Pat file (depending on the version of Pulse unit and software you are running) by plugging in a USB and following export guidelines in section 8.3.
-
Page 18: After Testing
Invalid The air flow exponent, n, is used to describe the airflow regime through the gaps and holes in Exponent the building fabric. Values must range between 0.5 and 1.0. An n value approaching 0.5 signifies turbulent flow, representing high flow through large apertures. An n value Threshold approaching 1.0 will indicate a more laminar flow, characteristic of more air tight structures or those with much smaller gaps and holes. -
Page 19: Control Box Menu Controls
8 Control Box Menu Controls 8.1 Menu Map Building Dimensions Test Test Parameters Property Details / Pulse Without Launch Test Parameters Export Delete History Rerun Test Show Results Main Menu Date& Time Settings Default Test Parameters Software Check Sensors Drain The main menu screen appears as follows. - Page 20 Click “Next” 3. Input: d. Property ID as per your organisation’s convention. Building Age (list of drop down options appear). Building Type (list of drop down options appear). Property Type (list of drop down options appear). h. Building Construction (list of drop down options appear). Notes –...
- Page 21 5. The launch screen will appear, select launch to begin the test algorithm The test will then launch, showing the following messages on screen: 1. “Testing in 5, 4, 3, 2, 1” 2. “Recording Background Pressure” 3. Pulse 1 Page 21 of 28...
-
Page 22: History And Back-Up
4. Steps 2 and 3 will repeat for additional Pulses in the test 5. “Recording Background Pressure” 6. Test Complete The screen will then present test results (unless a test has been fired without parameters). Also presented is “Test Status” information, with feedback to the quality and success of each step in the test, and the test as a whole. -
Page 23: Settings
To exit this menu, select “Main Menu” at the bottom of the page, below the stored tests. 8.3.1 Export/Delete Tap each test that you wish to export or delete, or if you would like to act upon all tests, select “All”, to remove your selections, press “none”. -
Page 24: Software
Default parameters allow the user to input standard parameters that are normally used in testing, allowing for greater efficiency. Alter these figures by tapping on them and making changes. Select “Save Changes” after any changes have been made to save them to system memory. To discard changes and exit settings, select “Main Menu (without save)”... -
Page 25: Tank Drain
The current software version can be seen at the top of the screen When a USB drive with a software version held on the device is inserted, these are recognised by the Pulse controller and listed. Select install and the system will automatically install the software and reboot. ... -
Page 26: Technical Support And Troubleshooting
9 Technical Support and Troubleshooting This section is in addition to the dedicated FAQ and help section on www.pulseairtest.com. Any issues not covered by this manual or the online help directory should be directed to enquiries@buildtestsolutions.com via our dedicated technical support line on 01455 883 250. Problem Possible Causes Fixes... - Page 27 of over or under pressurisation or for air Check connections, consider repositioning of the unit and flow/test data errors (n retest. coefficient and r2). Calculation error caused by operating conditions Page 27 of 28...
-
Page 28: Appendices
10 Appendices 10.1 Appendix A – Annual Self Calibration Check It is suggested that users carry out a periodic check to ensure the device is measuring correctly. This would not be as a replacement to any calibration required for regulatory testing requirements, nor omit the need to periodic servicing.
Need help?
Do you have a question about the BTS-Pulse 2.0 and is the answer not in the manual?
Questions and answers