Advertisement
■使用する工具 〜本機を正しく組み立てるため下記の工具を別途ご用意ください〜
はじめに
・プラスドライバー(1番) ・はんだごて ・はんだ ・ピンセット
⦿ 本製品の組み立てには、はんだ付け作業を要します。
はんだごてをご使用の際は、 安全上の注意が必要です。 金属を溶かすほどの高温であるため、 こて先に
触れるとやけどをしてしまうため、 はんだ付けをしている時だけでなく、 一時的に置いておく時にも取り
扱いに注意です。 こて台のご用意を推奨いたします。
また、 溶けたはんだが飛び散ったり、 溶ける時に煙が出たりするため、 保護用メガネやマスクなどで対策
をすることで、より安全に作業ができます。 手についたはんだを誤って口に触れると薬品が口に入る可
能性があります。 作業しやすい手袋をするか、 手についてしまった場合は速やかに洗い流してください。
■チューニング変化一覧表
パーツ名称
a
ハウジング用チューニングシート : 無し
b
ハウジング用チューニングシート : 不織布
c
ハウジング用チューニングシート : PET
d
ユニッ ト用チューニングダンパー : 無し
e
ユニッ ト用チューニングダンパー : 有り
f
バッフル用チューニングダンパー : 低密度
g
バッフル用チューニングダンパー : 高密度
h
合皮イヤパッ ド
i
ベロアイヤパッ ド
■着脱式ケーブルについて
LOCK
※2.5mm4極プラグを本体側に接続して下さい。
本製品に関するお問合せ先
フォステクスカンパニー
〒196-8550 東京都昭島市つつじが丘1-1-109
・国内営業窓口
・カスタマーサービス
TEL 042-545-6111
TEL 0428-28-3450
FAX 042-546-6067
FAX 0428-28-3455
効果
オープン仕様/低域ブースト
セミオープン仕様/標準仕様
クローズド仕様/300〜800Hz感度変化
標準仕様
低域ダンピング
標準仕様
低域ブースト
標準仕様
中域ダンピング
※標準仕様 → 弊社製品 T50RPmk3、及びT60RPに近い音質
⦿ 2.5mm 4極端子結線図
(WHITE)
Rch HOT
Lch COLD
Rch
Rch COLD
(RED)
Lch HOT
(BLUE)
⦿3.5mm 3極端子結線図
Lch
HOT COLD GND
本体
(WHITE)
フォステクスホームページ
オンラインショップ
PRINTED IN CHINA JUN 2021 646043 (85881590001)
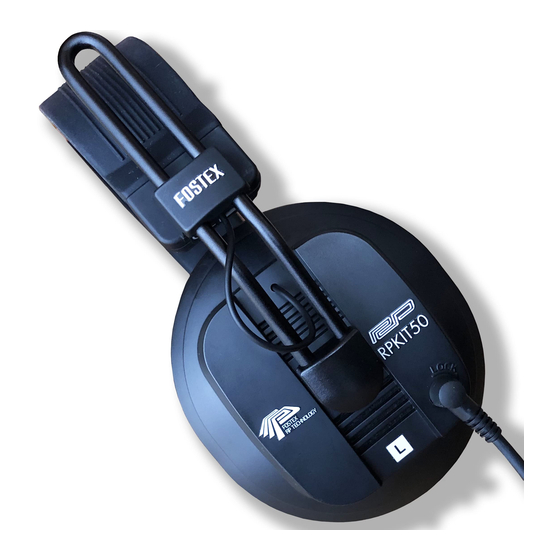
RPKIT50
RP [Regular Phase] Stereo Headphone Kit
Ownersʼs Manual
取扱説明書
■はじめに
このたびはフォステクス製品をお買い上げ頂き有難うございました。 ご使用の前にこの取扱説明書をよくお読みの上、
正しくご使用ください。
■主な特長
・本製品は、RP(Regular Phase )技術を採用した独自開発のドライバーユニット「RP振動板」を搭載したステレオ
ヘッドホンを組み立てることができるキット製品です。
・複数の音質調整用パーツを組み合わせることで、音楽鑑賞用や、音楽制作用モニター・ヘッドホン仕様など、用途
に合わせてお好みの音質作りを楽しむことができます。
■製品梱包内容
① 半完成本体(1台) ②合皮イヤパッド(2ペア) ③RPユニット(1ペア)
※ベロアタイプを①に装着済み
⑥~⑩ハウジング用
⑤バッフル用チューニングダンパー
吸音材セット(5種各1ペア) ⑪~⑫ハウジング用
・高密度タイプ(1ペア)
・低密度タイプ(1ペア※①に装着済み)
⑬バッフル用吸音材
(5mm×100枚)
⑮取付用ネジ
⑯ケーブル
Φ2.5→Φ3.5
(×8本/2本予備)
アンバランス×1本
⑭ユニット用
チューニングダンパー(1ペア)
④RPユニット用ガスケット
(1ペア)
⑧
チューニングシート
⑦
⑥
⑪不織布×6
⑩
⑫PETシート×6
⑨
⑰ケーブル
⑱変換コネクタ
Φ2.5→Φ2.5
Φ3.5→Φ6.3 ×1個
バランス×1本
⑲ロゴステッカー(1枚)
Advertisement
Table of Contents

Summary of Contents for Fostex RPKIT50
- Page 1 ■使用する工具 〜本機を正しく組み立てるため下記の工具を別途ご用意ください〜 RPKIT50 RP [Regular Phase] Stereo Headphone Kit Ownersʼs Manual 取扱説明書 はじめに ・プラスドライバー(1番) ・はんだごて ・はんだ ・ピンセット ■はじめに ⦿ 本製品の組み立てには、はんだ付け作業を要します。 このたびはフォステクス製品をお買い上げ頂き有難うございました。 ご使用の前にこの取扱説明書をよくお読みの上、 正しくご使用ください。 はんだごてをご使用の際は、 安全上の注意が必要です。 金属を溶かすほどの高温であるため、 こて先に 触れるとやけどをしてしまうため、 はんだ付けをしている時だけでなく、 一時的に置いておく時にも取り ■主な特長 扱いに注意です。 こて台のご用意を推奨いたします。 また、 溶けたはんだが飛び散ったり、 溶ける時に煙が出たりするため、 保護用メガネやマスクなどで対策 ・本製品は、RP(Regular Phase )技術を採用した独自開発のドライバーユニット「RP振動板」を搭載したステレオ をすることで、より安全に作業ができます。 手についたはんだを誤って口に触れると薬品が口に入る可 ヘッドホンを組み立てることができるキット製品です。 能性があります。 作業しやすい手袋をするか、 手についてしまった場合は速やかに洗い流してください。 ・複数の音質調整用パーツを組み合わせることで、音楽鑑賞用や、音楽制作用モニター・ヘッドホン仕様など、用途 に合わせてお好みの音質作りを楽しむことができます。 ■チューニング変化一覧表 ■製品梱包内容 パーツ名称 効果 ハウジング用チューニングシート : 無し...
- Page 2 ■組み立て ❹ハウジング内部チューニング部品を取り付ける ❶半完成本体から部品を取り出す ※使用工具:ドライバー ※使用工具:ピンセット ⦿半完成本体から下記部品を取り外します。 ⑭RPユニット用チューニングダンパー ・表 d ) 付けない:標準仕様 ②イヤパッド:ベロアタイプ ⑤低密度ダンパー ・表 e) 付ける:低域ダンピング ⑪または⑫ハウジング用チューニングシート ・表 a ) 貼らない:低域ブースト ・表 b ) 不織布:標準仕様 ・表 c ) PET シート:300~800Hz 感度変化 ・バッフル ⑮ネジ (片側 4 個 ×2) ❺内部配線はんだ付け、及びバッフル組み込み ❷ハウジング、及びバッフルに吸音材を取り付ける ※使用工具:ピンセット ※使用工具:はんだごて、ドライバー ⦿各ハウジングにハウジング用吸音材を貼り付ける ⦿各バッフルにバッフル用吸音材を貼り付ける ⦿内部配線をはんだ付けする ⦿バッフルねじ止め はんだ付け箇所...
- Page 3 ■ Tools to be used To correctly assemble this product, please prepare the following tools by yourself. RPKIT50 RP [Regular Phase] Stereo Headphone Kit Ownerʼs Manual ■ Introduction はじめに ・Philips screw driver (size No.1) ・Soldering iron ・Solder ・A pair of tweezer Thank you very much for the purchase of Fostex product. Please thoroughly read this ownerʼ s manual and correctly use the product. ⦿ Assembling this product requires soldering work Safety precautions are required when using a soldering iron. The temperature becomes hot ■ Main features enough to melt the metal. If you touch the tip, you will get burned. We recommend that you ・This product is to assemble a pair of headphones employing “RP diaphragm” that is uniquely developed using our should prepare the soldering iron stand. The melted solder may splash or smoke will come out RP (Regular Phase) technology. when melting, you can work safer if you wear the protection goggle and mask. There is a risk of CAUTION ・You can enjoy your own favorite sound by combining various parts to adjust the sound to make it for music listening entering chemicals if you accidentally touch your mouth with the hand with solder. Wear gloves or monitor headphones specific to music production. that are easy to work with or immediately wash your hand if solder has attached. ■ Product Packaging ■ Tuning change list Name of parts Effects ① Semi-finished headphone body (1set) ② Synthetic leather ear pads (2 pairs) ③ RP units (1 pair) * Velor type is already attached to ① Tuning sheet for housing: nothing mounted Open spec/Boosting low frequency region Tuning sheet for housing: non-woven fabric Semi-open spec/Standard spec Tuning sheet for housing: PET Closed spec/Sensitivity changed between 300 and 800Hz...
- Page 4 ■ Assembling ❹ Mount the tuning parts inside the housing. ❶ Remove the parts from semi-finished headphone body. *Tool used: a screw driver *Tool used: a pair of tweezer ⑭ Tuning damper for RP unit ⦿Remove the following parts from semi-finished headphone body. ・Table d) not mounted : standard specifications ・Table e) mounted ⑤ Low density type tuning damper ② Ear pads: velour type : low frequency ⑪ or ⑫, Tuning sheet for housing region damped ・Table a) nothing mounted : boosting the low frequency region ・Table b) non-woven fabric : standard specifications ・Table c) PET sheet : sensitivity changed between 300 and 800Hz ・Baffle ⑮ Screws (4 pcs each side x 2) ❷ Mount the sound absorbing material to the housing and the baffle. ❺ Solder the internal wiring and assemble the baffle. *Tool used: a pair of tweezer *Tools used: a soldering iron and screw driver ⦿ Mount the sound absorbing material for housing to both housing. ⦿Solder the internal wiring. ⦿ Mount the sound absorbing material for Soldering location ⦿Fixing the baffle with screws ・Lch:Red wire to “+” baffle to each baffle. :White wire to “−“ ・Baffle ⑬ ・Rch:Blue wire to “+” :White wire to “−” ・Filter ...


Need help?
Do you have a question about the RPKIT50 and is the answer not in the manual?
Questions and answers