
Related Manuals for Sanus VXT5


Summary of Contents for Sanus VXT5
- Page 1 VXT 5 INSTRUCTION MANUAL We’ll Make It Stress-Free If you have any questions along the way, just give us a call. 1-800-359-5520. We’re ready to help! Scan for easy install video http://san.us/273...
- Page 2 Does your TV weigh more than 180 lb (81.6 kg) including accessories? No — Perfect! 180 lb Yes — This mount is NOT compatible. Visit MountFinder.Sanus.com or call 1-800-359-5520 (UK: 0800-056-2853) to fi nd a compatible mount. (81.6 kg) What is your wall made of?
-
Page 3: Step 1 Attach Brackets To Tv
STEP 1 Attach Brackets to TV Parts and Hardware for STEP 1 WARNING: This product contains small items that could be a choking hazard if swallowed. Before starting assembly, verify all parts are included and undamaged. If any parts are missing or damaged, do not return the damaged item to your dealer;... - Page 4 1-1 Select TV Screw Diameter 1-2 Select TV Screw Length Hand thread screws into the threaded inserts If your TV has a flat back AND you want your TV closer to on the back of your TV to determine which the wall, use the shorter screws (a).
- Page 5 1-3 Attach Vertical TV Brackets Align the vertical TV brackets over your TV hole pattern, and secure using your screw/washer (a) or spacer/screw/washer (b) selection. CAUTION: Avoid potential personal injury or property damage! The hanging tabs must face downward as shown. If your TV included Flat Back inset spacers or wall...
- Page 6 1-4 Attach Horizontal TV Bracket Slide the sides of horizontal TV bracket to align with the vertical TV brackets Position horizontal TV bracket onto the vertical TV brackets by sliding the four bolts into the four hanging tabs. NOTE: Horizontal TV bracket does not stay in place until securing in STEP 3 on PAGE 7.
- Page 7 Secure horizontal TV bracket onto the vertical TV brackets using the knobs NOTE: Slide horizontal TV bracket up or down to locate the mounting holes in the vertical TV brackets CAUTION: Avoid potential personal injury or property damage! The knobs must be installed to secure horizontal TV bracket onto the vertical TV brackets...
- Page 8 5 in. (13 cm) between your device and the magnet. Please consult with your physician or medical professional prior to using this product. NOTE: Not all hardware included will be used. * Sanus Magnetic Stud Finder Wall Plate Template...
- Page 9 Stud centers must be verified - not all walls have a conventional 16 in. (406 mm) or 24 in. (610 mm) spacing NOTE: See Introducing Sanus Magnetic Stud Finder located in your Welcome folder for Min. 16 in. more detailed operation of stud finder.
- Page 10 Level the wall plate template and tape in place. NOTE: For assistance in determining wall plate location, see Height Finder at sanus.com. IMPORTANT : Be sure you mark and drill into the center of the stud.
- Page 11 Partially install the top two lag bolts , leaving about 1/2 in. (13 mm) space from the wall. NOTE: This space allows you to remove the template and hang the wall plate onto the top lag bolts Remove the wall plate template ½...
- Page 12 Prepare the wall plate by sliding the wall plate covers up/down so the mounting holes are visible. Hang the wall plate on the top lag bolts. Install the bottom two lag bolts . Tighten all four lag bolts only until they are pulled firmly against the wall plate NOTE: Hold the wall plate in place when tightening the first bolt...
- Page 13 Level the wall plate template and mark the hole locations. NOTE: For assistance in determining wall plate location, see Height Finder at sanus.com. Drill four pilot holes using a 3/8 in. (10 mm) diameter masonry drill bit.
- Page 14 Remove the wall plate template and insert four anchors CAUTION: Be sure the anchors are seated flush with the concrete surface. Partially install the top two lag bolts , leaving about 1/2 in. (13 mm) space from the wall. NOTE: This space allows you to hang the wall plate onto the top lag bolts ½...
- Page 15 Prepare the wall plate by sliding the wall plate covers up/down so the mounting holes are visible. Hang the wall plate on the top lag bolts. Install the bottom two lag bolts . Tighten all four lag bolts only until they are pulled firmly against the wall plate NOTE: Hold the wall plate in place when tightening the first lag bolt...
- Page 16 STEP 3 Mount TV to Wall Plate HEAVY ! You may need assistance with this step. Close wall plate covers. Make sure that the locking lever of the TV bracket is in the unlocked position. Wall Plate Cover LOCKED UNLOCKED Wall Plate Cover...
- Page 17 Hang the TV/bracket onto the wall plate NOTE: The TV/bracket can be slid anywhere along the wall plate for optimal positioning of your TV. Lock the TV/bracket onto the wall plate CAUTION: Avoid potential personal injury or property damage! Always make sure your TV/bracket is in the locked position so the TV is securely fastened to the wall plate FRONT VIEW...
- Page 18 Adjustments LEVEL TILT Your TV should adjust Your TV should adjust easily when moved, then stay in place. easily when moved, Adjust the TV balance wheel if your TV naturally tilts up or down. then stay in place. Experiment with multiple revolutions first, then smaller rotation increments to fine tune the TV balance.
- Page 19 TV LATERAL SHIFT REMOVING THE TV HEAVY HEAVY ! You may need assistance with this step. ! You may need assistance with this step. If you need to remove your TV from the wall NOTE: Use two people for this procedure, or remove the TV before starting. plate, disconnect all cables and then reverse Unlock the arm assembly by sliding the lock lever to the unlock position.
-
Page 20: Troubleshooting
Troubleshooting For TVs that come with inset spacers or wall mount adapter rings, Flat Back / Low Profile and your installation requires Use your TV supplied spacers and do not use the Sanus spacer TV Supplied TV Supplied Spacer Spacer... - Page 21 For TVs that come with inset spacers or wall mount adapter rings, Rounded Back / Extra Space and your installation requires TV Supplied Spacers Use the Sanus spacer and longer screws. Do not use your TV supplied spacers. NOTE: If using the M8x35 mm screws you may or may not need the washers depending on length of screw engagement.
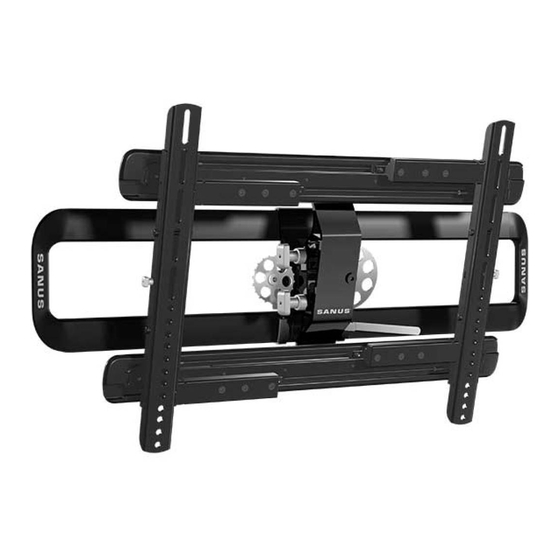
- Page 22 Features Expand the TV bracket to fi t TV hole patterns from 200 x 200 mm Conceal mounting hardware with up to 700 x 400 mm decorative covers for a fi nished look Align the center of gravity of any TV for optimal tilt motion Slide TV side-to-side for perfect positioning on the wall...
- Page 23 Dimensions 27.56 700.0 [mm] 7.87 24.00 200.0 609.6 1.81 16.00 45.9 406.4 7.25 3.90 5.12 15.75 184.2 99.1 129.9 400.0 16.00 406.4 24.00 609.6 30.20 767.1 2.00° ROLL CONTROL 13.07 332.1 15.00° 31.88 3.44 809.7 87.3...
- Page 24 ¿Su televisor pesa más de 81,6 kg (180 libras) incluyendo los accesorios? No — ¡Perfecto! 81,6 kg Sí — Este soporte NO es compatible. Visite MountFinder.Sanus.com o llame al 1-800-359-5520 (Reino Unido: 0800-056-2853) (180 libras) para encontrar un soporte compatible.
- Page 25 ESPAÑOL PASO 1 Colocar la placa de sujeción en el televisor Ver página 3 Piezas y elementos de sujeción para el PASO 1 ADVERTENCIA : Este producto contiene piezas pequeñas que, si fuesen tragadas, podrían producir asfixia. Antes de iniciar el ensamblaje, compruebe que todas las piezas estén incluidas y en buenas condiciones. Si faltan piezas o alguna está dañada, no devuelva el artículo al distribuidor;...
- Page 26 ESPAÑOL 1-4 Acople la placa de sujeción horizontal del televisor Desplace los lados de la placa de sujeción horizontal para alinearlos con las placas de sujeción verticales del televisor Ubique la placa de sujeción horizontal sobre las placas de sujeción verticales deslizando los cuatro pernos dentro de las cuatro pestañas de montaje.
- Page 27 Los centros de los montantes deben verificarse, ya que no todas las paredes tienen el espaciado convencional de 406 mm (16") o 610 mm (24") NOTA: Consulte el documento Presentación del detector de montantes magnético Sanus que se encuentra en la carpeta de bienvenida para obtener instrucciones detalladas sobre la operación del detector de montantes.
- Page 28 Nivele la plantilla de la placa mural y marque la ubicación de los orificios. NOTA: Si necesita ayuda para determinar la ubicación de la placa mural, utilice la herramienta Height Finder disponible en sanus.com.
- Page 29 ESPAÑOL PASO 3 Instalar el televisor en la placa mural Ver página 16 ¡ELEMENTO PESADO! Es posible que necesite ayuda en este paso. Cierre las cubiertas de la placa mural Cerciórese de que la palanca de bloqueo de la placa de sujeción del televisor se encuentre en la posición "desbloqueado".
-
Page 30: Solución De Problemas
VER PÁGINA 18 Para televisores que vienen con espaciadores o anillos adaptadores para soporte mural insertables, y cuya instalación requiere un Dorso plano / Perfil bajo Utilice el espaciador provisto con su televisor y no el espaciador Sanus tornillo. NOTA: Si utiliza los tornillos M8 x 20 mm... - Page 31 Para televisores que vienen con espaciadores o anillos adaptadores para soporte mural insertables, y cuya instalación requiere un Dorso redondeado / Espacio adicional Utilice el espaciador Sanus y los tornillos largos. NO utilice el espaciador provisto con su televisor. NOTA: Si utiliza los tornillos M8 x 35 mm , puede que necesite utilizar las arandelas o no, dependiendo de la longitud del orificio para el tornillo.
- Page 32 Thank you for choosing Sanus! Please take a moment to let us know how we did: Call us: 1-800-359-5520 Email us: info@sanus.com Leave a review: sanus.com UK: 0800 056 2853 Find us on Facebook: SANUS Follow us on Twitter @sanussystems Milestone AV Technologies and its affi liated corporations and subsidiaries (collectively, “Milestone”), intend to make this manual accurate and complete.
Need help?
Do you have a question about the VXT5 and is the answer not in the manual?
Questions and answers