Table of Contents
Advertisement
Quick Links
Advertisement
Table of Contents

Related Manuals for Concept Pro VHDIPL-32


Summary of Contents for Concept Pro VHDIPL-32
- Page 1 VHDIPL-32 32 CHANNEL NVR US ER MANU AL...
-
Page 2: Precautions
Network Video Recorder(NVR) Precautions Precautions Precautions Ensure that this manual is fully understood before using this device, and strictly observe regulations in this document referring to use of cctv systems. If the intention is to install this device in a public place, it is required that the public are made aware of this - "You have entered the area of CCTV surveillance"... - Page 3 Network Video Recorder(NVR) Precautions Strictly conform to local electrical safety standards and use power adapters that are marked with the LPS standard when installing and using this device. Otherwise, this device may be damaged. Use accessories delivered with this device. The voltage must meet input voltage requirements for this device.
- Page 4 Network Video Recorder(NVR) Precautions Special Announcement All complete products sold by the manufacturer are delivered along with nameplates, operation instructions, and accessories after strict inspection. The manufacturer shall not be held responsible for counterfeit products. This manual may contain misprints, technology information that is not accurate enough, or product function and operation description that is slightly inconsistent with the actual product.
-
Page 5: Table Of Contents
Network Video Recorder(NVR) Quick Start Guide Contents Contents Precautions ........................i 1 Specifications ......................1 2 NVR Networking ...................... 3 3 Hard Disk ........................5 3.1 Precautions ........................5 3.2 Hard Disk Recommendation .......... Error! Bookmark not defined. ... -
Page 7: Specifications
Network Video Recorder(NVR) 1 Specifications Specifications System Features Professional high-end SOC chip for NVR, dual-core, 930 MHz dominant frequency, ARM CPU. Operating Embedded Linux operating system. system Embedded complete CMS system, complete functions, user-friendly interface, and simple and easy operation. The unique "quick setup"... - Page 8 Network Video Recorder(NVR) 1 Specifications Quick Start Guide single hard disk is 4 TB. Video Eight 4TB hard disks are used and 32 videos whose highest total rate is 144 retention Mbps can be stored for 20 days. duration Four videos can be played back simultaneously. Video Support video playback based on time axis.
-
Page 9: Nvr Networking
Network Video Recorder(NVR) 2 NVR Networking NVR Networking The NVR has two network ports, LAN1 and LAN2. Two networking solutions are possible, private camera networking mode and open network mode. Solution 1: Camera Private Networking Mode A private network for cameras only include the IP cameras, switch and the VHDIPL, it does not include any other network devices. - Page 10 Network Video Recorder(NVR) 2 NVR Networking Quick Start Guide Solution 2: Open Network Mode (Not recommended, use at own risk) An open network includes many network devices other than just the IP cameras and VHDIPL. The design of an open network can be organised freely so long as the VHDIPL and IP cameras are on the same network, or IP range.
-
Page 11: Hard Disk
Network Video Recorder(NVR) 3 Hard Disk Hard Disk 3.1 Precautions Formatting will clear all video data on the hard disk. Use this function only when necessary. The NVR must be connected to a stable power supply during runtime; otherwise, the hard disk may be damaged or data may be lost. To achieve a balanced performance, more than two pieces of hard disk are recommended. -
Page 12: Operation Instruction
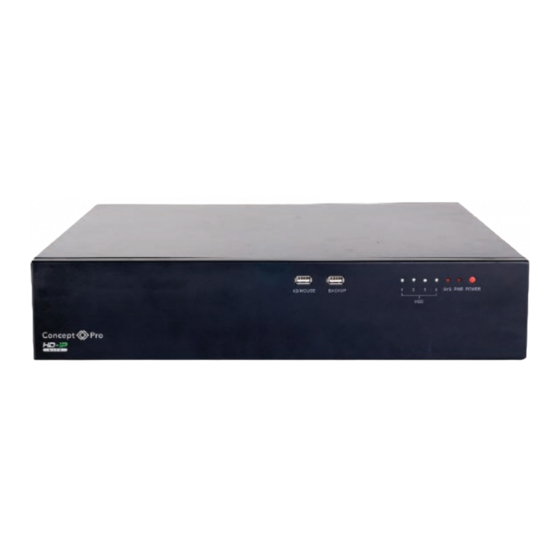
Network Video Recorder(NVR) 4 Operation Instruction Operation Instruction 4.1 Front panel Figure 4-1 shows the front panel of the NVR and Table 4-1 describes the interfaces. Figure 4-1 Front panel Table 4-1 Description of the front panel Name Description KB/MOUSE Input for USB mouse or USB keyboard BACKUP Connection interface for backup based on USB... -
Page 13: Rear Panel
Network Video Recorder(NVR) 4 Operation Instruction 4.2 Rear panel Figure 4-2 shows the rear panel of the NVR and Table 4-2 describes the numbered features. Figure 4-2 Rear panel Table 4-2 Description of the real panel Name Description Ground connector Grounding terminal for the device Power Input switch of the power supply... -
Page 14: Startup
Network Video Recorder(NVR) 4 Operation Instruction In the preceding table, interfaces 4, 5 and 9 are reserved in design and the NVR does not support these interfaces currently. 4.3 Startup Please connect a power supply securely and turn the power switch to the on position, the VHDIPL will then power-on. - Page 15 Network Video Recorder(NVR) 4 Operation Instruction During power-off, the system prompts Powering Off. In this case, do not disconnect the power supply. When the NVR is working, try to avoid disconnecting the power supply by directly pressing the POWER button on the rear panel or removing the power cable. In some environments, if the power source is abnormal, the NVR may not work properly.
-
Page 16: Quick Setup
Network Video Recorder(NVR) 5 Quick Setup Quick Setup To access the quick configuration of the NVR. From the live screen select the 'Quick Setup' tab on the top menu bar. Quick setup allows fast access to all the main features of the NVR, from setting the time and date to configuring the local network and cameras. - Page 17 Network Video Recorder(NVR) 5 Quick Setup Synchronize the time of the network cameras with NVR. You can select the manual mode or automatic mode. To set the time manually, click to open the NVR time configuration window. To synchronize the connected cameras with the NVR, set 'Sync Camera Time' to Area 2: NVR Network Configuration The default IP address of the NVR is: Network1: 192.168.0.121;...
- Page 18 Network Video Recorder(NVR) 5 Quick Setup Formatting will clear all video data on the hard disk. Use this function only when necessary. The NVR must be connected to a stable power supply during runtime; otherwise, the hard disk may be damaged or data may be lost. You can manage the hard disk of the NVR as follows: Format the hard disk.
- Page 19 Network Video Recorder(NVR) 5 Quick Setup Figure 5-3 Page for selecting cameras Select the cameras to managed using the tick boxes (ticking and unticking), then use the arrows to enable the management of the selected IP cameras. Click Apply to complete selection of IP cameras.
- Page 20 Network Video Recorder(NVR) 5 Quick Setup Figure 5-4 Page for searching cameras Click ‘Scan’ to search the network (either local or open) for cameras. Click go to camera management selection page, the page is displayed as shown in Figure 5-5. Select the cameras you want and then click Ok to complete selection of IP cameras.
- Page 21 Network Video Recorder(NVR) 5 Quick Setup Area 6: Authentication accounts of managed cameras Only successfully authenticated cameras can be used normally. Before adding a camera, add the authentication account and password of the camera to the list. To log in to an IP camera, you need to enter the correct authentication account. Only successfully authenticated IP cameras can be managed.
- Page 22 Network Video Recorder(NVR) 5 Quick Setup Figure 5-6 Stream dialog box Set stream parameters, select On for Apply to All Devices, and click Apply. The parameter settings are applied to all IP cameras that have the same resolution as the configured resolution.
-
Page 23: Web Access
Network Video Recorder(NVR) 6 Web Access Web Access The VHDIPL is embedded with a Flash-enabled web server and supports a number of browsers such as Internet Explorer, Chrome, Firefox, and Safari. Operations such as quick setup, live preview, video playback, alarm search, NVR configuration, and camera configuration can be performed via the web. - Page 24 Network Video Recorder(NVR) 6 Web Access The superuser and its password are both admin (case-sensitive). Change the password after the first login. If incorrect passwords are entered more than three times within 1 hour, the user is locked and prevented from logging in. Only the administrator can unlock the user. For details about unlocking, see section 8.1.9 "Account Management"...
-
Page 25: Faq
Network Video Recorder(NVR) Error! Style not defined.Error! Style not Quick Start Guide defined. 1. Why is the NVR self-test screen frozen? Use the methods below to fix the problem: Method 1: Check whether the NVR is equipped with a hard disk. Method 2: Check whether the NVR is equipped with an unformatted hard disk. -
Page 26: A Hazardous Substance Declaration
Error! Style not defined.Error! Style not Network Video Recorder(NVR) defined. Quick Start Guide Hazardous Substance Declaration Hazardous Substance or Element Hexavalent Polybrominated Component Plumbum Mercury Cadmium Polybrominated Chromium Diphenyl Ethers (Pb) (Hg) (Cd) Biphenyls (PBB) (Cr6+) (PBDE) Structural × ○ ○...
Need help?
Do you have a question about the VHDIPL-32 and is the answer not in the manual?
Questions and answers