Table of Contents
Advertisement
Available languages
Available languages
Quick Links
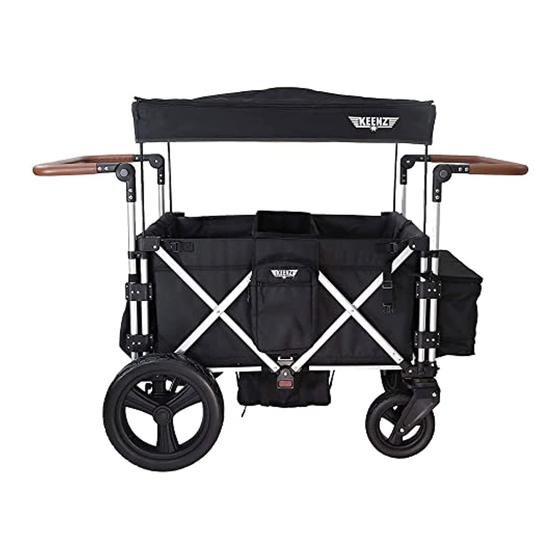
4 Passenger Multipurpose Stroller Wagon
KEENZ is proud to announce the arrival of the next generation folding Stroller Wagon! We've taken
previous designs to the next level with our premium 4 person folding multipurpose Stroller Wagon.
Our new multipurpose Stroller Wagon is the perfect combination of form, function, and utility.
Incorporating an ergonomic design with unrivaled luxury and safety features, our multi-functional
design combines aesthetics with the utility to create the most skillfully crafted folding Stroller
Wagon on the market.
Important-Keep These Instructions For Future Reference.
Instruction Manual
1
English Page 2
French Page 32
Spanish Page 62
U.S. Patent No.: 9,950,729 B2
U.S. Patent No.: 10,106,186 B2
Advertisement
Chapters
Table of Contents

Subscribe to Our Youtube Channel
Related Manuals for KEENZ 7S+


Summary of Contents for KEENZ 7S+
- Page 1 U.S. Patent No.: 10,106,186 B2 4 Passenger Multipurpose Stroller Wagon KEENZ is proud to announce the arrival of the next generation folding Stroller Wagon! We’ve taken previous designs to the next level with our premium 4 person folding multipurpose Stroller Wagon.
-
Page 2: Table Of Contents
4 Customer Assistance and Questions ........pg. 4 Recommended Use of The Product ........pg. 4 Keenz Premium Folding Multipurpose Stroller Wagon ..pg. 5 - What’s In The Box.............. pg. 5 - WARNINGS AND GENERAL SAFETY INFORMATION....pg. 6 Assembly Instructions ............ - Page 3 Product Registration For Safety Alert or Recall Only....pg. 27 Care and Maintenance............pg. 27 - WARNINGS AND INSTRUCTIONS......... pg. 27 - Frame and Fabric Care............pg. 28 KEENZ limited Warranty............ pg. 28 Manuel d’utilisation....pg. 32 ........pg. 62 Manual de Instrucciones............
-
Page 4: Importance Of These Instructions
• Your new Keenz premium Multipurpose Stroller Wagon is suitable for use with up to four children using the 5-point safety harness located in the fore and aft sections of the product. -
Page 5: Keenz Premium Folding Multipurpose Stroller Wagon
Keenz Premium Folding Multipurpose Stroller Wagon What's In The Box Canopy assembly with Stroller assambly with Cooler Bag Tread Plate Cover storage bag travel cover All-Terrain Locking rear axle All-Terrain Rear wheels All-Terrain Front wheels... -
Page 6: Warnings And General Safety Information
WARNINGS AND GENERAL SAFETY INFORMATION WARNING • Only for children ages 12 months and older. Not suitable for younger children due to minimum balance and coordination required for safe use. • Never leave children unattended. • Do not let your child play with this product. •... - Page 7 • Regularly check hardware and parts. Do not use the product if any hardware or parts are damaged or broken. • Contact KEENZ Customer Service for replacement parts or service questions by email at support@keenz.us or phone +1 855-569-5336 or visit us online at https://keenz.us.
-
Page 8: Assembly Instructions
ASSEMBLY INSTRUCTIONS WARNING • Choking hazard to children under 3 years – contains small parts. • During unpacking and assembly, make sure all parts and plastic storage bags are accounted for and kept out of the reach of children. Ensure all fasteners are fully tightened. •... -
Page 9: Installing Front Wheels
ASSEMBLY INSTRUCTIONS INSTALLING FRONT WHEELS STEP 1: Refer to page 11 for unfolding instructions; Adjust handles as shown and invert Stroller Wagon so that it rests on the handles. STEP 2: Push and hold the wheel lock button. STEP 3: Insert wheel on the Stroller Wagon frame. -
Page 10: Installing Rear Axle
ASSEMBLY INSTRUCTIONS INSTALLING REAR AXLE STEP 1: Position rear axle on STEP 2: Lift locking tabs on each side and secure the axle to the frame of Stroller Wagon frame with locking tabs the Stroller Wagon. facing outward as shown below. STEP 3: While lifting locking tabs, STEP 4: Axle shown properly push axle assembly down on frame... -
Page 11: Unfolding And Locking The Product
ASSEMBLY INSTRUCTIONS UNFOLDING AND LOCKING THE PRODUCT STEP 1: Unlock the top buckle. STEP 2: Pull product open to unfold. STEP 3: When product is in the unfolded position, STEP 4: Insert middle member of buckle the strap on the underside of the product. the product frame under the The product cannot be folded when the strap is fabric on each side as shown. -
Page 12: Installing The Canopy
ASSEMBLY INSTRUCTIONS WARNING • Ensure that all locking devices are engaged before use. • Check that the fabric is correctly engaged before use. • Check that Stroller Wagon compartment (pram) is correctly engaged before use. INSTALLING THE CANOPY STEP 1: Canopy supports are released by sliding and holding button. -
Page 13: Folding And Locking The Product
INSTRUCTIONS FOR USE FOLDING AND LOCKING THE PRODUCT STEP 1: Reverse the 3 steps shown on page 12 STEP 2: Fold storage bin up and secure to remove canopy and lower the 4 supports with strap and buckle. STEP 4: Turn product on its side and STEP 3: Pull fabric off frame where shown unbuckle the strap on the underside of the and place fabric behind frame for easy... -
Page 14: Safety Warnings For Folding And Locking The Product
SAFETY WARNINGS FOR FOLDING AND LOCKING THE PRODUCT WARNING • To keep the product stable when folded, always make sure to secure the top buckle. The top buckle is engaged when you hear an audible “click.” • There are pinch points between the product supports and frame that may injure fingers. Stay clear of pinch points when opening or closing the product or when making adjustments. -
Page 15: Warnings And Instructions For 5-Point Safety Harness
WARNINGS AND INSTRUCTIONS FOR 5-POINT SAFETY HARNESS WARNING • This product is only suitable for children ages 12 months and older. It is not suitable for younger children due to minimum balance and coordination required for safe use. • Never leave children unattended. •... -
Page 16: Changing Shoulder Harness Anchor Points
CHANGING SHOULDER HARNESS ANCHOR POINTS The shoulder harness straps can be adjusted To move shoulder harness straps to lower to fit your child. Use the top anchor point for position, unbuckle shoulder harness straps children weighing 40 – 45 lbs. Use the lower from harness, undo snaps and Velcro closure anchor points for children weighing and pull shoulder harness straps back... -
Page 17: Operating Stroller Wagon
OPERATING STROLLER WAGON WITH FRONT HANDLE STEP 1: Adjust the handle to a comfortable STEP 2: Secure the storage bin with position. If transporting one child or a heavy the buckle strap for added comfort load, secure the child in the 5-point harness and to prevent it from hitting your legs closest to you. -
Page 18: Footwell
OPERATING STROLLER WAGON OPEN FOOTWELL STEP 1: Open the zipper on the Footwell STEP 2: Detach cover plate STEP 4: Storage the Footwell cover plate STEP 3: Push to unfold the footwell CLOSE FOOTWELL STEP 1: Put the cover plate back on the initial STEP 2: Zip the cover plate to the wagon position... -
Page 19: Safety Warnings For Transporting Children
OPERATING STROLLER WAGON SAFETY WARNINGS FOR TRANSPORTING CHILDREN WARNING • Only for children ages 12 months and older. Not suitable for younger children due to minimum balance and coordination required for safe use. • Never leave children unattended. • Do not let your child play with this product. •... -
Page 20: Operating Stroller Wagon In Folded Position
WARNING • Ensure that all locking devices are engaged before use. • Ensure that all fasteners (nuts & bolts) are tightened and secure before use. • Check that the fabric is correctly engaged before use. • Check that Stroller Wagon compartment (pram) is correctly engaged before use. •... -
Page 21: Safety Warnings For Operating Product In Folded Position
SAFETY WARNINGS FOR OPERATING PRODUCT IN FOLDED POSITION WARNING • Do not transport children when product is in the folded position. • Do not let your child play with this product. • The product may become unstable if the manufacturer’s recommended load is exceeded. •... -
Page 22: Stroller Wagon Braking Systems
STROLLER WAGON BRAKING SYSTEMS FRONT WHEEL BRAKES LOCKING REAR AXLE TO LOCK: Step downward on the top of the TO LOCK: Step downward on the top of the pedal of each wheel. Push down on the pedal pedal as far as the pedal will go. Make sure with your foot as far as the pedal will go. -
Page 23: Removing Stroller Wagon Wheels
REMOVING STROLLER WAGON WHEELS REMOVE REAR AXLE STEP 1: Invert Stroller Wagon as shown on page 10.Pull up on lock on each side as shown. STEP 2: While pulling up the lock, lift the rear axle to remove from frame. REMOVING REAR WHEELS Wheels can be left on rear axle or removed. -
Page 24: Multiple Uses
STORAGE BIN The storage bin/cooler must be attached OPENING STORAGE BIN to front end so that the brake easily accessible. If storage bin is folded up, undo the buckle to open it. REMOVING STORAGE BIN INSTALLING STORAGE BIN STEP 1: Make sure storage bin is empty before STEP 1: Go to front of Stroller Wagon and attempting to remove it from the Stroller Wagon. -
Page 25: Opening And Closing The Mesh Top
OPENING & CLOSING THE MESH TOP OPENING MESH TOP CLOSING MESH TOP STEP 1: Using the two zippers on each STEP 1: Using the two zippers on each side, unzip the mesh top in any direction. side, zip the mesh top closed. STEP 2: The mesh top can be opened on both STEP 2: Finish securing the top using the the front and the back at the same time. -
Page 26: Removing Fabric
REMOVING FABRIC HOW TO REMOVE FABRIC FOR CLEANING STEP 1: Turn the product on its side. STEP 2: Undo all buckles. Remove underside strap from frame and undo Velcro straps from frame. STEP 3: On the rear of the Stroller Wagon, STEP 4: Repeat step 3 on the front of the unfasten Velcro and snaps, remove harness Stroller Wagon. -
Page 27: Product Registration For Safety Alert Or Recall Only
• Product is flammable. Do not use near open flame or other sources of heat. • Regularly check hardware, fasteners and parts. Do not use the product is any hardware, fastener or part is missing, damaged or broken. • Contact KEENZ Customer Service for replacement parts or service questions at https://keenz.us phone: +1 855-569-5336 or email to support@keenz.us... -
Page 28: Keenz Limited Warranty
KEENZ warrants that this product will be free from defects in material and workmanship occurring under normal use for a period limited to six (6) months from the date of the original purchase if the product is not registered with KEENZ, or one (1) year from the date of original purchase if the product is registered with KEENZ within six (6) months of the original purchase date of the product. - Page 30 For More Information: email: support@keenz.us https://keenz.us...
- Page 31 U.S. Patent No.: 10,106,186 B2 Chariot poussette polyvalent à 4 passagers KEENZ est fier d’annoncer l’arrivée de la nouvelle génération de chariot poussette pliant! Nous avons porté les conceptions précédentes au niveau supérieur avec notre chariot poussette pliant et polyvalent haut de gamme pour 4 personnes. Notre nouveau chariot poussette polyvalent est la combinaison parfaite de forme, de fonction d’utilitaire.
-
Page 32: Manuel D'utilisation
Assistance Clientèle et Questions ........pg. 34 Utilisation Recommandée Du Produit ......... pg. 34 Chariot Poussette à Usage Multiple Haut de Gamme Keenz . pg. 35 - Inclu Dans l’Emballage ............. pg. 35 - AVERTISSEMENT ET AVIS GENERAL DE SECURITE.... - Page 33 56 Enregistrement du Produit pour des Rappels de Sécurité ..pg. 57 Soin et Entretien ..............pg. 57 - AVERTISSEMENT ET INSTRUCTIONS........pg. 57 - Entretien de l’Armature et de la Toile........pg. 58 KEENZ Garantie Limitée............ pg. 58...
-
Page 34: Instructions Importantes
• Votre nouveau chariot poussette polyvalent premium Keenz peut être utilisé avec quatre enfants maximum utilisant le harnais de sécurité à 5 points situé dans les sections avant et arrière du produit. -
Page 35: Chariot Poussette À Usage Multiple Haut De Gamme Keenz
Chariot Poussette à Usage Multiple Haut de Gamm Keenz Inclu Dans l’Emballage Ensemble du toit Ensemble poussette Une glacière Couverture de avec sac de avec housse de plaque de bande de rangement voyage roulement Essieu arrière verrouillable tout-terrain Roues arrière tout-terrain... -
Page 36: Avertissement Et Avis General De Securite
AVERTISSEMENT ET AVIS GENERAL DE SECURITE ATTENTION • Recommandé pour les enfants de plus de 12 mois. Non recommandé pour des enfants plus jeunes à cause d’un minimum d’équilibre et de coordination nécessaire pour une utilisation sans danger. • Ne jamais laisser un enfant sans surveillance. •... - Page 37 • Contrôler régulièrement les pièces et matériaux. Ne pas utiliser si les pièces ou matériaux de ce produit sont cassés ou endommagés. • Contactez le service client KEENZ pour les pièces de rechange ou les questions de service par e-mail à l’adresse support@keenz.us ou par téléphone au...
-
Page 38: Instructions D'assemblage
INSTRUCTIONS D’ASSEMBLAGE ATTENTION • Risque d’étranglement pour les enfants de moins de 3 ans- présence de petites pièces. • Pendant le désemballage et l’assemblage, s’assurer que toutes les pièces et sac en plastique de pièces soient là et les garder hors de porté des enfants. Bien serrer à fond toutes les attaches. DESEMBALLAGE ET POSITIONEMENT POUR ASSEMBLAGE ETAPE 1: Enlever toutes les pièces du carton, des sacs en plastique et des sacs... -
Page 39: Montage Des Roues Avant
INSTRUCTIONS D’ASSEMBLAGE MONTAGE DES ROUES AVANT ETAPE 1: Consulter la page 41 pour les instructions de dépliage; Régler les poignées (voir photo) et renverser le chariot pour qu’il repose sur les poignées. ETAPE 2: Pousser et tenir le bouton de verrouillage de la roue. -
Page 40: Montage De L'essieu Arrière
INSTRUCTIONS D’ASSEMBLAGE MONTAGE DE L’ESSIEU ARRIERE ETAPE 2: Lever les manettes de verrouillage ETAPE 1: Positionner l’essieu arrière sur de chaque côté et sécuriser l’essieu sur le le châssis du chariot poussette (voir ci- dessous). châssis du chariot poussette. ETAPE 3: Lever les manettes de ETAPE 4: Vue de l’essieu verrouillé... -
Page 41: Dépliage Et Verrouillage Du Produit
INSTRUCTIONS D’ASSEMBLAGE DEPLIAGE ET VERROUILLAGE DU PRODUIT ETAPE 1: Décrocher la boucle sur le dessus. ETAPE 2: Tirer sur le produit pour le déplier. ETAPE 3: Une fois le produit déplié, raccrocher ETAPE 4: Insérer le morceau du milieu de la sangle sous le produit. -
Page 42: Installation Du Toit En Tissu
INSTRUCTIONS D’ASSEMBLAGE ATTENTION • Vérifier que les verrouillages soient enclanchés avant utilisation. • Vérifier que la toile soit correctement sécurisée avant utilisation. • Vérifier que le compartiment (pram) du chariot poussette soit correctement attaché avant utilisation. INSTALLATION DU TOIT ETAPE 1: Libérer les supports du toit en appyuant sur le bouton. -
Page 43: Plier Et Verrouiller Le Produit
INSTRUCTIONS D’ASSEMBLAGE PLIER ET VERROUILLER LE PRODUIT ETAPE 2: Plier le panier de rangement et ETAPE 1: Inverser les 3 étapes indiquées à la page 42 pour enlever le toit. l’attacher avec la sangle et la boucle. ÉTAPE 4: tourner le produit sur son côté et ETAPE 3: Enlever le tissu de l’armature et détacher la sangle sur la face inférieure pour faciliter le pliage. -
Page 44: Avertissement Pour Le Pliage Et Verrouillage Du Produit
AVERTISSEMENT PLIAGE ET VERROUILLAGE DU PRODUIT ATTENTION • Le produit peut devenir instable. Après le pliage du produit, il faut s’assurer que la sangle soit accrochée. La sangle est accrochée quand vous entendez un “clique.” • Des risques de pincements existent entre les supports du produit et l’armature pouvant créer des blessures aux doigts. -
Page 45: Avertissement Et Instructions Pour Le Harnais A 5-Points
AVERTISSEMENT ET INSTRUCTIONS POUR LE HARNAIS A 5-POINTS ATTENTION • Recommandé pour les enfants de plus de 12 mois. Non recommandé pour des enfants plus jeunes à cause d’un minimum d’équilibre et de coordination nécessaire pour une utilisation sans danger. •... -
Page 46: Changement Des Points D'attache À L'epaule Du Harnais
CHANGEMENT DES POINTS D’ATTACHE A L’EPAULE DU HARNAIS La ceinture à hauteur des épaules s’ajuste Pour baisser la position des attaches du pour votre enfant. Utiliser le point d’attache du harnais, défaire les attaches du harnais au haut pour les enfants entre 40-45 lbs. Utiliser niveau des épaules, puis les fermoirs et le les points d’attache du bas pour les enfants de revers avec Velcro et repasser les sangles à... -
Page 47: Mode Opératoire Du Chariot Poussette
MODE OPERATOIRE DU CHARIOT POUSSETTE AVEC LA POIGNEE AVANT ETAPE 2: Sécuriser le panier de ETAPE 1: Régler la poignée à une hauteur rangement avec la sangle pour plus de confortable. Lors du transport d’un enfant ou confort et pour éviter des blessures à d’un objet lourd, placer l’enfant dans le harnais cause d’impacts aux jambes. -
Page 48: Espace Pour Les Pieds Extensible
MODE OPERATOIRE DU CHARIOT POUSSETTE ESPACE POUR LES PIEDS EXTENSIBLE ETAPE 2: Détacher la plaque de ETAPE 1: Ouvrez la fermeture éclair sur le recouvrement Footwell ETAPE 4: Rangement de la plaque de ETAPE 3: Pousser pour déplier le plancher recouvrement su plancher FERMETURE DU PLANCHER ETAPE 1: Remettez le couvercle en position... -
Page 49: Avertissement Pour Le Transport D'enfants
MODE OPERATOIRE DU CHARIOT POUSSETTE AVERTISSEMENT POUR LE TRANSPORT D’ENFANTS ATTENTION • Recommandé pour les enfants de plus de 12 mois. Non recommandé pour des enfants plus jeunes à cause d’un minimum d’équilibre et de coordination nécessaire pour une utilisation sans danger. •... -
Page 50: Utilisation Du Chariot Poussette En Position Fermée
ATTENTION • Vérifier que le compartiment (pram) du chariot poussette soit correctement attaché avant utilisation. • Ne pas utiliser comme siège auto ou pour transporter des enfants dans un véhicule à moteur. • Ne pas s’assoir sur le panier de rangement ou le toit. Cela peut écraser ou rendre le produit instable. •... -
Page 51: Avertissement Pour L'utilisation En Position Fermee
AVERTISSEMENT POUR L’UTILISATION EN POSITION FERMEE ATTENTION • Ne pas transporter d’enfants en position fermée. • Ne jamais laisser un enfant jouer avec ce produit. • Ce produit peut devenir instable si le poids recommandé par le fabriquant est dépassé. •... -
Page 52: Systèmes De Freinage Du Chariot Poussette
SYSTEMES DE FREINAGE DU CHARIOT POUSSETTE FREIN AUX ROUES AVANT VERROUILLAGE ESSIEU ARRIERE POUR BLOQUER: Appuyer sur la pédale à POUR BLOQUER: Appuyer à fond sur la chaque roue. Appuyer à fond sur la pédale pédale avec votre pied. Vérifier que les avec votre pied. -
Page 53: Démontage Des Roues Du Chariot Poussette
DEMONTAGE DES ROUES DU CHARIOT DEMONTAGE DE L’ESSIEU ARRIERE ETAPE 1: Renverser le chariot comme à la page 40. Tirer sur les verrouillages de chaque côté. (voir photo). ETAPE 2: Tout en tirant sur les verrouillages, lever l’essieu arrière et le séparer du châssis. -
Page 54: Usage Multiple
PANIER DE RANGEMENT Le bac de stockage/refroidisseur doit être fixé à OUVERTURE DU PANIER DE l’extrémité avant de manière à ce que la rupture soit RANGEMENT facilement accessible. Si le panier de rangement est plié, défaire la sangle pour l’ouvrir. DEMONTAGE DU PANIER DE RANGEMENT INSTALLATION DU PANIER DE RANGEMENT ETAPE 1: Vérifier que le panier de rangement soit... -
Page 55: Ouverture Et Fermeture Du Toit En Toile
OUVERTURE ET FERMETURE DU TOIT EN TOILE OUVERTURE DU TOIT EN TOILE FERMETURE DU TOIT EN TOILE ETAPE 1: Défaire les deux fermetures ETAPE 1: Fermer le toit en toile avec éclaires de chaque côté quel que soit la les deux fermetures éclaires de direction. -
Page 56: Enlever La Toile
ENLEVER LA TOILE COMMENT ENLEVER LA TOILE POUR LA NETTOYER TAPE 1: Mettre le chariot poussette sur ETAPE 2: Défaire les boucles. le côté et défaire les sangles sous la poussette. ETAPE 3: A l’arrière du chariot poussette, ETAPE 4: Répéter l’étape 3 à l’avant du défaire les Velcro les attaches, enlever les Chariot Poussette. -
Page 57: Soin Et Entretien
ENREGISTREMENT DU PRODUIT POUR DES RAPPELS DE SECURITE, PROTECTION ET ENTRETIENT Enregistrer votre Chariot Poussette KEENZ en ligne à https://keenz.us/productregistration ou remplisser la carte d’enregistrement pré-timbrée avec ses instructions et la poster immédiatement. Nous utilisons les informations que vous nous donnez pour vous contacter s’il y a des alertes de sécurité... -
Page 58: Entretien De L'armature Et De La Toile
KEENZ garantie que son produit est sans défaut dans la matière et dans sa fabrication pendant une durée limitée à six (6) mois après la date d’origine d’achat sous usage normal si le produit n’est pas enregistré avec KEENZ, ou un (1) an après la date d’origine d’achat si le produit est enregistré... - Page 60 Para mas informacion: email: support@keenz.us https://keenz.us...
- Page 61 U.S. Patent No.: 10,106,186 B2 Vagón cochecito multiusos para 4 pasajeros KEENZ se enorgullece en anunciar la llegada de la nueva generación de Vagón cochecito premium multiusos plegable! Hemos llevado los diseños anteriores al siguiente nivel con nuestro Vagón cochecito multifunción plegable premium para 4 personas. Nuestro nuevo Vagón cochecito multiusos es la combinación perfecta de forma, función y utilidad.
- Page 62 64 Asistencia al cliente y preguntas ......... pg. 64 Uso recomendado del producto .......... pg. 64 Keenz Premium Vagon Cochecito plegable Multiusos.... pg. 65 - Qué viene en la caja ............pg. 65 - ADVERTENCIAS E INFORMACIÓN GENERAL DE SEGURIDAD Instrucciones de armado ............
- Page 63 86 Registro del producto para alertas de seguridad....pg. 87 Cuidado y mantenimiento ..........pg. 87 - ADVERTENCIAS E INSTRUCCIONES........pg. 87 - Cuidado del marco y de la tela ......... pg. 87 Garantía limitada de KEENZ ........... pg. 88...
-
Page 64: Importancia De Estas Instrucciones
• Su nuevo Keenz Premium Vagon Cochecito Multiusos, es adecuado para usar con hasta 4 niños, utilizando el arnés de seguridad de 5 puntos situado en las secciones delantera y trasera del producto. -
Page 65: Keenz Premium Vagon Cochecito Plegable Multiusos
KEENZ PREMIUM - Vagon Carreola plegable multiusos QUÉ HAY EN LA CAJA Toldo con bolsa de Funda de viaje para el Bolsa enfriadora Cubierta de espacio almacenamiento cochecito para pies Eje trasero con bloqueo todo terreno LLantas traseras todo LLantas delanteras todo... -
Page 66: Advertencias E Información General De Seguridad
ADVERTENCIAS E INFORMACIÓN GENERAL DE SEGURIDAD ADVERTENCIA • Sólo para niños de 12 meses o más. No es adecuado para los niños más pequeños debido al equilibrio mínimo y la coordinación necesaria para un uso seguro. • Nunca deje a los niños desatendidos. •... - Page 67 • Revise regularmente la estructura y las piezas. No utilice el producto si la estructura o las piezas están dañadas o rotas. • Póngase en contacto con el centro de atención al cliente de KEENZ para obtener información sobre piezas de repuesto o servicio técnico en https://keenz.us...
-
Page 68: Montaje
INSTRUCCIONES DE MONTAJE ADVERTENCIA WARNING WARNING • Riesgo de asfixia para niños menores de 3 años - contiene piezas pequeñas. • Durante el montaje y desmontaje, asegúrese de que todas las piezas y bolsas de plástico se mantengan fuera del alcance de los niños. Todos los sujetadores deben estar completamente apretados. -
Page 69: Instalación De Las Ruedas Delanteras
INSTRUCCIONES DE MONTAJE INSTALACIÓN DE LAS RUEDAS DELANTERAS Paso 1: Consulte la página 71 para instrucciones de despliegue; Ajuste las manijas como se muestra e invierta la Carriola Vagon para que descanse sobre las mismas. PASO 2: Presione y mantenga así el botón del seguro de la rueda Paso 3: Insertar la rueda en el armazón de la Carriola Vagon. -
Page 70: Instalación Del Eje Trasero
INSTRUCCIONES DE MONTAJE INSTALACIÓN DEL EJE TRASERO PASO 1: Coloque el eje trasero en la PASO 2: Levante las lengüetas del estructura del vagón cochecito mirando hacia seguro de cada lado y asegure el eje a la afuera como se muestra a continuación. estructura del carro. -
Page 71: Abrir Y Asegurar El Producto
INSTRUCCIONES DE MONTAJE DESPLIEGUE Y ASEGURAMIENTO DEL PRODUCTO PASO 1: Desabroche la hebilla superior. Paso 2: Abra el producto para desplegarlo PASO 3: Cuando el producto esté en la posición Paso 4: Inserte la parte media de la estructura desplegada, deslice la correa en la parte inferior bajo la tela a cada lado como se muestra. -
Page 72: Instalación Del Techo
INSTRUCCIONES DE MONTAJE ADVERTENCIA WARNING WARNING WARNING • Para evitar lesiones, asegúrese de que su niño se mantenga alejado al plegar y desplegar este producto. • Asegúrese de que todos los dispositivos de seguridad estén enganchados antes de su uso. •... -
Page 73: Plegado Y Aseguramiento Del Producto
INSTRUCCIONES DE MONTAJE PLEGADO Y ASEGURAMIENTO DEL PRODUCTO PASO 1: Invierta los 3 pasos que se muestran PASO 2: pliegue la caja de en la página 72 para quitar el toldo y bajar los 4 almacenamiento y asegúrela con la soportes correa y la hebilla. -
Page 74: Advertencias De Seguridad Para Plegar Y
ADVERTENCIAS DE SEGURIDAD PARA PLEGAR Y ASEGURAR EL PRODUCTO ADVERTENCIA WARNING WARNING WARNING WARNING • Para mantener el producto estable cuando está plegado, siempre confirme que la hebilla superior esté asegurada. la hebilla superior se activa cuando se escucha claramente un “click” •... -
Page 75: Advertencias E Instrucciones Para El Arnés De
ADVERTENCIAS E INSTRUCCIONES PARA UN ARNÉS DE SEGURIDAD DE 5 PUNTOS ADVERTENCIA WARNING WARNING • Este producto sólo es adecuado para niños de 12 meses de edad o mayores. No es adecuado para niños más pequeños debido al equilibrio mínimo y la coordinación necesaria para un uso seguro. •... -
Page 76: Ajuste De La Longitud Del Arnés De Seguridad
AJUSTE DE LA LONGITUD DEL ARNÉS DE SEGURIDAD Tanto el cinturón del hombro como el del de Ajuste según sea necesario y reacomode las regazo son ajustables. Desabroche las correas almohadillas. Asegúrese de que las correas para quitar las almohadillas. no estén demasiado sueltas o demasiado apretadas. -
Page 77: Funcionamiento De La Vagon Cochecito
FUNCIONAMIENTO DE LA VAGON CARRIOLA CON MANIJA DELANTERA PASO 1: Ajuste la manija a una posición PASO 2: Asegure el compartimiento de cómoda. Si transporta un niño o una carga almacenamiento con la correa de la hebilla pesada, asegure al niño en el arnés de 5 puntos para mayor comodidad y para evitar que se más cercano a usted. -
Page 78: Espacio Para Los Pies
FUNCIONAMIENTO DE LA VAGON CARRIOLA ABRIR ESPACIO PARA LOS PIES PASO 1: Abra el cierre PASO 2: Retire la placa de cubierta del espacio para los pies PASO 4: Guarde la placa de la cubierta PASO 3: Empuje para desplegar el espacio del espacio para los pies para los pies CERRAR ESPACIO PARA LOS PIES... -
Page 79: Advertencias De Seguridad Para El Transporte De
FUNCIONAMIENTO DE LA VAGON CARRIOLA ADVERTENCIAS DE SEGURIDAD PARA EL TRANSPORTE DE NIÑOS ADVERTENCIA • Sólo para niños de 12 meses o más. No es adecuado para los niños más pequeños debido al equilibrio mínimo y la coordinación necesaria para un uso seguro. •... -
Page 80: Funcionamiento De La Vagon Carreola En Posición Plegada
ADVERTENCIA WARNING WARNING • Asegúrese de que todos los dispositivos de seguridad estén enganchados antes de su uso. • Compruebe que la tela esté colocada correctamente antes de usarla. • Compruebe que el compartimiento del vagón cochecito esté correctamente colocado antes de usarlo. -
Page 81: Advertencias De Seguridad Para El
ADVERTENCIAS DE SEGURIDAD PARA EL FUNCIONAMIENTO DEL PRODUCTO EN POSICIÓN PLEGADA ADVERTENCIA • No transporte niños cuando el producto está en la posición plegada. • No deje que su niño juegue con este producto. • El producto puede volverse inestable si se supera la carga recomendada por el fabricante. •... -
Page 82: Sistemas De Frenos De La Vagon Carreola
SISTEMAS DE FRENADO DE LA CARRIOLA VAGONETA FRENOS DE LA RUEDA SEGURO DEL EJE TRASERO DELANTERA PARA BLOQUEAR: Ponga el pie en la PARA BLOQUEAR: Ponga el pie en el pedal y parte superior del pedal de cada rueda y presione hacia abajo tan lejos como llegue presione hacia abajo hasta donde llegue el pedal. -
Page 83: Cómo Quitar Las Ruedas De La Vagon Cochecito
ADVERTENCIA • No se estacione en superficies elevadas o inclinadas con niños a bordo, incluso si los frenos están puestos. DESMONTAJE DE LAS RUEDAS DE LA VAGON CARRIOLA DESMONTAJE DEL EJE TRASERO PASO 1: Voltee la Vagón Cochecito como se muestra en la página 70. Jale hacia arriba el seguro de cada lado como se muestra. -
Page 84: Usos Múltiples
COMPARTIMIENTO DE ALMACENAMIENTO USOS MÚLTIPLES ABRIENDO EL COMPARTIMIENTO DE ALMACENAMIENTO El contenedor puede usarse para sostener la bolsa Si el compartimiento de almacenamiento de refrigeración u otro equipo esencial. También está plegado, desabroche la hebilla para cuenta con un compartimento con un fondo de abrirlo. -
Page 85: Instalación Del Compartimiento De Almacenamiento
APERTURA Y CIERRE DE LA MALLA SUPERIOR ABRIENDO LA MALLA SUPERIOR CERRANDO LA MALLA SUPERIOR Paso 1: Usando los cierres de cada lado, Paso 1: Usando los cierres de cada abra la malla en cualquier dirección. lado, cierre la malla. Paso 2: La malla superior puede ser abierta PASO 2: Termine asegurando la parte tanto del frente como de la parte trasera al... -
Page 86: Cómo Quitar La Tela Para Limpiarla
QUITANDO LA TELA COMO QUITAR LA TELA PARA LIMPIARLA PASO 1: Ponga el producto de lado y PASO 2: Quite los seguros Retire la correa de la parte inferior del marco, y deshaga las correas de velcro de la parte inferior. PASO 3: En la parte trasera del Vagón PASO 4: Repita el paso tres pero en la parte Cochecito, suelte el velcro y los broches a... -
Page 87: Registro Del Producto Para Alertas De Seguridad
• Revise el equipo, pernos, tornillos y piezas regularmente. No utilice el producto si faltan pernos, tornillos o piezas, están dañados o rotos • Comuníquese con el área de servicio al cliente de KEENZ en EE. UU. Para obtener piezas de repuesto o preguntas de servicio por correo electrónico a support@keenz.us o... -
Page 88: Garantía Limitada De Keenz
KEENZ garantiza que este producto estará libre de defectos en materiales y mano de obra que ocurran bajo uso normal por un período limitado a seis (6) meses a partir de la fecha de la compra original si el producto no está registrado con KEENZ, o un (1) año a partir de la fecha de compra original si el producto está... - Page 90 Para mayor informacion: email: support@keenz.us https://keenz.us...
Need help?
Do you have a question about the 7S+ and is the answer not in the manual?
Questions and answers