Table of Contents
Advertisement
Available languages
Available languages
Quick Links
Instruction Manual
English Page 2
French Page 25
Spanish Page 47
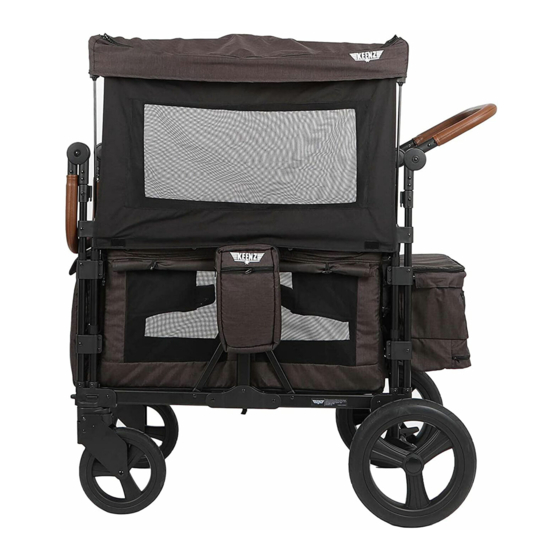
2 Passenger Multipurpose Stroller Wagon
KEENZ is proud to announce the arrival of the next generation folding Stroller Wagon! We've taken
previous designs to the next level with our premium 2 person folding multipurpose Stroller Wagon.
Our new multipurpose Stroller Wagon is the perfect combination of form, function, and utility.
Incorporating an ergonomic design with unrivaled luxury and safety features, our multi-functional
design combines aesthetics with the utility to create the most skillfully crafted folding Stroller
Wagon on the market.
Important-Keep These Instructions For Future Reference.
1
Advertisement
Chapters
Table of Contents

Related Manuals for KEENZ XC


Summary of Contents for KEENZ XC
- Page 1 Spanish Page 47 2 Passenger Multipurpose Stroller Wagon KEENZ is proud to announce the arrival of the next generation folding Stroller Wagon! We’ve taken previous designs to the next level with our premium 2 person folding multipurpose Stroller Wagon. Our new multipurpose Stroller Wagon is the perfect combination of form, function, and utility.
-
Page 2: Table Of Contents
Rear-wheel Brake Operation..........pg. 19 Product Registration For Safety Alert or Recall Only....pg. 20 Care and Maintenance............pg. 20 Warnings and Instructions............ pg. 20 KEENZ limited Warranty............pg. 21 pg. 25 Manuel d’utilisation............pg. 47 Manual de Instrucciones............ -
Page 3: Importance Of These Instructions
• Your new Keenz XC Multipurpose Stroller Wagon is suitable for use with up to two children using the 5-point safety harness located in the fore and aft sections of the product. -
Page 4: What's In The Box
Keenz XC Folding Multipurpose Stroller Wagon 1. Canopy 6. Front Wheel Orientation Button 2. Handle Adjustment Button 7. Rear Wheel Brake Pedal 3. Removable Seat Fabric 8. Front Wheel Brake Pedal 4. Basket 9. Front Wheel 5. Storage Bin 10. Rear Wheel... -
Page 5: Warnings And General Safety Information
WARNINGS AND GENERAL SAFETY INFORMATION WARNING • This product is only suitable for children ages 6 months and older. It is not suitable for younger children due to the minimum balance and coordination required for safe use. • Never leave children unattended. •... - Page 6 • Regularly check hardware and parts. Do not use the product if any hardware or parts are damaged or broken. • Contact KEENZ Customer Service for replacement parts or service questions by email at support@keenz.us or phone +1 855-569-5336 or visit us online at https://keenz.us.
- Page 7 ASSEMBLY INSTRUCTIONS WARNING • Choking hazard to children under 3 years – contains small parts. • During unpacking and assembly, make sure all parts and plastic storage bags are accounted for and kept out of the reach of children. Ensure all fasteners are fully tightened. •...
-
Page 8: Rear Wheels Installation And Removal
ASSEMBLY INSTRUCTIONS REAR WHEELS INSTALLATION AND REMOVAL STEP 1: Align the rear wheelset axle with the hole in the rear foot socket and insert it until a ringing snap is heard. Pull the wheelset in the opposite direction to confirm that the wheelset is in place. STEP 2: Insert a single rear wheel into the wheel hole laterally. -
Page 9: Front Wheels Installation And Removal
ASSEMBLY INSTRUCTIONS FRONT WHEELS INSTALLATION AND REMOVAL FRONT-WHEEL INSTALLATION: align the shaft of the front wheel group with the hole of the front foot tube seat and insert it until you hear the ringing sound, and pull the wheel in the opposite direction to confirm whether the wheel is installed in place. -
Page 10: Seats Installation
ASSEMBLY INSTRUCTIONS SEATS INSTALLATION First put the seat (1)(2) into the compartment as shown in the picture, and then put the seat back webbing pass through the hole in the carriag wall, bypass the horizontal tube and buckle (3), and then hang six hooks on the walls (4), complete the seat installation (5), the other is the same. -
Page 11: Tray Installation
ASSEMBLY INSTRUCTIONS TRAY INSTALLATION INSTALLING KEENZ XC TRAY: Lower the beverage rack to the middle position of the body and hang the beverage rack with four hooks on both sides of the body. Similarly, remove the beverage rack hook from the body. -
Page 12: Canopy Installation
ASSEMBLY INSTRUCTIONS CANOPY INSTALLATION CANOPY INSTALLATION: FIrst, as shown in figure (1), then open the switch in the direction of the arrow, and lift the carriage pole upward (2). Finally, the four Angle buckles on the canopy are clamped into the four poles to complete the installation of the canopy. - Page 13 ASSEMBLY INSTRUCTIONS UNFOLDING UNFOLD: First, remove the big canopy (1), put away the pole, and then pinch the car handles (2) on both sides, lift them up (3) at the same time, and pull in the pressure (4) on both sides until tightened, buckle the car buckle to complete closing.
-
Page 14: Warnings And Instructions For 5-Point Safety Harness
WARNINGS AND INSTRUCTIONS FOR 5-POINT SAFETY HARNESS WARNING • This product is only suitable for children ages 6 months and older. It is not suitable for younger children due to minimum balance and coordination required for safe use. • Never leave children unattended. •... -
Page 15: Safety Warnings For Transporting Children
OPERATING STROLLER WAGON SAFETY WARNINGS FOR TRANSPORTING CHILDREN WARNING • Only for children ages 6 months and older. Not suitable for younger children due to minimum balance and coordination required for safe use. • Never leave children unattended. • Do not let your child play with this product. •... - Page 16 OPERATING STROLLER WAGON SAFETY WARNINGS FOR TRANSPORTING CHILDREN WARNING • Do not install a mattress or other similar products in the Stroller Wagon compartment. The product could become unstable and children could fall out and be injured. • Do not transport children when product is in the folded position. •...
-
Page 17: Canopy Use - Side Curtains
OPERATING STROLLER WAGON CANOPY USE - SIDE CURTAINS After the big canopy is installed, open the four buckles inside the big top, hang down the shade cloth on both sides, and fix it with adhesive buckles. -
Page 18: Canopy Use - Top Mesh
OPERATING STROLLER WAGON CANOPY USE - TOP MESH In addition to shielding the sun, the big canopy can also provide ventilation. Similarly, as long as you unzip both sides of the big roof, you can roll up the whole roof to one side, increasing the ventilation effect and provide a more comfortable environment for your baby. - Page 19 OPERATING STROLLER WAGON HANDLE ADJUSTMET HANDLE ADJUSTMENT: Handle adjustment is divided into seven positions.First, press the knob adjustment button inside the handle joint on both sides with your thumb, and then adjust the appropriate height of the handle up and down.
-
Page 20: Safety Warning For Parking And Braking
OPERATING STROLLER WAGON SAFETY WARNINGS FOR PARKING AND BRAKING WARNING • Always make sure the brake pedal is fully depressed and that the wheels will not move before you release the handle. • Always apply the brakes when taking children in or out. •... -
Page 21: Care And Maintenance
• Product is flammable. Do not use near open flame or other sources of heat. • Regularly check hardware, fasteners and parts. Do not use the product is any hardware, fastener or part is missing, damaged or broken. • Contact KEENZ Customer Service for replacement parts or service questions at https://keenz.us phone: +1 855-569-5336 or email to support@keenz.us... -
Page 22: Keenz Limited Warranty
KEENZ warrants that this product will be free from defects in material and workmanship occurring under normal use for a period limited to six (6) months from the date of the original purchase if the product is not registered with KEENZ, or one (1) year from the date of original purchase if the product is registered with KEENZ within six (6) months of the original purchase date of the product. - Page 23 Contact Us: email: support@keenz.us https://keenz.us...
- Page 24 Spanish Page 47 2 Passenger Multipurpose Stroller Wagon KEENZ est fier d’annoncer l’arrivée de la prochaine génération de Wagon Poussette Pliant ! Nous avons pris nos anciens designs pour les faire évoluer au niveau supérieur en annonçant notre Wagon Poussette Polyvalent pour 2 Passagers prémium. Notre nouveau Wagon Poussette Polyvalent est la combination parfaite entre forme, fonction, et utilité.
- Page 25 Utilisation De L’auvent – Filet De L’auvent......pg. 41 Reglage De La Poignee............pg. 44 Utilisation Du Frein Aux Roues Arriere........pg. 43 Enregistrement Du Produit Pour Alerte Ou Rappel De Securite Seulent..........pg. 44 Garantie Limitée De Keenz............ pg. 45 Manual De Instrucciones............pg. 47...
-
Page 26: Importance De Ces Instructions
à cause d’un minimum de balance et de coordination requis pour une utilisation sûre. • Votre nouveau Wagon Poussette Polyvalent XC Plus est conçu pour une utilisation avec un maximum de 2 enfants en utilisant le harnais de sécurité à 5 points situé aux sections avant et arrière du produit. -
Page 27: Qu'est Ce Qu'il Y A Dans La Boite
Keenz Wagon Poussette Polyvalent Pliant XC 1. Auvent 6. Bouton d’Orientation des Roues Avant 2. Bouton de Réglage de la Poignée 7. Pédale de Frein des Roues Arrière 3. Tissu de Siège Amovible 8. Pédale de Frein des Roues Avant 4. - Page 28 MISES EN GARDE ET INFORMATION GENERALE DE SECURITE ATTENTION • Ce produit est seulement conçu pour des enfants d’au moins 6 mois. Il n’est pas conçu pour des enfants plus jeunes à cause d’un minimum de balance et de coordination requis pour une utilisation sûre.
- Page 29 • Vérifier régulièrement l’équipement et les pièces. Ne pas utiliser ce produit si l’équipement ou les pièces sont endommagés ou cassés. • Contacter le service du consommateur de KEENZ pour le remplacement de pièces ou pour des questions sur les réparations par email à support@keenz.us ou par téléphone au 1 855-569- 5336 ou en visitant le site internet à...
-
Page 30: Instruction D'assemblage Pour Le Dépliage
INSTRUCTIONS D’ASSEMBLAGE ATTENTION • Risque d’étouffement pour des enfants de moins de 3 ans. Contient des petites pièces. • Pendant le déballage et l’assemblage, vérifier que toutes les pièces, les sacs d’emballages soient comptabilisés et gardés hors de portée des enfants. Vérifier que tous les boulons soient serrés. •... -
Page 31: Installation Et Enlèvement Des Roues Arrière
INSTRUCTIONS D’ASSEMBLAGE INSTALLATION ET ENLEVEMENT DES ROUES ARRIERE ETAPE 1: Aligner l’axe de la roue arrière avec le montant de la prise de la roue arrière. Insérer le montant jusqu’au déclic. Tirer le montant dans le sens inverse pour s’assurer que l’axe de roue est sécurisé. -
Page 32: Installation Et Enlèvement Des Roues Avant
INSTRUCTIONS D’ASSEMBLAGE INSTALLATION ET ENLEVEMENT DES ROUES AVANT INSTALLATION DES ROUES AVANT: Aligner la tige de l’assemblage de la roue avant avec le trou du montant du cadre avant et enfiler la tige jusqu’au déclic. Puis tirer la roue dans le sens inverse pour s’assurer de l’installation correcte de la roue. -
Page 33: Installation Des Sièges
INSTRUCTIONS D’ASSEMBLAGE INSTALLATION DES SIEGES En premier, mettre le siège (1) (2) dans la partie intérieure du wagon comme sur la photo, puis passer le cordon positionné à l’arrière du siège par le trou dans le côté du wagon, passer autour du tube horizontal, puis attacher la boucle (3), finalement, pendre les 6 crochets sue le mur extérieur (4), terminer l’installation du siège (5), répéter de la même façon pour l’autre siège. -
Page 34: Installation Du Plateau
INSTRUCTION D’ASSEMBLAGE INSTALLATION DU PLATEAU INSTALLER LE PLATEAU KEENZ XC: Abaisser le support de boisson au milieu du montant du wagon et pendre le support de boisson avec les 4 crochets de chaque côté du wagon. Utiliser le processus inverse pour enlever le support de boisson. -
Page 35: Installation De L'auvent
INSTRUCTION D’ASSEMBLAGE INSTALLATION DE L’AUVENT INSTALLATION DE L’AUVENT: En premier, mettre en place comme sur la photo (1), puis ouvrir et tirer sur la tige dans le sens de la flèche vers le haut (2). Finalement, clipser les 4 boucles dans les angles de l’auvent sur les tiges pour terminer l’installation de l’auvent. -
Page 36: Dépliage Pour Le Rangement
INSTRUCTIONS D’ASSEMBLAGE DEPLIAGE DEPLIAGE : En premier, enlever l’auvent (1), ranger les tiges de l’auvent, puis pincer les poignées du wagon au centre (2) de chaque côté, lever les poignées en même temps, puis mettre de la pression de chaque côté l’extérieur pour plier. Un fois plié, attacher le wagon avec la boucle de la sangle. - Page 37 MISES EN GARDE ET INSTRUCTIONS POUR LE HARNAIS DE SECURITE A 5 POINTS ATTENTION • Ce produit est seulement conçu pour des enfants d’au moins 6 mois. Il n’est pas conçu pour des enfants plus jeunes à cause d’un minimum de balance et de coordination requis pour une utilisation \ sûre.
-
Page 38: Mises En Garde De Sécurité Pour Le Transport D'enfants
UTILISATION DU WAGON POUSSETTE MISES EN GARDE DE SECURITE POUR LE TRANSPORT D’ENFANTS ATTENTION • Ce produit est seulement conçu pour des enfants d’au moins 6 mois. Il n’est pas conçu pour des enfants plus jeunes à cause d’un minimum de balance et de coordination requis pour une utilisation sûre. - Page 39 UTILISATION DU WAGON POUSSETTE MISES EN GARDE DE SECURITE POUR LE TRANSPORT D’ENFANTS ATTENTION • Ne pas pendre d’objets sur le produit à n’importe quel moment. Le produit peut devenir instable. • Ne pas installer de matelas ou autre produit similaire dans la partie intérieure du Wagon Poussette. Le produit pourrait devenir instable et les enfant pourraient tomber et se blesser.
-
Page 40: Utilisation De L'auvent - Rideaux Latéraux
UTILISATION DU WAGON POUSSETTE UTILISATION DE L’AUVENT ET RIDEAUX LATERAUX Après l’installation de l’auvent, détacher les 4 boucles à l’intérieur du toit de l’auvent, baisser les rideaux en tissu de chaque côté et les attacher avec les attaches adhésives. -
Page 41: Utilisation De L'auvent - Filet De L'auvent
UTILISATION DU WAGON POUSSETTE UTILISATION DE L’AUVENT – FILET DU TOIT En plus de la protection contre le soleil, l’auvent peut aussi permettre de la ventilation. De la même manière, si vous ouvrez la fermeture éclaire de chaque côté du toit, vous pouvez rouler le toit sur un côté... -
Page 42: Reglage De La Poignee
UTILISATION DU WAGON POUSSETTE REGLAGE DE LA POIGNEE REGLAGE DE LA POIGNEE: le réglage de la poignée est divisé en 7 positions. En premier, appuyer sur le bouton de réglage à l’intérieur du montant de la poignée de chaque côté avec votre pousse, et puis ajuster à... -
Page 43: Utilisation Du Frein Aux Roues Arriere
UTILISATION DU WAGON POUSSETTE MISES EN GARDE DE SECURITE POUR LE STATIONNEMENT ET LE FREINAGE ATTENTION • Toujours s’assurer que la pédale de frein soit engagée et que les roues ne bougent pas avant de lâcher la poignée. • Toujours enclencher le frein avant de positionner ou sortir les enfants. •... -
Page 44: Enregistrement Du Produit Pour Alerte Ou
• Contacter le service du consommateur de KEENZ pour le remplacement de pièces ou pour des questions sur les réparations par email à support@keenz.us ou par téléphone au 1 855-569-5336 ou en visitant le site internet à... -
Page 45: Garantie Limitée De Keenz
KEENZ garantie que ce produit sera exempt de défaut pour les matériaux et la fabrication lors d’une utilisation normale pendant une durée de 6 mois après la date originale d’achat si ce produit n’est pas enregistré auprès de KEENZ, ou un (1) an après la date originale d’achat si le produit est enregistré... -
Page 46: Manual De Instrucciones
Spanish Page 47 Carriola Vagoneta Multipropósito para 2 pasajeros KEENZ se enorgullece de anunciar la llegada de la nueva generación de la Carriola Vagoneta plegable! Hemos llevado los diseños anteriores al siguiente nivel con nuestro cochecito multipropósito plegable premium para 2 personas. Nuestro nuevo cochecito multipropósito es la combinación perfecta de forma, función y utilidad. - Page 47 Funcionamiento del freno de la rueda trasera....... pg. 65 Registro del producto para alertas de seguridad o retiro del mercado................pg. 66 Cuidado y mantenimiento............. pg. 66 Precauciones e instrucciones..........pg. 66 Garantía limitada por parte de KEENZ........pg. 67...
-
Page 48: Importancia De Estas Instrucciones
• Su nueva Carriola Vagoneta multipropósito Keenz XC está diseñada para usarse con hasta 2 niños, usando el arnés de seguridad de 5 puntos localizado en la sección delantera y trasera del producto. -
Page 49: Qué Trae La Caja
Carriola Vagoneta plegable multipropósito Keenz XC 1. Toldo 6. Botón de orientación de la rueda delantera 2. Botón der ajuste de la manija 7. Pedal de frenado de la rueda trasera 3. Asiento removible de fábrica 8. Pedal de freno de la llanta delantera 4. -
Page 50: Precauciones E Información General De Seguridad
ADVERTENCIAS E INFORMACIÓN GENERAL DE SEGURIDAD PRECAUCIÓN • Este producto está hecho para niños de 6 meses de edad o mayores. No está diseñado para niños más pequeños que no tengan el mínimo balance o coordinación requerida para un uso seguro. •... -
Page 51: Precauciones E Información General De Seguridad
• De manera regular, cheque todo la estructura y las partes del carrito. No use este producto si alguna parte está dañada o rota. • Contacte al departamento de servicio al cliente de KEENZ para remplazo de partes o preguntas de servicio escribiendo al email support@keenz.us o por teléfono al +1 855-569-5336 o visite... - Page 52 INSTRUCCIONES DE MONTAJE ADVERTENCIA • Peligro de asfixia para niños menores de 3 años: Contiene piezas pequeñas. • Durante el desempaque y montaje del producto, asegúrese de que todas las partes y bolsas de plástico de almacenamiento, se mantengan fuera del alcance de los niños. Asegúrese de que todos los sujetadores estén bien apretados.
-
Page 53: Instalación Y Retiro De Las Llantas Traseras
INSTRUCCIONES DE MONTAJE INSTALACIÓN Y DESMONTAJE DE LAS RUEDAS TRASERAS PASO 1: Alinee el eje del juego de ruedas trasero con el orificio en el enchufe de la pata trasera e insértelo hasta que escuche un chasquido. Tire del juego de ruedas en la dirección opuesta para confirmar que están en su lugar. -
Page 54: Instalación Y Retiro De Las Llantas Delanteras
INSTRUCCIONES DE MONTAJE INSTALACIÓN Y DESMONTAJE DE LAS RUEDAS DELANTERAS INSTALACIÓN DE LA RUEDA DELANTERA: Alinee el eje de la rueda delantera con el orificio del tubo del pie delantero e introdúzcalo hasta que escuche el sonido de timbre, y tire de la rueda en la dirección opuesta para confirmar si la rueda quedó... -
Page 55: Instalación De Los Asientos
INSTRUCCIONES DE MONTAJE INSTALACIÓN DE LOS ASIENTOS Primero coloque los asientos (1) (2) en el compartimiento como se muestra en la imagen, y luego pase la correa del respaldo de uno de los asientos a través del orificio que está en la pared del carro, evitando el tubo horizontal y la hebilla (3), y luego cuelgue seis ganchos en las paredes (4). -
Page 56: Instalación De La Bandeja
INSTRUCCIONES DE MONTAJE INSTALACIÓN DE LA BANDEJA INSTALANDO LA BANDEJA DEL KEENZ XC: Baje el portabebidas hasta la posición media del cuerpo del carrito y cuélguelo con cuatro ganchos a ambos lados del mismo. De manera similar, retire el portabebidas del carrito. - Page 57 INSTRUCCIONES DE MONTAJE INSTALACIÓN DEL TOLDO INSTALACIÓN DEL TOLDO: Primero, como se muestra en la figura (1), abra el interruptor en la dirección de la flecha y levante el poste del carro hacia arriba (2). Finalmente, las 4 hebillas en ángulo del toldo se sujetan en los 4 postes para completar la instalación.
-
Page 58: Desarmado Para Almacenamiento
INSTRUCCIONES DE MONTAJE PLEGADO PLEGAR: Primeramente, retire el toldo grande (1), guarde el poste, jale las manijas (2) en ambos lados, levantándolas al mismo tiempo (3) y presione con fuerza (4) los dos lados hasta que estén apretados y abroche la hebilla de la cabina para completar el cierre. - Page 59 ADVERTENCIAS E INSTRUCCIONES PARA EL USO DEL ARNÉS DE SEGURIDAD DE 5 PUNTOS ADVERTENCIA • Este producto está hecho para niños de 6 meses de edad o mayores. No está diseñado para niños más pequeños que no tengan el mínimo balance o coordinación requerida para un uso seguro. •...
-
Page 60: Precauciones De Seguridad Para Transportar Niños
OPERACIÓN DE LA CARREOLA VAGONETA ADVERTENCIAS DE SEGURIDAD PARA TRANSPORTAR NIÑOS ADVERTENCIA • Este producto está hecho para niños de 6 meses de edad o mayores. No está diseñado para niños más pequeños que no tengan el mínimo balance o coordinación requerida para un uso seguro. •... - Page 61 OPERACIÓN DE LA CARREOLA VAGONETA ADVERTENCIAS DE SEGURIDAD PARA TRANSPORTAR NIÑOS ADVERTENCIA • No ponga un colchón en el cochecito o algo similar pues podría volverse inestable y los niños podrían caerse o lastimarse. • No transporte a los niños cuando el producto esté plegado. •...
-
Page 62: Uso Del Toldo - Cortinas Laterales
OPERACIÓN DE LA CARRIOLA VAGONETA USO DEL TOLDO – CORTINAS LATERALES Una vez instalado el toldo grande, abra las 4 hebillas del interior del toldo, cuelgue la tela de sombra en ambos lados y fíjela con hebillas adhesivas... -
Page 63: Uso Del Toldo - Malla Superior
OPERACIÓN DE LA CARRIOLA VAGONETA USO DEL TOLDO – MALLA SUPERIOR Además de proteger del sol, el gran toldo también puede proporcionar ventilación. Del mismo modo, siempre que abra el cierre de ambos lados del toldo, puede enrollar todo el techo hacia un lado, aumentando la ventilación y proporcionando un entorno más cómodo para su bebé. - Page 64 OPERACIÓN DE LA CARRIOLA VAGONETA AJUSTE DE LA MANIJA AJUSTE DE LA MANIJA: El ajuste de la manija se divide en 7 posiciones. Primero, presione con el pulgar el botón de ajuste de la perilla dentro de la articulación de la manija de ambos lados y luego ajuste la altura apropiada de la manija hacia arriba y hacia abajo.
-
Page 65: Precauciones De Seguridad Al Estacionarse Y Al Detenerse
OPERACIÓN DE LA CARRIOLA VAGONETA ADVERTENCIAS DE SEGURIDAD PARA ESTACIONARSE Y FRENAR ADVERTENCIA • Asegúrese siempre de que el pedal de freno esté completamente pisado y que las ruedas no se muevan antes de soltar la manija. • Ponga siempre los frenos cuando suba y baje a los niños •... -
Page 66: Registro Del Producto Para Alertas De Seguridad O Retiro Del Mercado
• De manera regular, cheque todo la estructura y las partes del carrito. No use este producto si alguna parte está dañada o rota. • Contacte al departamento de servicio al cliente de KEENZ para remplazo de partes o preguntas de servicio escribiendo al email support@keenz.us o por teléfono al +1 855-569-5336 o visite nuestra página https://keenz.us... -
Page 67: Garantía Limitada Por Parte De Keenz
6 meses a partir de la fecha de la compra original, si el producto no está registrado en KEENZ, o un (1) año a partir de la fecha de la compra original si el producto se registra dentro de los primeros 6 meses siguientes a la compra original del producto. - Page 68 Para mayor informacion: email: support@keenz.us https://keenz.us...
Need help?
Do you have a question about the XC and is the answer not in the manual?
Questions and answers
I have no idea how to install the seats into my Keenz wagon and the manual is no help. Is there a video available?
To install the seats in your KEENZ XC wagon:
1. Wrap the seat strap around the horizontal tube.
2. Attach the buckle.
3. Hang the six hooks on the outer wall.
4. Complete the seat installation.
5. Repeat the process for the other seat.
There is no mention of a video available for guidance.
This answer is automatically generated